Hello Everybody!
First up here regarding a project of my own…. well I will put someone else’s project together and make it the best way I can. I want to be able to look, the true brain of this project, in the eyes and be proud.😉
Bought PCB:s from Tom Christiansen for the Damn Good 300B amp a good year ago and have been collecting items since then… but now I am here to start putting things together (I have already been in building the PCB:s and now I realize that some things has to be changed but such is life and not a problem, only an obstacle) and realize that, even though I also made some electronic studying during the past year, this is not for beginners.
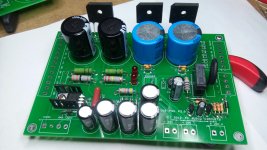
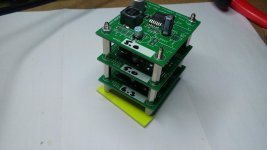
Ok, I am not a really a beginner when it come to electronical equipment and understanding but I do admit that there are things that I am definitely going to do for the first time in my life building this DG300B. I have not been working at all with tubes, or valves as many call them but the high voltages is not what is giving me doubts… it is more basic things than so.🙄
I have bought a power transformer from Lundahl, the LL2740, the problem I see in front of me is that the specified voltages from Tom Christiansen are not met to the point since he have based the construction on a Classictone 40 18069 where things are more or less plug and play.
View attachment 2740.pdf
View attachment 40-18069.pdf
I can of cause go the easy way and order a Classictone transformer and don’t have to bother about what voltages and amps are present and where. As I said, plug and play but now I already have the LL 2740 that was certainly not for free and if sound come in kilos (or pounds for you who are more comfy with that) it should sound….. awesome. I hope that what ever way I go the end result will be awesome.
How should I do??
I feel that I lack knowledge, and I am not experienced enough to go on and rebuild/tweak existing things on the PCB or outside the PCB to make the Lundahl work in this application. Simply said, I will need help cause this is above my level.😱😱
Or should I accept fact and order the Classictone and make life simple??
Anyway, I am going to update the project as it goes along and I hope it will be to some satisfaction to some, at least it will be to me.
First up here regarding a project of my own…. well I will put someone else’s project together and make it the best way I can. I want to be able to look, the true brain of this project, in the eyes and be proud.😉
Bought PCB:s from Tom Christiansen for the Damn Good 300B amp a good year ago and have been collecting items since then… but now I am here to start putting things together (I have already been in building the PCB:s and now I realize that some things has to be changed but such is life and not a problem, only an obstacle) and realize that, even though I also made some electronic studying during the past year, this is not for beginners.


Ok, I am not a really a beginner when it come to electronical equipment and understanding but I do admit that there are things that I am definitely going to do for the first time in my life building this DG300B. I have not been working at all with tubes, or valves as many call them but the high voltages is not what is giving me doubts… it is more basic things than so.🙄
I have bought a power transformer from Lundahl, the LL2740, the problem I see in front of me is that the specified voltages from Tom Christiansen are not met to the point since he have based the construction on a Classictone 40 18069 where things are more or less plug and play.
View attachment 2740.pdf
View attachment 40-18069.pdf
I can of cause go the easy way and order a Classictone transformer and don’t have to bother about what voltages and amps are present and where. As I said, plug and play but now I already have the LL 2740 that was certainly not for free and if sound come in kilos (or pounds for you who are more comfy with that) it should sound….. awesome. I hope that what ever way I go the end result will be awesome.
How should I do??
I feel that I lack knowledge, and I am not experienced enough to go on and rebuild/tweak existing things on the PCB or outside the PCB to make the Lundahl work in this application. Simply said, I will need help cause this is above my level.😱😱
Or should I accept fact and order the Classictone and make life simple??
Anyway, I am going to update the project as it goes along and I hope it will be to some satisfaction to some, at least it will be to me.
Member
Joined 2009
Paid Member
Buy the Classictone, build the amp and enjoy it. If you rely on this forum you'll have to weigh up advice from people you don't know, deal with critics and progress will be outside of your control. We'll follow your progress with the Classictone and we like photos!
Use the Lundhal for your next project and learn more about design from it. Don't doubt that you'll build another project, this is an addictive hobby 😀
Use the Lundhal for your next project and learn more about design from it. Don't doubt that you'll build another project, this is an addictive hobby 😀
Last edited:
PCB is not the way how to build tube DIY amp unless you've had a chance to hear specific amp and liked it. It will be hard/impossible to do changes.
No experience with Lundahl power transformer but should be O.K.
No experience with Lundahl power transformer but should be O.K.
Pictures
Ok, I will give you pictures.
A year ago I started putting together the different parts of this project and I have now also gained some experience with surface mounted devices.
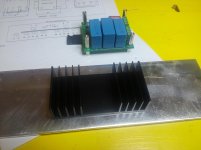
The Maida regulator with the heatsink and what will be my back panel.
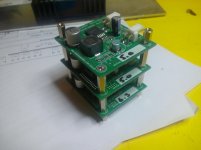
and the three filament regulators. Hopefully they fulfil the numbers I have marked them with.... test will come, cause I have to wait so I can feed them with something....
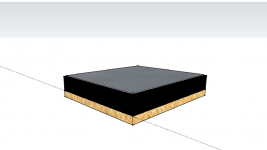
And as a teaser I also made a quick sketch of how I belive the finished enclosure will look like. The enclosure will be made of MDF, painted brilliant black with a natural framework made of oak or mahogny(not decided yet) and the top plate is 8 mm Aluminium that I intend to glass blaster to silk smooth surface. My first idea was to high gloss polish the aluminium to be mirror like but I think that will be hard to maintain so glass blastering might be nicer in the long run.
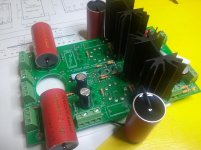
Since I have had long time to staaaaart this project wile collecting things, most is done on Power board and Driver board, just had to add some jumpers and the big caps that don't fit anywhere until you fiddle a little with them.
Observe the home made heatsink for the rectifiers....
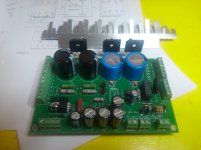
And then the transformers that finally have arrived to their new house, not their new home, cause the enclosure has to be done and testing and connection so I can't say their new home yet.... but in time
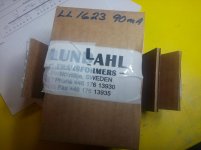
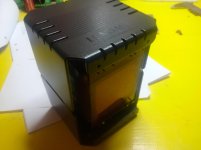
I have oredered the Classictone transformer today so I will go the easy plug and play-way but the OPT from Lundahl will stay and hopefully they will later also play.....
The poor power transformer from Lundahl.... don't know if it is a keeper for the future or I will sell cause it is standing at about $390 that I will have to put on hold..... (power transformer and steel casing) not good if I want to have a friendly wife in the long run so we'll see what happens.
Well, now I hope you get an idea about what I want to accomplish and even if putting all together both take time and a lot of thinking (asking questions) I really belive it will be worth it.
Ok, I will give you pictures.
A year ago I started putting together the different parts of this project and I have now also gained some experience with surface mounted devices.
The Maida regulator with the heatsink and what will be my back panel.

and the three filament regulators. Hopefully they fulfil the numbers I have marked them with.... test will come, cause I have to wait so I can feed them with something....

And as a teaser I also made a quick sketch of how I belive the finished enclosure will look like. The enclosure will be made of MDF, painted brilliant black with a natural framework made of oak or mahogny(not decided yet) and the top plate is 8 mm Aluminium that I intend to glass blaster to silk smooth surface. My first idea was to high gloss polish the aluminium to be mirror like but I think that will be hard to maintain so glass blastering might be nicer in the long run.

Since I have had long time to staaaaart this project wile collecting things, most is done on Power board and Driver board, just had to add some jumpers and the big caps that don't fit anywhere until you fiddle a little with them.
Observe the home made heatsink for the rectifiers....


And then the transformers that finally have arrived to their new house, not their new home, cause the enclosure has to be done and testing and connection so I can't say their new home yet.... but in time


I have oredered the Classictone transformer today so I will go the easy plug and play-way but the OPT from Lundahl will stay and hopefully they will later also play.....
The poor power transformer from Lundahl.... don't know if it is a keeper for the future or I will sell cause it is standing at about $390 that I will have to put on hold..... (power transformer and steel casing) not good if I want to have a friendly wife in the long run so we'll see what happens.
Well, now I hope you get an idea about what I want to accomplish and even if putting all together both take time and a lot of thinking (asking questions) I really belive it will be worth it.
Good to see that you're making progress. Thanks for starting a build thread. It's always fun to watch my circuits come to life.
I selected the Classic-Tone transformer as it was the only transformer I could find with an international primary that could deliver the voltages needed. I found plenty of transformers that could deliver most of the voltages, but preferred one that could deliver all rather than having to fit another transformer on the chassis.
Ya know... If you can't turn your amplifier project into a power supply project, you're probably on the wrong track. 🙂
Thanks again. Please keep the pictures flowing.
Tom
Power supply and Amp
Hello tomchr, if not said before then, thank you for giving me the possibility to take this nice project up.🙂
My parents named me Thomas (which I from the beginning did not like, always asking why they had to give me such ridicoulus name).
Now, with half century of experinece I have come to like and understand this given, but in fact very well suiting, name.😉😉
Doubting Thomas, one of the apostles, have in deed made me asking too many questions through life and I never know if I am right until I sertainly know that I am right....😕
it have also given me a lot of knowledge within many skills... not only usable ones, some very unusable as well.....😱😱
Since I am not master in this matter called electronics I do still ask questions, sometimes maybe stupid but in the end I get it, and then I get it for life.😱
A little (private) story that happened some 48 years ago.... could even be 49 years ago.
The chimney sweepers came to our street and it was my first experience with chimney sweepers.
Curious and eger to lern I followed them from house to house asking questions, talking and being very social for my 3-4 years.
After some hours one of the chimney sweepers stopped me from talking, got me to tell where I lived and it turned out that I had followed the chimney sweepers to one of the near by streets, admiring what they did.
He was very kind to take me back to the right place.
When leaving me in the hands of my mother he said (and it have been qouted many times through the years) -"this boy must be vaccinated with a pick-up needle"
So yes, when in doubt I don't give up until I have learnt and understood what I am doing but at this moment I want to build this Damn Good amp so if I'm in doubt, better go safe cause now I want result.😀
Hello tomchr, if not said before then, thank you for giving me the possibility to take this nice project up.🙂
My parents named me Thomas (which I from the beginning did not like, always asking why they had to give me such ridicoulus name).
Now, with half century of experinece I have come to like and understand this given, but in fact very well suiting, name.😉😉
Doubting Thomas, one of the apostles, have in deed made me asking too many questions through life and I never know if I am right until I sertainly know that I am right....😕
it have also given me a lot of knowledge within many skills... not only usable ones, some very unusable as well.....😱😱
Since I am not master in this matter called electronics I do still ask questions, sometimes maybe stupid but in the end I get it, and then I get it for life.😱
A little (private) story that happened some 48 years ago.... could even be 49 years ago.
The chimney sweepers came to our street and it was my first experience with chimney sweepers.
Curious and eger to lern I followed them from house to house asking questions, talking and being very social for my 3-4 years.
After some hours one of the chimney sweepers stopped me from talking, got me to tell where I lived and it turned out that I had followed the chimney sweepers to one of the near by streets, admiring what they did.
He was very kind to take me back to the right place.
When leaving me in the hands of my mother he said (and it have been qouted many times through the years) -"this boy must be vaccinated with a pick-up needle"

So yes, when in doubt I don't give up until I have learnt and understood what I am doing but at this moment I want to build this Damn Good amp so if I'm in doubt, better go safe cause now I want result.😀
Hello tomchr, if not said before then, thank you for giving me the possibility to take this nice project up.🙂
You're welcome.
My parents named me Thomas
Mine named me Tom. No 'mas. I'm a social animal as well. I've always been able to engage just about anyone in conversation.
Doubting Thomas, one of the apostles, have in deed made me asking too many questions through life and I never know if I am right until I sertainly know that I am right....😕
Always be curious.
I grew up just across the water from you in Køge, Denmark, by the way. Small world, eh?
Tom
Planning for the future
Ok, start looking a little more into detail when it come to the enclosure. The general layout I have pretty much clear but now when it come to planning the inside I have to renew my thinking.
I think this will be a good layout on the backside allowing me to separate AC/DC and signal IN and OUT. I also want to have the front entirely cleaned from LED:s and switches so everything on the backside. Will even be place to shield AC/DC and signal IN/OUT from each other if needed.
What do you think??
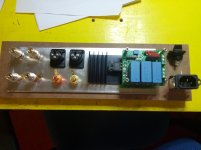
Can also show how I will do with the enclosure when coming so far since I am about to finish a power supply for my DAC.
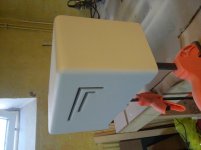
Ok, start looking a little more into detail when it come to the enclosure. The general layout I have pretty much clear but now when it come to planning the inside I have to renew my thinking.
I think this will be a good layout on the backside allowing me to separate AC/DC and signal IN and OUT. I also want to have the front entirely cleaned from LED:s and switches so everything on the backside. Will even be place to shield AC/DC and signal IN/OUT from each other if needed.
What do you think??

Can also show how I will do with the enclosure when coming so far since I am about to finish a power supply for my DAC.

Last edited:
I think this will be a good layout on the backside allowing me to separate AC/DC and signal IN and OUT. I also want to have the front entirely cleaned from LED:s and switches so everything on the backside. Will even be place to shield AC/DC and signal IN/OUT from each other if needed.
What do you think??
I suggest putting the input connectors towards the edge so they get as far from the mains voltage as possible. That will make it more difficult to get to the speaker binding posts though. One could use SpeakON connectors instead... 🙂 It looks good as is too.
Tom
Back Panel has begun
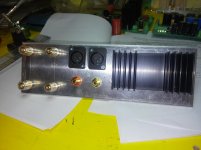
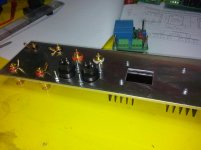
Have done some work getting things in their place on the aluminium plate. I use 4 mm aluminium for the back panel so sturdiness is a key word here.😎
Unfortunately the speaker contacts don't have real plastic washers so it looks that I have to do that also later (nobody sells plastic washers here in Sweden it seem), for the moment I continue doing the back panel so I can get the chassi together otherwise I will not be able to go ahead.
Started routing the MDF for the aluminium panels but then I realized that I have missed one important thing, the wood inlay for the plinth.😡😱
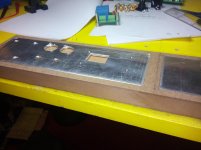
Have to do the routing again later cause I first have to get the plinth together to be able to route the outtake for the wood inlay that will go all way around the case. After that I can glue the hardwood to the plint and do the final routing for the aluminium panel.
Ok, I can get lazy and just keep the back plain black but I am in no hurry so...
"re-do, do right"!😉
Have done some work getting things in their place on the aluminium plate. I use 4 mm aluminium for the back panel so sturdiness is a key word here.😎
Unfortunately the speaker contacts don't have real plastic washers so it looks that I have to do that also later (nobody sells plastic washers here in Sweden it seem), for the moment I continue doing the back panel so I can get the chassi together otherwise I will not be able to go ahead.


Started routing the MDF for the aluminium panels but then I realized that I have missed one important thing, the wood inlay for the plinth.😡😱

Have to do the routing again later cause I first have to get the plinth together to be able to route the outtake for the wood inlay that will go all way around the case. After that I can glue the hardwood to the plint and do the final routing for the aluminium panel.
Ok, I can get lazy and just keep the back plain black but I am in no hurry so...
"re-do, do right"!😉
Before work
Had the time before work to continue with my backside. Tomorrow I will start putting the plinth together so I can start putting things together.
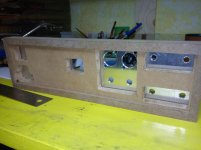
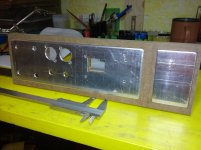
I need the plinth, even if I will not put things on the final aluminium top yet, to put things in and connect them so I can check and verify and make needed testing before putting the tubes in and so, so yes there is still a little carpenter work before testing.
On the other hand, I am still waiting for the tranformer coming all the way from US.
Had the time before work to continue with my backside. Tomorrow I will start putting the plinth together so I can start putting things together.


I need the plinth, even if I will not put things on the final aluminium top yet, to put things in and connect them so I can check and verify and make needed testing before putting the tubes in and so, so yes there is still a little carpenter work before testing.
On the other hand, I am still waiting for the tranformer coming all the way from US.
Member
Joined 2009
Paid Member
don't use mdf is glue is toxic formaldeide (cancer) with all that hot!
I'm sure that you have some pine around 😉
I'm sure that you have some pine around 😉
MDF and aluminium
When it come to MDF I always work with non formaldhyde MDF... 😱
Since I earlier was working as civil engineer within construction and environmental aspects, also carrying a licence for work with recine plastic I am well aware what this can do to your health.
Taken care of!!😉😉
Aluminium... well, I first thought of high polished aluminium with a mirror like surface but realized that it might be a PITA keeping it nice in the long run so my thoughts now lean towards a glass blastered surface.
I belive that it will be easier in the future but I have still not decided how to do.
Still thinking and most likely I will have to make some kind of aereation of the plinth and either way I choose, those aereation details will be in bronze. Polished or glass blastered, whichever will look smashing.... I hope!😀
If anyone here have information about a good protection that don't colour the aluminium yellow then I still might go for mirror look.😎
Aluminium... well, I first thought of high polished aluminium with a mirror like surface but realized that it might be a PITA keeping it nice in the long run so my thoughts now lean towards a glass blastered surface.
I've done sand blasted aluminum in the past. It gives a nice grey uniform look. I gave it a coat of clear coat to prevent it from oxidizing or attracting fingerprint "etchings". Any glass/sand/bead blasting could be pretty cool. Another treatment to consider would be one of those drums with little ceramic deals in them. I forget what it's called. You tumble the parts for a while and they come out with a smooth grey look. It's almost like bead blasting but not as abrasive.
Still thinking and most likely I will have to make some kind of aereation of the plinth and either way I choose, those aereation details will be in bronze. Polished or glass blastered, whichever will look smashing.... I hope!😀
Nice!
Tom
Nice @TIC37 !
I'll be starting the same project myself soon, so will be paying attention to your progress. I intend to add a volume pot and headphone jack.
I'm wondering about the input isolation transformers. I may just go with caps there as I'm not doing balanced or differential input, just RCA. Thoughts?
I'll be starting the same project myself soon, so will be paying attention to your progress. I intend to add a volume pot and headphone jack.
I'm wondering about the input isolation transformers. I may just go with caps there as I'm not doing balanced or differential input, just RCA. Thoughts?
I'll be starting the same project myself soon, so will be paying attention to your progress. I intend to add a volume pot and headphone jack.
I'm wondering about the input isolation transformers. I may just go with caps there as I'm not doing balanced or differential input, just RCA. Thoughts?
The input transformers are recommended as they do break any ground loop you may have on the input of the amp or in the rest of your setup. That said, they do cost money ($70/each) so I have included a footprint for a 220 nF polypropylene capacitor on the board as an option for those who wish to use cap coupled input rather than transformer coupled.
Tom
- Home
- Amplifiers
- Tubes / Valves
- New project, Damn Good 300B amp.