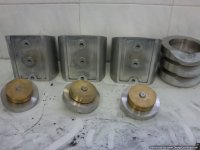
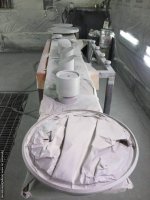
Time for the last parts being machined.
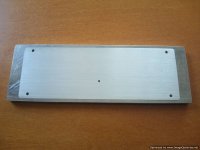
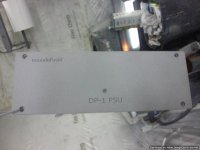
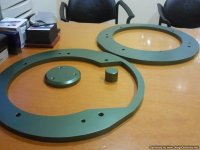
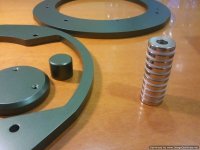
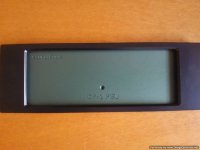
A "frame" was made from aluminium for the faceplate of the power supply unit.
Cut from a 12mm thick plate it made possible to conceal the fascia screws of the PS/control box.
And was cut a bit wider (30X10 cm) because i like that style...
It will follow the same bi-color theme that the turntable is going to have.
I'm thinking something like grey and black...
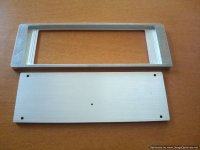
Attachments
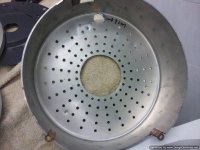
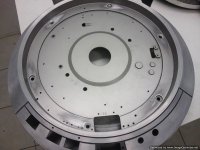
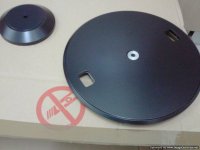
Looks like you will have a considerable air pocket right under the platter when done.
You might want to fill this with closed cell foam of some sort.
Bass frequencys could excite this area and find its way thru the platter since it looks like
you have a rather tight close fit around the platter making a resonant chamber for low frequency excitation.
Awesome work either way and look forward to how it sounds after your done.
Regards
David
That's a good point David!
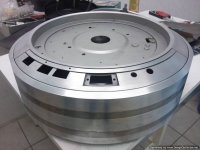
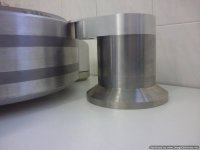
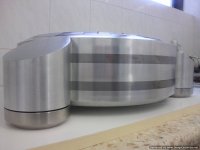
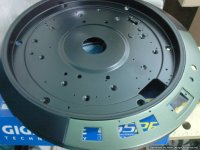
I knew i was going to have this, since i take out of the turntable chassis all the boards regarding power supply, electronic speed control and the transformer.
However i am keeping the underside aluminium "bowl" that protected all these parts for the reason you just described.
It separates the space under the platter into two and helps me with use of specific sound absorbing materials to "tight fit" the turntable into the massive exoskeleton.
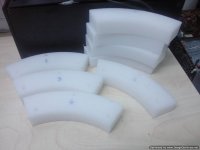
In the place of the lost boards and transformer i will use "barriers" out of teflon and leaded iron in the form of four arcs surrounding the motor to help me damp the resonances in this chamber even more.
The screwing points for these have been created and will help me pack sound absorbing material BETWEEN them and the "bowl" leaving clear space just for the motor.
Plus the area around the motor is vented through a lot of small holes that will help me control this phenomenon.
See some related pics:
I knew i was going to have this, since i take out of the turntable chassis all the boards regarding power supply, electronic speed control and the transformer.
However i am keeping the underside aluminium "bowl" that protected all these parts for the reason you just described.
It separates the space under the platter into two and helps me with use of specific sound absorbing materials to "tight fit" the turntable into the massive exoskeleton.
In the place of the lost boards and transformer i will use "barriers" out of teflon and leaded iron in the form of four arcs surrounding the motor to help me damp the resonances in this chamber even more.
The screwing points for these have been created and will help me pack sound absorbing material BETWEEN them and the "bowl" leaving clear space just for the motor.
Plus the area around the motor is vented through a lot of small holes that will help me control this phenomenon.
See some related pics:
Attachments

Last edited:
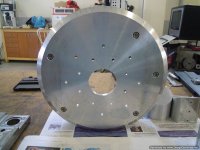
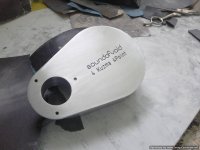
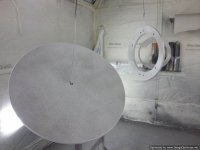
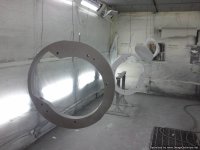
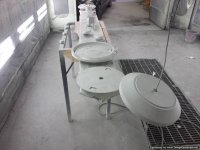
A last fitting session was done prior to sending the parts out for automotive paint.
I had to check the distance and height of the tonearm tower to the DP chassis
so that it was within specs of the Kuzma 4 Point arm.
All measured well.
Also the original cast chassis of the DP was sanded down to bare metal and i had to be sure that there was a good 1.5mm gap between CNC cut pieces and original chassis as paint does add thickness!
I have learn this the hard way when painting my Mitsubishi and paint ate away
the 1mm gap between moving parts and i had to re-machine a bronze plate to
save the day...
Attachments

Paint?
With all the beautiful aluminum, why no anodizing?
If it were mine I would make it the black you mention and a Krell grayish silver or slight bluish tint to the silver
Then again, beauty is in the eye of the beholder....
Regards
David
With all the beautiful aluminum, why no anodizing?
If it were mine I would make it the black you mention and a Krell grayish silver or slight bluish tint to the silver
Then again, beauty is in the eye of the beholder....
Regards
David
About paint:
I've been told this so many times...
I wish i could find a reliable service for surface treatment and anodizing of the aluminium parts.
I have tried many times but the quality of service regarding color hues was so inconsistent that caused more problems than the ones it solved.
I live in Greece and here only the big factories produce good results...
I am small fish to them and they treat my pieces like run of the mill metal parts.
The smallest of scratch/dent renders the part to be anodized useless, and that is a
loss i cannot accept with some parts costing hundreds of euros in metal and machine work!
So after many heartaches i have decided to use automotive lacquer.
I have a much broader color palette and the coloring is always spot on.
And if something gets scratched or hit, it can be easily repaired...no rejects.
Besides you have to remember that i use a mix of metals and only aluminium can be anodized.
Leaded iron which i use extensively because it damps aluminium very well and is cheap as a raw material rusts and needs surface coating...a good one!
Bronze also oxidizes on the surface and needs to get polished and clear lacquered
without human contact in between.
It is for these reasons that most manufacturers use only aluminium and polished inox steel for their chassis...saves them from all the hassle.
Of course special primers have to be used for each metal but that is a problem that i have dealt before.
AND if after it's delivered, let's say a leg gets scratched during a move to a new house
you can always sent it back to me for a respray to a like new condition.
You can't do that with anodizing...you need a new piece🙁($$$)!
Regarding color selection:
The Kuzma 4P is flat black and one of the joys of custom ordering is to choose a matching color.
But total black will make it look like Darth Vader's helmet and i would like to
have some parts in different color to show off it's lines.
Probably it will be some kind of grey-ish color and it will be in the two
thinner slabs of leaded iron of the main chassis, the part surrounding the buttons on top,the protruding ballast weight under the spindle, the tonearm collar and the inner part of the PSU faceplate...i think.
I have thought of this a lot and if someone has a silver tonearm it can be made accordingly in silver and grey...pretty much like the way it looks now.
Enough with testing...for now!
The whole thing was disassembled and a final inspection of the parts was made.
A little more spit 'n polish and the parts where moved to my friends paint shop.
It took ages to get to this point...
I've have started working on this project since last August.
It's very hard to design so many pieces that fit or interact with each other.
There have been many ups and downs, recalculations, pieces recut, afterthoughts added to the original design etc etc.
Let's hope that the final finish will justify my efforts!
Attachments
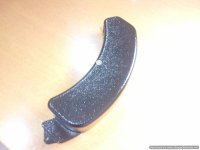
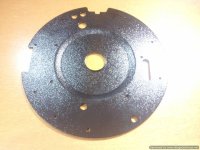
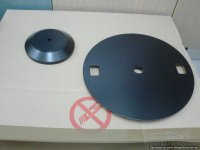
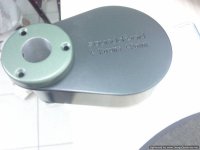
Some three of all these parts have been sent to an electrostatic paint facility.
They are the parts under the original chassis that used to protect the electronics and the metal shield that is used used to prevent the motor magnetism from reaching the platter.
I 've just received these parts today.
I asked for a thick "relief" type of paint in an effort to dampen things down as much as possible.
They showed me a Nextel-like type of paint and went for it...
I am very happy with the outcome!
I'm not sure the pics do them justice...but they do look like new from factory!
Attachments

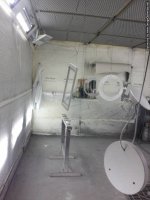
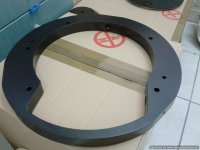
We've had some problems with the adhesion of primer onto polished aluminum.
After some research we've ordered a Sikkens product used as a primer on airplane aluminium panels.
It arrived on Friday and today i've been to the paint shop to see how things are going.
Here are some pics of what was hangin'...
After some research we've ordered a Sikkens product used as a primer on airplane aluminium panels.
It arrived on Friday and today i've been to the paint shop to see how things are going.
Here are some pics of what was hangin'...
Attachments
Last edited:
And some more from other stuff, not hanging!
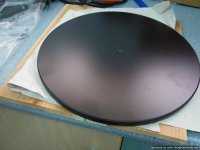
Now it's going to be sanded down to perfection and painted.
I've already chosen the colors...A BMW metallic black (BMW 181) and a Nissan metallic greenish grey (D 14)...to pay homage to the original olive/dark grey
color used in the original.
And then it's going to be finished in semi-gloss to make it a bit immune to finger oil smear...
Attachments


Ah now there is where youve made your first mistake 😱
It should be silver and blue to pay homage to
Hee hee hee
http://ts2.mm.bing.net/th?id=HN.608051791632663521&pid=15.1
It should be silver and blue to pay homage to
An externally hosted image should be here but it was not working when we last tested it.
Hee hee hee
http://ts2.mm.bing.net/th?id=HN.608051791632663521&pid=15.1
Ha ha...i see you.
Anyway, nothing prevents me from making the next one silver and blue,
or silver and Ferrari yellow or silver and black and so on.
If the next owner has a silver tonearm...
Anyway, nothing prevents me from making the next one silver and blue,
or silver and Ferrari yellow or silver and black and so on.
If the next owner has a silver tonearm...
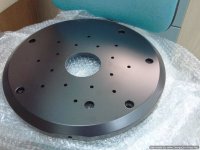
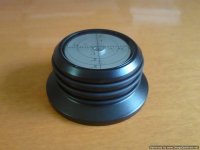
Just picked up the first parts from the paint shop today.
All in the metallic green i chose:two layers of leaded iron from the chassis, one of two bronze ballast weights under the thrust plate and the bottom cover for the Kuzma's 4P axle.
All look excellent and i am particularly happy with the satin like finish...
I took some pics that i hope do them justice.
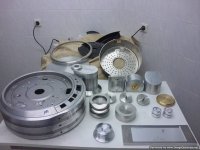
In the last one you can see my custom ordered N45 neo magnets for my effort to maglev an even more massive version of the platter...around 13 Kgs!
Something very difficult because of the proximity of the motor but i will give it a try...
All in the metallic green i chose:two layers of leaded iron from the chassis, one of two bronze ballast weights under the thrust plate and the bottom cover for the Kuzma's 4P axle.
All look excellent and i am particularly happy with the satin like finish...
I took some pics that i hope do them justice.
In the last one you can see my custom ordered N45 neo magnets for my effort to maglev an even more massive version of the platter...around 13 Kgs!
Something very difficult because of the proximity of the motor but i will give it a try...
Attachments

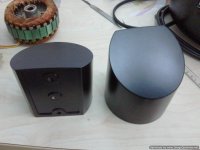
...and yesterday afternoon i was called to pick up some more painted parts.
Painted in the BMW 180 "diamant swartz" metallic black.
They look great...i'm not sure it shows but it has a small metallic flake in it.
Now i'm expecting the final batch of painted pieces and i'm done with painting.
I have to wait for a week before assembling them together as the paint has to "breathe" and the varnish has to harden up a bit...
Attachments

I've got the last painted parts...
It's in all in my hands now...besides the lettering on the button area...any ideas there?
It will be a long week waiting for the varnish to settle...
It's in all in my hands now...besides the lettering on the button area...any ideas there?
It will be a long week waiting for the varnish to settle...
Attachments
I've got the last painted parts...
It's in all in my hands now...besides the lettering on the button area...any ideas there?
It will be a long week waiting for the varnish to settle...
Just a comment on the finish coating. Nice subdued, low contrast color choices. And the texture is just right. Low key and elegant. This appeals to me very nicely.
-Steve
Thank you Steve!
You are describing better than me what i was after...
Although the turntable will be shipped to Far East (and sometimes they like it flashy)
the owner said that he wanted to see my taste and let me choose the color and finish.
I hope he will not be disappointed.
You are describing better than me what i was after...
Although the turntable will be shipped to Far East (and sometimes they like it flashy)
the owner said that he wanted to see my taste and let me choose the color and finish.
I hope he will not be disappointed.
Now THAT is bling!
But it's more middle eastern than far east...
I am very fortunate in that i have to deal with a real gentleman.
He deals very expensive audio equipment and is in love with direct drive.
He has trusted my skills and has been very supportive in every step of the way.
And is very patient, because it has been a long way...
- Status
- Not open for further replies.
- Home
- Source & Line
- Analogue Source
- My new effort on making the ultimate DP-80