My Frugal Horn Build
After searching up and down the DIYaudio.com full range forum the fist thing I learned was that I knew NOTHING about horn design. It's a totally different ball game than regular audio. I decided on my drivers and my horn design after getting some suggestions from you guys here. The Fostex 126eN had a great reputation and I decided that would be my driver of choice. I went with the frugal horn design because it's compact and also had a good reputation behind it for sounding very very nice when combined with the 126eN.
The drivers wont be here for at least another 3 weeks while Dave puts the finishing touches on them. Normally this would suck, but in this case it's good because it's encouraged me to take my time with the build. I was told to use birch because it "sounded better". Normally I'd use MDF but I wasn't going to argue since horns aren't my area of expertise. I'm going to stain these since it has a nice grain on the wood. This means that I can't get messy with the wood glue because it will cause the wood not to accept stain.
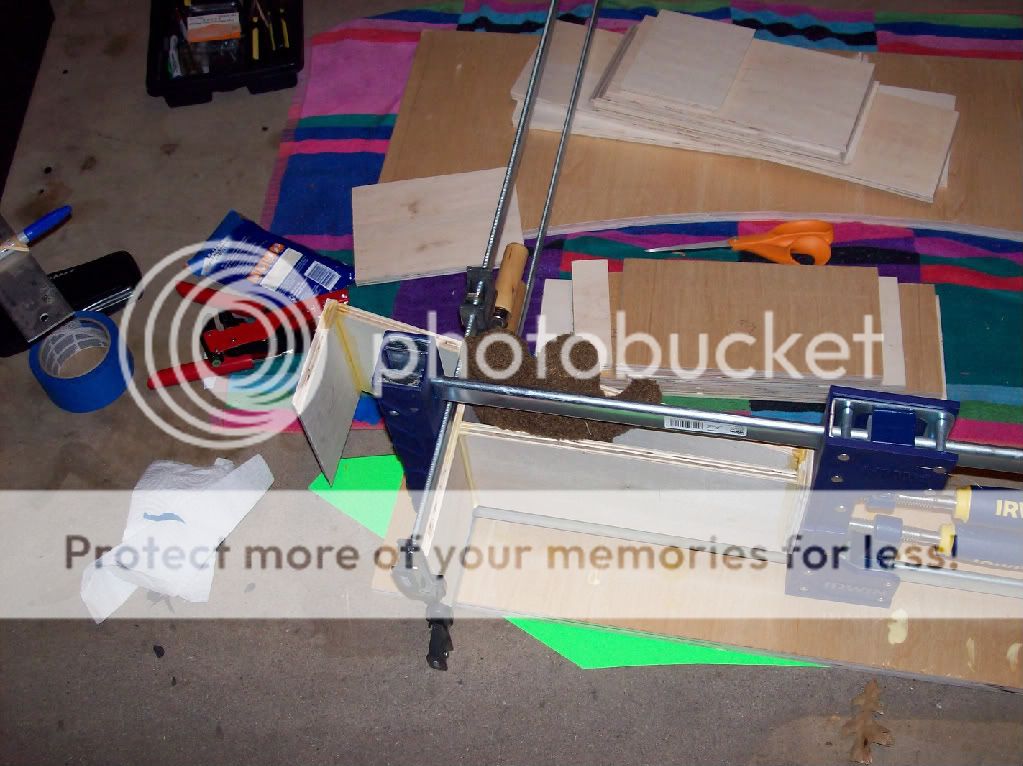
My friend Joseph helped me cut the wood with his delta table saw. Everything came out perfect and very precise. This is the wood before I got started. I'm using a towel to protect the finish on the sides that will be showing.
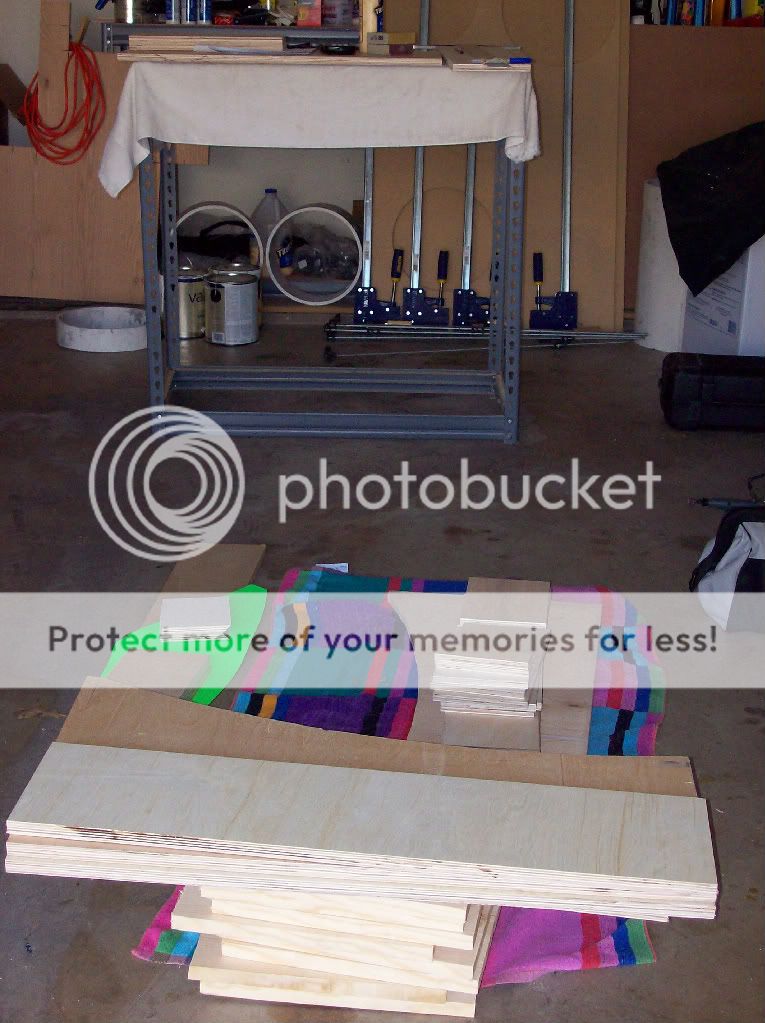
Since I wouldn't be painting wood filler would not be an option which meant that nails or screws were out of the picture. Joseph let me borrow a few of his clamps (thanks man) and since I needed an extra hand Domokun helped me with assembly.
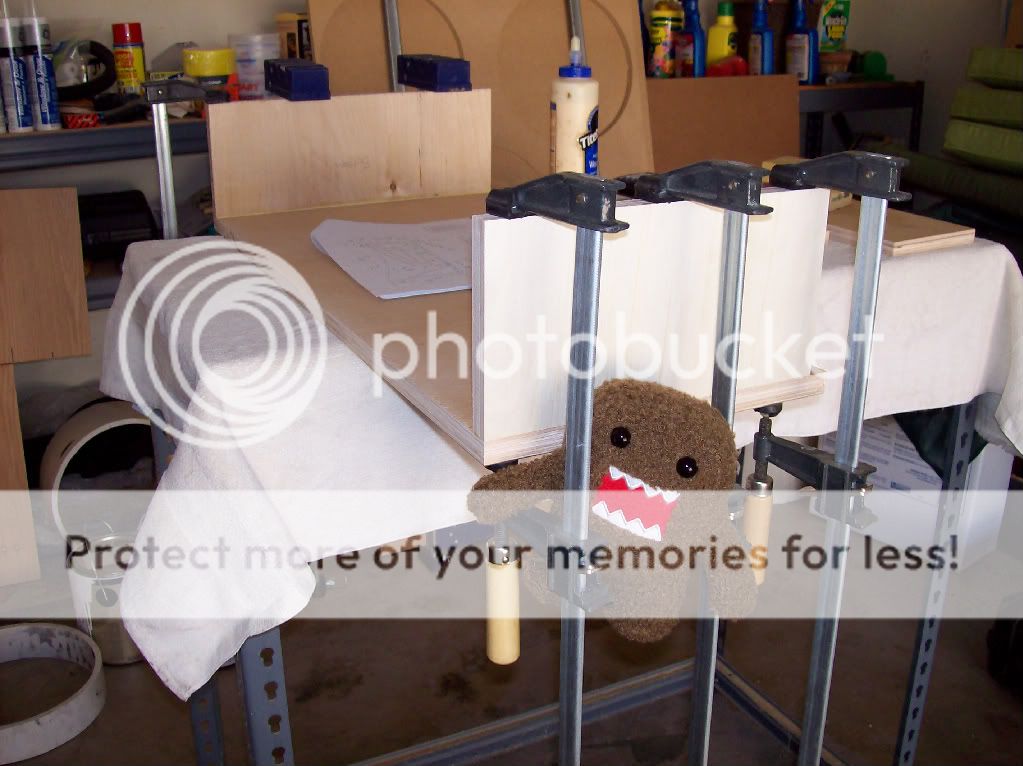
Team work paid off and we started getting pretty good with the clamps. This helped us do more than one piece at once which cut down on our dry times.
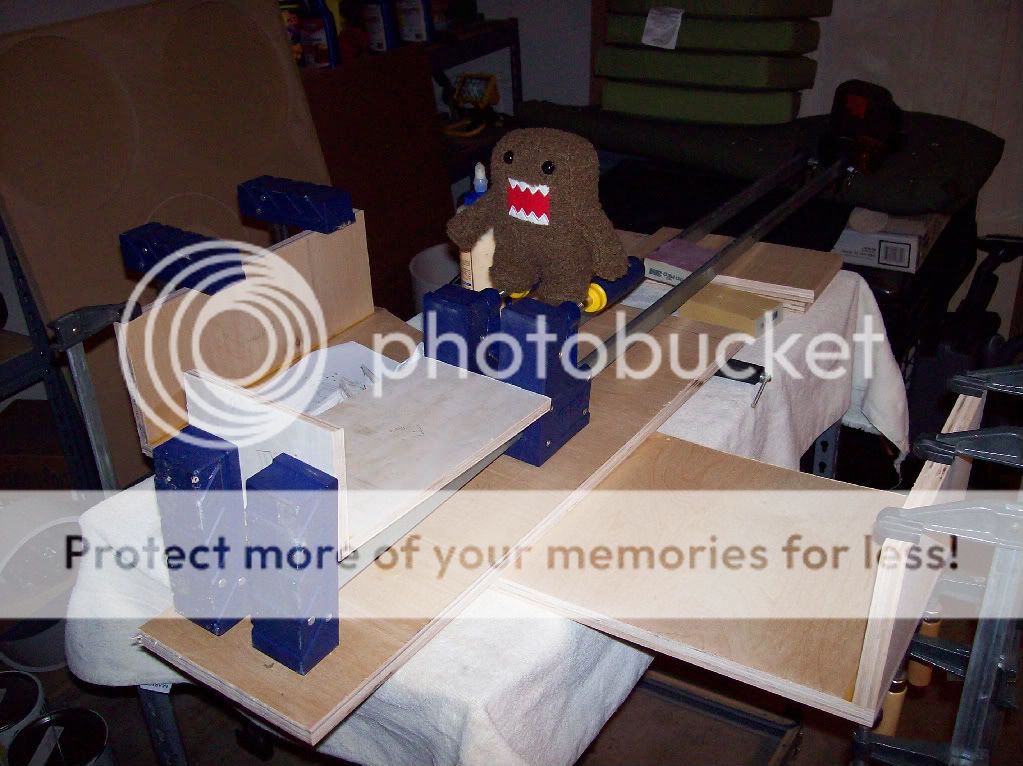
The internals aren't in it and the other side isn't on. This is just what it will look like when it's together before I install the supra baffles.
Finishing up the horn internals...
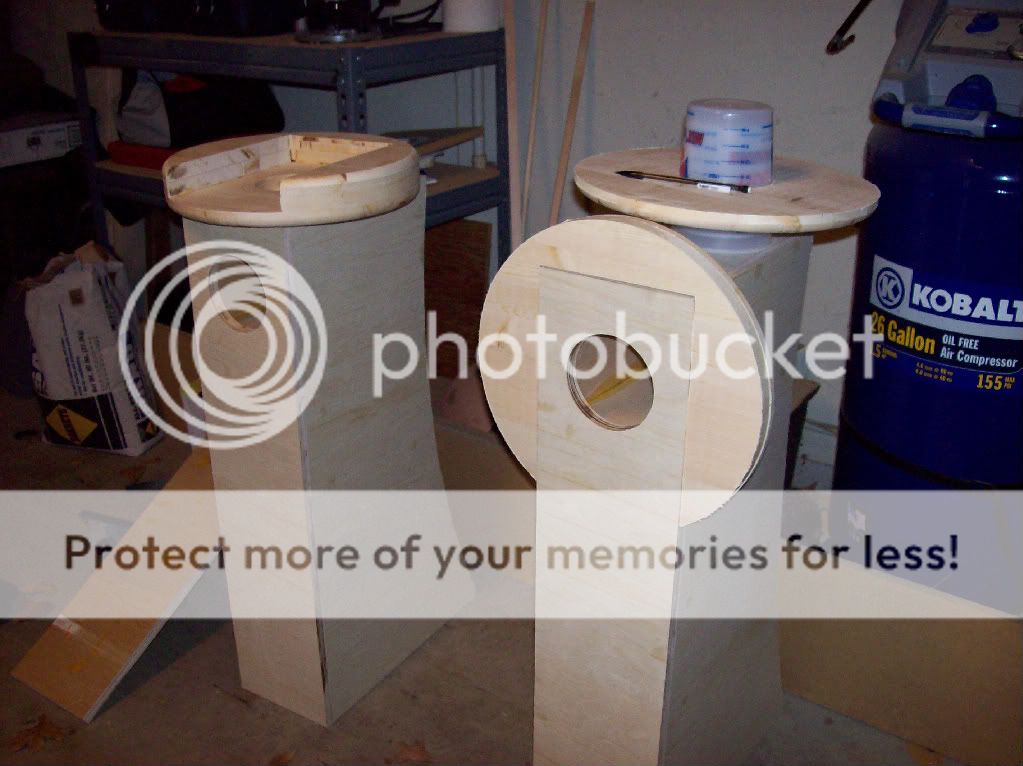
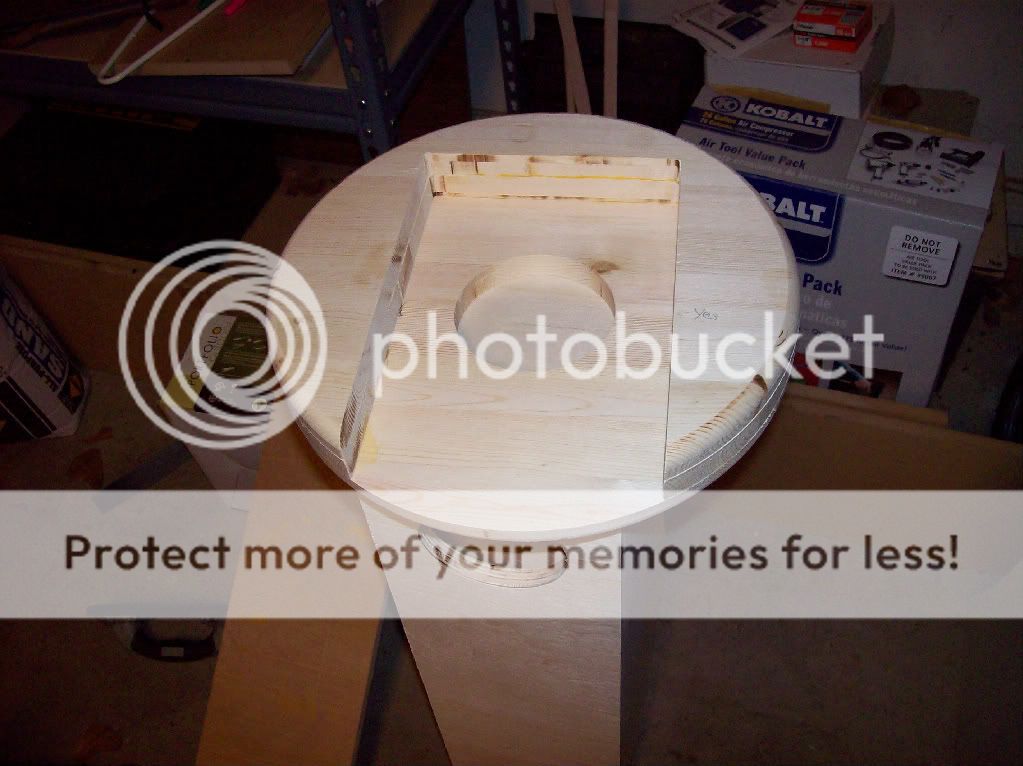
Internals done right before the side got put on. The areas that are in the middle and very bottom (sealed chambers) were filled with sand before everything was sealed up.
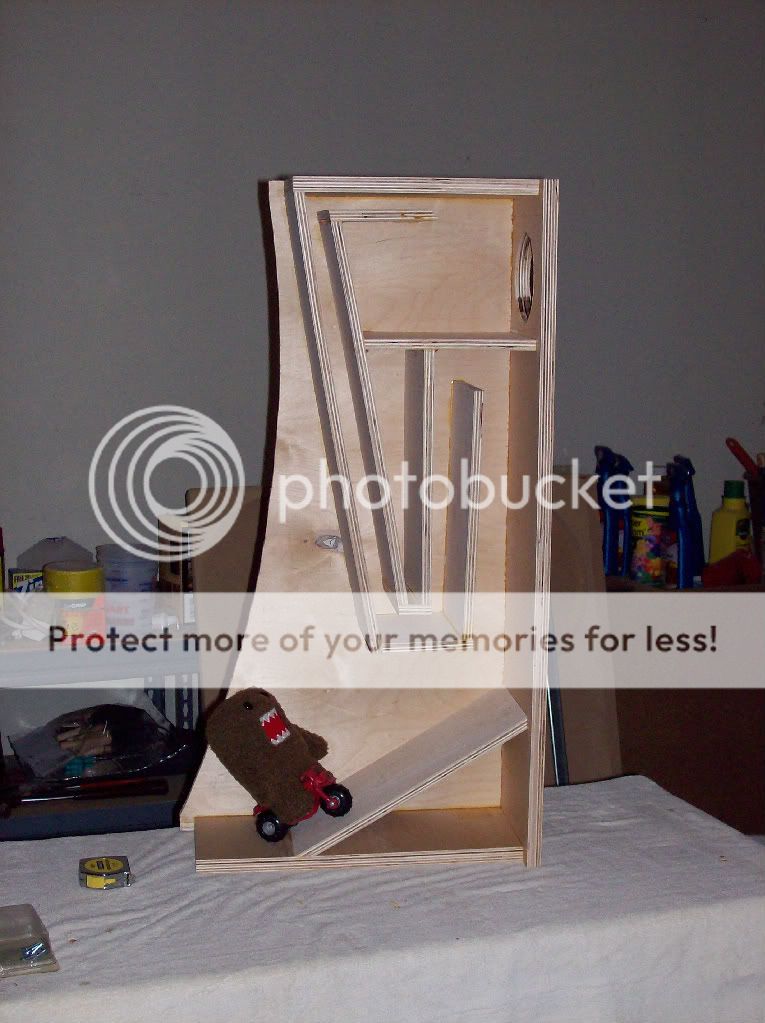
I finished the other one too so I moved on to the supra baffles today. It was really a bitch to cut out the inner parts so that they fit around the top of the enclosure body. It was especially hard too because Domo said he wouldn't help me. He complained about the saw dust getting in his fur or something.
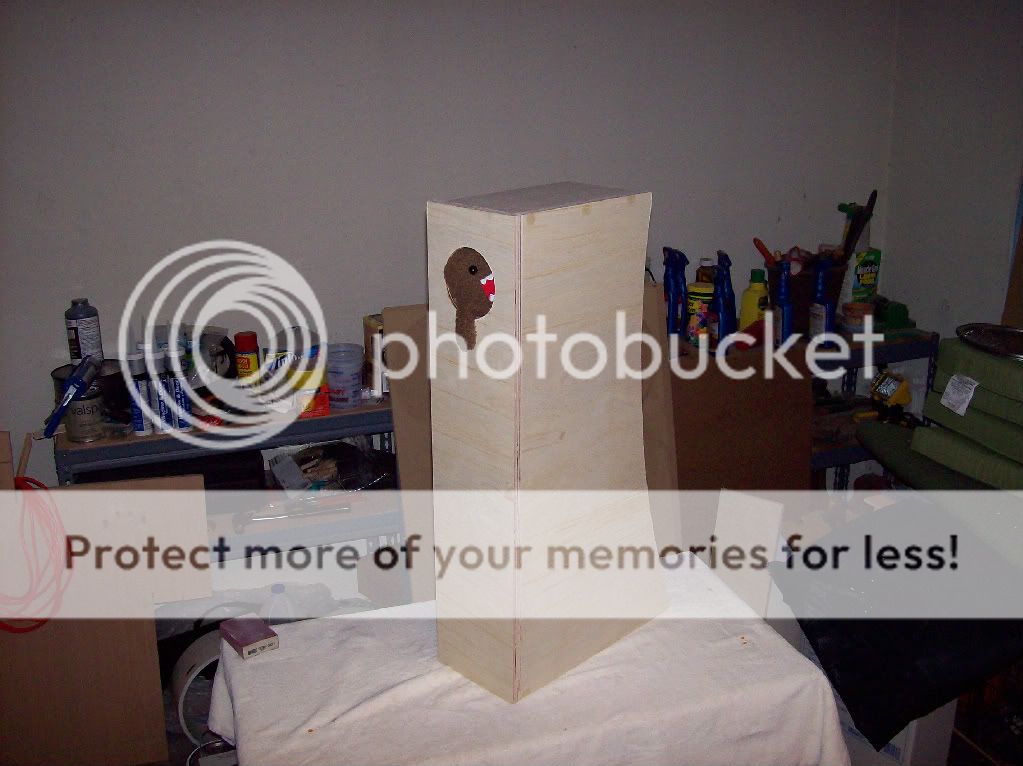
Anyways....I'm basically done building and I need to prep these babies for stain and a protective coat.
What do you guys think? Am I headed in the right direction so far? I built the horns with the small and medium chamber open. Page 9 Explains what I mean. I figured I could fill it in later if i needed to but if I only built the small chamber I'd never be able to open it up more than that.
After searching up and down the DIYaudio.com full range forum the fist thing I learned was that I knew NOTHING about horn design. It's a totally different ball game than regular audio. I decided on my drivers and my horn design after getting some suggestions from you guys here. The Fostex 126eN had a great reputation and I decided that would be my driver of choice. I went with the frugal horn design because it's compact and also had a good reputation behind it for sounding very very nice when combined with the 126eN.
The drivers wont be here for at least another 3 weeks while Dave puts the finishing touches on them. Normally this would suck, but in this case it's good because it's encouraged me to take my time with the build. I was told to use birch because it "sounded better". Normally I'd use MDF but I wasn't going to argue since horns aren't my area of expertise. I'm going to stain these since it has a nice grain on the wood. This means that I can't get messy with the wood glue because it will cause the wood not to accept stain.
My friend Joseph helped me cut the wood with his delta table saw. Everything came out perfect and very precise. This is the wood before I got started. I'm using a towel to protect the finish on the sides that will be showing.
Since I wouldn't be painting wood filler would not be an option which meant that nails or screws were out of the picture. Joseph let me borrow a few of his clamps (thanks man) and since I needed an extra hand Domokun helped me with assembly.
Team work paid off and we started getting pretty good with the clamps. This helped us do more than one piece at once which cut down on our dry times.
The internals aren't in it and the other side isn't on. This is just what it will look like when it's together before I install the supra baffles.
Finishing up the horn internals...
Internals done right before the side got put on. The areas that are in the middle and very bottom (sealed chambers) were filled with sand before everything was sealed up.
I finished the other one too so I moved on to the supra baffles today. It was really a bitch to cut out the inner parts so that they fit around the top of the enclosure body. It was especially hard too because Domo said he wouldn't help me. He complained about the saw dust getting in his fur or something.
Anyways....I'm basically done building and I need to prep these babies for stain and a protective coat.
What do you guys think? Am I headed in the right direction so far? I built the horns with the small and medium chamber open. Page 9 Explains what I mean. I figured I could fill it in later if i needed to but if I only built the small chamber I'd never be able to open it up more than that.
I do have a question about the binding posts though. I thought about this for a long time before I closed up the box. I see that most people choose to put the binding posts in the lower rear piece of the horn and run the wires up through the inside. I feared that I would be able to hear the wires rattling in there so I decided to put the binding posts on the side of the compression chamber so I could keep the internal wires as short as possible. Is there any problem with that?
italynstylion said:I just realized the pictures are ENORMOUS and I'm fixing it....gimme a sec
how much detail would we see if the pics were compressed to under the 100k Forum limit?fwater said:Leave the pictures enormous! I absolutely love this kind of picture documentation of a build, along with any quirks or snags recorded along the way. I am sure that I speak for many others when I say thanks for taking the time, pics are entertaining and useful. Good job!
I will be making the deflectors. I want to get the main enclosures done first though so if the drivers arrive early I'll be able to listen to them.
I'm also trying to come up with a way to integrate a subwoofer into each of the two deflectors without drastically changing their shape. I'm pretty creative so we'll see what happens.
I'm also trying to come up with a way to integrate a subwoofer into each of the two deflectors without drastically changing their shape. I'm pretty creative so we'll see what happens.
planet10 said:Nice work... the choice of the larger air cavity will give you lots of opportunity to tune it down to the appropriate volume (~2.2litre) with irregular shaped objects.
dave
2.2L is the most ideal starting point? What types of stuff should I put in there? I've never done that before.
italynstylion said:I do have a question about the binding posts though. I thought about this for a long time before I closed up the box. I see that most people choose to put the binding posts in the lower rear piece of the horn and run the wires up through the inside. I feared that I would be able to hear the wires rattling in there so I decided to put the binding posts on the side of the compression chamber so I could keep the internal wires as short as possible. Is there any problem with that?
aside from aesthetics, not really
If you haven't already permanently attached the second side, you could also install near the top of the rear most angled panel and dress the wiring along the top - bedding it in either hot melt glue or silicone. If you prefer not to use input cups, you could try something like:
An externally hosted image should be here but it was not working when we last tested it.
http://www.parts-express.com/pe/showdetl.cfm?Partnumber=260-302
This would still keep the wire fairly short, but frankly, I don't think you'd hear a huge difference with as much as the extra couple of feet of wire it takes to run from the lower deflector panel, nor have I ever been able to hear the wire rattling.
On an early FH build, I installed the input terminals on the bottom, entering in the lower void chamber, and added a U-Shaped plinth to hide the wires. Makes it really difficult to quickly change speakers.
If you haven't sealed up the second side yet, now would be the time to fill at least the lower void cavity with sand / shot / kitty litter etc.
Chris, thanks for the response.
I have already sealed up the sides so the construction is done. I did fill the voids completely with sand and it's added a considerable amount of weight to the unit. I'm actually happy it did because it's a ton more solid than before.
Anyways, I've used these silver binding posts from parts express on my last project and I really liked them. I'm probably going to use them for this pair of horns too. Very solid construction and a good quality feel. Dayton Binding Posts
italynstylion said:Anyways, I've used these silver binding posts from parts express on my last project and I really liked them. I'm probably going to use them for this pair of horns too. Very solid construction and a good quality feel.
Too much metal in those for my taste... the Cheesy looking plastic capped ones sound better (like Chris pictured)
dave
planet10 said:
Too much metal in those for my taste... the Cheesy looking plastic capped ones sound better (like Chris pictured)
dave
Sound like a better idea or SOUND better.....can you really tell the difference in sound between different binding posts? I was just looking for something solid that would not leak air out of the box and I could tighten down fairly well.
On another note. I gave some thought to the design of the deflectors today. I realized that a single ported 8" sub in each of them is probably the best route to go for me. I'd likely mount the sub in the rear face of the deflector and exit the port out the top of the deflector. The subs in the current pole position for my choosing are the Tang Band W8-1363SB's. They model well in unibox in a small 22L enclosure and have dead flat response down to 30hz. Their neo magnet should help with mounting in the apex of the triangle section of that deflector too.
Any other suggestions on 8" subs?
italynstylion said:Sound like a better idea or SOUND better.....can you really tell the difference in sound between different binding posts?
Sounds better... yes binding posts sound different. Best is actually to run the wire out of the box and only use it to pinchthe speaker cable & the internal wiring together (not always convienient thou.
mount the sub in the rear face of the deflector and exit the port out the top of the deflector... Any other suggestions on 8" subs?
My 1st choice for this ap is SDX7 in 14-21 liters sealed. Loaded into the corner you are going to get a lot of gain, if you stick something that models flat, it is going t be WAY boosted in use modeles flat to 30 probably means 6-12 dB peak in practise). You want something with a gentle rolloff. I you go with the veted, make sure the port is of a shape to easily stuff.
dave
captive tails one or two feet long are best of all. Power amp/s right behind the speaker.planet10 said:Best is actually to run the wire out of the box and only use it to pinch the speaker cable & the internal wiring together
planet10 said:
My 1st choice for this ap is SDX7 in 14-21 liters sealed. Loaded into the corner you are going to get a lot of gain, if you stick something that models flat, it is going t be WAY boosted in use modeles flat to 30 probably means 6-12 dB peak in practise). You want something with a gentle rolloff. I you go with the veted, make sure the port is of a shape to easily stuff.
dave
Dave, are these horns intended to both be in a different corner of the room? I haven't read much about placement with these yet.
If flat modeled response is too much then what should I be looking for? Where should my roll off begin? I checked out those SDX7's and I like them a lot (i always wanted to try the extremis a few years back) but I fear I'll blow them up if I stick them on a 500watt plate amp on the pair. What's the power handling on them? The specs sheet doesn't say.
Also, that driver has a phase plug and isn't completely sealed, much like the Focal 7w4311's I run in my car. I've been told not to run a driver of this type sealed because of air noise being present moving in and out. Would this be a problem with this driver?
italynstylion said:
Dave, are these horns intended to both be in a different corner of the room? I haven't read much about placement with these yet.
In over 40yrs in this game (36 of which married - since '73), I've had very few rooms that easily accommodated "perfect" placement of the wide range of speaker types that have passed through my hands.
My wife's upstairs retreat has a pair of Buschhorns, which could be considered a spiritual cousin to the Frugels (or other small form factor BLH designs). For her the sonics are less important than the tidiness of the room, so they are tucked diagonally across a corner, and no more than 6 ft apart. I'd opine that symmetry of placement in relation to walls and corners is more significant than concentrating on using the corners to their best effect, particularly in wide rooms that could result in a hole in the middle of the sound stage.
If flat modeled response is too much then what should I be looking for? Where should my roll off begin? I checked out those SDX7's and I like them a lot (i always wanted to try the extremis a few years back) but I fear I'll blow them up if I stick them on a 500watt plate amp on the pair. What's the power handling on them? The specs sheet doesn't say.
IINM, buried somewhere on the SDX7 data sheet is the power handling of 100W. Even though these drivers pay the "Hoffman" premium of sensitivity, multiple drivers with that power handling capacity can certainly produce all the SPL that I could ever want. I've heard what 2 per side can do with approx 100W amp in Dave's large room, and it's more than enough for any musical genre I'd enjoy - i.e. not just chicks and guitars.
Yes, I suppose you could damage them with a 500W amp, but unless 100ft away in an auditorium, you'd likely sustain some SPL induced damage of your own along the way.
Also, that driver has a phase plug and isn't completely sealed, much like the Focal 7w4311's I run in my car. I've been told not to run a driver of this type sealed because of air noise being present moving in and out. Would this be a problem with this driver?
in a word, not likely
OK, that's 2 words
- Status
- This old topic is closed. If you want to reopen this topic, contact a moderator using the "Report Post" button.
- Home
- Loudspeakers
- Full Range
- My Frugel-Horn Build