If you realy want to shield the cable Mu metal tape and copper braid is the best combination in todays EMI polluted world.
Fellas...
"ILL BE BAK" later tonight to show the build of the cotton/shield build.
...yea I know, you're on "pins n' needles"....sigh
Cheers
Keep it up Spiro, I had my doubts but you have started to deliver 🙂 The George Michael note was an unexpected bonus, gave me a good chuckle.
Tony.
Keep it up Spiro, I had my doubts but you have started to deliver 🙂 The George Michael note was an unexpected bonus, gave me a good chuckle.
Tony.
hehe...thanks
I thought about the MU metal shielding...but when I looked at the pricing, it was out of the question as far a what I had in mind. Granted, even though I did spend allot of money investing in this hobby...my ultimate goal was to make everything from materials widely available that would do the job. As much hands-on as possible.
Cheers
Aptquark, if you're looking for something easy and different to experiment with for your next pair of IC's, try some 18 ga solid core inductor wire covered by some Techflex (no shielding).
If you were to build them I'd be interested to know what you think of their sound.
If you were to build them I'd be interested to know what you think of their sound.
Aptquark, if you're looking for something easy and different to experiment with for your next pair of IC's, try some 18 ga solid core inductor wire covered by some Techflex (no shielding).
If you were to build them I'd be interested to know what you think of their sound.
Sounds interesting. Regarding the way I have designed mine...the shielding is substantially distanced from the conductor. I didn't want anything influencing the signal from internal interactions. Ill, be on in a little with pictures of the design.
Cheers
Thank you Kevin. BTW that is a sweet looking 300B on your website.
Cheers
Thanks!
I'll be following the thread. Should be fun trying some of your ideas when I have a little more time. In the throws of horn and TT upgrades..
Edit: I've subscribed to your blog, can't wait to see some construction details.
Last edited:
Thanks!
I'll be following the thread. Should be fun trying some of your ideas when I have a little more time. In the throws of horn and TT upgrades..
Edit: I've subscribed to your blog, can't wait to see some construction details.
Great!
I have reached the max limit on the amount of pics that you can have in a blob (blog). So keep looking here for the updates and pics. Unless I'm missing something in the blob settings...BUT NO THANKS TO THE ADMINS FOR NOT RETURNING MY QUESTIONS...HELLLLLO!
Here we go peeps...
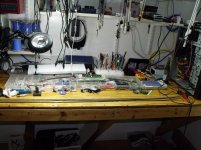
Not too many words tonight...a few pics to get things going.
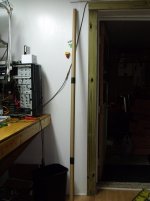
See that tube? Thats how I store the cables before adding the conductors. I have managed to make up to 7 foot cables with my technique.
Once made, I slide some texflex over the cable so the shielding does not unwrap. Once in the texflex jacket, a few days will keep the cable from unwrapping permanently.
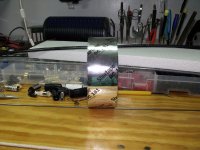
Pretty from the outside eh??
Not too many words tonight...a few pics to get things going.
See that tube? Thats how I store the cables before adding the conductors. I have managed to make up to 7 foot cables with my technique.
Once made, I slide some texflex over the cable so the shielding does not unwrap. Once in the texflex jacket, a few days will keep the cable from unwrapping permanently.
Pretty from the outside eh??
Attachments

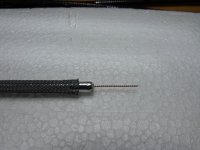
This is the final cable prior to adding the RCA/XLR connectors. Two cables make up a set of RCA's. Three for XLR's. I will show you later on down the line how the final combination of single runs add up to one RCA. There are a few different ways to house both runs, depending on a few factors like aesthetics and handling strength characteristics.
Attachments

If you realy want to shield the cable Mu metal tape and copper braid is the best combination in todays EMI polluted world.
do you have a source for the tape ?
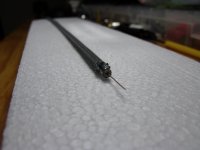
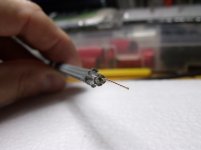
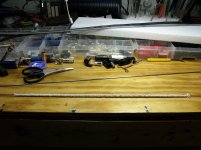
Check out the space inside the cotton dielectric. BIG. Air functions more as a dielectric here than the cotton. You will need piano wire or spring steel. I forget the diameter...I will post that later. I got these from the local hobby store. They come in 3 foot lengths. To make longer cables...I will show you how to combine 2 together to make longer shielding.
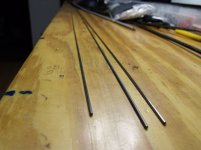
The middle piano wire is original. The outer two have been polished with steel wool and wet sanding. YOU HAVE to get the piano wire as smooth as possible.
The middle piano wire is original. The outer two have been polished with steel wool and wet sanding. YOU HAVE to get the piano wire as smooth as possible.
Attachments
Last edited:
do you have a source for the tape ?
I remember it was easy to locate online. Just google it.
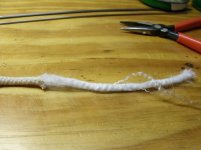
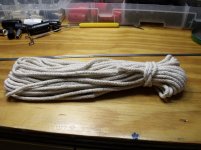
Pick up some cotton rope. It has a polyester stranded interior. Use a pair of needle nose pliers and pull the polyester out. It is easily done by pulling the cotton in the opposite direction. Once done, all the polyester is out...and you have a perfect large diameter opening.
Attachments

Last edited:
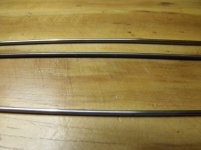
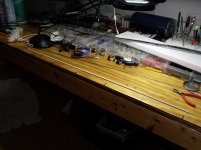
The piano wire needs to be polished with steel wool or very fine wet sanding. The smoother you get the metal...the easier it will slide into the cotton. TRUST ME...polish the crap out of it. When you are working on sliding it in 6 feet of cotton..it HAS to be very smooth to go in.
Attachments


Peeps...I got a response back from my inquiry about the limit on pics in the blob section. We can now post up to 50 pics. WOOHOO! So, what I'm going to do is when I finish up here with the show, I will then add some tips on the various techniques in the blog section with pics.
Cheers.
Cheers.
The piano wire needs to be polished with steel wool or very fine wet sanding. The smoother you get the metal...the easier it will slide into the cotton. TRUST ME...polish the crap out of it. When you are working on sliding it in 6 feet of cotton..it HAS to be very smooth to go in.
Later in the Blob (blog), I will add tips concerning various portions of the build. There are a few things to keep in mind when adjusting the cotton tension onto the piano wire. More later.
Thanks

- Status
- Not open for further replies.
- Home
- Design & Build
- Construction Tips
- My contribution to this site...if anyone is interested.