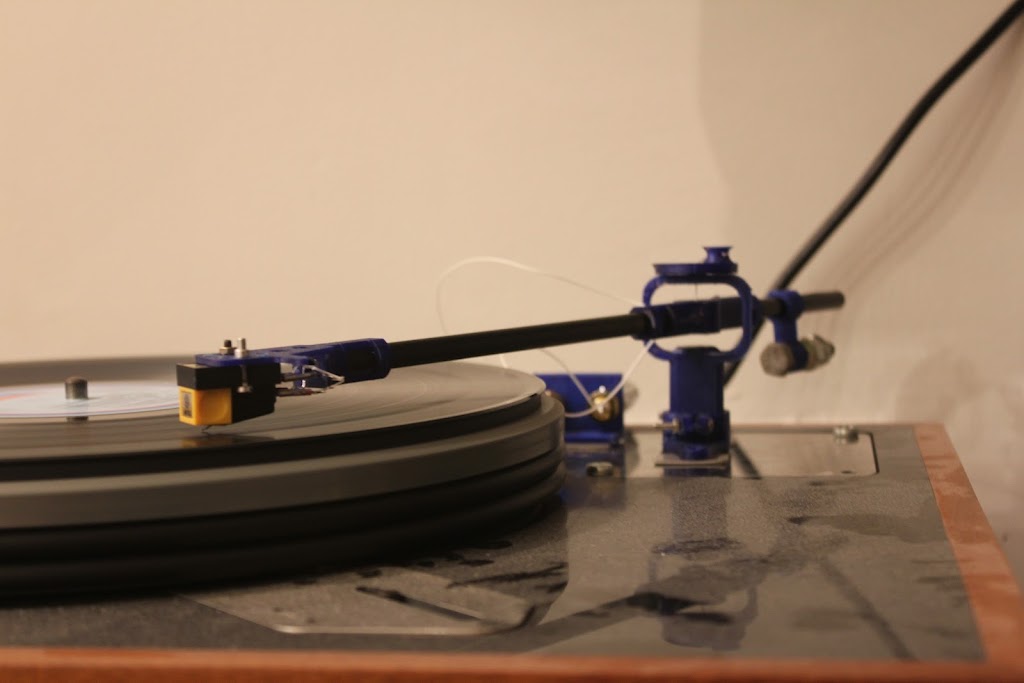
After more than a year of work my 3D printed tonearm is finally playing.
The arm is based on the Schroeder tonearm and printed from PLA and PET-G using my home printer. I designed all the parts myself on SolidWorks.
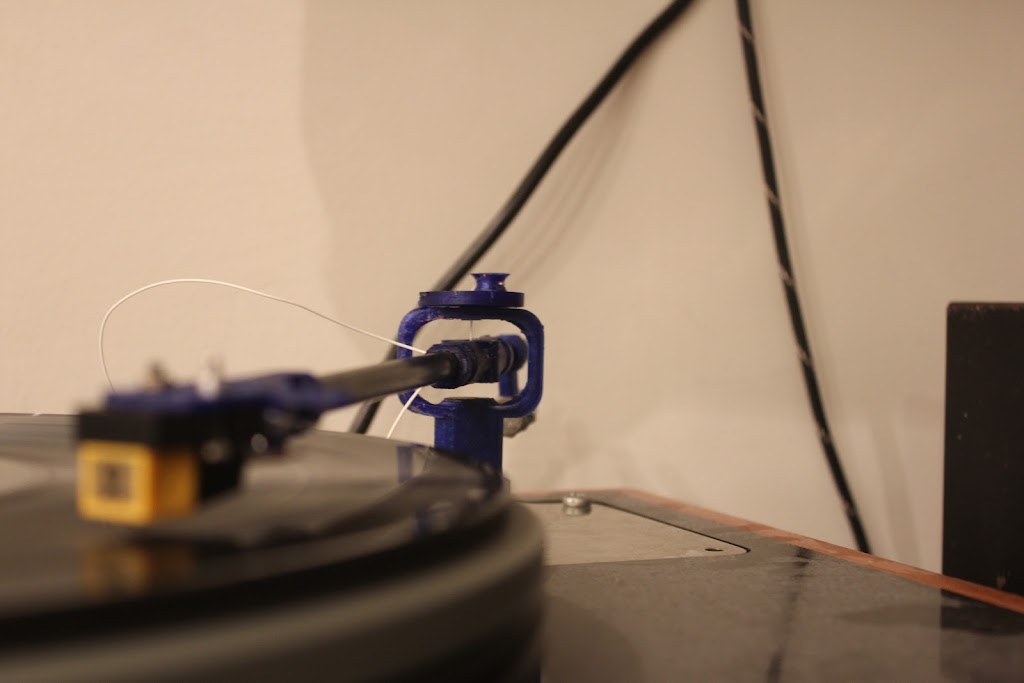
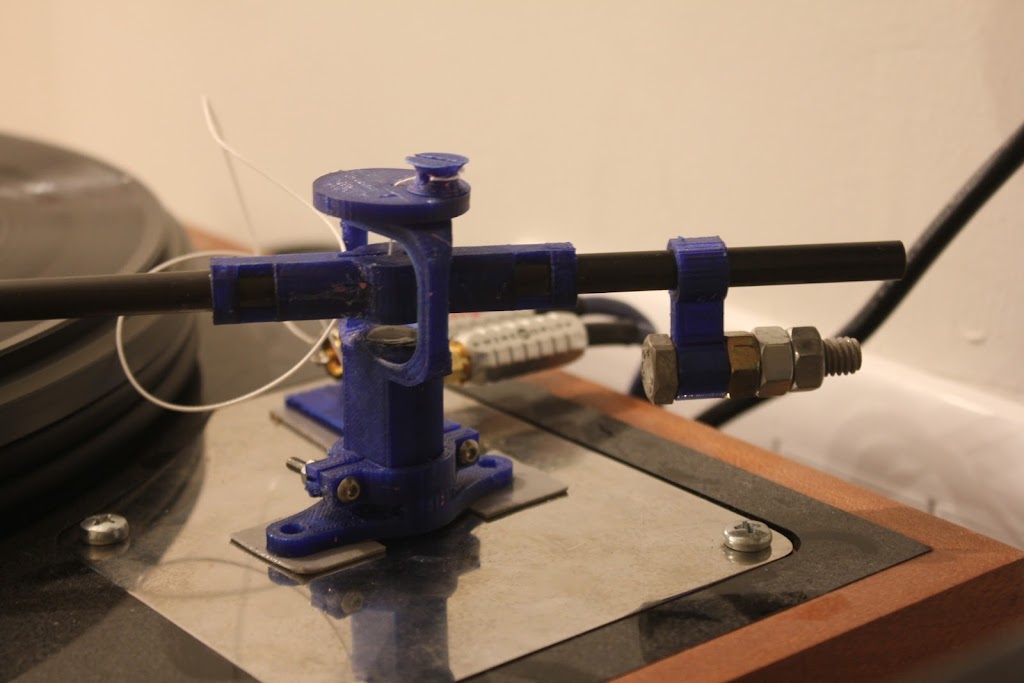
Also, the arm has a working VTA and antiskating mechanisms.


Right now it sounds better than my Rega RB300 but still has a lot of room for improvement. Next step would be to improve the base and change the string and magnets.
A cool aspect of 3D printing is the ability the control the internal properties of the printed object. The printed object is not solid but actually has a polygon structure inside. When I print i can define the outer walls thickness and the density of the infill. For example - 3 mm thick walls and 30% infill. This is important because it allows me to control the final weight and mass of the arm and also kill unwanted resonance. With time, all this will be addressed.
Thank you for your time!
Tank out.
The arm is based on the Schroeder tonearm and printed from PLA and PET-G using my home printer. I designed all the parts myself on SolidWorks.
Also, the arm has a working VTA and antiskating mechanisms.
Right now it sounds better than my Rega RB300 but still has a lot of room for improvement. Next step would be to improve the base and change the string and magnets.
A cool aspect of 3D printing is the ability the control the internal properties of the printed object. The printed object is not solid but actually has a polygon structure inside. When I print i can define the outer walls thickness and the density of the infill. For example - 3 mm thick walls and 30% infill. This is important because it allows me to control the final weight and mass of the arm and also kill unwanted resonance. With time, all this will be addressed.
Thank you for your time!
Tank out.
You have done a beautiful job with that 3d system but from what I know plastic is going to add it's own dimension to the sound, just like the record if you don't clamp or deaden it somehow. You would be surprised at transmitted energy from some of your less compliant carts.

That's very nice! I can see the vta - looks like you turn the small knob to pull the string up. How is anti-skate controlled?
Is designing it a trial and error subjective process or are there quantitative measurements too?
Is designing it a trial and error subjective process or are there quantitative measurements too?
Well done, looks amazing.
I started designing a wire frame one to be 3D printed. Have you seen some of the materials that Shapeways and others can use? Brass, stainless steel etc...
I started designing a wire frame one to be 3D printed. Have you seen some of the materials that Shapeways and others can use? Brass, stainless steel etc...
Hi guys, sorry for disappearing.
The printer I used is very similar to a makerbot duo. It has two extruders and can print with a wide variety of materials.
This is definitely a trial and error process. Right now I’m looking at the mass (or density) of the printed parts, the magnets and different materials for the arm tube.
Shape ways is very cool and I have given their service a thought, but that would be further down the line.. Right now I’ll be using only my home printer, and i see it as part of the challenge.
Thank you all!
Great job. Impressive!
Hi guys, sorry for disappearing.
The printer I used is very similar to a makerbot duo. It has two extruders and can print with a wide variety of materials.
This is definitely a trial and error process. Right now I’m looking at the mass (or density) of the printed parts, the magnets and different materials for the arm tube.
Shape ways is very cool and I have given their service a thought, but that would be further down the line.. Right now I’ll be using only my home printer, and i see it as part of the challenge.
Thank you all!
this is awesome perhaps the really early type vintage tonearms could be a good one to measure and copy too. And yes this is one more reason why I want to buy a 3d printer. everyday they are less a curiosity and more an essentially diy item. my brain has been thinking about all sorts of uses for tube amp builds. another idea if your having trouble with shielding don't forget self adhesive copper sheet. It may be some use to you.
Thats great!
Did you make it in separate pieces or one whole arm?
Plans?
Printer model?
thank you
mdr
Did you make it in separate pieces or one whole arm?
Plans?
Printer model?
thank you
mdr
- Home
- Source & Line
- Analogue Source
- My 3D printed ToneArm