Your speakers look and sound very good per the YouTube video. I'm happy that you are satisfied with the results.
For stuffing I recommend polyfill or AcoustaStuf. Also Meniscus Audio sells sheets of bonded Dacron which comes ready to insert into enclosures without the teasing and shaping associated with normal polyfill. I use foam stuffing in vented cabinets but normally don't recommend it in MLTL style speakers. For MLTLs I like to enclose the drivers (or drivers in your case) in the filling material from the top of the box down to a few cm below the lowest driver. Normally, no other filling is needed in the bottom half of the enclosure.
To extrapolate the single driver design to two drivers per cabinet: What I do in similar iterations is to place the drivers equal distance above and below the design location for the single unit unit. The cross-sectional area of the box is doubled for two drivers but the other box dimensions (height, port location, etc) remain the same. You can use two ports which are the same diameter and length as for the one driver design. Alternately for a single port design with two drivers, you increase the area of the single driver port by factor of 1.414 (square root of 2) for the new port diameter in the two driver variant.
Slotted port ok too?
Slotted ports will work just as well as round holes. The port area would be the same for round or rectangular dimensions. You would use the same port length but you would need to account for the port cover (top panel of the port) thickness when you figure the port length summation.
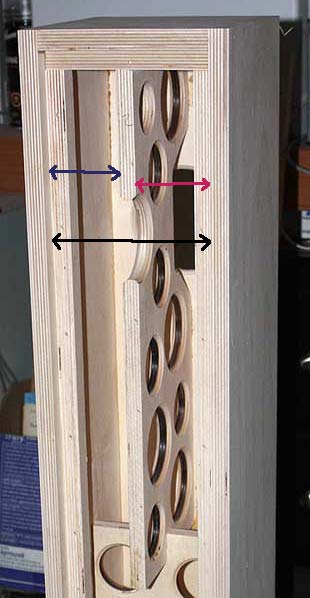
Some of my designs have the port location away from the bottom of the box. So you have to construct internal port panels to account for that example.
Of course if you need to tweak the port length of a slotted port after the cabinet is assembled then it is not as simple as cutting or extending a slide-in port tube.
Last edited:
Well, the top panel does not have to be glued. If it can be pulled out, it would be an easy adjustable port [emoji846]
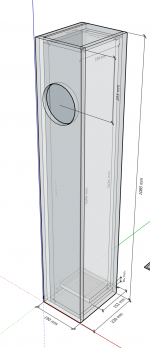
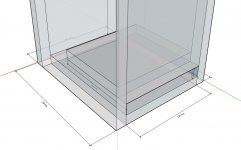
How this looks? I increased the height slightly to compensate for potential bracing and port panel.
Any bracing should run vertically for 2 reasons, 1/ you do not want to choke the line with horizontal braces, and 2/any brace should create subpanels with higher ratios of w x l than the panel brieng braced, so height will need to increase (the slot vent has to be added to the bottom), but braces increase width or depth (or both, the x-section needs to remain the same).
Something like this:
An externally hosted image should be here but it was not working when we last tested it.
An externally hosted image should be here but it was not working when we last tested it.
These should be just off-centre.
dave
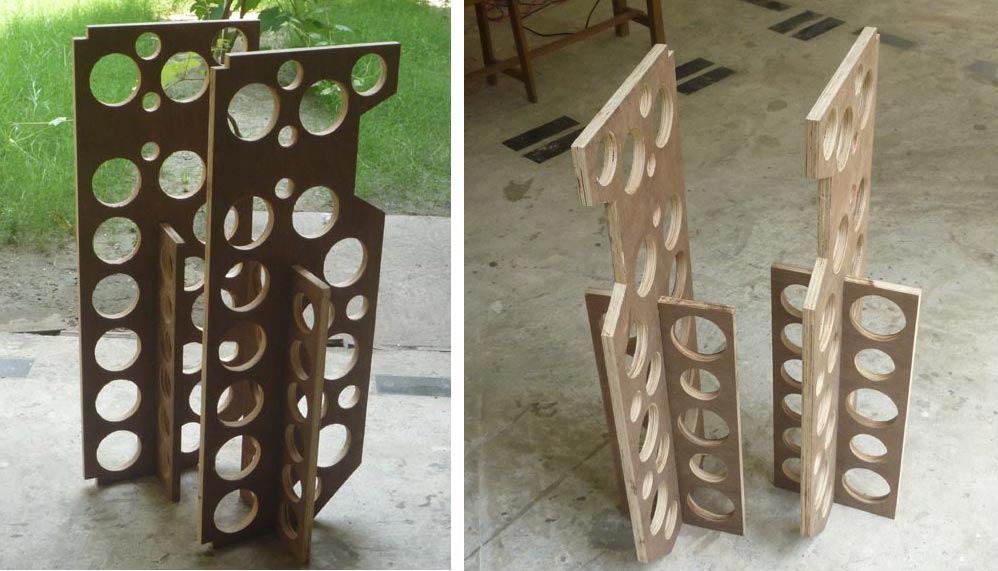
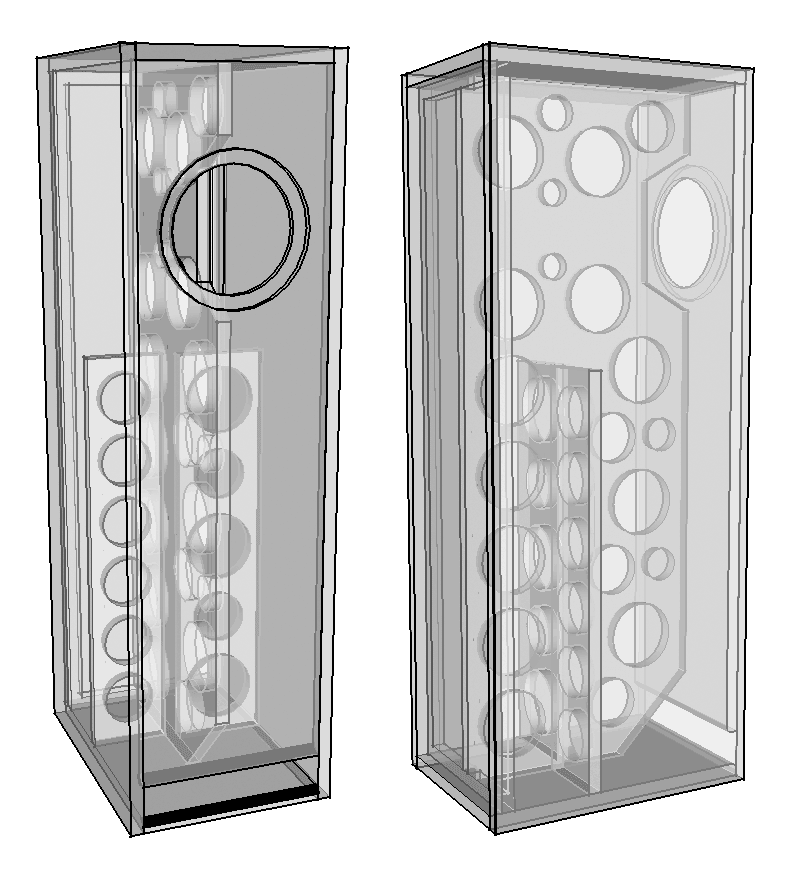
I didn't have in mind such a heavy bracing, this box is quite a bit thinner then pensils after all. More inline with Dr. Griffin's suggestions, few vertical planks here and there.
We put similar bracing inside the much smaller Pensil7, the pictures were just for illustration purposes.
What kind of material do you plan on using? The amount of bracing will be somewhat dependent on that.
dave
What kind of material do you plan on using? The amount of bracing will be somewhat dependent on that.
dave
About the same size as the Pensil7 (WxD), here is what we did.
TL the sides need more bracing than front to back, but putting a brace facing the driver, and we like to brace the driver to the back of the box so this compromise was what we came up with.
With 18mm and about 33% holes, you would increase width or depth by 12mm.
dave
TL the sides need more bracing than front to back, but putting a brace facing the driver, and we like to brace the driver to the back of the box so this compromise was what we came up with.
With 18mm and about 33% holes, you would increase width or depth by 12mm.
dave
Are the rear panel cleats accounted for in this design, or should I do it by increasing depth for example?
Rear cleats are universal in the Pensils. They allow for the removable back used to be able to adjust the damping. I don’t thibk Jim’s have that feature.
dave
dave
How’s the sound compared to pensils with the same driver? I have pensil 10p but I prefer the slimmer box like this one.
I have never been one to design or build enclosures with unneeded complexity such as full length braces or cleats for removable panels unless there are compelling reasons to do so. The DIYer who chooses to build a MLTL can include such features as they please to suit their needs.
The internal width and depth of my Alpair 10 designs span no greater than 7 inches so my experience is that exhaustive bracing is not needed for 18 mm thick material. Also removable panels--especially the rear panel--necessitate excellent box building expertise and sealing. If desired the damping material (placed from the top of the box to just below the driver), can be adjusted via the driver hole. Also I use a terminal plate which allows me to access the wiring or perhaps a baffle step network in the rear of the enclosure. Hence, my bottom line is that elaborate bracing or a removable panel are not needed for this design.
If Planet10 was designing or building his own enclosures, he would likely reach the same conclusions on some of the designs that he sells.
Last edited:
Thanks, that's what I was hoping to confirm. Unless foam is used which is not recommended anyway, removable back should not be necessary to fluff the polyfill around.
How’s the sound compared to pensils with the same driver? I have pensil 10p but I prefer the slimmer box like this one.
I have only heard the Pensil (and FHXL and a cariety of Mar-Kens (have a pair in the living room at the moment).
Jim’s design is certainly smaller than i would have expected, but it shows the strength of how modern modelers have opened up the TL space for a variety of designs.
You’ll just have to build it and form your own opinions. :^)
dave
Also I use a terminal plate which allows me to access the wiring or perhaps a baffle step network in the rear of the enclosure.
+1.
This cannot be overemphasized.
The Pensil designs from Scott are done for Mark Audio and some of the features come from them.
All of my designs, even those with no panel having any dimension greater than 7”, have a brace connecting the back of the driver to the back of the box. In Jim’s, the side panels, i would suggest, even with quality 18mm ply, could benefit from some bracing. And none have removable panels.
dave
I am thinking going for tube port after all, but 63mm diameter for PVC pipe seems difficult to find. Can I use 50mm?
I don't see any plans attached in the thread, is it only the dimensions in the first post that we should respect?
- Home
- Loudspeakers
- Full Range
- Mark Audio Alpair 10.3/A10p MLTL