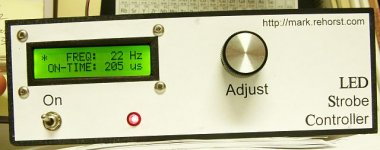
Anyone know a way to put nice looking lables on a DIY chassis/encloser?
Like Volume, Balance, Bass, Treble, and so forth.
Thanks
Like Volume, Balance, Bass, Treble, and so forth.
Thanks
Hence "the big DIY question."😉
I sort of knew what you were getting at. I just hoped this would clear some of it out. I guess some sort of screen print is required. I have a similar problem coming up where I need some really fancy print. It's some vintage gear being modified.
I sort of knew what you were getting at. I just hoped this would clear some of it out. I guess some sort of screen print is required. I have a similar problem coming up where I need some really fancy print. It's some vintage gear being modified.
Yeah, new stuff for me too. Actually, with the software from your link, I designed a very nice panel that I could glue to the actual front panel.
Price $30. But would really make a nice looking unit.
I'm still going to look into some type of styncilling. sp?
Price $30. But would really make a nice looking unit.
I'm still going to look into some type of styncilling. sp?
Dave,
Here is just one example of "dry transfer lettering". There are zillions of different kinds/styles out there. It DOES take some practice and patience to do it.
It is also rather fragile. What I usually do is put a few coats of polyurethane over it... this helps alot for durability.
😉
Here is just one example of "dry transfer lettering". There are zillions of different kinds/styles out there. It DOES take some practice and patience to do it.
It is also rather fragile. What I usually do is put a few coats of polyurethane over it... this helps alot for durability.
😉
Recently I've taken to printing front panels out on thin card (using a colour ink jet printer), then laminating the card. Cut the design out and glue it to the front panel. Nice and colourful, and the laminating makes it shiny and proof against damage.
As this thread dies out, I just wanted to say "THANKS" to all. The term "dry transfer" is what I needed to get me on my way.
Anyone tried Lazertran (also called Fotocal).
Waterslide decal paper but very strong where others I tried tended to break more easily.
Homepage here:
www.lazertran.com
Lots of examples here:
http://1176neve.tripod.com
More details here:
http://monopole.ph.qmw.ac.uk/~thomas/synthdiy/index.htm
It can give a very professional finish.
Regards
Peter
I think I like the waterslide better than the dry transfer. I'm sure it's going to be a hit and miss project.
You can get very nice panels made for about $35. But I really don't mind if the project has a little "homaid" look.
You can get very nice panels made for about $35. But I really don't mind if the project has a little "homaid" look.
Use a CAD program or other accurate drawing program to draw an outline of the panel in full scale. Add center points (crosshairs) for holes to be drilled. Add text as desired.
Print at 1:1 scale using a laser or inkjet printer. Spray front panel piece with spray-on adhesive. Apply printed front panel. Drill/cut holes as required. Peel off front panel label. Clean adhesive off with goof-off, mineral spirits, or whatever is handy.
Print another copy of the label. Spray the drilled front panel with adhesive again. Apply the label again. Cut holes through the paper where there are holes in the panel.
You can run the printed label through a laminator before gluing it to the front panel. That will protect it from dirty fingers and wear.
Here's one I did recently. It takes only a few minutes and the result is pretty good.
I_F
Attachments
davidlzimmer said:Very nice! But what if you want the natuaral metal finish?
Then you do something else.
Natural metal fisnishes are so industrial. Use more imagination... How about fractal patterns in 64k colors? Photos of clouds or tornadoes or lightning? Beautiful nudes reclining on chaise lounges? Your favorite anime characters?
I_F
See Parts Express and you can get them in white and black dry transfer lettering. They have complete names already done and a rub and you're there. I found you don't need to put a clear coat over the top, but does make them more durable.
They also have a sheet for lines and dots etc for graduations.
http://www.partsexpress.com/pe/showdetl.cfm?&DID=7&Partnumber=340-171
http://www.partsexpress.com/pe/showdetl.cfm?&DID=7&Partnumber=340-172
http://www.partsexpress.com/pe/showdetl.cfm?&DID=7&Partnumber=340-179
They also have a sheet for lines and dots etc for graduations.
http://www.partsexpress.com/pe/showdetl.cfm?&DID=7&Partnumber=340-171
http://www.partsexpress.com/pe/showdetl.cfm?&DID=7&Partnumber=340-172
http://www.partsexpress.com/pe/showdetl.cfm?&DID=7&Partnumber=340-179
- Status
- Not open for further replies.
- Home
- General Interest
- Everything Else
- Lable chassis
