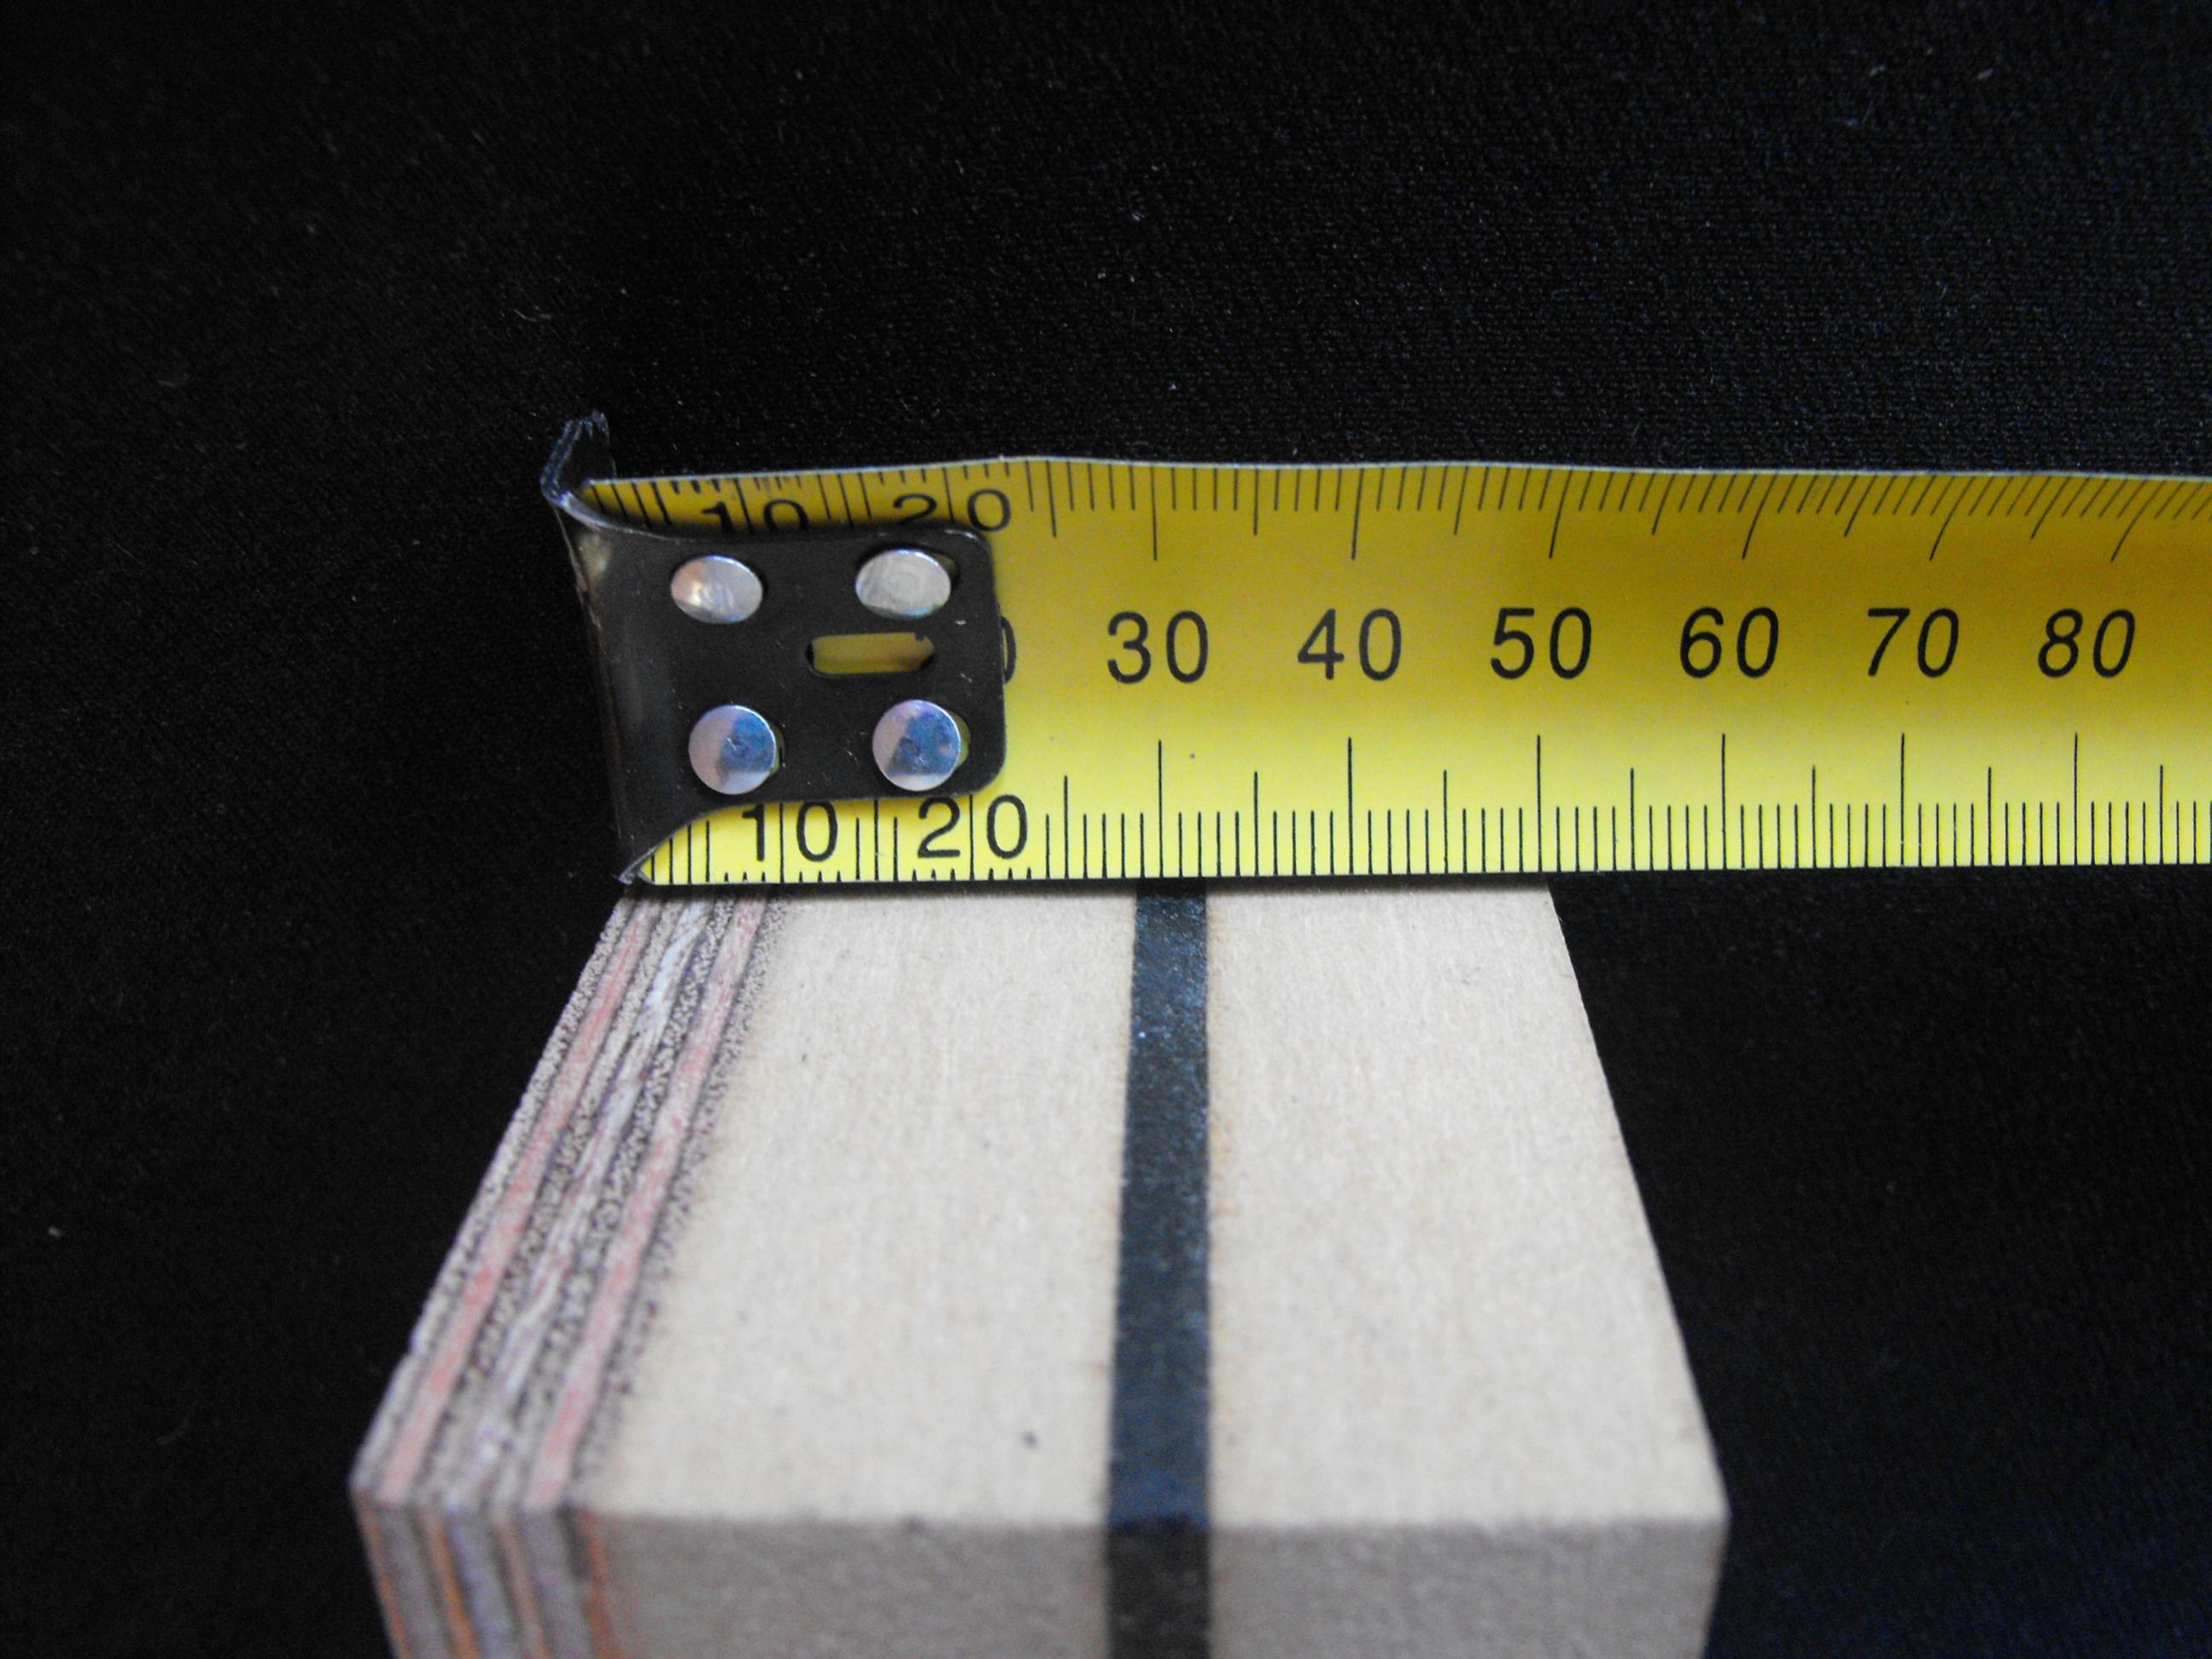
I used a 6"x6" array of wood screws to hold the panels together until dry. Removed the screws afterward.
Re #44 lilun, I think that's polystyrene you have in mind. Down here in Aust' about 35 yrs ago there was a small business that did produce a 3 cubic foot (80 litre) concrete speaker for some Philips drivers and he mixed polystyrene (Bean bag balls) with the concrete to make it a bit lighter....................
And am I right in thinking that one manufacturer (JBL?) produced a double sided box (cavity walls) that the owner bought, took home and then filled the wall cavity with water? Getting old now and may have imagined it! But our US friends may be able to confirm it. Back in the 70's I think.
Cheers Jonathan
I think there are two different issues with cabinets which should not be mixed up. The first is preventing sound from being transmitted through the cabinet. The other is preventing cabinet vibrations.
Why not make the cabinet of foam or sound absorbent material? Then mount the driver separately to secure it. Anybody tried this great idea?
Why not make the cabinet of foam or sound absorbent material? Then mount the driver separately to secure it. Anybody tried this great idea?
In the 80s, Wharfedale produced a cabinet made of expanded polystyrene faced with Formica. It was a response to the Celestion SL600 aerolam cabinets.
Around the same time, Mordaunt Short's 552 floor-standing speaker mounted the drivers directly on the stand and had the rest of the enclosure 'floating', separated from the baffle and frame by rubber seals.
Apart from Celestion, I don't know if any of the manufacturers produced any research to support their ideas, in which case it could have been pure marketing.
This is very interesting. Hence, are you saying that the screws were not rigid enough to restrain the panel? Would more screws have helped? Or was it just that the back was so large that any uniform motion was a problem? In this later case then even a glued back would have been a problem unless it was CLD, and even then CLD does nothing if the panel moves as a unit.
Well, all you say is true the screws did not restrained the panel enough and anyways, if I had glued it the first resonance of this panel would have been an issue because of the size.
This is why I said that good practice should be to brace for the first few modes of each panel by linking (vibration) nodes to likely anti-node...
CLD only help for mid and high orders.
M
Hi "M"
CLD will work on the first mode if it is a bending mode, i.e. the panel bends as part of its mode shape. CLD requires shear across its thickness to be effective, but this happens for any bending mode. Hence, if the panel is clamped at its edge then it has to bend to some degree.
My concern is for a removable back panel. It has to be screwed only.
Hi "M"
CLD will work on the first mode if it is a bending mode, i.e. the panel bends as part of its mode shape. CLD requires shear across its thickness to be effective, but this happens for any bending mode. Hence, if the panel is clamped at its edge then it has to bend to some degree.
My concern is for a removable back panel. It has to be screwed only.
Hi,
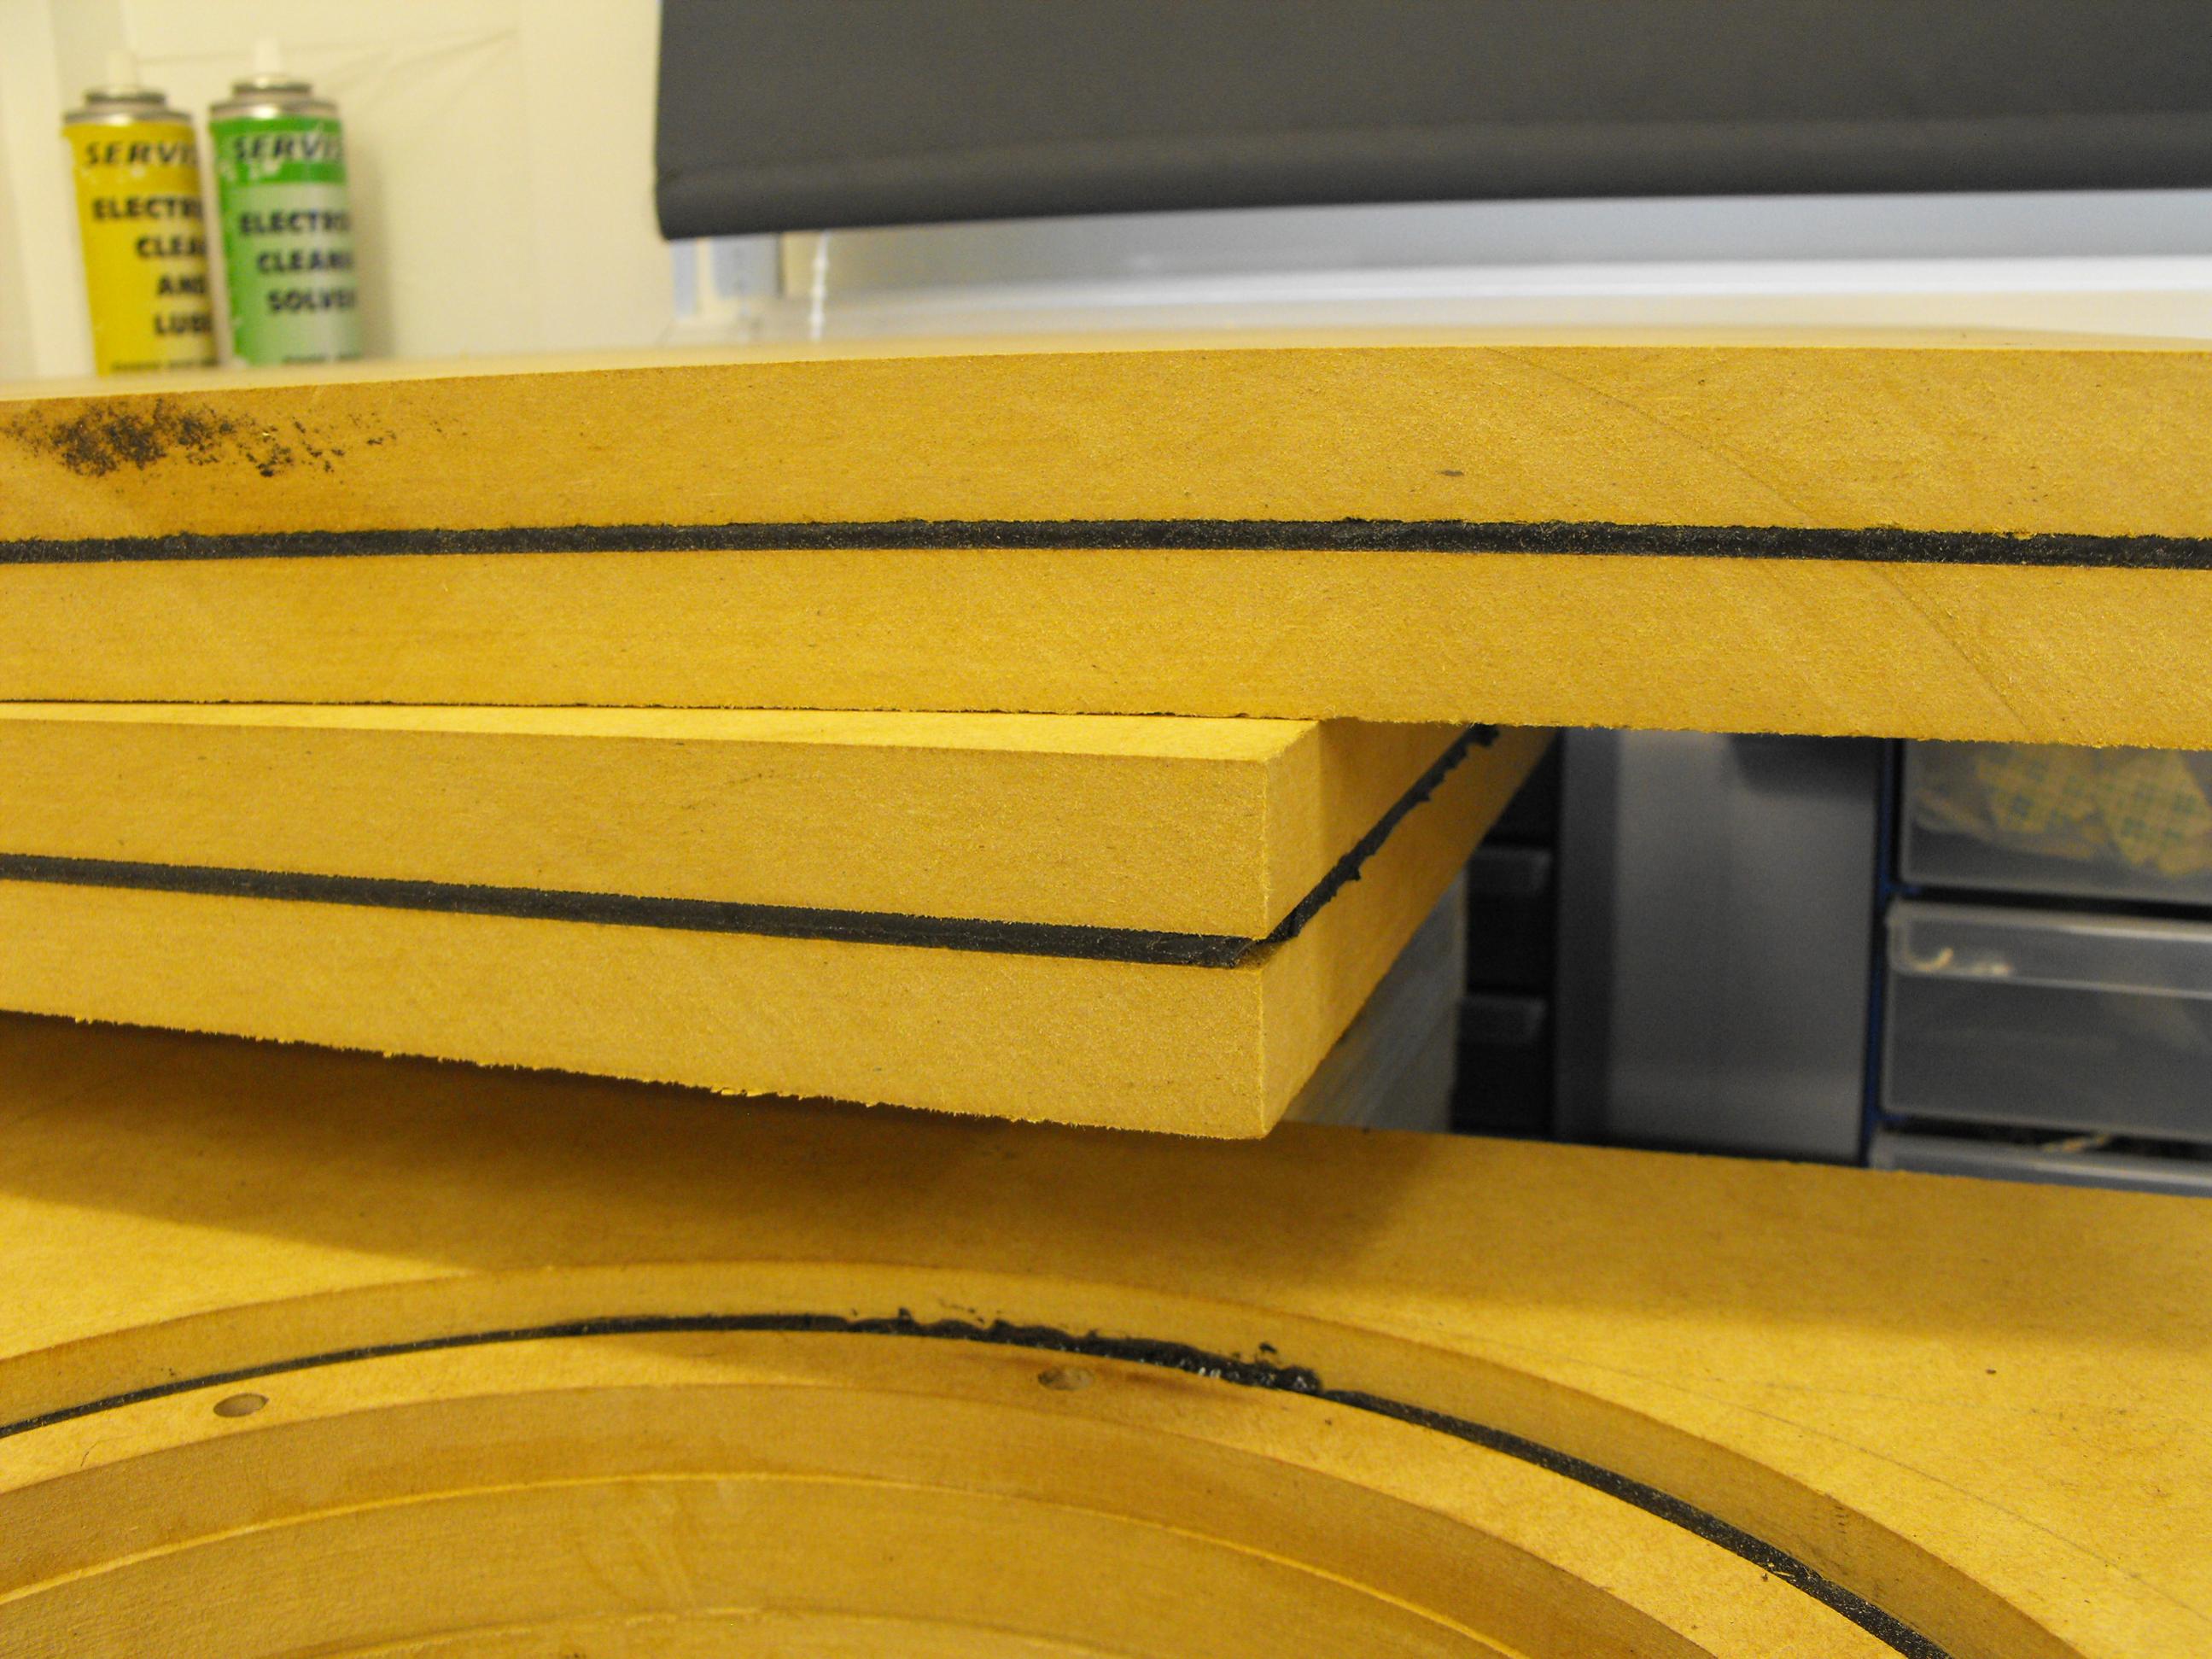
I know quite well about the CLD but I stand next to my claim; see the attached measurements. the black curve is the naked cabinet the blue curve is the cabinet with added CLD on the back only but the results are similar (just amplified) for more surfaces treated with the CLD.
The damping does nothing for the first few modes.
BTW you mentioned you are using braces with CLD. May I ask how you do it because I tried it and it proved useless.
M
PS: SMAC – DAMPING PRODUCTS | SMAC - DAMPING PRODUCTS
I tried their stuff, it works great but i am not too sure how to procure it for DIY ;-)
Attachments

It depends on the frequency of those first few modes. Damping is more effective at higher frequencies and so one option is to make stiff structures (e.g. aluminium with ribs) with the first few modes at relatively high frequencies that can be well damped.The damping does nothing for the first few modes.
M
I make my own formulation of compound from elastomeric polyurethane, but its exact formulation is proprietary.
As I said for CLD to work you must put the object into shear. In a cross brace you can do this with two plates bonded together, but each plate adheres tightly to a different side. Virtually all vibrations across this object will be in shear. Sorry, but I don't have any measurements - I don't have an accelerometer.
]Here's an epic build in which CLD is used. The builder actually ran some tests to help determine which material was most effective. Sikaflex polyurethane was the best but the most expensive so he went with Bostik V60 glazing silicone that was almost as good. I think I'd use the Sika since it has a longer working life and not worry about the cost. He used 3 mm adhesive silicone buttons to keep the thickness consistent while clamping.
He employed a bunch of interesting construction techniques including a
cast resin baffle. The build thread was well documented and an interesting read.
http://www.diyaudio.com/forums/mult...e-aligned-constrained-layer-construction.html
He employed a bunch of interesting construction techniques including a
cast resin baffle. The build thread was well documented and an interesting read.
http://www.diyaudio.com/forums/mult...e-aligned-constrained-layer-construction.html
Hi,
I might be wrong but ribbed Al is a bit outside DIY realm.
I did cabinets with tension curved walls made of glass fiber, Al honey comb, glass fiber damping layer and carbon fiber.
The braces were using gas dampers (like the ones used to hold the boot lid up).
I would say that the results were "good" but I don't think that would help anyone ;-)
The first few modes of a "normal" cabinet are quite simple in their shape and this is a key.
You can think of the first mode of a drum skin: http://en.wikipedia.org/wiki/Vibrations_of_a_circular_membrane
The deformation gradient within the thickness of the material is rather small and therefore shear forces you need to get the CLD working are weak.
Of course that is if the vibration amplitude is small as it should be since you should be using correct (stiff) material and adequate braces on the anti-nodes.
With higher order modes the gradient is higher (radius of curvature is smaller to make it simple) so the CLD is more efficient.
I used a very decent accelerometer: http://www.digikey.com/catalog/en/partgroup/ach-01/21992 about 40USD.
some hits here: http://www.libinst.com/accel.htm
you need surf board wax to glue it on the DUT, this is critical ;-)
M
Last edited:
Forgot a couple of interesting things: readymade sandwiches that could give some ideas (no relationship with them)
Toubois
Toubois
Toubois
Toubois
Toubois
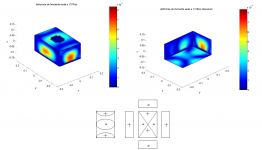
Note that the box was 320x178x210mm with about 5.5L internal volume, Standard quality particle board.
1181 points were measured (15.3mm special step)
We can consider this box small but the first resonance was at about 150Hz. A compact floor stander first mode was about 80Hz so you really cannot count on the "high frequency" to help with CLD.
Here is attached another example of global mode.
M
Toubois
Toubois
Toubois
Toubois
Toubois
Note that the box was 320x178x210mm with about 5.5L internal volume, Standard quality particle board.
1181 points were measured (15.3mm special step)
We can consider this box small but the first resonance was at about 150Hz. A compact floor stander first mode was about 80Hz so you really cannot count on the "high frequency" to help with CLD.
Here is attached another example of global mode.
M
Attachments
Sikaflex polyurethane was the best but the most expensive so he went with Bostik V60 glazing silicone that was almost as good.
A while ago I did some tests with simple 6 mm sheets of MDF and different intermediate layers. A 1 mm thick PU foam double-sided adhesive tape proved best. Easy to apply, but way too expensive for a complete speaker. Can't find the results anymore, but AFAIR it damped the modes nearly completely.
Seems like PU is somewhat good for that purpose.
]Here's an epic build in which CLD is used. The builder actually ran some tests to help determine which material was most effective. Sikaflex polyurethane was the best but the most expensive so he went with Bostik V60 glazing silicone that was almost as good. I think I'd use the Sika since it has a longer working life and not worry about the cost. He used 3 mm adhesive silicone buttons to keep the thickness consistent while clamping.
He employed a bunch of interesting construction techniques including a
cast resin baffle. The build thread was well documented and an interesting read.
http://www.diyaudio.com/forums/mult...e-aligned-constrained-layer-construction.html
Beautiful on the outside; but this is example of horrible way to mount drivers:
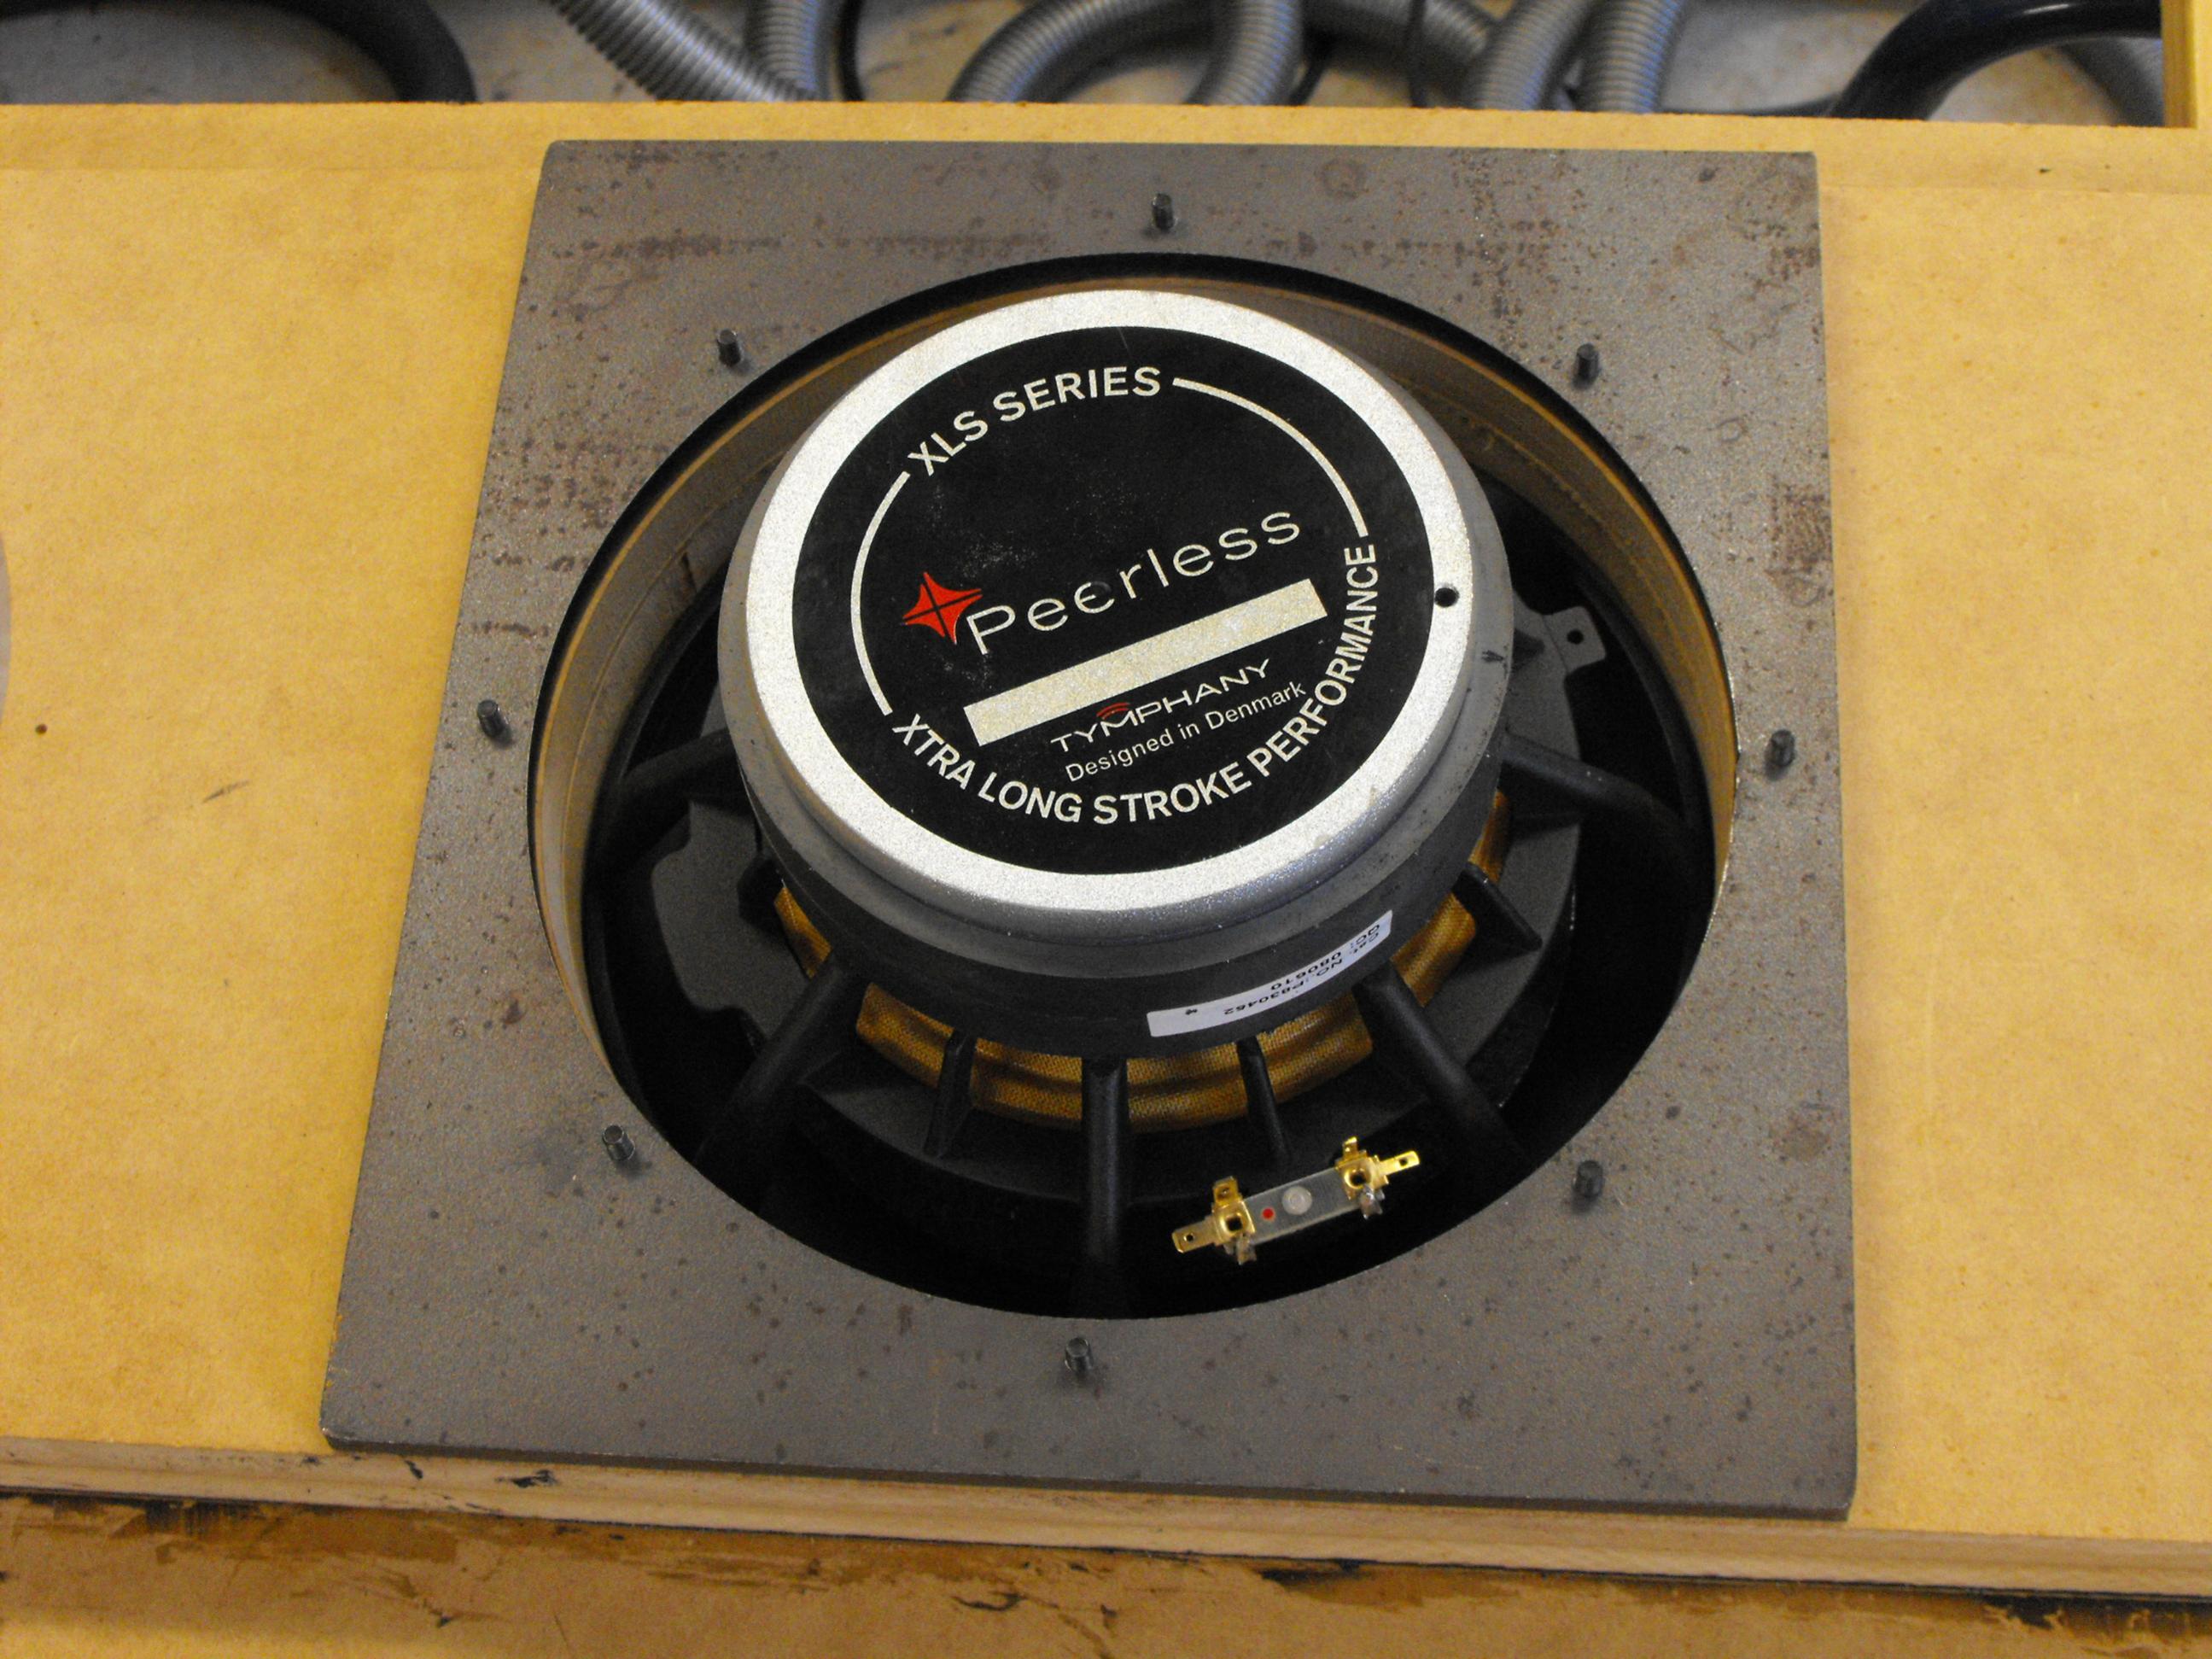
Deep cavity constrains air motion, and sets up cavity resonance. In case of woofer this may be well above crossover point, but is pumped mode. For all the reduced cabinet sound, this cavity resonance is adding way more color.
In case of this projects mid range:
The mid range is effectively mounted in short pipe with horrible resonance. This is bad compromise.
Designer can't loose sight of what is going on inside the cabinet that effects what comes out of the driver.
In case of above mid, the baffle element that is mounted in has small irregular shape; this alone greatly reduces how much sound this panel is radiating.
true but how can you avoid that? if you want a strong baffle, its usually very thick. What you would need is a very thin material which is also rigid and damped.
true but how can you avoid that?
Flare the inside edges of the cylinder.
Then it would become a short horn instead of a short pipe.Flare the inside edges of the cylinder.
No, it would reduce the pumping action, evening out the transition. This is normally accomplished with a 45° chamfer bit.Then it would become a short horn instead of a short pipe.
Deep cavity constrains air motion, and sets up cavity resonance. In case of woofer this may be well above crossover point, but is pumped mode. For all the reduced cabinet sound, this cavity resonance is adding way more color.
For a woofer, this cavity is just an additional acoustic mass. Nothing more. Coloration? Not really, nothing you can't handle with the crossover.
The flowing noises from the sharp edges may be more crucial, but I don't think you'll ever hear them with real music program.
The mid range is effectively mounted in short pipe with horrible resonance. This is bad compromise.
That's right, though.
Any truth to this?
Source: http://www.bossobass.com/Bossobass.com/BB, In Depth 3.htmlWhy use a cylinder-shaped enclosure?
A: Box-type enclosures require extensive internal bracing to prevent unwanted panel resonances.
A cylinders physical properties are such that it does not require internal bracing, does not require thick, heavy material for its construction, has the appearance of much less bulk due to the curved lines and it can be designed to achieve a one-of-a-kind form factor that separates it from ordinary audio products.
- Status
- Not open for further replies.
- Home
- Loudspeakers
- Multi-Way
- how much cabinet sound