Easy but takes a little practice.
First apply a uniform coat or two, which is the normal painting job and tends to dry shiny, touching/overlapping drops attract each other and tend to self level by capillarity.
Which is fine, you want a uniform layer covering aluminum surface.
Let it dry half an hour and then apply the final, texture coat.
I lower air pressure a lot, IF available use somewhat fatter nozzle (it depends on which spray pistol you are using) , the idea being that at such low pressure you do not *vaporize* paint but let it sputter in large drops.
large drops must be applied sparingly (you already painted the background so no big deal) so they do not touch each other.
As always, practice makes perfect.
Practice on cardboard or old cans finding proper distance, air pressure, drop size, etc. before you paint the actual panel.
Since I use "car paint" it dries in minutes; other paint types will take longer.
"Real" Industrial paint is cheap and in theory what "should" be used, but it never hardens on its own, it requires an oven for curing.
Same with "dry dust" paint.
No big deal for a Factory, but setting up an oven for infrequent use is too much, that´s why I searched for hobby level alternatives.
2 component Epoxy paint is more expensive and does not require an oven, but you MUST clean painting equipment very well afterwards, once it hardens it´s there forever.
For paint, this would my choice;
Polane T Polyurethane Enamel | General Industrial Coatings
It does take some technique to achieve a textured finish, however, and it is one of the most durable finishes out there.
A well machined finish of about 20-30 ra is pretty nice on its own imo.
Polane T Polyurethane Enamel | General Industrial Coatings
It does take some technique to achieve a textured finish, however, and it is one of the most durable finishes out there.
A well machined finish of about 20-30 ra is pretty nice on its own imo.
For the home store finish you can try soaking the aluminum in a lye drain cleaner solution, rinsing, then soaking in muriatic acid and scrubbing with a brush to clean then rinsing again. That will get you a frosted finish you can cover with clear. Depending on how long you leave it in the lye you can get rid of small scratches etc. The black smut that develops in the lye is probably better removed with nitric acid but that stuff is expensive.
Make sure you do it outdoors and wear proper ppe. The bath in lye releases hydrogen gas so keep well away from an ignition source.
Make sure you do it outdoors and wear proper ppe. The bath in lye releases hydrogen gas so keep well away from an ignition source.
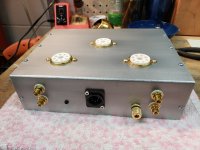
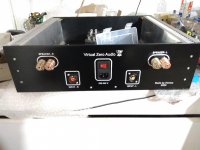
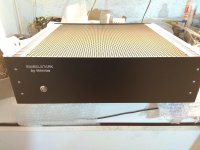
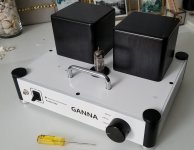
I make my own Guitar and Bass amplifier panels out of raw 1.6mm aluminum sheet, which I cut - bend - treat - paint - silkscreen - punch in-house.
After cutting and bending aluminum gets wet sanded with medium grit wetordry paper simply to remove gross scratches and blemishes, and get a rough surface which facilitates painting.
No special scratched pattern is searched for since it will disappear under large drop spray painting ... a common finish in MI amplifiers.
This is this morning´s batch, not too many since quarantine sales are sllloooowwwww but since I sold two 100W Bass amplifiers, I made 8, had used the last one past Friday.
Can make 1 if strictly necessary and urgent, but setting up machines, cleaning silkscreen panel and tools, cleaning spray paint pistol, etc. is the same for 1 or many, so usually 8 is the minimum batch, up to , say, 30 or 40 .
For a "Powdercoat look" equivalent which would make me set up an oven , I use instead, first a two component wash primer precoat, and then, believe it or not, Nitro or Acrylic "car paint" which is very noble, easy to use, clean, reuse (it´s thinner based), can be touched up (Musicians abuse their equipment), etc.
Currently using excellent Akzo Nobel products, including their traditional "Taxi Black" car paint.
What's your method for the silkscreen and text? Looks very clean and sharp.
I'm surprised no one has mentioned Alodine - the conversion coating for aluminum. I like the brownish version on it's own, ymmv - getting a uniform color is hard. It's very good prior to painting. There is also a more or less clear version - both prevent oxidation.
Member
Joined 2009
Paid Member
I wonder, for DIY one-off projects if it isn’t better to buy a commercial amp (some of them are not that expensive because they’re made in high volume), just strip out the electronics and install your own. Job done with all the labels, cut-outs etc. There’s virtually no machining, chemicals, baths, finishing etc. all of which ain’t cheap of you are buying from scratch.
Thanks.What's your method for the silkscreen and text? Looks very clean and sharp.
It´s plain silkscreening, no secrets, just use solvent type inks and fine mesh silk which is the standard for panels and such and not the coarser mesh silk and water based ink used for T Shirts.
But basic tecnhique is the same.
Just as a shortlist:
1) Draw in your favourite package (I use Corel Draw since ´93, and previous 20 years some variant of Letraset and China ink pens, go figure)
2) print on translucid drafting paper (Vellum) or Transparencies (inkjet or Laser)
If the latter, print 2 copies and overlap them for good opacity; toner on polyester sheet is not REAL black.
3) use it to burn a silkscreen.
Use 100 mesh silk.
4) screen using your favourite ink; Epoxy is what Pros use but then clean screen obsessively, any minute residue you leave behind will stay forever once cured and will progressively clog it.
5) different to T Shirt printing, screen is NOT in permanent contact with panel but 5 o 8 mm above, silk which must be tight stretches a little under squeegee pressure .
6) use a sharp rectangular edge squeegee.
and like with everything, practice makes perfect. 🙂
Sanded anodized and painted. lettering using laser engraver.
Attachments
Last edited:
In "the old days" (think early 70´s) in Argentina, at the beginning of SS domination and a golden era for DIYing, our small local market was cornered by 3 or 4 large semiconductor companies, meaning Texas Instruments, Philips, Siemens, Fairchild and RCA, period, each offering some suggested projects, obviously designed around own semiconductors.I wonder, for DIY one-off projects if it isn’t better to buy a commercial amp (some of them are not that expensive because they’re made in high volume), just strip out the electronics and install your own. Job done with all the labels, cut-outs etc. There’s virtually no machining, chemicals, baths, finishing etc. all of which ain’t cheap of you are buying from scratch.
So we had a "Texas Preamp": generic Hi Fi with selectable inputs, volume, balance, tone controls, optional scratch and rumble filters and maybetape/monitor jacks and switch; then same functionality (different schematic and transistors of course) from all others.
Plus 4 or 5 power amps,from 7W to mighty 35 or even 70W 😱
So some entrepreneurs manufactured and sold "generic" chassis, cabinets and even fully finished front panels.
Many techs (me included) were asked by a customer/friend/family : "hey, can you build me an amp?" which was quick, cheap and easy: just get boards, components, cabinet and even generic power transformers on Friday, spend weekend building it and delivering on Monday, go figure.
And end product looked as professional as what could be bought at an Audio shop.
Joys of standardization 😀
This was typical looks.
Notice generic controls and lack of brand, you could fit most anything inside:
Goldmund does one of the most expensive looking aluminum finish and I always wonder how they do it.
I start with one coat of good quality spray paint, and I painfully found Krylon to be the best option. The panels are painted light or, better - white. Then print the label on a special waterslide decal paper. Thin coat of clear polyurethane (again, Krylon is great), dry until it does not stick to the finger at all. Cut out, slide on, use soft cloth to get water bubbles from underneath and dry out for a couple of hours. Another coat of polyurethane to hide the edges of the patches.
Attachments
That looks great Radiola. Do you use laser or inkjet waterslide? In the past I have had problems with the edges of the decals showing through with even multiple coats of clear over the top but that was with laser water slide and lacquer over the top.
Do you use laser or inkjet waterslide?
Inkjet. Printing on HP inkjet printer with 'Other glossy paper' and 'Best print' settings. It needs to dry out on its own before coating with polyurethane, forgot to mention that!
I cut out the decals using my wife's craft exacto knife and her rubber craft mat 🙂 so no visible rapture to the edges is typically created. Krylon stuff is also true transparent, the other brands could be yellowish and multiple coats may end up changing the looks.
Goldmund does one of the most expensive looking aluminum finish and I always wonder how they do it.
That’s likely a clear anodize finish. Another type of clear finish is a lye treatment.
I just leave them be, haven’t had any corrosion yet, but would just use a mild etching cleaner if so.
Mine are all old anyways, so it’s unlikely they will degrade.
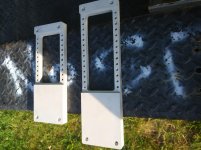
I'm building up a Victor TT with the two arm constrained layer plinth. I didn't want to use the original wood arm boards as they are hard to find and pricey so I built my own. Made the main armboard from aluminum and it will hold smaller aluminum plates to attach the arms to.
I finished the aluminum by glass beading them in a blast media cabinet. Gives a very nice smooth mat finish.
BillWojo
I finished the aluminum by glass beading them in a blast media cabinet. Gives a very nice smooth mat finish.
BillWojo
Attachments
You should clear coat the raw beaded alumium as fingerprint marks will start to show from the oil in your hands later on.
Hi AVWERK, I have clear coated bead blasted aluminum in the past and wasn't happy with the finish. That was years ago, if you have any good suggestions I would love to try it out on a piece of scrap. The finish I used last time filled the surface texture and after a few years yellowed a bit.
Cleaning this is pretty easy, just spray it down outside with automotive brake clean. Leaves no residue.
BillWojo
Cleaning this is pretty easy, just spray it down outside with automotive brake clean. Leaves no residue.
BillWojo
This side of Anodizing which is always the best surface treatment for aluminum,
I use Alumiprep 33 as a mild acid etch followed by Alodine clear 1500 surface treatment.
This stops corrosion before spraying a clear coating or other surface finishes
Regards
David
I use Alumiprep 33 as a mild acid etch followed by Alodine clear 1500 surface treatment.
This stops corrosion before spraying a clear coating or other surface finishes
Regards
David
Last edited:
- Home
- Design & Build
- Construction Tips
- How do you finish your aluminum plate stock for DIY amps?