I've ordered the F6 kit and PSU boards from the store for a winter project...🙂 Could someone point me in the direction of PSU caps 30000uf 35v and is there a preferred make manufacturer supplier ?
TIA
TIA
These are the ones I used in my FirstWatt power supplies:
https://www.mouser.de/ProductDetail/united-chemi-con-ucc/ekmh350vnn333ma63t/?qs=0Kodg4Py2Q7dqaFYrSUF8A==&countrycode=DE¤cycode=EUR
I'm very happy with them, no issues, and they're 105 C rated, so should last longer inside a FirstWatt amp 😉
Best regards, Claas
https://www.mouser.de/ProductDetail/united-chemi-con-ucc/ekmh350vnn333ma63t/?qs=0Kodg4Py2Q7dqaFYrSUF8A==&countrycode=DE¤cycode=EUR
I'm very happy with them, no issues, and they're 105 C rated, so should last longer inside a FirstWatt amp 😉
Best regards, Claas
chede & fabrice63
Many thanks for the links. I'm putting a shopping list/options together at the present time..
Many thanks for the links. I'm putting a shopping list/options together at the present time..
laverda,
IIRC the "standard" F6 power supply is 60,000uF per rail. The diyAudio store power supply has space for 4 caps/rail, so 15,000uF 35V capacitors will give you 60,000uF/rail of you use all 4 of them. For higher capacitance you can opt for 22,000uF or 33,000uF. You will need to order 8 capacitors in total.
Examples:
https://uk.farnell.com/epcos/b41252a7159m000/cap-15000-f-35v-alu-elec-snap/dp/2750099
https://uk.farnell.com/cornell-dubi...p-15000-f-35v-alu-elec-snap/dp/2333493?st=35V
https://uk.farnell.com/epcos/b41231a7229m000/cap-22000-f-35v-alu-elec-snap/dp/1839286?st=35V
For my SissySIT, I did build a dual-mono power supply, so I used 16 of the United Chemicon 33,000 uF / 35V caps ... 😀 - plus 4 smaller Hammond chokes ...

troubleshooting first build after ACA
My first post here of course after a failed build attempt (up to now)😉
The Pass ACA was a joy to build, which led me to investigate further and decided upon building the Pass F6. Also so far this build has been lot's of fun.
I have built according to the build guide but apparently I made a mistake.
When powering up, power supply seems fine, both sides give 23.xV. However when connecting up the F6 board one by one and turning them on with a bulb in series (before the inrush limitor on 230v psu), I get 22v on source resistor (R2). Off course immediately smoke came out of the Jfets Q2 and Q3. The bulb glows up at first but then goes down. (led's on both boards come on)
While writing this i decided to remove the tie-wraps from the jfets and saw that on Q4 I put the LSK170 instead of the LSJ74's. That is really stupid as I deliberately decided not to recheck them before powering up
So then my question is, which other parts could possibly haven been fried? I noticed that turning P2 did not change anything on value on source resistor (R2). What are the next (measuring) steps before firing up with new jfets?
Thanks,
Robin
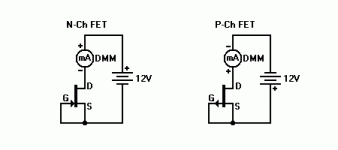
well, if you don't have enough xperience , most secure way is to check both JFets and mosfets with matching jig
that means desoldering
it is quite possible that JFets survived being flipped on rails , so check them
also , it is possible that you had max voltage set at trimpots , so check that too without having mosfets in situ
for upper mosfet , you need to have min Ugs voltage , same for lower mosfet
if you want more precise instructions , link ref. schematic
Thanks Zen Mod, much appreciated. The comment you made will have me do a lot of reading and testing the coming evening, will get back with the results.
Robin
Robin
Quick update: I took out jfets and started measuring voltage across R2 the right way😉 I managed to set 0.1V across the source resistors and zero offset after adjusting both P1 and P2 using two multimeters. Earlier stated info were wrong measurements. I guess next step is to try to solder the jfets in the right way, correct?
I tested the jfets using a 9V battery and 47 resistor. So these are the results:
Lsj74 #1 -0,02V/47R=-0.42mA
LSJ74 #2: -1.34V/47R=-28.5mA
LSK170 #1 0.43/47r= 9.1mA
LSK170 #2 0.22/47r= 4.7mA
Seems like one has survived no, (lsk170 #1)? If that is indeed the fact I will be ordering a new set of matched jfets from the US.
They are currently on backorder so in the meantime can I try to to use alternatives like the 2N5457 and 2N5460? These are available locally and i saw they were used in some kind of budget version here on diyaudio. I would prefer not to sit idle waiting for the Linear systems ones😉
I don't get it how you check them with resistor ( I have an idea but can't be sure without confirmation)
however - if you test them simply as I show in previous post , and you don't get normal values ( say 6 to 15mA , dunno which range you have) , part is simply toasted
better wait for real deal
however - if you test them simply as I show in previous post , and you don't get normal values ( say 6 to 15mA , dunno which range you have) , part is simply toasted
better wait for real deal
I measured according to your previous post and all values are below 5 mA. One N-ch is even 0. I'll just have to be patient then! Thanks for your assistance. I will be exploring this forum for a nice source to build. DDDAC from my fellow coutryman looks interesting too! will get back of course when all is working, or not😉
Hello everybody,
I took the big step and I ordered the kit to build the F6 with the selected FETs from the diyaudio shop and I can't wait to start building it.
Unfortunately the space that my wife has given me is not compatible with the wonderful 4U enclosure of my compatriot HIFI2000 because it is too big in height, so I have to find a solution and I was wondering if the one in the link is sufficient for use in a small room (18 square meters) piloting the Elac debut 5.2.
Thanks to everyone who will help me!
Dissipante 03/300B 3U 10mm SILVER
thejekocomputer,
Would you have space for this one? Also 3U, but deeper:
Dissipante 03/400N 3U 10mm BLACK
Maybe the 300mm deep 3U Disspante will also work with slightly lower bias and/or voltage rails reduced just a little.
Would you have space for this one? Also 3U, but deeper:
Dissipante 03/400N 3U 10mm BLACK
Maybe the 300mm deep 3U Disspante will also work with slightly lower bias and/or voltage rails reduced just a little.
Last edited:
I find, (and I think others have,) that the F6 does not run super hot at "normal" bias.
In the UK the case temp never gets to be a problem.
Depending where you live you may get away with a slightly smaller case.
An alternative is Might Zen Mod's "Babysitter.
Computer fan built into a false base below the amp.
In the UK the case temp never gets to be a problem.
Depending where you live you may get away with a slightly smaller case.
An alternative is Might Zen Mod's "Babysitter.
Computer fan built into a false base below the amp.
If you have to go 3U, I too suggest the 400mm depth chassis. (Assuming that
works within your space limitation.)
With a 300mm chassis, it's a tight fit for the Jensen transformers if you want to space out
the output mosfets evenly.
works within your space limitation.)
With a 300mm chassis, it's a tight fit for the Jensen transformers if you want to space out
the output mosfets evenly.
I definitely recommend a 400mm deep chassis for the F6. The deeper chassis also does a better job of keeping more space between the Jensen signal transformers and the big power transformer(s). The 3U height will probably be Ok for standard rail voltage and bias current. I used this size for my M2x, and it runs pleasantly warm with 23.4V rails and 1.3A bias current.
I happen to be using a 3.5U, 400mm chassis for my F6, but I'm also going to be running the amp a bit hotter in both voltage and current than normal.
I happen to be using a 3.5U, 400mm chassis for my F6, but I'm also going to be running the amp a bit hotter in both voltage and current than normal.
Last edited:
- Home
- Amplifiers
- Pass Labs
- F6 Illustrated Build Guide