Don't worry too much.@ Super_BQ
Without official informations from semiconductor companies and distributors
is just rumours 🙂 IRF250P225 Infineon Technologies | Mouser France
... So far I haven't seen to many shortages on discrete through hole semiconductors. The problem with big CPU's is the fab time, 3 to 6 months from start to finish, and the consolidation of major wafer fabs. There are only a few production ready fabs in the world capable of the small geometry (less than 30 nm) stuff needed for modern CPU chips. I'm sure that the situation is worse now than when I was still working, but even IBM sold or shut down their production fabs as I was leaving Motorola (they were building our chips). The biggies now are TSMC, Samsung, Intel, Global Foundaries, NXP, AMD, and a few others. The guys making big mosfets and other discretes are still using old fabs and are pretty much unaffected.
Sooo... given I haven't posted since my pix of the casing, because people here are so skilled and make beautiful things I can't do, plus I am among the lasts to receive the parts... I thought I should do something different 🙂
These packaging pix are perhaps a bad idea after all, as I am still suprised by the small size of all components of this amp. Not that it is really THAT small - after all I am used to SMD - but with all the nice close up pix posted here I somehow figured out everything was MUCH bigger. My imagination, don't know about yours...
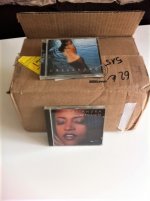
To give an idea of sizes, I decided to unpack everything and post pix with a CD next to it, so anyone from every country can have a real idea of sizes... and also of beauty, as this kit is really very very well done and complete. Of course, for most people that have already posted here, you know all that, you can skip, my posts. But the pix are hopefully also motivating people even more for the various kits to come, outlining the excellency of Papa and DIYAUDIO's team work. And giving an idea to those not fortunate as we were at the 1st round lottery to have a forestate of things to come...
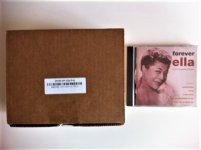
As a starter, you receive a nice parcel. Look, it is really small and yet it contains all the parts, inclusive of course the 2 T brackets and the power supply with all cords.
Inside, everything is again packaged, this time separately, inside the big parcel: SMPS with power cords on one side, OS boards with SMPS filter parts in another small parcel, FE in another one, all very carefully packed again inside these small parcels so nothing can move or get damaged. On top you get a DIN A5 enveloppe and a small bag with the nice output connectors...
These packaging pix are perhaps a bad idea after all, as I am still suprised by the small size of all components of this amp. Not that it is really THAT small - after all I am used to SMD - but with all the nice close up pix posted here I somehow figured out everything was MUCH bigger. My imagination, don't know about yours...
To give an idea of sizes, I decided to unpack everything and post pix with a CD next to it, so anyone from every country can have a real idea of sizes... and also of beauty, as this kit is really very very well done and complete. Of course, for most people that have already posted here, you know all that, you can skip, my posts. But the pix are hopefully also motivating people even more for the various kits to come, outlining the excellency of Papa and DIYAUDIO's team work. And giving an idea to those not fortunate as we were at the 1st round lottery to have a forestate of things to come...
As a starter, you receive a nice parcel. Look, it is really small and yet it contains all the parts, inclusive of course the 2 T brackets and the power supply with all cords.
Inside, everything is again packaged, this time separately, inside the big parcel: SMPS with power cords on one side, OS boards with SMPS filter parts in another small parcel, FE in another one, all very carefully packed again inside these small parcels so nothing can move or get damaged. On top you get a DIN A5 enveloppe and a small bag with the nice output connectors...
Attachments

Looks like a good 'second DIY in a lifetime' project when the Sony VFET variants are released in the future for my handful of Sony VFETs. My Korg B1 (firstest DIY project) is still singing beautifully.
Are these stereo versions going to have a 'mono operation' option like the Amp Camp Amp? (Sorry if question was already asked and answered.)
Are these stereo versions going to have a 'mono operation' option like the Amp Camp Amp? (Sorry if question was already asked and answered.)
So lets get into the details...
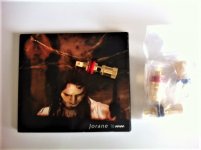
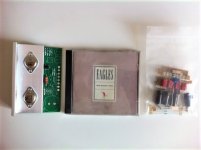
The output connectors are really nice. OK, they aren't as big as on mega watts power amps, but given the output power of the VFET and the corresponding LS cables you don't need mega LS connectors. Having said, that I love them: they aren't that small and they feel really like quality in your hands (weight, screw, play...). They can also accept bare cables though their reasonably sized hole. I wonder what part reference they are / who makes them...
In the enveloppe you will find all the cabling plus the crimping and also the thermal grease syringe. All nicely packed. Plus some small bits, the main switch and the PS connector and their bolts and nuts, the RCA plugs... and a light blue LED. Yep, look carefully, it is hidden there, as addition to the red one you will find in the SMPS filter. bag elsewhere...
I haven't yet decided on how to attach the wires to the boards etc.: crimping is one solution and everything is provided...
Attachments
Moving on to the powerhouse 🙂
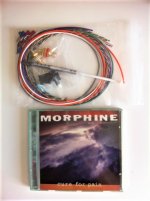
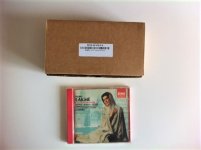
Again look at how well everything is packed and all is provided, inclusive the powercord for your country.
The thing that surprised me the most was the size of the SMPS filter board. Somewhere I expected it to be bigger, the coil also, possibly due to all these nice close up pix (that are quality pix whereas my pix are miserable LOL).
It is IMHO nice to have an idea of size, and also to do some blank mounting of the chassis in anticipation. That enables at least me to think twice about future developments, should I fancy to swap filters or FE boards, or add something to the existing... and how to dismantle and reassemble all this easily and safely hopefully.
Attachments

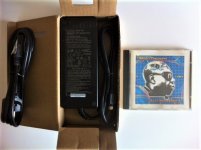
Here you can see the main part: the output stages prepared by the Master.
Again, very clean, my pix don't do it any justice but then you have Jim's / 6L6 excellent ones, so what 🙂
Plus... that's the way YOU WILL SEE the parts first: yes, BLURRED... due to the small tears in your eyes when you will receive all this and unpack it like a child at Xmas...
More seriously, again look at the size of the OS boards... and the quality of it: it IS clean... couldn't even find Papa's fingerprints, he must have been wearing gloves like Arsene Lupin, another magician...
Oh, à propos magician, there is part missing on that pix... it is in fact under the OS board, same when you open the package... did you find which one?
Attachments
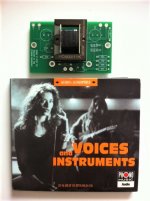
And finally to the FEs package... did I already mentioned how things were small LOL?
Now that you can see the size of all this, and you have seen how close it was once mounted on the numerous reports starting with the excellent build guide by Jim/6L6, I guess you get an idea of how complicated it could be to have to fiddle inside the unit once assembled. Better plan first if you plan coming back / modding it, me says... Or just follow the build guide and have fun.
I will build it exactly as intended and enjoy it for a while like that. Me being me, I will though make already some provisions for possible future upgrade paths without having to ruin it all...
And last but not least, I thought I would try to make one decent pix to outline the quality and cleaness of all those boards.
Papa, Jason, well the entire Team... you did a splendid job.
THANKS
Claude
Attachments

No, but the ACA switch was just a convenience. One can do the wiring with the connection cables externally, it just isn't as quick or neat. Keep in mind that the different options can change the distortion profile.
..........Are these stereo versions going to have a 'mono operation' option like the Amp Camp Amp? (Sorry if question was already asked and answered.)
@ClaudeG, thanks for the great tour!!
Let us know how your music sounds through your new prize.
Let us know how your music sounds through your new prize.
Tried to chose covers or titles that could have some remote link to the parts LOL
Love it too...
Love it too...
Guys just starting to follow this thread. Is this the Sony VFET that are on the DIY site? or a different unit? I got an email back in April about a lottery, and seems these units are all sold out. So were they a different unit or the same is being offered again soon.
What wattage amps are they? Maybe someone can update this thanks...I did the Amp camp kit and was shocked how really good an 8 watt SS amp sounds. I am a tube guy and use some 50watt EL34 mono blocks.
What wattage amps are they? Maybe someone can update this thanks...I did the Amp camp kit and was shocked how really good an 8 watt SS amp sounds. I am a tube guy and use some 50watt EL34 mono blocks.
And to be clear, this is lottery-only because they were rare, last of their kind parts and demand was going to be far greater than supply. There will be another lottery (right!!!???) and that is it.
- Home
- Amplifiers
- Pass Labs
- DIY Sony VFET pt 1