Mark Techer said:Hi Steve,
Your benefit will be from using all of the vertical pixels of the projector's panel as opposed to 75%.
2.35:1 / 2 is 1.175 which equals 705 (roughly) pixels of the 800 that you will have, so there will be small portions of unused horizontal pixels when this is done.
Given that we are more sensitive to vertical rez than we are to horizontal, it will actually be better than the letterboxing you would have going 16:9.
Of course to do this, you will need a lens capable of at least 2x stretch...
I wonder just how far the prisms will stretch before they introduce problems?
Mark
Mark: I know I feel slow today, for some reason (coming back from a holiday, perhaps?) but I cannot follow that math above. It must the new math everyone keeps talking about. I mean, I was able to ace three semesters of Calculus at University, but I can't follow that for some reason.
Care to dumb it down a little? I don't understand why you divided the aspect ratio in half to start. My understanding is that, in a 2.35:1 aspect ratio movie, on a SVGA projector, in actuality, the projector is only showing 340 lines of resolution in the picture, with the rest being black bars. Anamorphic stretch allows you to use 33% more pixels (but in 2.35:1, it still can't use the entire panel, and now only uses 450 pixels). But by vertically stretching the picture even more (using the projector's scaler), I now use the full 600 pixels on the panel. Why am I now using less horizontal pixels?
Mark Techer said:And here they are 🙂
Screen shots coming soon...
Mark
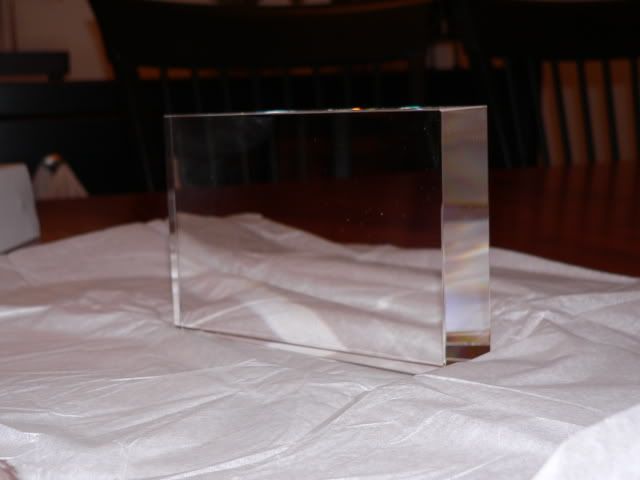
That picture of the wedges themselves looks a bit odd, like the faces aren't truly rectangular. Is that the case? Does that affect the thickness of the prism from top to bottom?
Steve Scherrer said:
That picture of the wedges themselves looks a bit odd, like the faces aren't truly rectangular. Is that the case? Does that affect the thickness of the prism from top to bottom?
Yes, they do taper from 140mm at the thick end down to 130mm at the thin end.
I was actually a little put off by that myself because if if your prisms rotate, so does the image. But as it turns out, the offest of one is cancelled out by the offset of the other, so it is all good...
Mark 🙂
Steve Scherrer said:
Mark: I know I feel slow today, for some reason (coming back from a holiday, perhaps?) but I cannot follow that math above. It must the new math everyone keeps talking about. I mean, I was able to ace three semesters of Calculus at University, but I can't follow that for some reason.
Care to dumb it down a little? I don't understand why you divided the aspect ratio in half to start. My understanding is that, in a 2.35:1 aspect ratio movie, on a SVGA projector, in actuality, the projector is only showing 340 lines of resolution in the picture, with the rest being black bars. Anamorphic stretch allows you to use 33% more pixels (but in 2.35:1, it still can't use the entire panel, and now only uses 450 pixels). But by vertically stretching the picture even more (using the projector's scaler), I now use the full 600 pixels on the panel. Why am I now using less horizontal pixels?
You will need a scaler and a 2x stretch lens for this -
Your panel is 600 x 800 or 1.33:1.
The 235 film therefore letter boxes at 340 x 800 pixels to be geometry correct.
If you set the player to 16:9 you increase the vertical rez from 340 to about 425, but now your geometry is wrong.
If the panel was 600 x 1068, you could simply use a 33% stretch lens, but as it is not 16:9, but rather a 4 x 3 display, you need further manipulation of the signal - hence the need for a scaler or HTPC...
So now you vertically stretch the image electronically to fill the full 600 pixel with image. You have a very tall and thin image. If your prisms can be staggered enough (I don’t think a pair will – but multiple prisms might), you might be able to stretch this out. If not, then you need a 2x stretch anamorphic lens that you can find on EBAY for between $50 and $100.
A film anamorphic lens (being 2x and not 1.33x) means that your now going to be able to project the full panel at twice the original AR, so 1.33:1 will become 2.66:1.
2.66:1 is too wide for 235:1, so using the scaler or HTPC, you will have to apply some horizontal squeeze to the image to bring the geometry back to being correct.
So based on a ability of a 2x lens you need to half the horizontal size of the image – where 2.35:1 / 2 = 1.17 x your vertical pixel count (now the full 600) = 705. 800 – 705 = 95 / 2 = 47 pixels per side that can not be used. The small sacrifice of these horizontal pixels are way better than the huge amount of vertical pixels you lost before.
If you were to take light output measurements you would indeed see a huge difference.
Hope that helps…
Mark
Thanks, Mark, for that explanation. I was able to follow that with no problem.
I could use a 2x lens online (seems a lot easier than doing what I am trying to do with the prisms...)
Speaking of prisms--I finally got them! They are really nice.
I set up my projector on the table in front of my screen, and set the prisms on the table in front (actually, set up a little, since my projector has such a steep vertical rise on the image emanating from the projector lens.
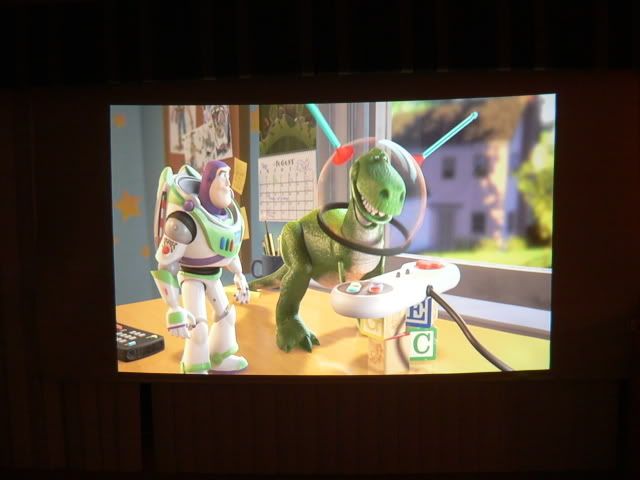
I found that I got some serious geometry issues with the lenses, that are a bit disappointing. Pincushioning? This image uses the anamorphic stretch:
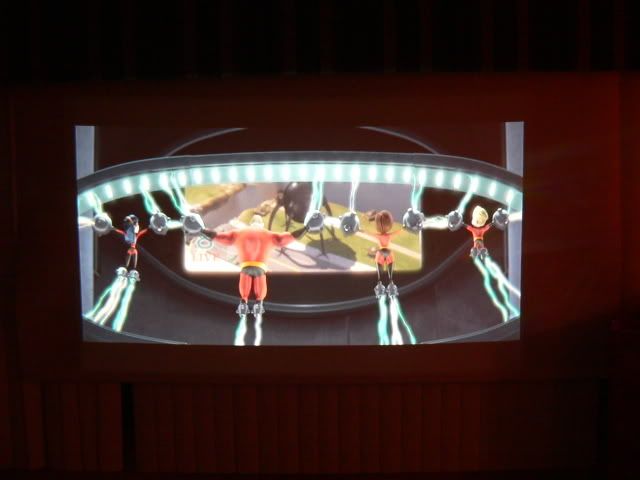
But I was able to test the proof of concept with the 235 aspect ratio. This image uses the anamorphic stretch and the projector's scaler to eliminate the black bars on the 2.35:1 ratio Incredibles.
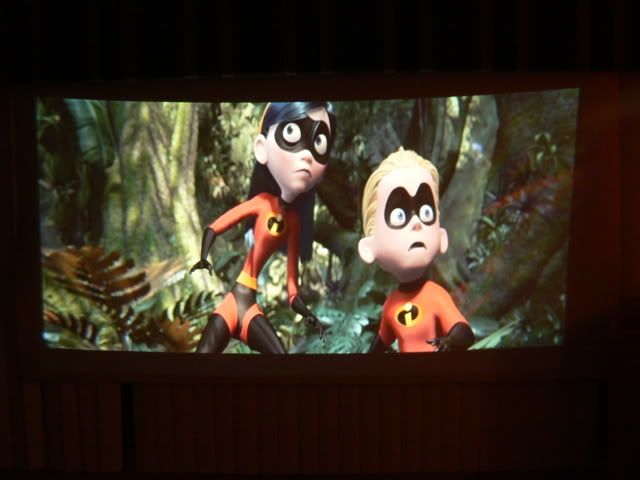
While the geometric distortions were more serious, I also noticed a reflection problem on the image, as can be seen on this picture:
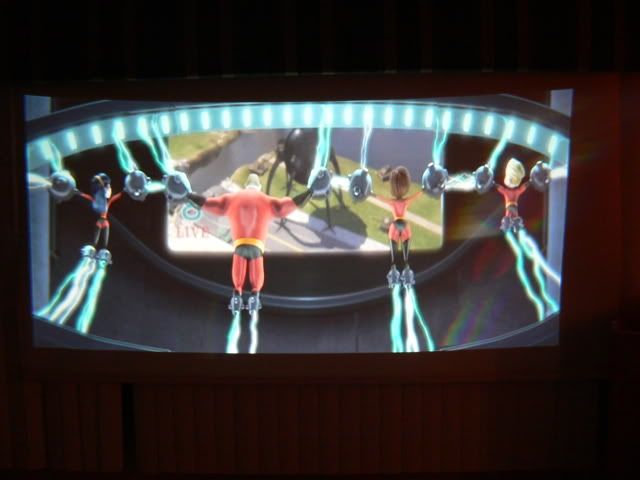
Here is the same picture, but with only the anamorphic squeeze, and the lenses dialed in for 16:9 (therefore, black bars, and the lack of the entire panel used...)
I also found that I could probably get away with using just two of the smaller 4x6 wedges. The image shining through the second wedge doesn't go larger than about 3x5. However, I may lose the ability to dial in 2.35:1.
Not sure where to go from here. My plan was to use this for our outdoor movie nights, where the projector sits about 30 feet from the screen. I don't suppose that will necessary help the image--it just makes the distortions larger, doesn't it? The throw on the projector is a big cause of the distortions with the lens, so it shouldn't matter how far from the screen the projector sits, right?
I guess in general I was pretty pleased. Any suggestions on how to fix the distortions? Would doubling up the lenses help?
EDIT: Wondering if having two prisms the exact same dimensions would help this out. (I think this is why I am getting such a rise in the image on the right side--that side of the image is getting stretched by the larger prism.) I think I will go ahead and get another identical wedge. As it is, I got the small one which is paired with a medium one.
I could use a 2x lens online (seems a lot easier than doing what I am trying to do with the prisms...)
Speaking of prisms--I finally got them! They are really nice.
I set up my projector on the table in front of my screen, and set the prisms on the table in front (actually, set up a little, since my projector has such a steep vertical rise on the image emanating from the projector lens.
I found that I got some serious geometry issues with the lenses, that are a bit disappointing. Pincushioning? This image uses the anamorphic stretch:
But I was able to test the proof of concept with the 235 aspect ratio. This image uses the anamorphic stretch and the projector's scaler to eliminate the black bars on the 2.35:1 ratio Incredibles.
While the geometric distortions were more serious, I also noticed a reflection problem on the image, as can be seen on this picture:
Here is the same picture, but with only the anamorphic squeeze, and the lenses dialed in for 16:9 (therefore, black bars, and the lack of the entire panel used...)
I also found that I could probably get away with using just two of the smaller 4x6 wedges. The image shining through the second wedge doesn't go larger than about 3x5. However, I may lose the ability to dial in 2.35:1.
Not sure where to go from here. My plan was to use this for our outdoor movie nights, where the projector sits about 30 feet from the screen. I don't suppose that will necessary help the image--it just makes the distortions larger, doesn't it? The throw on the projector is a big cause of the distortions with the lens, so it shouldn't matter how far from the screen the projector sits, right?
I guess in general I was pretty pleased. Any suggestions on how to fix the distortions? Would doubling up the lenses help?
EDIT: Wondering if having two prisms the exact same dimensions would help this out. (I think this is why I am getting such a rise in the image on the right side--that side of the image is getting stretched by the larger prism.) I think I will go ahead and get another identical wedge. As it is, I got the small one which is paired with a medium one.
Steve Scherrer said:Thanks, Mark, for that explanation. I was able to follow that with no problem.
I could use a 2x lens online (seems a lot easier than doing what I am trying to do with the prisms...)
No problems 🙂
Speaking of prisms--I finally got them! They are really nice.
Yes they do look very good. Do they have the same taper that mine do?
I set up my projector on the table in front of my screen, and set the prisms on the table in front (actually, set up a little, since my projector has such a steep vertical rise on the image emanating from the projector lens.
I found that I got some serious geometry issues with the lenses, that are a bit disappointing. Pincushioning?It is looking more like the image is simply not centered, but then your shot with out the prism is straight. I did find (water prism days) that sometimes tilt was needed and if you look at posts of both Prismasonic's H600 and H1200, and Panamorph's UH50, and even my first posts of my own lens, you see that they too needed a little tilt.
This is actually one of the reasons I went over size. My water prisms were tall at 125mm, but these new crystal prisms are 140mm high (laying on their side of course) so I can raise and lower the projector to suit...
But I was able to test the proof of concept with the 235 aspect ratio. This image uses the anamorphic stretch and the projector's scaler to eliminate the black bars on the 2.35:1 ratio Incredibles.
While the geometric distortions were more serious, I also noticed a reflection problem on the image, as can be seen on this picture
And the image (apart from that small rainbow and the shape) looks very good. It is extremely clear with deep solid blacks and it actually (color wise) looks better than with out the prisms, or is that just me...
I also found that I could probably get away with using just two of the smaller 4x6 wedges. The image shining through the second wedge doesn't go larger than about 3x5. However, I may lose the ability to dial in 2.35:1.
Again, size is a concern, but I would prefer to be slightly over sized, then too small to do the job...
Not sure where to go from here. My plan was to use this for our outdoor movie nights, where the projector sits about 30 feet from the screen. I don't suppose that will necessary help the image--it just makes the distortions larger, doesn't it? The throw on the projector is a big cause of the distortions with the lens, so it shouldn't matter how far from the screen the projector sits, right?
Technically, the stretch applied by the prisms remains the same. The further the projector, the larger the image. Just be careful not to lose too much brightness going too big - the same applies with a lens...
I guess in general I was pretty pleased. Any suggestions on how to fix the distortions? Would doubling up the lenses help?
I think you need to build the case first, then that way you can move the lens as one piece rather than trying to keep the two prisms aligned. Even if you just used a piece of MDF and a good hand full of clay to hold them in place. I think tilt is the key here...
EDIT: Wondering if having two prisms the exact same dimensions would help this out. (I think this is why I am getting such a rise in the image on the right side--that side of the image is getting stretched by the larger prism.) I think I will go ahead and get another identical wedge. As it is, I got the small one which is paired with a medium one.
That’s why I have asked about the taper. Both of my prisms are the same size, and as a result, any non uniform stretching has been cancelled out by using the same size prism. If there is taper, you may have to “wedge” it up a little to keep the prism horizontal.
I also have a curved screen for correcting pincushion…
Mark
Mark: No, there is no tapered edge. The faces of the wedges are exact rectangles.
The more I think about it, the more I am convinced that the different sized prisms are causing the majority of my distortions. In the pictures you can see a definite upward pull in the top right corner of the screen--it appears that this is cause by the bigger (and thicker) prism bending the light more aggressively and giving the image uneven stretch. There is also a keystone issue with the prism set up this way. I bet if I got both prisms the same size, and corrected the keystoning, the image (at least going from 4:3 to 16:9 would be pretty good. It would minimize the distortion of the 2.35:1 image, but I think it would still be pretty good--nothing some good masking can't straighten out!
But hey, I guess you get what you pay for. Not sure how Prismasonic or Panamorph correct their lenses. I have a Panamorph, and the image after the lens is in place is pretty rectangular. There might be an ever so slight pincushioning effect, but I would have to actually measure it to prove it was there.
I didn't have the lenses in a case, but merely had them set up in front of the projector (so there could be no pitch of the lenses (if that makes sense), just rotation of them--(as Mark wrote above, perhaps tilting the prisms as a unit would help the geometry problems as well). Anyway, one thing I wanted to note was the multiple images of the lens all around the room. The thing reflected off of every surface of the lens creating a bit of a kaleidoscope in every direction with the image.
My wife noticed the image get a bit darker when the lenses were placed in front of them. I would imagine the brightness (or lack thereof) offsets and probably is still superior to the loss of brightness when having black bars on the image. Wish I could measure this in some way.
Going to order another pair of prisms--one small and one medium again, and then I'll see if I can do the prisms with the smaller ones, or whether I have to do them with the larger ones. Whichever I end up not using, maybe I'll sell to someone who wants to do this...
One other thing that struck me--these prisms are much heavier than I thought they would be. They are just very solid and heavy chunks of glass. With respect to the wedges themselves, I didn't really notice anything inside that would cause distortions. The lenses were pretty crystal clear--there may have been a tiny bubble up in the corner of the image, but I couldn't tell if that was in the wedge, or on the surface on the other side. One thing I didn't do was clean the surfaces, which I probably should have done, and when I placed them in the light path, I could see the dust and slight smudges on the surfaces.
Steve Scherrer said:Mark: No, there is no tapered edge. The faces of the wedges are exact rectangles.
So just different heights and widths for different size prisms...
The more I think about it, the more I am convinced that the different sized prisms are causing the majority of my distortions. In the pictures you can see a definite upward pull in the top right corner of the screen--it appears that this is cause by the bigger (and thicker) prism bending the light more aggressively and giving the image uneven stretch. There is also a keystone issue with the prism set up this way. I bet if I got both prisms the same size, and corrected the keystoning, the image (at least going from 4:3 to 16:9 would be pretty good. It would minimize the distortion of the 2.35:1 image, but I think it would still be pretty good--nothing some good masking can't straighten out!
That is an interesting theory, but all pro lenes have a smaller rear optic and they don't have the problems your speaking of. I have made (resin days) lenses from 2 different sizes and never had these problems either. In fact, I found it easier to align the prism when they are fifferent widths...
The key reason for the increase of size in the front prisms is simply becuase the light beam expands, and the only way to prevent vignetting is to increase the front optic.
My design is a little different (uses the same size for both) but is done so for two reasons -
1. the supplier can not provide two different size prisms and
2. my design can be turned around to form other types of lenses like HC and VC. If you go back through the first few pages of this thread, you see all the lenes discussed have a smaller rear optic...
But hey, I guess you get what you pay for. Not sure how Prismasonic or Panamorph correct their lenses. I have a Panamorph, and the image after the lens is in place is pretty rectangular. There might be an ever so slight pincushioning effect, but I would have to actually measure it to prove it was there.
But the rear optic is way smaller than the front, yes?
I didn't have the lenses in a case, but merely had them set up in front of the projector (so there could be no pitch of the lenses (if that makes sense), just rotation of them--(as Mark wrote above, perhaps tilting the prisms as a unit would help the geometry problems as well). Anyway, one thing I wanted to note was the multiple images of the lens all around the room. The thing reflected off of every surface of the lens creating a bit of a kaleidoscope in every direction with the image.
And this is correctable only by controlling the stray light, especially off the fat end on each prism...
My wife noticed the image get a bit darker when the lenses were placed in front of them. I would imagine the brightness (or lack thereof) offsets and probably is still superior to the loss of brightness when having black bars on the image. Wish I could measure this in some way.
At the end of the day, all lenes are going to be the cause of some light loss. You are placeing an object in the light path after all. When I said there was no brightness drop, maybe a little too optimistic, but the difference is the clarity which remained so much better than the previous water prisms. The benifets are simple - full panel use must be brighter than 75% panel use. If the lens does cause a light output drop, at worst (documentented) it will be in the order of 9%, with most commercial equivalants being in the order of between 2% and 5%.
So even the worst case is still better than letter boxing...
Going to order another pair of prisms--one small and one medium again, and then I'll see if I can do the prisms with the smaller ones, or whether I have to do them with the larger ones. Whichever I end up not using, maybe I'll sell to someone who wants to do this...
I hostestly think Steve that once you make a case, you will have more control. I mentioned tilt in the earlier post. You see diagrams with tilt on different lens instructions and the photos of the lenses in place. With mine, the optics are huge (I was thinking ISCO III sizes when I designed mine), so raising or lowering the projector is no problem. In fact I have to drop the rear of my projector some 2" to get the image vertically aligned...
One other thing that struck me--these prisms are much heavier than I thought they would be. They are just very solid and heavy chunks of glass. With respect to the wedges themselves, I didn't really notice anything inside that would cause distortions. The lenses were pretty crystal clear--there may have been a tiny bubble up in the corner of the image, but I couldn't tell if that was in the wedge, or on the surface on the other side. One thing I didn't do was clean the surfaces, which I probably should have done, and when I placed them in the light path, I could see the dust and slight smudges on the surfaces.
I had to clean mine when they arrived too. Each was individually packed in a gift box lines with blue material. The boxes them selves even have a small magnetic latch to secure the lids. They will make great DVD case up grades 🙂 for SEs like LOTR...
The first thing I did was (holding by the edges) to test their ability to bend light by simply rotating the prism in my hands. I had a quick look around the room through them, and was more then happy with the result.
Next was to eliminate the stray light. I uses 2" tape on the thick ends of each prism before loading them into the case...
The mount that I made was already sturdy (it was previously holding two massive water prisms which way over about 1.25KG each) so was simply a case of sliding the new lens into position...
Mark
My thinking on the smaller rear optic is not that it is actually smaller--as long as the angles are the same with the same kind of material used for the prism, then it should bend the light in the same way, right? The thought is that there is actually a different angle for the larger prism as compared to the smaller prism. If the angles of the prisms were different, this could cause some uneven stretch, couldn't it?
I will pull out the prisms and measure the angles tonight when I get home.
I will pull out the prisms and measure the angles tonight when I get home.
Steve Scherrer said:My thinking on the smaller rear optic is not that it is actually smaller--as long as the angles are the same with the same kind of material used for the prism, then it should bend the light in the same way, right? The thought is that there is actually a different angle for the larger prism as compared to the smaller prism. If the angles of the prisms were different, this could cause some uneven stretch, couldn't it?
I will pull out the prisms and measure the angles tonight when I get home.
Possibly, but I would not think so. The angles of interraction between the prisms might change...
Mark
Measured the angles. Each prism is exactly 5 degrees. Although I didn't have the prisms set in the projector beam, I did experiment with them a little--just looking through them to see how images changed. In particular, I have a rectangular mirror, and by rotating one of the prisms in my hand, I was able to replicate what I was seeing with my projector. The solution is, simply, exactly what you said, Mark. When looking through the prism, with my line of sight normal to the face of the prism, I was able to get perfect geometry with my reference (a rectangular mirror on the wall). Once I changed the angle of my line of sight relative to the face of the prism, I got distortion--exactly what I was seeing in the pictures that I posed.
This makes sense with the projector I am using. It has a steep incline when it exits the lens, so when I set my prisms up on the table in front of the projector, the light entering the prisms came in on a steep angle. If, as Mark said, I were to tilt the prisms so that the projector beam entered the prisms normal to the face (tilting the tops of the prisms back toward the projector) I will probably minimize or even eliminate the distortions.
It's not the different sized prisms, as I postulated, that causes the distortion. It's the tilt of the prisms relative to the beam. I did go ahead and order another of the small prisms, and I would like to make my housing small--with two different sized prisms, it makes it tough. Hopefully, the second small prism is big enough for the image.
Very cool finding Steve 🙂
I was playing with one of my water prisms rotating and tilting as well. It is an interesting effect...
Whilst you are waiting for the other small prism to arrive, try a prism reversla so the your large prism becomes the rear optic, and if this works with out vignetting, then you will have no problems making a smaller lens. Good lucj with that and keep us all posted...
So good to see some real interest back in this (now 66 pages) thread...
Mark
Mark Techer said:Very cool finding Steve 🙂
I was playing with one of my water prisms rotating and tilting as well. It is an interesting effect...
Whilst you are waiting for the other small prism to arrive, try a prism reversla so the your large prism becomes the rear optic, and if this works with out vignetting, then you will have no problems making a smaller lens. Good lucj with that and keep us all posted...
So good to see some real interest back in this (now 66 pages) thread...
Mark
Of course--Mark, thanks for the suggestion. After looking at these prisms again last night, I am just astounded at how cheap they were, and how clear and, well, perfect they are. There really aren't any noticeable imperfections in the elements at all.
Incidentally, when I called the distributor yesterday to order another small wedge, she said--"Are you the person who called yesterday?" [No--why?] "Because someone yesterday ordered a small and a larger one, and wanted them completely blank--it's just odd, that's all. Nobody ever orders them blank."
"Because someone yesterday ordered a small and a larger one, and wanted them completely blank--it's just odd, that's all. Nobody ever orders them blank."
Ha! That's funny. It was me who ordered the small and large 🙂
One thing I should clarify on the prisms, from what I said above--I guess it is a misnomer to say that the beam must enter "normal" to the face of the prism--because that implies that the wedge is not rotated in any direction, but of course, to get the anamorphic effect, the prisms must be rotated from right to left.
So if the prism has a vertical axis and a horizontal axis, the beam must enter the prisms at a 90 degree angle to the vertical axis, while changing the angle the beam enters the prism relative to the horizontal axis gives you the squeeze ability. I am going to test this theory tonight with my projector, and see if I can correct the distortions.
So if the prism has a vertical axis and a horizontal axis, the beam must enter the prisms at a 90 degree angle to the vertical axis, while changing the angle the beam enters the prism relative to the horizontal axis gives you the squeeze ability. I am going to test this theory tonight with my projector, and see if I can correct the distortions.
sdspga said:
Ha! That's funny. It was me who ordered the small and large 🙂
She did mention they were for a golf course, which made me think they really were for awards--but, if memory serves me right, you work for a golf course, right?
Some great discussion going on here 🙂
Yes Steve,
Assuming just two axis (V and H), the prisms must at 90 degrees to the light in the vertical and will be on an angle to to the light in the horizontal.
As you rotated the prims horizontally, the optical effects of stretch and or squeeze wil be seen...
I assembled my new casing yesterday, and fitted the prisms last night. pictures soon...
Mark
Some great discussion going on here
OK, Mark, good point. Back on topic.
Steve referenced his projector's upward lens shift in an earlier post. In your opinion, when one switches from ceiling mounted (upside down) to shelf mounted (right side up), does that change the optimal projector position. i.e. ceiling mounted should be centered horizontally and level with the top of the screen vertically.
Panny AE700 is my PJ. Very versatile with regard to positioning, but the geometric distortion Steve showed has me concerned.
Problem is if you go too low with the PJ, it becomes easier for people to get in the way of the beam. Too high, and you have to fight keystoning. Thoughts?
while changing the angle the beam enters the prism relative to the horizontal axis gives you the squeeze ability
or stretch ability in yours and my cases.
sds
- Home
- General Interest
- Everything Else
- The Moving Image
- Optics
- DIY anamorphic lens