This weekends update,
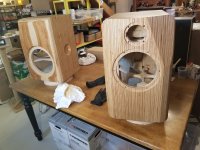
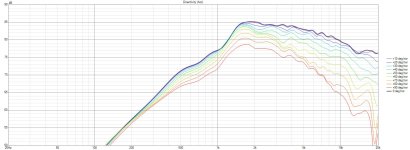
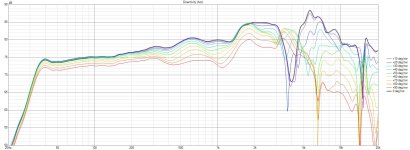
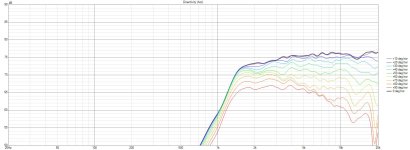
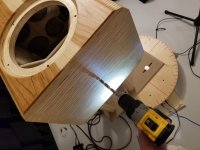
Put some Osmo Oil finish on the Seawaves, installed the binding posts and the drivers, made measurements in 10º increments 0º to 180º horizontally and -180º to +180º vertically, designed a crossover and did some validation measurements to ensure the design and reality matched.
Today's post will have lots of boring graphs, if anyone wants more detail about a specific slide, please ask.
Attachments
-
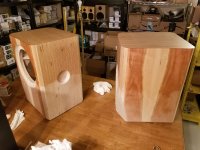 103 - starting finish.jpg223.1 KB · Views: 194
 -
 104 - finish done.jpg253.2 KB · Views: 171
 -
 104a - binding posts installed.jpg308 KB · Views: 220
 -
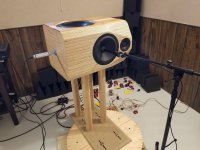
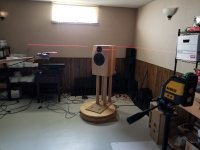 105 - starting measuring.jpg134.3 KB · Views: 229
 -
 107 - raw woofer.jpg140.7 KB · Views: 211
 -
 106 - raw tweeter.jpg121.3 KB · Views: 201
 -
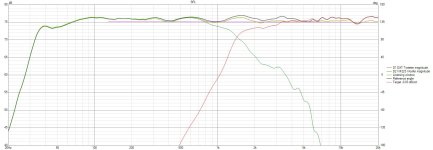
 108 - raw woofer and tweeter.jpg137.5 KB · Views: 181
 -
 109 - tweeter with filter.jpg112.5 KB · Views: 186
 -
 110 - woofer with filter.jpg117.8 KB · Views: 220
 -
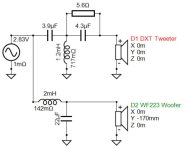 113 - crossover schematic.jpg30.9 KB · Views: 255
 -
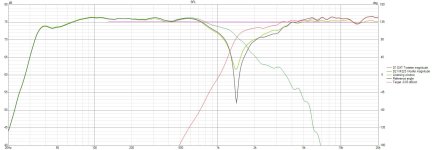
 112 - measured woofer and tweeter with filter 0º - 60º.jpg158.8 KB · Views: 249
 -
 111 - tweeter and woofer with filter.jpg125.4 KB · Views: 185
 -
 114 - xo spl chart.jpg103.9 KB · Views: 200
 -
 115 - xo spl chart with reverse null.jpg106.2 KB · Views: 200
 -
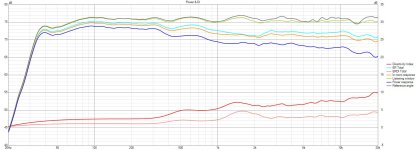 116 - Power and DI.jpg119.5 KB · Views: 163
 -
 117 - impedance.jpg99.4 KB · Views: 150
 -
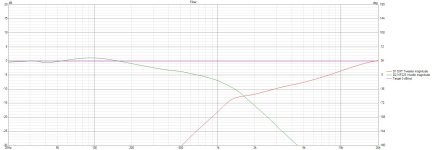 118 - filter slopes.jpg107 KB · Views: 150
 -
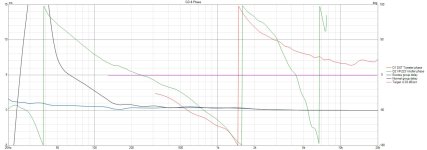 119 - phase.jpg87.3 KB · Views: 142
 -
 121 - distortion 97db @315 mm or 88db @1m pct.jpg155.4 KB · Views: 147
 -
 122 - distortion 97db @315 mm or 88db @1m spl.jpg227.5 KB · Views: 165

Member
Joined 2003
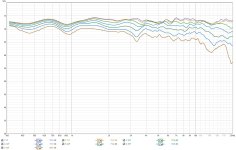
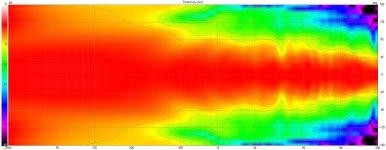
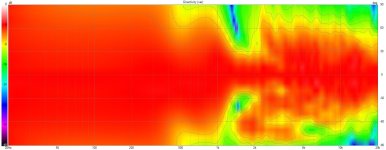
Very nice data set, but please uncheck normalization for polar map.And some polars...
I didn't know that tools exist to project the beam over such a wide area. Can you link the one you use?
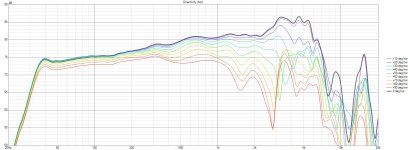
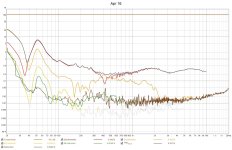
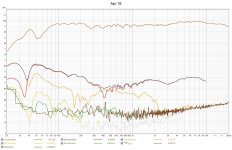
Small update for today, playing around with PR weight options.
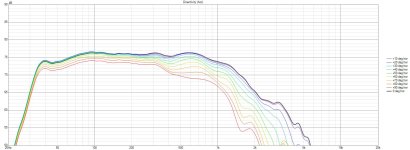
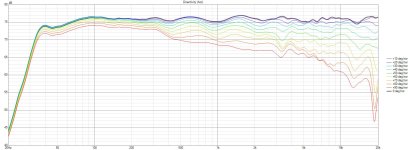
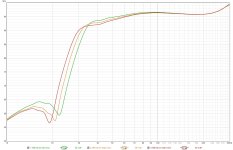
Low end measurements with 0, 20 and 40 grams added to the Dayton DSA270-PR 10" passive radiator.
As my previous graphs show, I was having a little problem merging the passive radiator with the woofer and ended up with a peak at the low end.
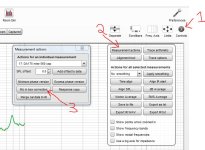
Scott Hinson reminded me about the REW option to use "In the Box" microphone measurements and that is how these measurements were done, no merge required to see where the roll off is.
In the end I oped for no added weight and went with the green response.
Low end measurements with 0, 20 and 40 grams added to the Dayton DSA270-PR 10" passive radiator.
As my previous graphs show, I was having a little problem merging the passive radiator with the woofer and ended up with a peak at the low end.
Scott Hinson reminded me about the REW option to use "In the Box" microphone measurements and that is how these measurements were done, no merge required to see where the roll off is.
In the end I oped for no added weight and went with the green response.
Attachments

Member
Joined 2003
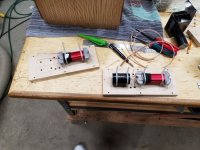
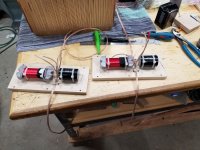
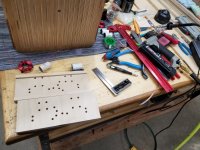
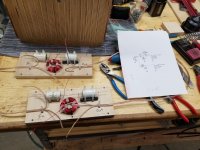
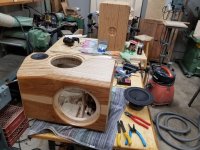
With the PR weights all decided on, it was time to build the XO's, install them, wire up the drivers, button everything up and hope they met my expectations!
I am very pleased with how they turned out and sound!
I am very pleased with how they turned out and sound!
Attachments
-
 130 - starting woofer XO.jpg278.9 KB · Views: 166
 -
 131 - woofer XO 2.jpg259.5 KB · Views: 110
 -
 133 - woofer xo 4.jpg235.9 KB · Views: 99
 -
 132 - woofer xo 3.jpg239.2 KB · Views: 102
 -
 134 - tweeter xo 1.jpg245 KB · Views: 96
 -
 135 - tweeter xo 2.jpg233.6 KB · Views: 104
 -
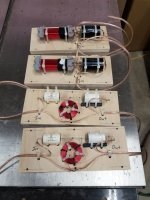 136 - all xos ready to install.jpg215.2 KB · Views: 104
 -
 137 - screwing in xo.jpg190.1 KB · Views: 108
 -
 138 - both xos installed.jpg201.9 KB · Views: 106
 -
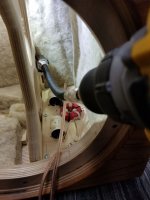
 139 - installing drivers.jpg283.6 KB · Views: 108
 -
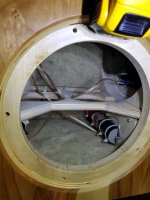 140 - securing wires.jpg203.2 KB · Views: 171
 -
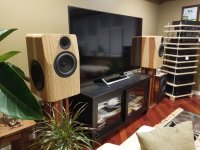 141 - finally listening to the finished pair.jpg214.2 KB · Views: 172
Member
Joined 2003
I suppose the inconsistency is likely PR spec vs reality, where a port is just a tube.What was the problem or challenge? Measurement or Merging tool in VituixCAD2 or passive radiator simulation?
I’ve found that the BR and sealed simulations are close to perfect in VituixCAD2 but the PR needs empirical testing; significant mismatch between the model and the result.
I liked the way your speaker sounded Dave. The low bass, mid bass and upper bass was excellent. The treble balance was just a bit brighter than I prefer, but I liked the sound a lot. The build quality was impressive, it looked great. Thanks for sharing your work. !
Interesting comment about the brightness.
@Wolf are you saying that you didn’t feel ot was bright at all; or just a tiny bit on the bright side, but that others were far brighter?
Any ideas where this is coming from? Listener preference, room or recordings?
CTA2034A looks very good.
I wonder whether it’s the the LW slope- speaks to be completely flat or even ever so slight rising
What’s the target PIR or PR slope?
A simple resister on the tweeter (or a DSP shelf filter) to allow for a 1dB drop in the LW will probably suit many listeners/rooms.
True. I was a bit disappointed that Dave's project did not make it into the final round... They really sounded good.I liked them as well, but they were not as bright as some other theme entries.
- Home
- Loudspeakers
- Multi-Way
- Dave's 8" woofer + 104mm tweeter speaker build