Yes. They are Roederstein MK3 resistors. Each gate resistor has a ferrite bead slotted on to one lead and the whole assembly is then protected by a cloth tube. Depending on whether they are for the N or P channel MOSFETS, teh value is 51R or 20R, respectively.Are the gate stopper resistors the ones that span the output devices? They look like Rodersteins encased in vinyl tubing or something?
There are two devices (?) encased in rubber or something in the center of the board. Markings on the PCB are D something. Are these the zeners?
These are the rail fuses. I'm not sure what the "D" refers to because it is not test point D. You should pop those plastic covers and check the condition of the fuses. If the fuses are both OK, this is evidence supporting the MOSFETs still being OK - not conclusive, just supporting evidence.
Now a question: if the APC is triggered (which is unusual considering that the factory default setting requires > 800W dissipation in the output stage) the user will notice this as a mute condition (front panel LED goes from green to red AND the music stops in both channels) which lasts for 90 seconds, typically. Did your brother notice this happening at ANY time during his stewardship of this amp?
I sent your question on the APC to my brother. Also, popped the covers off and the rail fuses are intact. 10A, 250V. I removed them and ohmed them out.
As far as whether he had ever noticed the APC triggering before or not, the answer is no. He was not home when the amp failed; his wife had turned it on and noticed the smoke and hearing a crackling noise.
As far as whether he had ever noticed the APC triggering before or not, the answer is no
Just so I am clear on this - you are saying that your brother has NEVER noticed the APC causing the amp to mute at ANY time since he first had the amp. Correct? Or Not?
Then unless you really really are determined to make the APC work, then I would suggest disabling it. At the very least, this is the first step as you get to see if the output stage is otherwise working.Correct, he has never noticed the APC muting the amp.
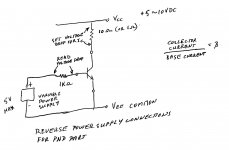
Do you have a DMM, audio signal generator, oscilloscope (100MHz min), dummy load and Variac?
I have a couple of good DMMs and an oscilloscope (Tek 465b). No signal generator or variac. I do have an MAudio firewire box that I use for RMAA, etc. and some computer test tones that I could use for testing (maybe?).
Hi Alan,
That protection circuit has always left the factory in it's least sensitive setting. Probably the same situation you saw with your product. Very basically, the protection circuit never operates and is therefore not useful. I'm reasonably sure that the amplifier can be repaired and put back into service without this PCB in place, just wire it up in a similar way to the SA-100.
Hi Chris,
Alan (VivaVee) is also an expert on Counterpoint products. We've been comparing notes on what each of us has seen. Alan became involved with Counterpoint earlier in time than I did, so he has first hand experience with the changing construction of each model. I'd trust him (and do).
Now for the down and dirty on this amplifier. If all your gate stopper resistors are fine, and the gate clamp zener diodes are still diodes (as opposed to cute bits of wire), then your outputs are most probably fine. It is critical that you test each and every gate stopper resistor, an open one will cause excessive current flow. You will not enjoy this.
If these are good, leave them mounted on the heat sink (best not to disturb them) and short the gate and source leads together once you have access to them. You want to prevent any static issues from killing the gate(s). Remove that darn analog computer PCB. The actual useful parts can be wired with flying leads. I would love to play with any RMS converter IC "pulls" from these.
Now, if you do require a set of output transistors, old pulls from Michael are your best best. However, you must test them first!! I had a customer buy a set and they were from a defective side (most blown). Good thing I tested first. He did get a replacement without any trouble. The thing is, the fact that there are blown sets in Michael's possession makes me really nervous. As far as I'm concerned, a set with one shorted output has no "good" parts at all. They are junk as a set. Dead sets have no business outside of a trash bin. So the question becomes, does Michael obtain replacement sets of outputs from blown sets? I sure hope this isn't the case, but I am very worried about this.
Testing and selecting a new set of outputs is a long and arduous job. Understand that there are no source resistors used at all. Also, these parts do not share current until the bias current reaches a couple amperes. So they hog current in the same way BJTs do. This means that your matching must produce extremely tight tolerance. I did this a few times myself, and it took me at least two full days each time. You need to start with 40 or so of each type. You will probably end up with one set for your 220, maybe two (great - a spare for the other side!), and maybe a few sets for SA-100 type amps. It's more difficult to get four in a tight match than it is to get two.
I discovered that:
What I would suggest you need to do this matching work:
You're going to set up what is basically an experiment. The first thing you're going to do is to group transistors according to gate voltage for about 100 mA flow (close to what your bias current will be). You can do this at a drain voltage of 10 VDC or so. A 20 VDC supply might be better, but keep an eye on the case temperature. You want to group all these when they are around the same case temperature. I find a touch of thermal compound on your temperature probe helps here.
Okay, all graded now? Good, time to match them. Mount four matching transistors on the heat sink and set for about 20 mA current flow. Run the drain voltage up to around 60 VDC to replicate conditions in the amp. Provide good air flow and try to keep the temperature down to 50 °C approx. You can use the drain voltage to regulate the temperature if need be, then measure the individual current flow through each transistor. Write this down on each transistor so you can't get them mixed up.
You should be able to end up with some very close matched parts, and some matched pairs as well. Understand that parts that don't match well are probably good in most other amp designs. Just look for source resistors to tell if you can use a looser matched set.
Let the fun begin!
-Chris
That protection circuit has always left the factory in it's least sensitive setting. Probably the same situation you saw with your product. Very basically, the protection circuit never operates and is therefore not useful. I'm reasonably sure that the amplifier can be repaired and put back into service without this PCB in place, just wire it up in a similar way to the SA-100.
Hi Chris,
Alan (VivaVee) is also an expert on Counterpoint products. We've been comparing notes on what each of us has seen. Alan became involved with Counterpoint earlier in time than I did, so he has first hand experience with the changing construction of each model. I'd trust him (and do).
Now for the down and dirty on this amplifier. If all your gate stopper resistors are fine, and the gate clamp zener diodes are still diodes (as opposed to cute bits of wire), then your outputs are most probably fine. It is critical that you test each and every gate stopper resistor, an open one will cause excessive current flow. You will not enjoy this.
If these are good, leave them mounted on the heat sink (best not to disturb them) and short the gate and source leads together once you have access to them. You want to prevent any static issues from killing the gate(s). Remove that darn analog computer PCB. The actual useful parts can be wired with flying leads. I would love to play with any RMS converter IC "pulls" from these.
Now, if you do require a set of output transistors, old pulls from Michael are your best best. However, you must test them first!! I had a customer buy a set and they were from a defective side (most blown). Good thing I tested first. He did get a replacement without any trouble. The thing is, the fact that there are blown sets in Michael's possession makes me really nervous. As far as I'm concerned, a set with one shorted output has no "good" parts at all. They are junk as a set. Dead sets have no business outside of a trash bin. So the question becomes, does Michael obtain replacement sets of outputs from blown sets? I sure hope this isn't the case, but I am very worried about this.
Testing and selecting a new set of outputs is a long and arduous job. Understand that there are no source resistors used at all. Also, these parts do not share current until the bias current reaches a couple amperes. So they hog current in the same way BJTs do. This means that your matching must produce extremely tight tolerance. I did this a few times myself, and it took me at least two full days each time. You need to start with 40 or so of each type. You will probably end up with one set for your 220, maybe two (great - a spare for the other side!), and maybe a few sets for SA-100 type amps. It's more difficult to get four in a tight match than it is to get two.
I discovered that:
- my matches were far tighter than the ones in existing amps or that Michael supplies.
- with the tighter matches, the amps were more stable.
- if the matches are not extremely tight, the amp will fry again sometime
- you will get a neck-ache from bending over matching these parts
What I would suggest you need to do this matching work:
- a good DVM that has a decent mV range and resistance function
- a power supply good for 6 VDC full scale,, or set it carefully with a meter
- a power supply good for 60 VDC, anything should work here within reason
- alternative, amp or receiver you can use a variac with
- a set of four matched 2 watt resistors, metal oxide suggested, at 1 ohm or up to 10 ohms depending on your meter mV scale
- four matched 1K00 resistors, 1/4 watt is fine, half watt is better
- electronic thermometer, I use a thermocouple bead, "J" type
- four "plastic" TO-3 (TO-204 now?) thermal pads
- heat sink drilled for four TO-3 devices, a good size so reduce temperatures
- two or more termnal strips to support the wire and resistors
- four TO-3 transistor sockets that can be attached to the heat sink
- heavy copper wire, #12
- lighter wire for base connections
You're going to set up what is basically an experiment. The first thing you're going to do is to group transistors according to gate voltage for about 100 mA flow (close to what your bias current will be). You can do this at a drain voltage of 10 VDC or so. A 20 VDC supply might be better, but keep an eye on the case temperature. You want to group all these when they are around the same case temperature. I find a touch of thermal compound on your temperature probe helps here.
Okay, all graded now? Good, time to match them. Mount four matching transistors on the heat sink and set for about 20 mA current flow. Run the drain voltage up to around 60 VDC to replicate conditions in the amp. Provide good air flow and try to keep the temperature down to 50 °C approx. You can use the drain voltage to regulate the temperature if need be, then measure the individual current flow through each transistor. Write this down on each transistor so you can't get them mixed up.
You should be able to end up with some very close matched parts, and some matched pairs as well. Understand that parts that don't match well are probably good in most other amp designs. Just look for source resistors to tell if you can use a looser matched set.
Let the fun begin!
-Chris
Attachments
Chris,
Are you saying that the entire PCB is for the APC circuitry, other than the Mosfet output device connections? It appears to me that a portion (mostly the center area) is for the APC, and the rest supporting the output devices?
At any rate, if the output devices are gone on this channel, I probably will not proceed with fixing this. Or at least I believe that those are the wishes of my brother. He has owned this for probably 11-12 years and feels he has gotten his money out of it.
That said, it appears at least at this time that the outputs are probably good (though I haven't verified that yet). What is the best way to verify these? With VR1 and VR2 burned up (and the underlying PCB charred), if the outputs are indeed good then I would probably want to replace the PCB. Until I pull it from the heatsink, I won't be able to tell how badly the traces were burned. Might be possible to hardwire them. Maybe I could get a board from Mike Elliot? Depends on what he would want for it. My brother wants to balance what repair would cost versus just getting a different power amp.
Another user offered the good output channel from an SA-20, including the output devices. Was the SA20 the same with regards to the output PCB, or was much of the APC unique to the SA220?
Also, it was pretty clear to me that Alan (VivaVee) knew what he was talking about. I am listening (to both of you) 🙂
Whoa, Chris. No need to scare the poor guy!
Based on the answers to my quite careful questions, I would recommend completely disabling the APC. You are not going to miss it. But, leave the rest of the output stage alone. The board has a very real benefit that has nothing to do with the actual protection circuit, so I ask you to ignore, completely Chris's advice to remove it and rebuild just the MOSFETs. I hope you haven't done that already 🙂
If you are comfortable with that idea, then give me a little time to work out the easiest way to do this based on the gear you have to work with. Understand that I work with a very well equipped lab - I need to figure a way to fix this thing one-handed!
Chris,
Are you saying that the entire PCB is for the APC circuitry, other than the Mosfet output device connections? It appears to me that a portion (mostly the center area) is for the APC, and the rest supporting the output devices?
Just to be clear. The output board includes both the APC (automatic protection circuit) AND the output stage circuitry. You don't need the former but you do need the latter. Unless you are in need of large doorstop...
Nah, matching devices doesn't scare me, other than the largest devices I have matched previously were TO-220s. It's just that if it came down to that, given the unavailability of suitable output devices and cost, it just isn't worth it to my brother to fix at that point. He can get quite a ways towards a replacement amplifier for the $400-$??? to fix this thing at that point (Odyssey Stratos, Bel Canto digital, possibly a Bryston, etc.). Given the common vulnerabilities of this design, there would still be no guarantees that it wouldn't happen again. And he certainly is not interested in going down the altavista path.Whoa, Chris. No need to scare the poor guy!
<snip>
If it can be repaired without a large outlay of cash, then he would go ahead with that. I would think I need to determine the status of the output devices before anything?
I do know on the good channel that ohming the output devices out between the outer pins (drain and ???) shows a steady 22.xxx K ohms, whereas the bad channel shows high readings (climbing, like a cap charging). I'll have to recheck it. I did find the datasheets for the output devices, so I'll figure out what pins I am looking at. I will check all of the gate stoppers as well.
Thanks for your help also, both you and Chris.
OK.
To kill (and I mean stone dead never to get up again) the APC.
1. Remove R40 & R42. These are 10R resistors just below the right hand fuse.
2. Remove D20, D21, D22 and D23. These are 1N4148 signal diodes found to the left and right of the two transistors mounted on heat sinks
3. Remove U1(NE5532) and U2(TL084) - these should be in sockets just below the presets VR1 and VR2 which have smoked.
4. Remove D4 and D7 (1N4007). These are on the top right hand corner.
5. Remove Q4 (MPSU10). This is above and to the right of the right hand fuse.
Steps 1 & 2, disable the power supply.
Step 3 removes any non-linear load from non-powered ICs on the output stage
Step 4 disconnects the MOSFET clamps
Step 5 breaks the connection to the mute circuit.
To remove these parts, I would just clip them out neatly with oblique nippers and hurl them in the bin. This should be quite cathartic.
What has not been touched? The MOSFET output stage remains and the temperature switches on the bottom edge of the heat sink are still wired into the mute circuit.
Now a little preventive maintenance. Replace D42, D43, D44, and D45 with NEW good 1N4740 (I normally use different parts because these US codes can be hard to source locally, but you should have no problem). You will find these on the outer edges of the board. To keep the repair easy, I normally carefully clip the leads of the old diodes near the body and solder the new diodes onto the bent up legs of the old ones.
If you get the idea that I don't like removing the APC board you are spot on. Keep the work simple - this is not a piece of restoration furniture.
Use your DMM to check the gate resistors. If you any doubts at all, then replace with your favorite brand of 0.5W resistor. For me that means whatever is sitting in my stock bin, but then I have no class. Steady Chris 😛
That should keep you occupied for a bit. Happy trails.
Thanks Alan. I'll have to source some 1N4740s... I assume the "A" variant is fine? Probably grab some Fairchild 1N4740A's from Mouser. It somewhat goes against my grain to clip components and solder to their leads. I need to clean behind this board anyhow and evaluate the state of the traces around VR1/2. Are these the bias and offset pots?
I will also probably disconnect the output board connections to the main board in order to make it easier to work on unless you advise against it. I have had the main board out in this amp before (timing capacitor replacement), so I know it is a PITA.
I'm not going to rush into anything; my brother is in no big hurry and I don't want to do anything rash, so will not proceed until I get the parts, etc. Anything else I should get while I'm at it? This will be $1.20 plus shipping from Mouser. I assume the 1N4739 9.1V zeners I already have on hand won't do?
Are you assuming at this point that the output devices are good, or are we getting to that? Thanks.
Chris
Last edited:
yes, 1N4740A is fine - I'm pretty sure the A just means 5% tolerance. No need for great accuracy here - just fresh parts, just in case. The 9.1V Zeners would also be quite fine - in theory you will lose a bit of drive current , but if you check the data sheets you will see that at 9V Vgs you will have a enough drain current in each MOSFET channel to vaporize any speaker I've seen. The Zener's are really there just to protect the MOSFET gate oxide layer in the event of real nasty over drive. Like when the cathode follower valves fail and the full B+ voltage reaches the gates or you get an ESD event...it only happens as a transient spike but those MOSFETs will fail in a ns.I'll have to source some 1N4740s... I assume the "A" variant is fine?
The reason I suggest just clipping the leads is to avoid any need to remove that board from the heat sink. And it really doesn't have any impact on anything except your ego. Loosen up, get sloppy and save yourself some effort. These parts are only in circuit when the fireworks are imminent.It somewhat goes against my grain to clip components and solder to their leads. I need to clean behind this board anyhow and evaluate the state of the traces around VR1/2. Are these the bias and offset pots?
VR1 and VR2 are used to calibrate the APC. So ignore them. The bias and offset are on the main board and probably need no adjustment at all.
Are you assuming at this point that the output devices are good, or are we getting to that? Thanks.
Chris
That is the working assumption - to be tested in due course 😉
A couple more questions:
1) Should I remove the two 15V regs? I would assume these are blown anyhow.
2) What are VR3 and VR4 used for?
3) Should I remove the crispied VR1 and VR2?
1) Should I remove the two 15V regs? I would assume these are blown anyhow.
2) What are VR3 and VR4 used for?
3) Should I remove the crispied VR1 and VR2?
Caps C9 and C10 (electrolytic) are below the right fuse. There are a pair of 0 ohm jumpers below the L fuse. Also, two sets of pads (resistor spacing) below those marked "L" and "R". I did not do anything yet for this item. You can see these in the photo (click and you can zoom in)VivaVee said:1. Remove R40 & R42. These are 10R resistors just below the right hand fuse.
An externally hosted image should be here but it was not working when we last tested it.
These are labeled D10, D11, D12 and D13. Two appear to be 1N4148s. The other two are slightly larger diameter (or burned). I did not do anything yet for this item. See photo above.VivaVee said:2. Remove D20, D21, D22 and D23. These are 1N4148 signal diodes found to the left and right of the two transistors mounted on heat sinks
Done. Also, all gate resistors ohm out correctly (20 ohms one set, 50 ohms the other). I have not replaced the zeners (D42-45) yet either. I have a large quantity of 1N4739s, so I will start with those. I assume I don't need to match these since they are just clamps?VivaVee said:3. Remove U1(NE5532) and U2(TL084) - these should be in sockets just below the presets VR1 and VR2 which have smoked.
4. Remove D4 and D7 (1N4007). These are on the top right hand corner.
5. Remove Q4 (MPSU10). This is above and to the right of the right hand fuse.
Last edited:
A couple more questions:
1) Should I remove the two 15V regs? I would assume these are blown anyhow.
2) What are VR3 and VR4 used for?
3) Should I remove the crispied VR1 and VR2?
1) You could if you like. If they are not dead now they soon will be but they are no longer connected to anything. Actually removing R34/R35 would be useful - that covers anything that might happen to the two 3-terminal regulators and they are easier to remove. They are 3k9 2W resistors found slightly above and between the two 15V regulators
2) They adjust the current sense amplifier and are no longer in circuit
3) No need - they are out of circuit if you follow the guide above. But I can understand if you want to cut them out in the interest of improving the visual appeal.
Caps C9 and C10 (electrolytic) are below the right fuse. There are a pair of 0 ohm jumpers below the L fuse. Also, two sets of pads (resistor spacing) below those marked "L" and "R". I did not do anything yet for this item. You can see these in the photo (click and you can zoom in)
OK, I see the problem. You have an early revA board. Didn't I mention something about 'continuous development' a while back?
Plan B: For a revA APC board: Instead of step 1) mentioned in my earlier post, do the following
a) remove R34/R35 (3k9 2W resistors found slightly above and between the two 15V regulators)
b) remove Q4/5 (MJE340/350 with heat sinks)
c) remove D10/D13 (1N4007 found next to Q4 and Q5, respectively)
I assume I don't need to match these since they are just clamps?
You assume correctly.
Hi Alan,
I suggested that Chris just dispense with the PCB because I thought I read that there were burned components and PCB material. If all of this is fine, then obviously the board should stay. Whenever I hear about burned parts that shouldn't be burned on a board that isn't 100% required, it's not a bad idea to get rid of the thing. In this case, the board isn't necessary, but as you say it's nice in that it controls the component locations. The SA-100s never had trouble due to the components being "air wired" unless a messy hack got in there. Personally, I'd like to see a replacement PCB that omitted the analog computer entirely and only contained the stuff required for music.
Hi Chris,
The only thing mismatched zeners will do to you is deliver asymmetric clipped current. Some designs actually have tried to use these zener clamps as a form of current limiting (bad idea). Anyway, just go ahead and stick two of the same diode number in and be happy.
As for removing the PCB, that is something I would do. Of course, this is a lot of extra work. I have come to distrust any older failed amplifier after years of witnessing the most unbelievable "repair" jobs. If you have a variac, you can make some tests and measurements as you power up that might show you if there are other issues that need attention. So unless you find more problems as you power up, you may want to work from the top side. <shiver>
-Chris
Edit:
Alan, I know you're trying to save Chris some work here, but it may very well back-fire. I don't disagree with you lightly.
I suggested that Chris just dispense with the PCB because I thought I read that there were burned components and PCB material. If all of this is fine, then obviously the board should stay. Whenever I hear about burned parts that shouldn't be burned on a board that isn't 100% required, it's not a bad idea to get rid of the thing. In this case, the board isn't necessary, but as you say it's nice in that it controls the component locations. The SA-100s never had trouble due to the components being "air wired" unless a messy hack got in there. Personally, I'd like to see a replacement PCB that omitted the analog computer entirely and only contained the stuff required for music.
Hi Chris,
The only thing mismatched zeners will do to you is deliver asymmetric clipped current. Some designs actually have tried to use these zener clamps as a form of current limiting (bad idea). Anyway, just go ahead and stick two of the same diode number in and be happy.
As for removing the PCB, that is something I would do. Of course, this is a lot of extra work. I have come to distrust any older failed amplifier after years of witnessing the most unbelievable "repair" jobs. If you have a variac, you can make some tests and measurements as you power up that might show you if there are other issues that need attention. So unless you find more problems as you power up, you may want to work from the top side. <shiver>
-Chris
Edit:
From post #1. Upon re-reading that, I recommend that you take the darn board off so you can check traces and solder pads. Do it properly in this case. Only one channel needs this attention if the other is fine (and this appears to be the case).U3 (AD42020-1) and U4 (AD736JN) both split in half. The portion of the board above these has smoke damage from this. VR1 and VR2 trimpots are both charred and the board below them is also damaged, though I haven't taken it apart to inspect how much damage there is.
Alan, I know you're trying to save Chris some work here, but it may very well back-fire. I don't disagree with you lightly.
Last edited:
- Home
- Amplifiers
- Solid State
- Counterpoint SA-220 problem...