Okay well thats kinda it...
I was unable to get hold of decent F-clamps to clamp my project together, but tried to do my own 'stable' environment.
Anyhow, without 2 hands to hold the drill, I tried to screw my front baffle onto one of the side pieces as a start to my cabinet.
Needless to say I had to screw slower than normal, and the MDF started to seperate or rip apart into the thin layers it appears to be comprised of. Furthermore my screw on the other side was more successful due to better technique on my behalf, but still could not successfully screw into the other board - Ive realised that somewhat stable is not enough.. it *needs* to be clamped tightly, and I need to have both hands free for the drill.
So both screws are out. Im thinking of putting wood glue (small amounts) into the place where the MDF has seperated, and clamp it with my C-clamps until dry. I also plan to put filler into the screw holes, and do a little sanding on the surface to flatten it out... is this is best way I can correct my mistake without cutting another front baffle (which would involve buying more MDF)?
I have learnt my lesson - MDF needs to be securely clamped, and the screw needs to go in reasonably quickly to prevent tear through the layers, and to make sure that it does pierce into the next piece.
Any suggestions welcome. This is the part where I hate being new to woodwork - why can't I just realise these things without having to make the mistake first?
Hi Genix, sorry to hearabout your problems...🙁
First rule of screwing into timber- drill and countersink pilot holes fo all your screws!
Second rule, use the correct screw- for end grain MDF, drywall or plasterboard screws are the best, because of their sharp point, narrow shank, and wide threads!
Ok, solving problems- yes, clamping and glueing the delaminated mdf will work, but you may need a bit more sanding when you finish, but as you are filling screw holes you will be doing that anyway. I find the best filler for mdf is car body filler, the two part epoxy stuff, it works much better than the plaster based fillers.
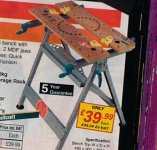
Do you have access to a B&D workmate or similar bench?. If you give me an idea of what you have available, I can suggest possible techniques to assist.🙂
Don't give up...
First rule of screwing into timber- drill and countersink pilot holes fo all your screws!
Second rule, use the correct screw- for end grain MDF, drywall or plasterboard screws are the best, because of their sharp point, narrow shank, and wide threads!
Ok, solving problems- yes, clamping and glueing the delaminated mdf will work, but you may need a bit more sanding when you finish, but as you are filling screw holes you will be doing that anyway. I find the best filler for mdf is car body filler, the two part epoxy stuff, it works much better than the plaster based fillers.
Do you have access to a B&D workmate or similar bench?. If you give me an idea of what you have available, I can suggest possible techniques to assist.🙂
Don't give up...
Thanks for coming to my aid again, PinkMouse!
OK well, heres the deal - the screws I bought are 1.5" brass woodscrews. It says 'countersunk' on the packaging.. I have no clue what that means.
I did drill short pilot holes - not all the way through into the other MDF sheet tho (I probably should have in hind-sight). I didnt really have a problem with guiding the screw straight as my pilot hole seemed to do that reasonably well.
Im not sure what a B&D workmate bench is, but Im quite confident that I do not have access to one. What I do have, though, are a couple of robust 'horses' (why i choose this word, I dont know, it seems to fit). Picture an upside down V shape. Now that shape is for each end - the place where the lines (legs) come together sees a plank of wood that connects them.
The constructs are a bit wobbly (I sat on one to help stabalize it while sanding).
---
Its a pity I didnt ask about filler earlier, as I have already bought some that seemed like it might work. Its called 'ezee Wood Patch' - just cheap stuff. Apparently it has no shrinking/cracking, is rapid drying, accepts enamel and acrylic paints.
Is the type of filler likely to make much of a difference if I am going to coat with a few coats of high-gloss black enamel paint?
Once again, thanks very much for your help! This whole forum has been about the best source of info for DIY I have found on the net.
Hi Genix,
Five a.m. here in Vermont, so good morning.
Countersunk usually means the head of the screw is tapered and flat on the end so that it will come flush with the surface. You should drill pilot holes all the way or the screw will just "spread" the MDF apart. Make the pilot hole in the first sheet the same diameter as the screw WITH the threads. In the second sheet, make the pilot hole the same diamater as the central shank of the screw MINUS the threads(just eyeball it). In this way you will ensure the screw is tightening the joint by pulling the second sheet to it, because it can simply spin round in the first sheet. When you have pilot holes like this, you can put the screws in ahead of time,then hold the sheet with one hand and screw with the other. Make sure to glue the joint also.
best luck, Jason
Genix,
I'm sure the filler you bought will be fine, though I am a bit worried by your use of brass screws, as they are very soft and may snap whilst driving.
Are you driving the screws in by hand, or using a battery drill/driver?
Do you have access to luggage type ratchet straps?
How big will your clamps open?
What glue are you using?
What is your inside leg measurement?( 😀 Just joking!)
I'm sure the filler you bought will be fine, though I am a bit worried by your use of brass screws, as they are very soft and may snap whilst driving.
Quite right, they are called saw horses!!😀What I do have, though, are a couple of robust 'horses' (why i choose this word, I dont know, it seems to fit)
Are you driving the screws in by hand, or using a battery drill/driver?
Do you have access to luggage type ratchet straps?
How big will your clamps open?
What glue are you using?
What is your inside leg measurement?( 😀 Just joking!)
First off, thanks ever so much for the info guys!
diypole: hey - that might actually work. How about tomorrow I place the boards together, mark off on the one the screws still have to go into where to make the pilot holes. Make small pilot holes the depth of the screw that will go in, and then I use the existing holes I drilled today to put the screws in (since they go pretty much all the way thru), and screw into the pilot holes.. make sense? If not, I apologise - Ive never done well at describing things (dont EVER ask me for directions 🙂
pinkmouse: I see what you mean about the screws. On the heads where the screw driver (actually electric drill with screw driver bit) kept popping out, Ive actually chipped some of the brass away. Showing that these are at least easily chippable screws (and thus probably more brittle than they should be). However, seeing as Ive spent more on this project than I planned, I am aiming to use what Ive bought unless it really wont do the job. I think the screws will hold as every side that adjoins onto another piece of wood will get 2 screws.
I dont have a workmate style bench, but just looking at the picture I reckon thats exactly what I would have needed to help this project! That, and a vice or two...
I probably dont have access (that I know of) to ratchet straps (not that I know what they are, but Im quite confident I wont have access to any). None of my friends possess any woodwork gear - they're all computer programmers (like me), and have probably never seen a woodworking tool in their lives.
The clamps I have are just a pair of 4" C-clamps. I really do need some large F-clamps.. but as said the store wont have any until this coming week.
The glue I have is just a generic wood adhesive. Apparently made for NZ native timbers, but Im guessing thats just a marketting gimick to get NZ'ers to buy it. I bought it because it came in a smallish container (thus Im not paying for lots that I wont use), and it was only NZ$4. Its apparently non-staining, fast setting, fast grabbing, paintable, resists heat, and non-toxic. Ofcourse most wood glues probably adhere to the above...
---
Unless advice to the contrary is brought to my attention on this thread, Ill commence an attemp at diypoles idea tomorrow. Maybe I can get away without waiting for the store to get F-clamps in (although the salesman did say that when they do get them in this week coming, there will be a 2 for 1 sale on F-clamps, and other tools will be discounted).
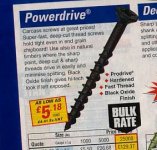
I like to use these screws and countersink/pilot bit:
--
Brian
An externally hosted image should be here but it was not working when we last tested it.
--
Brian
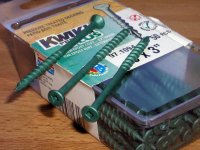
IMHO these are the best screws for woodworking. They are deck screws with square slot (Canadian invention, forgot the name😉 ) instead of Philips, which makes driving them much easier. Also, the thread should not be on the whole length, but only on the part which goes throught the second piece. The length is way too big for MDF, since I was using them for framing.😉
Attachments
The ratchet clamps that Pinkmouse speaks of are called web clamps over here.
They are a strong strap with a fitting on the end. The free end of the strap goes around whatever two pieces you wish to clamp together and then returns to the fitting. The strap therefore forms a loop. The picture does not show it, but that fitting has a small handle that you toggle back and forth to keep tightening the loop you have made with the strap. As a result, whatever two pieces are in that loop get more and more pressure applied. You can apply just loose pressure if you want, but if you keep tightening, enormous pressure can be brought to bear as well.
Buy at least one. You might want to buy several. They are available in discount home-and-hardware type stores for 7 or 8 bucks. More expensive models are available in Sears and other stores where tools are sold. Once considered fairly rare, over the years they have become very common, not surprisingly. You can use these for pulling something, lifting, attaching things to your car-anything you can put that 12 foot loop around and want to clamp together. You'll love them-they're great.
LOL, even if you never use the loudspeaker, you'll find a million uses for those web clamps!
Attachments

PS: If you are going to tightly clamp the pieces together, be sure to put some wood boards around the work. If the strap is made very tight, it will leave indentations in the particle board, MDF or whatever you are using. If you are just going to make it tight enough to hold the boards together so you can screw them together, then you won't have to worry about it.
something i always find to be essential and useful when i work with mdf is plain old cheap and easy construction adhesive in the gun tubes, i mean those cartridge guns you get silicone sealant in. here in australia we have stuff called "liquid nails" plus lots of other generic versions. when it is applied it's very sticky and holds well enough to allow you to brace or add more panels, while still allowing you to move and adjust pieces/panels into position. sometimes i actually just use this stuff and lots of battens and bracing and dont bother with screws at all.
I also never used screws on mdf when building speakers. For positioning and holding pieces together I use finishing nails sometimes.
Peter Daniel said:with square slot (Canadian invention, forgot the name😉 )
Robertson screws. I don't know why the rest of the world doesn't adopt them. Quality would go up, costs would go down.
dave
IMHO these are the best screws for woodworking. They are deck screws with square slot
There is also another version available with hex slot, and they are indeed very easy to drive with something like this:
Attachments
Peter Daniel said:When you driving 500 or more screws it's not easy anymore. You need a cordless drill gun.😉
Easy enuff to get a hex head drill bit. The hexs are nice for driver mounting and such, but for regular work i'll stick with Robertsons (red usually).
dave
Thanks all!
I tried the notion of drilling a hole wide enough for the screw thru the 1st sheet of MDF, and then aligning the two with one hand, I used a smaller bit to drill the pilot hole into the 2nd piece of MDF.
I then applied wood glue along the area they would join, matched my larger holes with the pilot holes by eye and screwed the screws. The result is quite a success!
No need for f-clamps and the like - this method is doable by hand alone, and the screws join the boards so that they're effectively clamped for the wood glue.
I will endeavour to do the rest of the cabinets a bit later on today (weather is really miserable.. wet and rainy).
Just a quick question tho (again sorry!) -- is it better to leave the back off for the eventual wiring of crossover & drivers, or is it better to leave a side off? So far as I can see, both have some merits later on, but the back does hide any visual issues if it is put on last..
- Status
- Not open for further replies.
- Home
- Loudspeakers
- Multi-Way
- Chipping MDF