In the early 2000s Dick Olsher completed the plans for a high-efficiency speaker called BassZilla. The concept was to combine a bass platform (boxed) with a wide range driver mounted on a dipole (open) baffle. In the years since its initial release, the BassZilla plans have been updated and different editions created based on the drivers used. You can learn more about the BassZilla visiting Dick Olsher’s web site at Black Dahlia | A Day Without Music Is Like a Black and White Sunset.
In a recent conversation with another member of the forum I was asked about the speakers used in my main system. After I mentioned having built a pair of BassZillas during the Fall in 2012, he asked me to share some photos. The pictures below were taken during the construction of my BassZillas Platinum Edition.
In a recent conversation with another member of the forum I was asked about the speakers used in my main system. After I mentioned having built a pair of BassZillas during the Fall in 2012, he asked me to share some photos. The pictures below were taken during the construction of my BassZillas Platinum Edition.
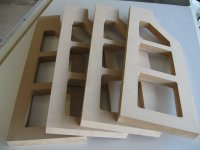
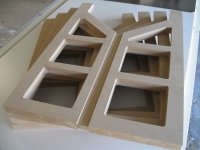
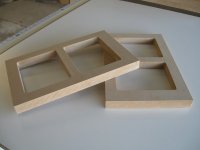
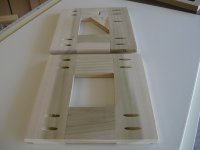
The braces
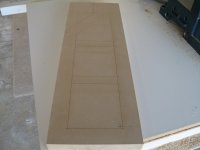
In 2007, Kevin Kerwin, an architect from St. Louis, decided to build the Platinum Edition. He created AutoCAD drawings for CNC cutting of the wood and graciously made them available to other BassZilla builders. I wanted to mount each crossover in its own box and keep the construction of the baffle simpler, so I did not use that portion of his drawings. I did however use his box plans as the basis for my version because I liked the way he braced it. Unable to find a local CNC shop I cut the wood for my BassZillas with the tools I have available: table saw, jigsaw and router.
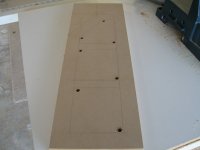
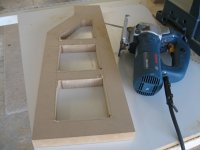
I created templates for the openings of the braces and used them to mark the MDF. I drilled holes on opposite corners big enough to accommodate the jigsaw blade and made rough cuts close to the lines. I then clamped the templates and trimmed the openings using the router and a flush trim bit.
In 2007, Kevin Kerwin, an architect from St. Louis, decided to build the Platinum Edition. He created AutoCAD drawings for CNC cutting of the wood and graciously made them available to other BassZilla builders. I wanted to mount each crossover in its own box and keep the construction of the baffle simpler, so I did not use that portion of his drawings. I did however use his box plans as the basis for my version because I liked the way he braced it. Unable to find a local CNC shop I cut the wood for my BassZillas with the tools I have available: table saw, jigsaw and router.
I created templates for the openings of the braces and used them to mark the MDF. I drilled holes on opposite corners big enough to accommodate the jigsaw blade and made rough cuts close to the lines. I then clamped the templates and trimmed the openings using the router and a flush trim bit.
Attachments
-
 02_BraceMarked.JPG75 KB · Views: 1,644
 -
 03_BraceDrilled.JPG73.8 KB · Views: 1,611
 -
 04_BraceRoughCut.JPG95.1 KB · Views: 1,621
 -
 05_BraceRouted.JPG63 KB · Views: 1,612
 -
 06_BigBraceRouted.JPG76.1 KB · Views: 272
 -
 07_Braces.JPG88.7 KB · Views: 247
 -
 08_BigBraces.JPG95.9 KB · Views: 251
 -
 09_CenterBraces.JPG71.8 KB · Views: 257
 -
 01_Templates.JPG70.5 KB · Views: 1,680
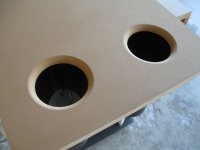
The back panel
Using the router and a circle jig I cut slightly undersized openings for the vents. I cut internal rabbets to fit the PVC pipes and finally trimmed the openings from the outside using a roundover bit.
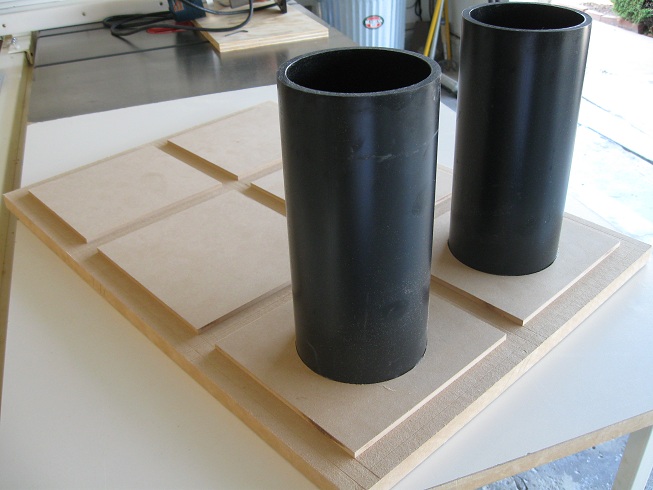

Using the router and a circle jig I cut slightly undersized openings for the vents. I cut internal rabbets to fit the PVC pipes and finally trimmed the openings from the outside using a roundover bit.
Attachments

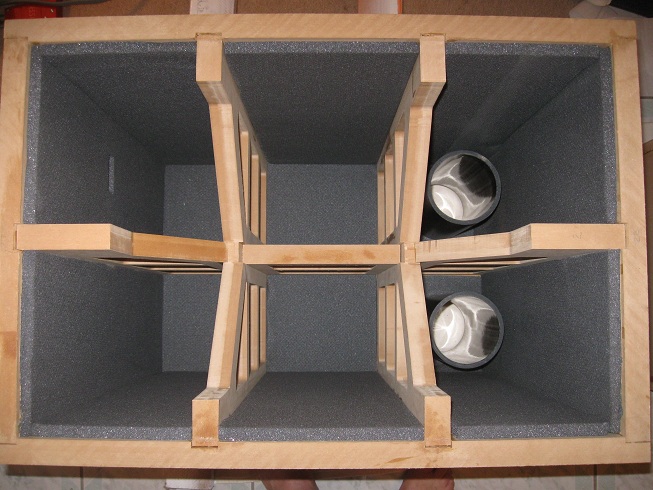
The box
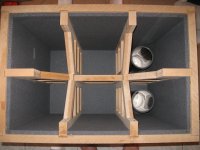
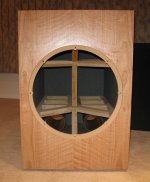
This is a view of the assembled box minus the front baffle. Because of the bracing I decided to install the padding foam before finishing the assembly.
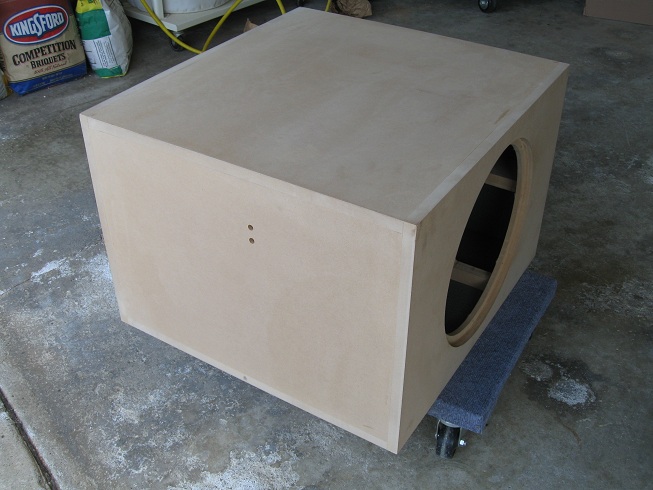
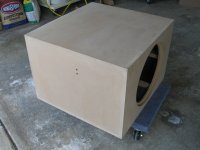
The box fully assembled and sanded, ready for veneering and painting. Notice the holes for the binding posts on the top of the box.
This is a view of the assembled box minus the front baffle. Because of the bracing I decided to install the padding foam before finishing the assembly.
The box fully assembled and sanded, ready for veneering and painting. Notice the holes for the binding posts on the top of the box.
Attachments
The finished box
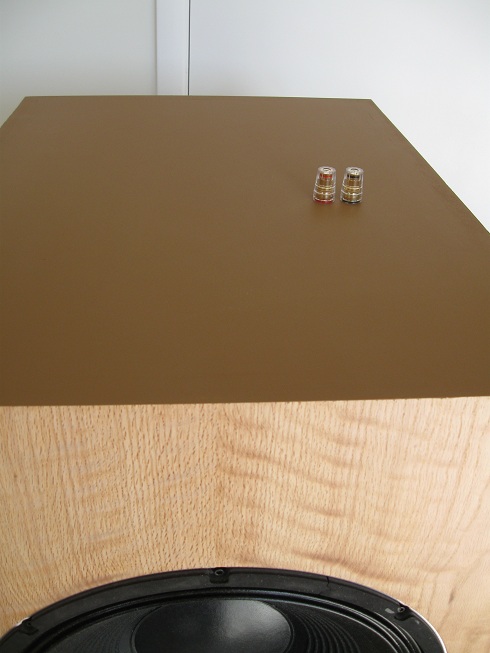
The box is now veneered and finished with water-based polyurethane.

The top and back were just painted as they will be out of sight.
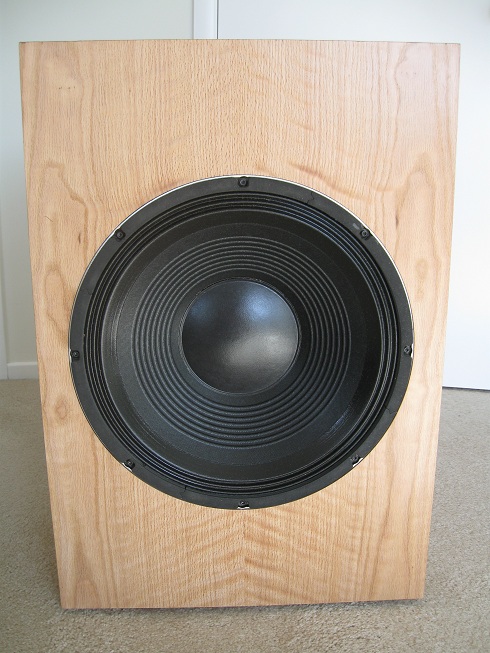
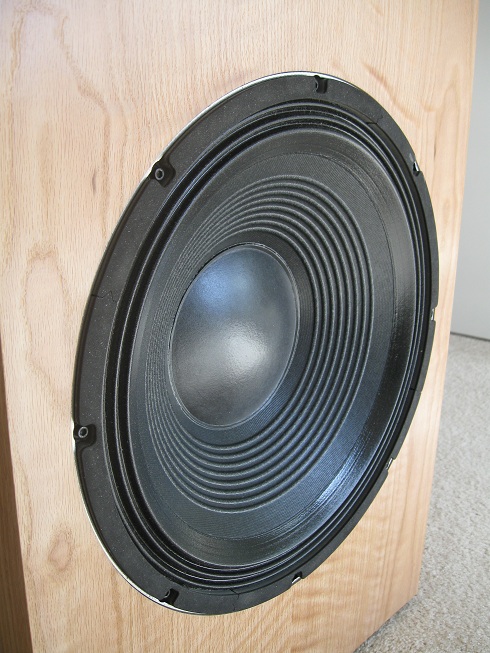
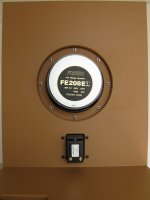
The woofer installed and flush with the baffle.
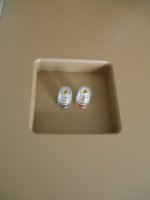
The top of the box with the binding posts installed.
The box is now veneered and finished with water-based polyurethane.
The top and back were just painted as they will be out of sight.
The woofer installed and flush with the baffle.
The top of the box with the binding posts installed.
Attachments


Last edited:
The open baffle
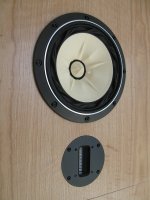
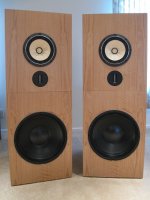
The open baffle finished with the drivers installed
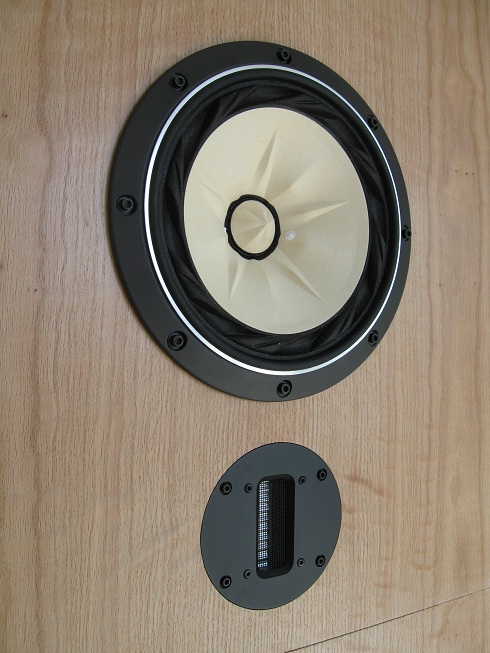
The detail of the tweeter flush with the baffle.

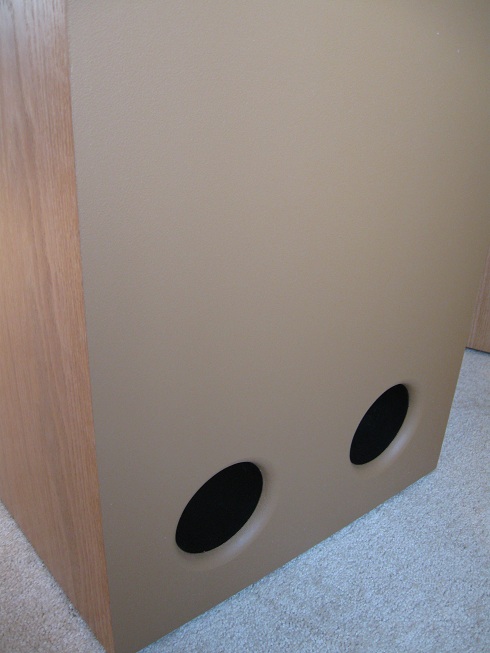
The back of the baffle showing a rabbet cut around the full-range to maximize air flow.
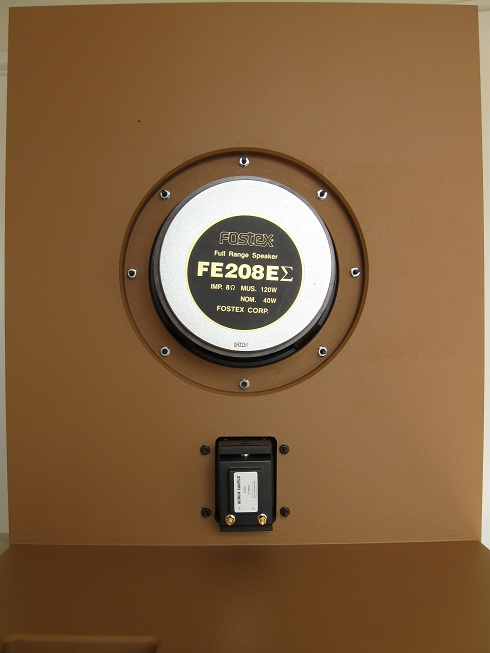
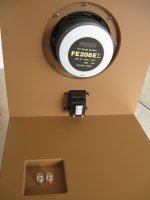
A view of the drivers and the cut in the base of the open baffle matching the location of the box's binding posts.
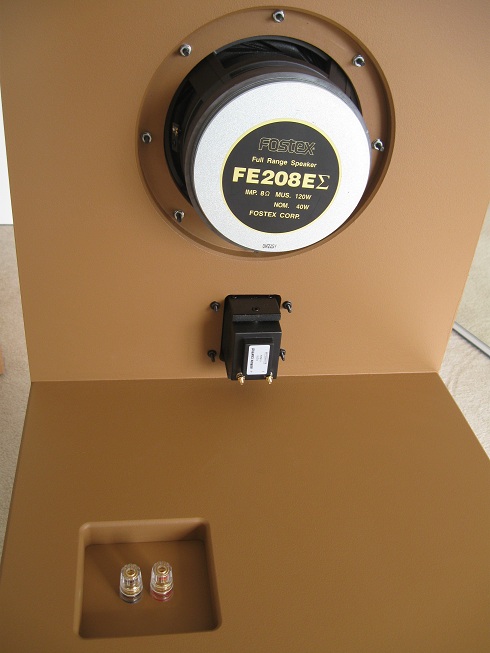
A closeup of the opening in the base.

And finally, the completed BassZillas

The open baffle finished with the drivers installed
The detail of the tweeter flush with the baffle.
The back of the baffle showing a rabbet cut around the full-range to maximize air flow.
A view of the drivers and the cut in the base of the open baffle matching the location of the box's binding posts.
A closeup of the opening in the base.
And finally, the completed BassZillas
Attachments


Thanks for sharing Grimberg. The photos that do show up are excellent, but in your second post, I get no pictures at all. Anyone else having this problem?
Greg
Greg
The sound of the BassZillas
I am thrilled about the sound of the BassZillas. There are two aspects that stand out and I believe will convey my impressions about how they sound. First is the bass generated by the 15” woofers. As a teenager living with my parents I had a large bedroom and DIY speakers with 15” woofers. They were of average quality but delivered a gut punching bass that stayed in my memory for all these years. After I moved out of my parents’ house, space constraints prevented me from owning large speakers. The BassZillas brought back that bass with 30+ years of speaker technology improvement. The second aspect is what the open baffle takes away: the boxy sound. I had heard people talking about it but did not know what that was, until I first listened to an open baffle. It makes the room sound much bigger than it did with regular speakers. As for the imaging, I’ll quote my girlfriend when she first listened to them: “Funny, it sounds like the singer is standing between the speakers”. I think that says it all.
I am thrilled about the sound of the BassZillas. There are two aspects that stand out and I believe will convey my impressions about how they sound. First is the bass generated by the 15” woofers. As a teenager living with my parents I had a large bedroom and DIY speakers with 15” woofers. They were of average quality but delivered a gut punching bass that stayed in my memory for all these years. After I moved out of my parents’ house, space constraints prevented me from owning large speakers. The BassZillas brought back that bass with 30+ years of speaker technology improvement. The second aspect is what the open baffle takes away: the boxy sound. I had heard people talking about it but did not know what that was, until I first listened to an open baffle. It makes the room sound much bigger than it did with regular speakers. As for the imaging, I’ll quote my girlfriend when she first listened to them: “Funny, it sounds like the singer is standing between the speakers”. I think that says it all.
The photos that do show up are excellent, but in your second post, I get no pictures at all.
Cal Weldon, one of the moderators, is looking into that issue and it should be corrected soon.
Wow - Great Work!
Hi Grimberg,
Fantastic work, and thanks for sharing your project with such explicit pictures. 😀 They would really make building this project much easier!
I'm curious about your choice of speakers - I have not seen the plans from Dick Olsher. Are you using his recommended speakers and crossover components?
Have you tried bi-amping the speakers?
Thanks, I am glad you enjoyed the pictures. The speakers used are the recommended ones for the Platinum Edition MKII, as published by Mr. Olsher in December 2008. The crossover design and component values also comply with the provided schematic diagram.
I built the crossover with separated inputs for the woofer and the mid+tweeter to allow for the use of two amplifiers. I have listened to them that way and it helps if you like that extra punch in the bass, especially with old recordings. Otherwise, being efficient speakers, my DIY versions of the F4, F5 and Aleph J are able to play them plenty loud.
I built the crossover with separated inputs for the woofer and the mid+tweeter to allow for the use of two amplifiers. I have listened to them that way and it helps if you like that extra punch in the bass, especially with old recordings. Otherwise, being efficient speakers, my DIY versions of the F4, F5 and Aleph J are able to play them plenty loud.
Thanks, I am glad you enjoyed the pictures. The speakers used are the recommended ones for the Platinum Edition MKII, as published by Mr. Olsher in December 2008. The crossover design and component values also comply with the provided schematic diagram.
I built the crossover with separated inputs for the woofer and the mid+tweeter to allow for the use of two amplifiers. I have listened to them that way and it helps if you like that extra punch in the bass, especially with old recordings. Otherwise, being efficient speakers, my DIY versions of the F4, F5 and Aleph J are able to play them plenty loud.
I was curious as to whether or not the separated low -mid/high circuit & PCB was a part of Mr.Olsher's design. It was good thinking to do that, I would also do that - as I presently bi-amp my B&W 803D speakers and find there's a world of difference. As I bi-amp with my tube amplifiers now, I'll want to do that with the pair of Aleph J amplifiers I am currently building.
Thanks!
The BassZilla plans include the schematic diagram for the crossover but no layout or instructions to separate the inputs. I decided to do it because I have been using bi-amplification for many years, and wanted the flexibility to do so with the BassZillas. Building a short cable to bridge the inputs is so easy, it would be silly on my part no to separate the inputs. The link below shows one other BassZilla builder who agrees:
Tip_71
Tip_71
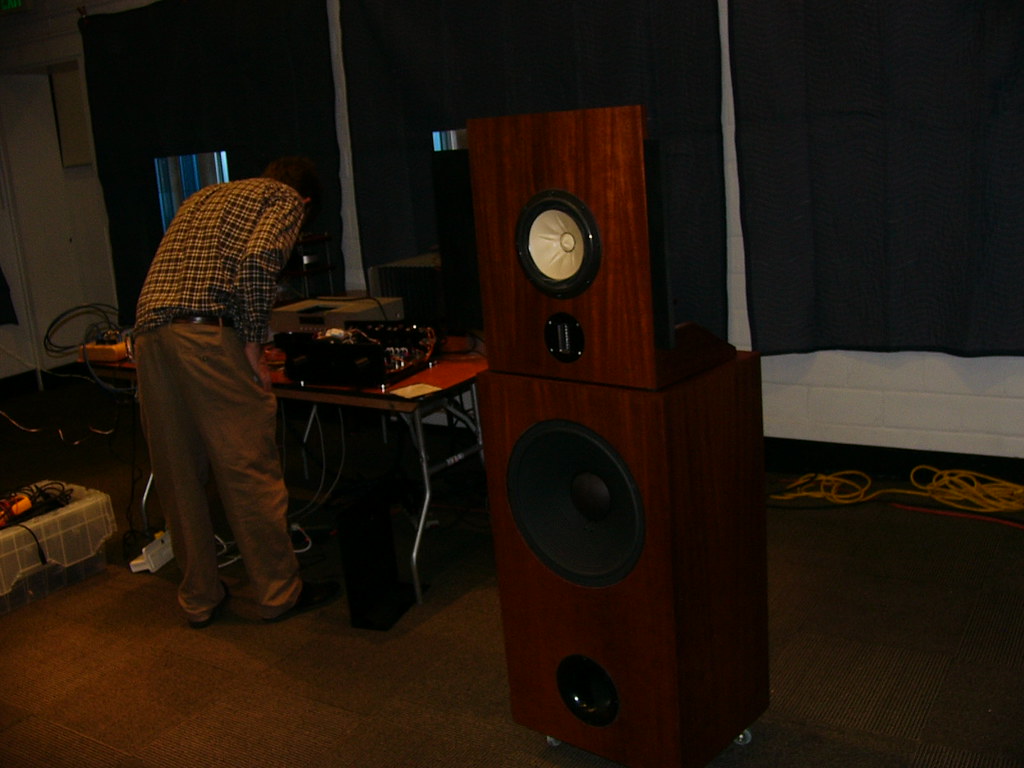
Variac had his Basszillas at the first Burning Amp (was it really back in 2007? Time flies!):
Bill
Bill

Hey-- I'm about to build a pair of these and was wondering if the CNC drawings are still available. I can't find them on the web. Would someone be willing to post / send them?
Kofi
Kofi
- Status
- Not open for further replies.
- Home
- Loudspeakers
- Multi-Way
- Building the BassZilla Platinum Edition - Fall 2012