Why lining over the butyl? Which effect do you expect from felt?
Just to have an extra layer of absorption near boundaries (cabinet walls)
Felt is not very thick compared to wavelengths at these frequencies. You'd get clearer results with fibreglass or rockwool.
Yes I didn't account for the part behind the mids. Your idea of measuring with and without stuffing is good.. in that part separately and in addition to the main volume. You might be able to measure with the mic close to the woofer cone and only paying attention to the area around and below the cross. By measuring this way they won't be as contaminated by the room, getting down to what you really want to know, but measuring this close doesn't do well at much higher frequencies so try to ignore what you might see there.
Yes I didn't account for the part behind the mids. Your idea of measuring with and without stuffing is good.. in that part separately and in addition to the main volume. You might be able to measure with the mic close to the woofer cone and only paying attention to the area around and below the cross. By measuring this way they won't be as contaminated by the room, getting down to what you really want to know, but measuring this close doesn't do well at much higher frequencies so try to ignore what you might see there.

I worked with both materials when building my listening room and to be honest, I want to stay away from them as much as I can. One of the worst allergies of my life, even using long sleeves, gloves and a respirator - almost ended up in the hospital.Felt is not very thick compared to wavelengths at these frequencies. You'd get clearer results with fibreglass or rockwool.
But I get your point and totally agree with it. It’s just a compromise that I know I’m making here. I'm quite sure that this box will go apart many times, so I do not want any of those materials inside it.
Maybe open cell foam would be a better idea, or stack more than one layer of the felt. I'll think about it, thanks.
Isn't dacron a polyester wool-like thick fabric that we usually find inside commercial speakers?Sure. Also dacron, but you need more of it to work. You could use natural wool.
If so, this is what I intend to use to stuff the boxes as I have a few kg of it laying around.
Why no HP for the low mid? I'd suggest 1st or 2nd order around 2-300Hz. Vertical separation will not be a problem.
Eg. KEF Blade II has 450Hz LR4 https://www.stereophile.com/content/kef-blade-two-meta-loudspeaker-measurements
Eg. KEF Blade II has 450Hz LR4 https://www.stereophile.com/content/kef-blade-two-meta-loudspeaker-measurements
Why no HP for the low mid?
Actually, the crossover configuration is far from being defined. It is just an initial thought, yet to be tuned after (several) measurements.
I haven't even decided if I'll use an active or passive crossover yet. Leaning towards an active config with minidsp flex eight or camillaDSP + 8 channel DAC feeding 4 stereo class-D amps, but i really like my curent setup as descibed in post #2. So, a lot to think about! 🤓
A little bit of progress this weekend.
The boxes got a good quality 15mm thick felt lining. I know I may have gotten carried away and over-lined the interior 🤣, but I guess it won’t create any problem. The wiring (1.5mm OFC copper wire) is already in place. The wires will be covered with foam tape to prevent any possible rattling.


After a lot of reading and research, I’ve finally decided to go with a fully active crossover. I got a good deal on four Fosi Audio ZA3 class-D amplifiers (which will probably get an opamp upgrade - at least the ones driving the mids and tweeters). So, I reprinted the binding post plate to support four terminal pairs.

Now I need to get the DAC. My primary choice is the DAC 8 PRO from Okto Research, but with the Brazilian import tax of 93%, it’s beyond my budget. The second choice is the MOTU Ultralite MK5, which seems to be a good option. My source is a WiiM Pro (Tidal), so only digital need to be supported.
If someone has any experience with the MOTU (or any other multichannel DAC) and wants to share, I would love to hear it.
The boxes got a good quality 15mm thick felt lining. I know I may have gotten carried away and over-lined the interior 🤣, but I guess it won’t create any problem. The wiring (1.5mm OFC copper wire) is already in place. The wires will be covered with foam tape to prevent any possible rattling.
After a lot of reading and research, I’ve finally decided to go with a fully active crossover. I got a good deal on four Fosi Audio ZA3 class-D amplifiers (which will probably get an opamp upgrade - at least the ones driving the mids and tweeters). So, I reprinted the binding post plate to support four terminal pairs.
Now I need to get the DAC. My primary choice is the DAC 8 PRO from Okto Research, but with the Brazilian import tax of 93%, it’s beyond my budget. The second choice is the MOTU Ultralite MK5, which seems to be a good option. My source is a WiiM Pro (Tidal), so only digital need to be supported.
If someone has any experience with the MOTU (or any other multichannel DAC) and wants to share, I would love to hear it.
A bit more progress.
The wiring is covered with foam to avoid rattling, and the two top chambers that I can’t reach after closing the box were stuffed with low-density polyester fiber.

Then, after closing the boxes, came one of the worst parts of woodworking: sanding 😬. Both boxes were thoroughly sanded using 80-grit sandpaper.

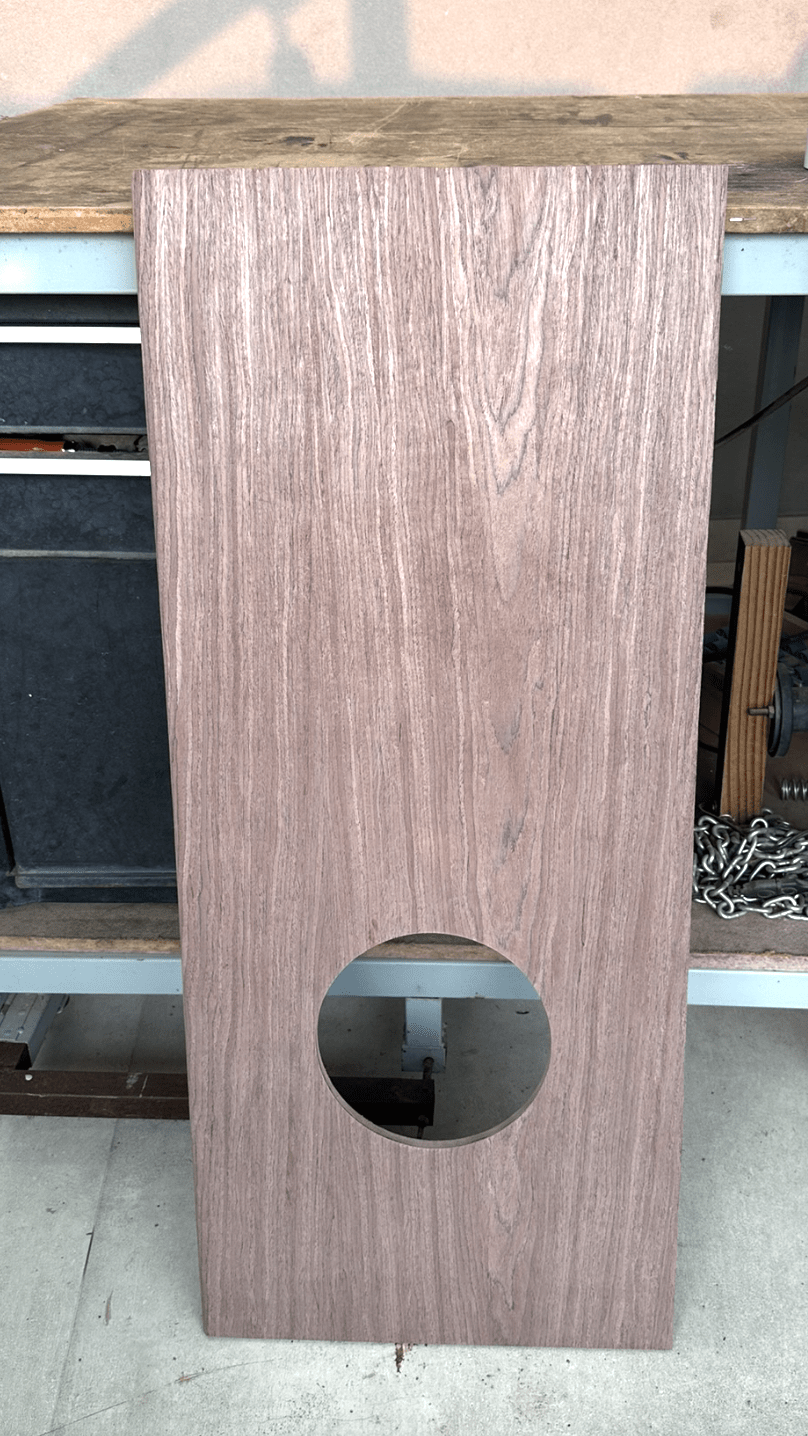
Next, all four side panels (12mm MDF) had the woofer holes cut, and the edges were rounded. By adding these 12mm panels, the sides will have a thickness of 40mm, and the front baffle will have a 10mm radius rounded edge on the sides. I guess the rounding won’t be enough to avoid significant diffraction, but at least it will have a nice aesthetic effect with the wood veneer.


I’ve also started building the cables. I combined eight 1.5mm² OFC cables using braided heat shrink tubing and 3D printed a “thing” that will help position the cables behind the amplifiers. I got a nice deal on four Fosi Audio ZA3 class-D amplifiers—not very high-end, but they sound pretty nice!

About the amplifiers: What would be better, to use all four amplifiers for both speakers (one amp for the tweeters L/R, another for the mid L/R, another for the mid-bass L/R, and the last one for the woofers L/R), or to use two amplifiers per speaker, combining the tweeter/mid on one amp and mid-bass/woofers on another (or some other combination)?
I’ll be using a Raspberry Pi 5 to run Tidal Connect, CamillaDSP, and, at least initially, four cheap PCM5102A modules from AliExpress (similar to a HiFiBerry DAC 8x). If I feel the speakers deserve it (i.e., if I don’t mess things up 🤣), I’ll get (or build) a better DAC.
The wiring is covered with foam to avoid rattling, and the two top chambers that I can’t reach after closing the box were stuffed with low-density polyester fiber.
Then, after closing the boxes, came one of the worst parts of woodworking: sanding 😬. Both boxes were thoroughly sanded using 80-grit sandpaper.
Next, all four side panels (12mm MDF) had the woofer holes cut, and the edges were rounded. By adding these 12mm panels, the sides will have a thickness of 40mm, and the front baffle will have a 10mm radius rounded edge on the sides. I guess the rounding won’t be enough to avoid significant diffraction, but at least it will have a nice aesthetic effect with the wood veneer.
I’ve also started building the cables. I combined eight 1.5mm² OFC cables using braided heat shrink tubing and 3D printed a “thing” that will help position the cables behind the amplifiers. I got a nice deal on four Fosi Audio ZA3 class-D amplifiers—not very high-end, but they sound pretty nice!
About the amplifiers: What would be better, to use all four amplifiers for both speakers (one amp for the tweeters L/R, another for the mid L/R, another for the mid-bass L/R, and the last one for the woofers L/R), or to use two amplifiers per speaker, combining the tweeter/mid on one amp and mid-bass/woofers on another (or some other combination)?
I’ll be using a Raspberry Pi 5 to run Tidal Connect, CamillaDSP, and, at least initially, four cheap PCM5102A modules from AliExpress (similar to a HiFiBerry DAC 8x). If I feel the speakers deserve it (i.e., if I don’t mess things up 🤣), I’ll get (or build) a better DAC.
I use two 4ch amps, each driving one speaker. Easier to locate and shorter high-voltages lines. cross-talk between channels is not a problem IMO.
Forgot to say, I have two stereo amp modules per speaker, ICEpower. Each module has own alternator built-in.
Hypex FA series 3-ch plateamps have one stereo and one mono module. They also have integrated dsp-preamp and common alternator. I have used them too.
Hypex FA series 3-ch plateamps have one stereo and one mono module. They also have integrated dsp-preamp and common alternator. I have used them too.
Forgot to say, I have two stereo amp modules per speaker, ICEpower. Each module has own alternator built-in.
It’s similar to what I’ll be using, I guess—four stereo amplifiers, each with its own power supply.
To be honest, I’ll probably test all possible combinations anyway 😬, but it would be easier to use two amps per speaker.
Another update.
After sanding and preparing everything, it was time for veneering. The 12mm side panels and the bottom of the box were veneered with Imbuia (a Brazilian wood that resembles walnut).


The baffle, top, and rear were veneered with an ebony wood veneer (I don’t know which wood it’s made from). It is dark gray, almost black when varnished.


The next step was to glue the side panels and the box together. It was just after the glue was applied and the parts were ready to be clamped that I realized I didn’t have enough clamps! Damn… Well, a little weight here and there, a threaded rod, and a few wood pieces, and everything went well.

Next steps are sanding (again!) and three coats of varnish.
After sanding and preparing everything, it was time for veneering. The 12mm side panels and the bottom of the box were veneered with Imbuia (a Brazilian wood that resembles walnut).
The baffle, top, and rear were veneered with an ebony wood veneer (I don’t know which wood it’s made from). It is dark gray, almost black when varnished.
The next step was to glue the side panels and the box together. It was just after the glue was applied and the parts were ready to be clamped that I realized I didn’t have enough clamps! Damn… Well, a little weight here and there, a threaded rod, and a few wood pieces, and everything went well.
Next steps are sanding (again!) and three coats of varnish.
Attachments

FInally the boxes are done!
After veneering, both boxes were sanded with 180-grit sandpaper using a random orbit sander. I used my storage room as a paint booth to apply the varnish to the boxes. Note to self: Use white plastic next time. The black plastic makes it difficult to see what you’re doing, as it absorbs all the light.

Three coats of matte marine varnish were applied, with a 12-hour interval between coats. Between the first and second coats, I hand-sanded the boxes using 600-grit sandpaper.
First coat:

Second coat:

Third and last coat:

All pictures were taken while the varnish was still wet. I’ll have to wait at least 24 hours before handling the boxes, so I expect to have them assembled by the end of the week.
I am very happy with the result, especially with the Imbuia veneer. It looks great. Hopefully, it will sound as good as it looks!
After veneering, both boxes were sanded with 180-grit sandpaper using a random orbit sander. I used my storage room as a paint booth to apply the varnish to the boxes. Note to self: Use white plastic next time. The black plastic makes it difficult to see what you’re doing, as it absorbs all the light.
Three coats of matte marine varnish were applied, with a 12-hour interval between coats. Between the first and second coats, I hand-sanded the boxes using 600-grit sandpaper.
First coat:
Second coat:
Third and last coat:
All pictures were taken while the varnish was still wet. I’ll have to wait at least 24 hours before handling the boxes, so I expect to have them assembled by the end of the week.
I am very happy with the result, especially with the Imbuia veneer. It looks great. Hopefully, it will sound as good as it looks!
These look fantastic with an amazing build quality. Look forward to the final results.
Well done!
Well done!
Thanks!These look fantastic with an amazing build quality. Look forward to the final results.
Well done!
They are finally ready!
Before mounting the drivers and terminals at the back, I 3D-printed TPU gaskets for each driver to ensure they sit perfectly flush with the baffle (yeah, I really need to tune my slicer when printing with TPU)

The result was great!

The wiring, color coded, was connected to the 3D printed terminal plate at the back

In the first assembly (I’m quite sure I’ll be doing a lot of tweaking with the stuffing), I didn’t add any filling to the midbass chamber. In the woofer chamber, I added Dacron around the perimeter, loosely filling all spaces except between the woofers. Of course there will be a lot of measurement work to tune the active crossover.

They’re in their new home!

Nest steps, hook up everything, configure Camilladsp and take some measurements.
Before mounting the drivers and terminals at the back, I 3D-printed TPU gaskets for each driver to ensure they sit perfectly flush with the baffle (yeah, I really need to tune my slicer when printing with TPU)
The result was great!
The wiring, color coded, was connected to the 3D printed terminal plate at the back
In the first assembly (I’m quite sure I’ll be doing a lot of tweaking with the stuffing), I didn’t add any filling to the midbass chamber. In the woofer chamber, I added Dacron around the perimeter, loosely filling all spaces except between the woofers. Of course there will be a lot of measurement work to tune the active crossover.
They’re in their new home!
Nest steps, hook up everything, configure Camilladsp and take some measurements.
One quick update:
THEY SOUND F* AMAZING. I didn’t know what to expect, as it was my first serious build, but I am certainly stunned by how good they sound. I was too anxious to hear them so no measurements were taken yet. I simply configured a few HPF/LPF in CamillaDSP and fired them up.
As I wrote in the beginning of the thread, my goal was to have better detail, soundstage and imaging than my Klipsch RP-6000F. Goal achieved with honors and distinction. They fill the front wall, disappear completelly and have an incredible 3D imaging. Effects in musics like Roger Water's "The Ballad of Bill Hubbard" are amazing - the dog barks behind me, the TV sound is on the side, the whole package.
I am quite sure that, when I take the measurements and build a decent XO in Camilla, they will sound even better!
CamillaDSP is running in a Raspberry Pi 5 and digital to analog conversion is being done by 4 cheap (2 usd) PCM5102A modules from Ali Express. I've designed and 3D printed a case to put everything in.

This is the final result. I was too lazy to cut the wires to size and add terminals, so I used standard jumper cables and wrapped the excess in heat shrink tubing. At least it’s tidy.

THEY SOUND F* AMAZING. I didn’t know what to expect, as it was my first serious build, but I am certainly stunned by how good they sound. I was too anxious to hear them so no measurements were taken yet. I simply configured a few HPF/LPF in CamillaDSP and fired them up.
As I wrote in the beginning of the thread, my goal was to have better detail, soundstage and imaging than my Klipsch RP-6000F. Goal achieved with honors and distinction. They fill the front wall, disappear completelly and have an incredible 3D imaging. Effects in musics like Roger Water's "The Ballad of Bill Hubbard" are amazing - the dog barks behind me, the TV sound is on the side, the whole package.
I am quite sure that, when I take the measurements and build a decent XO in Camilla, they will sound even better!
CamillaDSP is running in a Raspberry Pi 5 and digital to analog conversion is being done by 4 cheap (2 usd) PCM5102A modules from Ali Express. I've designed and 3D printed a case to put everything in.
This is the final result. I was too lazy to cut the wires to size and add terminals, so I used standard jumper cables and wrapped the excess in heat shrink tubing. At least it’s tidy.
After a weekend of listening and experimenting with the speakers “by ear,” I am unsure how to proceed with measurements.
Taking measurements of the tweeter and midrange drivers is quite straightforward - just find a place with minimal reflections and take time-gated measurements. For the mid-bass, as it operates down to 100Hz, it might be appropriate to combine a near-field measurement with a time-gated one. What do you think?
However, I am a bit uncertain about how to measure and model the side-firing woofers in VituixCAD. I’ve found bits of scattered information here in the forum, but nothing that gives me full confidence on how to proceed. I assume near-field measurement is the way to go, but I’m not entirely sure since they are “90 degrees off-axis.”
I would greatly appreciate your help.
- Home
- Loudspeakers
- Multi-Way
- Build thread: 4-way with side firing woofers