

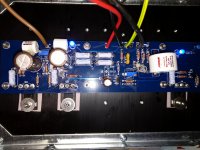
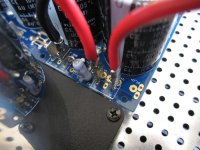
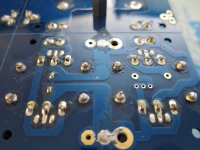
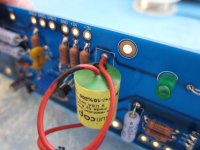
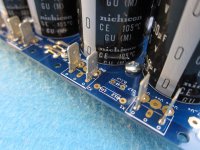
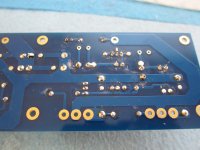
From your photo, you have a pot for R7. Does voltage across it change at all if you
adjust the pot?
Please check the soldering of R7 and Q1a.
adjust the pot?
Please check the soldering of R7 and Q1a.
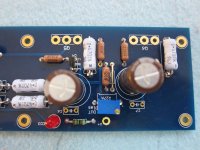
Reflowed the soldering on Q1a and R7 but still no voltage across R7 even if I adjust it. R7 measures 1k. (Although it's difficult to get a stable reading but all the other three boards I built are the same)
Could it be a bad JFET?
Could it be a bad JFET?
R8 looks like 1K so you should be getting the correct current through the
jfets. It seems nothing is going through Q1a to R7 so it's not looking
good for Q1a. 🙁
jfets. It seems nothing is going through Q1a to R7 so it's not looking
good for Q1a. 🙁
That is what I feared. Looks like I'll be waiting a few weeks to listen to them whilst I order some more LSJ74's to the UK 🙁
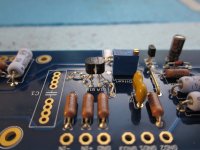
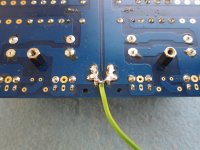
Always hard to tell with flash/lighting but some of those solder joints look cold. I would reflow everything before buying new parts.
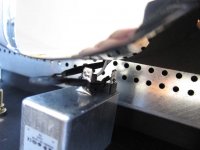
That was the big issue with my Aleph build - not enough temp since I was afraid of roasting the 2SJ74s.
That was the big issue with my Aleph build - not enough temp since I was afraid of roasting the 2SJ74s.
An easy way to test if there’s a cold joint is turn it on, connect a voltmeter to the output and start poking/flexing the PCB/components a little. If you see the offset make a big jump back towards neutral, you have a suspect connection near where you were poking.
I had that exact issue on my first Aleph. It’s a very DC coupled amp, so if something is not connected the rest of the circuit is effected.
I had that exact issue on my first Aleph. It’s a very DC coupled amp, so if something is not connected the rest of the circuit is effected.
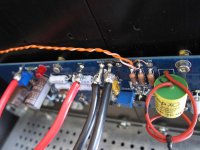
I think what happens with some of these higher quality boards with 2 oz copper is that more heat/time is required with the soldering iron. I also strongly recommend the use of flux for every single soldering joint, period. Check the boards on both the top and bottom faces to make sure the joint is fully covered with solder. I usually wash my boards intermittently with Flux Off (No Clean Plus) and dab it with Kimwipes so I can see the quality of the joint. If the board and solder joints don't appear to have a mirror finish you may miss a cold joint somewhere (which becomes a headache).
Using a soldering iron with a feedback mechanism to keep the temp at 750 deg F (~400 degrees C) is a good idea. I use a Hakko FX-951. It's so worth it compared to my earlier Hakko 936. I have a number of tips which I can switch on the fly and the iron automatically knows and adjusts the feedback mechanism and gets the tip temp back up to 750 deg F (or wherever I set it to).
Best,
Anand.
TungstenAudio and Mark Johnson, thank you for the info about LVB2650 bridge rectifiers. I put a few into my Mousers shopping cart.
I think what happens with some of these higher quality boards with 2 oz copper is that more heat/time is required with the soldering iron. I also strongly recommend the use of flux for every single soldering joint, period. Check the boards on both the top and bottom faces to make sure the joint is fully covered with solder. I usually wash my boards intermittently with Flux Off (No Clean Plus) and dab it with Kimwipes so I can see the quality of the joint. If the board and solder joints don't appear to have a mirror finish you may miss a cold joint somewhere (which becomes a headache).
Using a soldering iron with a feedback mechanism to keep the temp at 750 deg F (~400 degrees C) is a good idea. I use a Hakko FX-951. It's so worth it compared to my earlier Hakko 936. I have a number of tips which I can switch on the fly and the iron automatically knows and adjusts the feedback mechanism and gets the tip temp back up to 750 deg F (or wherever I set it to).
Best,
Anand.
And if you watch the joint very closely you can see the pool of solder suddenly shrink a bit when there's enough heat to wick it to the other side of the board. At that point the joint is done.
Cheers,
Jeff.
Thanks guys, I'll reflow all of the solder joints and see if it helps. I guess it only needs one to be bad!
And if you watch the joint very closely you can see the pool of solder suddenly shrink a bit when there's enough heat to wick it to the other side of the board. At that point the joint is done.
Cheers,
Jeff.
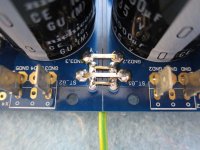
This tip is especially useful when when one does not have access to the top side of the PCB to check solder joint integrity.
When installing snap in capacitors, for instance.
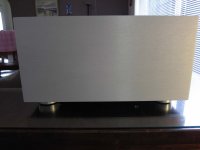
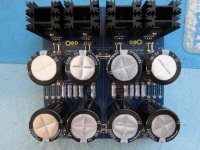
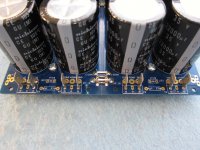
Exceptional sound
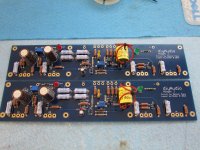
Spent 3 days making this amp. The words can not describe how good this amp sounds...
Spent 3 days making this amp. The words can not describe how good this amp sounds...
Attachments


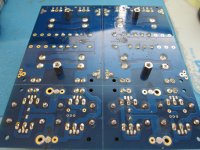
... and the PCB's
... lot No 1
... lot No 1
Attachments


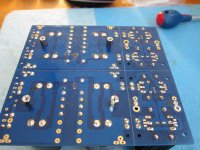
... and the PCB's
lot No 2
lot No 2
Attachments

- Home
- Amplifiers
- Pass Labs
- Aleph J illustrated build guide