Just watched this instructable on guitar building using plywood.
Fully Plywood Guitar AKA How to annoy purists - All
I could not see any mention of what accuracy is needed in placing the frets.
What tolerance could be allowed in placing a fret across the neck?
0.1% of the length between the witness contacts?
or ?
BTW, I'm not planning to build one, but I did do a test to see how well, or not, I could differentiate slightly different tones, to discover I can't discrimate between close frequency tones.
The ability to differentiate between two closely spaced tones varies a bit from person to person. Age, hearing ability, and degree of musical training or experience are also big factors. Read these for some insights:
https://en.wikipedia.org/wiki/Cent_(music)
https://en.wikipedia.org/wiki/Just-noticeable_difference
From these references it would seem that the average error could be just under 0.6%. Other references claim that a trained musician can detect 0.2%.
The degree of accuracy required also depends on how the instrument will be used. A single note at a time (lead guitar) played without accompaniment will allow for the largest error since there is no reference. Two or musically related notes (chords) will reveal small errors to a trained musician.
I made a huge spreadsheet to examine all the error sources in an analog music synthesizer project that I am working on. The accepted requirement for the D/A converter in a MIDI to Control Voltage translator is 12 bits. This translates to 0.025%, but there are others error sources bringing the total error to about 0.1 to 0.2%.
Note, Absolute perfection isn't required. OR WANTED. Consider the unfretted instruments in an orchestra. Each violin plays a slightly different pitch, yet the combined result sounds fat and lush if all the performers are having a good day....really sick if they are not.
Total digital perfection sounds clinical, sterile or lifeless....this is the reason for the recent resurgence in analog music synthesis.
I have made a few guitars, so have some of my friends. I use pre made fretboards or pre made necks, others use a pre made fret slot cutting jig. Both solve the error problem easily.
Electric Guitar Bodies + Necks + Wood | stewmac.com
My guitar used a "Fender authorized replacement neck" from Ebay. My friend made his neck for his electric uke using a jig he made from a pre made fretboard. He made the jig, since he was making several ukes.
He used exotic hardwoods for the uke, I used Home Depot pine for the guitar.
Attachments
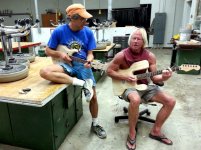
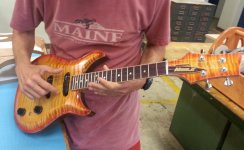
You actually put your T-shirt on for the second shot! That's a rare sight 😀
Edit: No that may not be you. I thought they were both taken on same day!
Edit: No that may not be you. I thought they were both taken on same day!
It is mathematics. The 12th fret is half string length. The first fret is 1/12 of the 12th fret length from the nut. The second fret is 1/12th the distance between the first fret and the 12th. Etc. The 13th fret is 1/12th of the distance between the centre 1/12th fret mark and the bridge. 1/14 fret is 1/12th the remaining etc etc.
There is a "12" involved, but not quite the way you described it.The first fret is 1/12 of the 12th fret length from the nut. The second fret is 1/12th the distance between the first fret and the 12th. Etc.
Each note frequency is higher than the preceding one by the twelfth root of two - which is roughly 1.0594631. By pure coincidence, this number happens to be fairly close to the fraction 18/17 (1.0588).
And so if you place each successive fret 1/18 of the way closer to the far end of the string (the bridge), you get a passable approximation to the proper fret positioning. It's not really accurate enough, but centuries ago, when luthiers didn't exactly have pocket calculators and CNC machinery, the "rule of eighteens" was good enough to get the job done.
I agree with George - one semitone is about 6%, and one tenth of that (0.6%) is quite a significant error. Each semitone is divided into 100 "cents", so 0.6% is a ten-cent error. That is big enough to be audible under some circumstances.
There is an odd bit of trivia to add to this. We're talking about equal temperament here - the frequency ratio between successive notes is constant all the way up and down the string (or keyboard). But equal temperament itself is permanently a little bit "out of tune" - a compromise, which makes every note a little bit sour, but allows one to play in different keys without having to re-tune the whole instrument.
The most "out of tune" interval in equal temperament is the major third. If every note is perfectly tuned in equal temperament, the major third is in fact a whopping 14 cents (0.14 of a semitone) out of tune! (It's too big, the frequency ratio 14 cents too large).
As it happens, a major third is the interval between the open "G" string on a guitar and the open "B" string. Ever since I first began to play the guitar, I always found it impossible to get that dratted B string to sound quite right. No matter what I did, it always sounded a little sour or rough on some chords. I couldn't figure out why, until, just a few years ago, I discovered that the major third interval got sold down the river when musicians switched to using equal temperament, back in Bach's time. The sourness is built into the equally tempered scale!
-Gnobuddy
No that may not be you. I thought they were both taken on same day!
No, it's not me. That uke didn't get painted in an instant.....it took several weeks. These pictures were taken in a very dirty high school wood shop that hasn't been used by high school students in several years. Nobody wore good clothes to that place. There was no AC or heat either. The school let us use the shop for an evening class, taught by a teacher from another school in our neighborhood that closed its evening classes because of the crime.
Many instruments.....most electronic keyboards, and all digital instruments use an approximation to generate each tone. Since the twelfth root of two is an irrational number, it can not be generated exactly by dividing a master clock by an integer. Today's 32 bit systems can get pretty close, but that was not always the case.
Even the revered tone wheel Hammond organ has built in errors. The tone wheels and gear sets are mechanical frequency multipliers and dividers. All are driven by a common motor.
Last edited:
Just to add a little to the above two posts. Many guitars have adjustable bridge saddles which allow the length of each string to be varied. Gibson called it a 'tune-o-matic' bridge. To get good intonation at the 12th fret, the strings which flex easier can be closer to their expected theoretical length, while the strings which don't flex so easily have to be a bit longer. This allows for the 'end effect' in the string vibration mode.
The thinner strings flex more easily, but for the 'wound' strings it is the thickness of the core which counts more.
On my Gibson, the difference in string lengths is up to about 5mm.
The thinner strings flex more easily, but for the 'wound' strings it is the thickness of the core which counts more.
On my Gibson, the difference in string lengths is up to about 5mm.
Last edited:
The fret crown profiles will also have an affect as well as placement of the fret slots. Worn frets with flattened crowns could introduce another error.
Someone I knew who built a guitar, suggested that rather than 'calculating' where the fret slots should go, the easy way is to copy the distances from a good guitar (with similar size and profile frets to the ones that you will use).
Always measure from the nut, of course, to avoid an error build up.
Always measure from the nut, of course, to avoid an error build up.
the easy way is to copy the distances from a good guitar
Copying from a known good example is the easiest way to get things right, but you need to know what to copy.
The important dimensions are:
The scale length. This is the distance from the nut to the bridge, the point where the strings touch the pivot, and yes they should all differ by a few MM. Good bridges should allow for adjustment of each string. Set the adjustment in the center, and make sure the distances from the nut to the 12th fret is the same as the 12th fret to the pivot point on the bridge before mounting the bridge. Every brand and style of guitar is different, with most Strats at just over 25 inches. Many Gibsons are 24 to 25 inches.
The fretboard radius. Some fretbaords are flat, most have a gentle curve with a radius from 9 to 12 inches. Some fretboards have a compound radius that changes over the length of the neck.
The neck width. This tapers from under two inches at the nut, to over 2.5 inches at the last fret.
Neck thickness. This is an important parameter for people like me with short, fat fingers. A thick neck is a non starter for me, but extremely thin necks are prone to warpage and breaking. The neck thickness usually tapers over it's length.
Truss rod mounting and adjustment access. Most electrics and many acoustics have a truss rod built into the neck to adjust the neck's curvature to eliminate fret buzz. Contrary to popular belief you want a slight bow in the neck, to minimize buzz, and allow for a low action.
Fret wire size and head radius. There dozens of fret wire sizes and styles. Attempting to press the wrong wire into your neck leads to the use of bad language!
Neck mounting method, pocket size, and screw location. There are three main ways the neck it attached to the body.
#1) Neck through (the body) This is a different guitar design completely. Here the neck is as long as the entire guitar with the bridge and sometimes the pickups attached to it. It is a completely playable unit with the "wings" of the body attached to it. There is often a separate "top" or veneer over it to hide the joints. Steve's electric uke (pictures in previous post) was made this way. Many feel that this gives better tone, and dimensional stability.
#2) Bolt on neck, This is the most common, and means just what it says. The attachment, pocket in the body must match the neck, and there are many variations even among Fender made Strats.
#3) Set neck. This is like the bolt on, except that the neck is glued in place. This requires a jig and some clamps, but eliminates the possibility of neck shift over time and use (abuse). I have seen (and currently have one) Fender made Strats where the alignment has shifted (or was never right) over the years. My example came from a flea market for $50.
To avoid much of this madness, I have simply used pre made Fender replacement necks. However I will need to make a custom neck for an upcoming design.
The easiest way here is to buy a pre-made fretboard. You can get a maple fretboard with the nut and fret slots already cut for $15.
If you want to make your own, buy a pre made fretboard for a template. You will also need a fret saw or something with a very thin blade. It must match the requirements of the fret wire you will use.
Make a jig with a means to clamp the fretboard down. Glue two hardwood rails, slightly taller than the fretboard to the jig on either side of the fretboard very close to it. Shim the fretbooard so that it stands slightly taller than the rails. Use the fret saw in the fret slots on the new fret board to start cutting slots in the rails. Remove the fretboard, and cut the slots to the desired depth. You can then put your new fretboard material in the jig, and use the slots in the rails to cut the slots in your new fret board.
There are zillions of Youtube videos on this subject alone. We learned a lot from the guys at Crimson Guitars in the UK.
I know everybody calls them "bolt on necks", but Leo Fender was an accountant, and looking at his designs, it would seem he never spent an extra penny on a product if he could possibly avoid it.#2) Bolt on neck, This is the most common, and means just what it says.
So Leo used ordinary wood screws - not bolts - to attach his necks to his bodies, and to this day, that is what every Fender and Squier guitar still uses. They are screw-on necks, not bolt-on necks! 😀
Perhaps some of today's high-quality guitars and/or basses with detachable necks actually do use nuts (set into the neck pocket) and actual bolts to attach the neck. (This is the big difference between screws and bolts - a bolt is designed to work with a nut, a screw usually isn't.)
But 99% of the time, this is not the case - all I find is cheap wood-screws, screwed directly into the body wood of the neck pocket, in every brand of detachable-neck guitar I've ever looked at.
I think I may have seen one lone exception, an older Yamaha RBX 774 bass guitar that had metal nuts set into the neck pocket. If my memory is correct, that bass actually did use bolts to attach the neck to the body.
Bolts can make much stronger joints than screws do, which is why you find lots of bolts holding important structural parts of your car together. You'll never find, say, your brake calipers mounted to the suspension with screws - only with bolts.
So when a guitar manufacturer says they have a "bolt on neck", they are probably trying to get you to believe they are using something better than the wood-screw you would use to hang a picture on the wall. But it isn't true!
I know, everyone will continue to call them "bolt on necks", because the term is solidly established in the collective consciousness by decades of advertising and usage. But at least now you know it's a big fat lie! 😀
-Gnobuddy
Yes, bolt on necks....aren't, and it IS all about cost of manufacturing. However, for a guitar where the neck may be removed once or twice during the life of the guitar it is a good compromise.
The neck, body, and neck plate are held in alignment and clamped under pressure while self threading screws are screwed in using automated machinery. Sometimes, but not always, pilot holes are drilled first. This yields an accurate well aligned joint with near zero room for movement.....Until the first time the neck is removed. The wood screws never go back exactly the same way twice, since a little bit of wood is removed every time this is done, and after a while, you have a guitar, like my Squire, that won't stay in tune since the neck has side play in it.
I started making guitars in high school. My first attempt was a crude pine wood copy of a Flying Vee with the neck and pickups from a broken Hagstrom. It was ugly, but it sounded great, and lasted me for 15 years.
A friend and I enrolled in a night time adult wood working class at a local school, where we made guitars, amps, and other musical weaponry over a 15 year period. I bought three Mighty Mite "Fender replacement necks" which come undrilled. I used one of them on several bodies which were just experiments (some got played exactly once, then hit the trash can), and it wound up with 2 sets of holes, both of which were worn.
I plugged and filled the holes, drilled a new set, and glued in some threaded studs, so I could use it as a true bolt on neck. This turns out to be a lot harder to get right than it seems. You still need to create some mechanism to positively locate the neck with zero room for movement. Having a neck plate with bolts and nuts sticking out of the back of the guitar doesn't work, and a recessed back plate requires several extra wood working steps, which are possible with CNC machinery, but unrepeatable with a hand router. My last iteration used some captive bolts that resembled T-nuts without the tangs, but with a screwdriver slot. It is still possible to knock the neck out of alignment.
- Status
- Not open for further replies.
- Home
- Live Sound
- Instruments and Amps
- Accuracy in building an electric guitar?