Member
Joined 2009
Paid Member
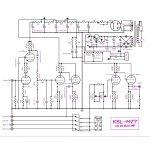
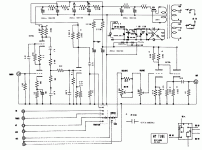
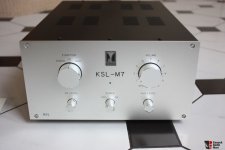
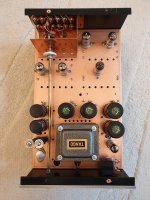
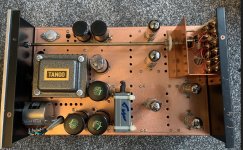
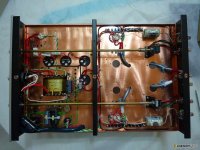
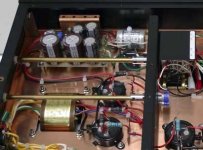
I wanted to build the Kondo M7 all tube pre-amp, but discovered that the company founded by Kondo has taken the design a little further and my project will now take advantage of this to see what’s changed, what hasn’t changed and deliver the ultimate M7 for my system. The latest products being sold by Kondo Japan are very expensive so DIY is particularly attractive.
Although mine is a mono system what comes out of this still applies to the stereo version. I’m going to build from scratch, no ready made kits or pcb’s for which other threads exist to help those interested in that approach.
I hope this thread will be of interest, it’s going to look a bit like a diary of my build as it goes along. I really want it finished over the coming weeks.
Contents (by Post #):
25, 38 & 41 - main H.T. Power supply, schematic shaping up on #46
30 - adding a heater winding to an off-the-shelf power transformer
54 & 61 - shunt regulated heater supply
77 - H.T. power supply board build
88 - fixed -20dB attenuator design
90 - Line amp schematic
97 - Phono amp schematic
106 - Line amp square wave test results
111 - Line amp frequency response test results
112 - RIAA curve compliance test results
35 & 115 - RIAA design analysis, ‘correcting‘ the OEM design
118 - the finished unit
Last edited:
Member
Joined 2009
Paid Member
Member
Joined 2009
Paid Member
Member
Joined 2009
Paid Member
Member
Joined 2009
Paid Member
Member
Joined 2009
Paid Member
Does it sound good? - many people have said it does, not just loads of cloners
“Positive Feedback Issue 26 (2006)
There is a very great sense of "hear through" factor here. Details and instrument decay are very natural, and the sense of acoustic space is always present when it is on the recording. In fact, I thought that the balance of this preamp when fed into my Sphinx amp was nearly perfect, and the tone among the most beautiful and natural I have heard. It has really a lovely sound, yet without syrupy or artificial sweetness.
(On CD the input level was too high, resulting in compression)
I do have to say that listening to phono was a pleasure with the Kondo combination. The music flows and provides great insight to the music. Its presentation is very open and transparent. Tone again seems to be spot on, with neither a yin nor yang flavor. In this regard, the Kondo is perhaps the best I have heard.”
“HiFi Advisor (2013)
Best treble sound. One of the best preamplifiers. Analog, a bit on the warm tube side.”
“SixMoons (2006) M77
Songs that I didn't get suddenly became heart tugging and mind expanding. Transparent is the wrong word - that implies a hi-fi quality but this was a musical and artistic transparency as if layers of invisible grunge and gunk have been scraped away. Each vibrant note is suddenly here. Its like love; deep, rich and dense - you don't rationalize it, you just fall into it.
We get transported into a world of spiritual longings, ecstasies and despairs that takes the inner emotional self on what I can only describe as some kind of minor mystical transport. It can often reveal, in the superficially banal, something simply earth-shattering. The Kondo M77 is the only piece of audio equipment I've heard do this - which is why it exists at the very pinnacle of Parnassus.
Of course, if what you want is just to sit back and be absolutely blown away by the quality of sound, that is going to happen, too. Sonically the M77 is so good that you can appreciate is superlative qualities even if you're riding on an open bus in a force ten gale. But if you want more, if you want to get into the deepest part of what makes music so powerful and moving, then ultimately, that is what the M77 is all about.”
Member
Joined 2009
Paid Member
Member
Joined 2009
Paid Member
Member
Joined 2009
Paid Member
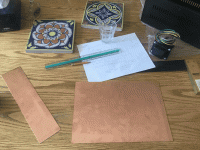
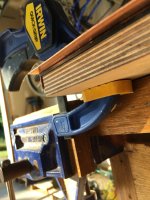
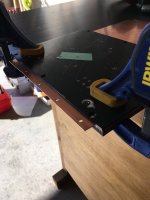
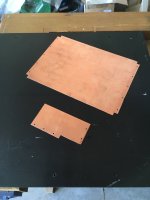
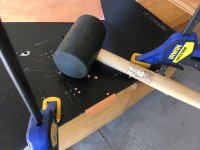
Cutting the copper wasn't too hard with a hand-held jig saw but I don't have a Brake for bending metal so this job is performed over the edge of my work bench with the aid of a rubber hammer ! I pre-drilled holes at the ends where the finished shelf will be screwed to the front panel and back panel.
It was really hard to make a clean job of this with the tools available, so it wasn't at all perfect.
It was really hard to make a clean job of this with the tools available, so it wasn't at all perfect.
Attachments
Member
Joined 2009
Paid Member
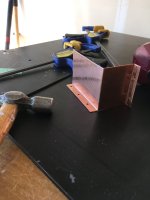
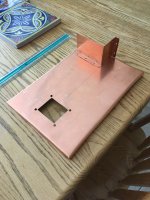
And here's the shelf, along with the bracket that will hold the input selector switch and act as a shield for the input RCA connectors at the back panel.
The transformer cut-out has been positioned to match the M7 as closely as possible, judging by eye. The cut-out has been sized to suit a Hammond transformer, an off-the-peg power transformer which has been designed for horizontal chassis mounting like this.
The transformer cut-out has been positioned to match the M7 as closely as possible, judging by eye. The cut-out has been sized to suit a Hammond transformer, an off-the-peg power transformer which has been designed for horizontal chassis mounting like this.
Attachments
Member
Joined 2009
Paid Member
The front plate is drilled with pilot holes for the controls, trying to match their positions as closely as I can by-eye to the M7 photos.
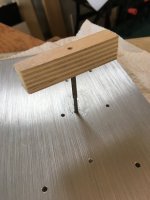
The front plate is 8mm thick so nice to work with. And it allows me to create blind-tapped mounting holes on the inside of the front plate for the copper shelf to screw on to. I bought some taps but baulked at the cost of those traditional tap holders and instead I just made up something from an off-cut of birch plywood. This was perfectly fine for some careful hand work at a M3 thread size.
The front plate is 8mm thick so nice to work with. And it allows me to create blind-tapped mounting holes on the inside of the front plate for the copper shelf to screw on to. I bought some taps but baulked at the cost of those traditional tap holders and instead I just made up something from an off-cut of birch plywood. This was perfectly fine for some careful hand work at a M3 thread size.
Attachments
Member
Joined 2009
Paid Member
The seller listed it as .04” thick. I was worried that it should have been thicker, but it seems fine.
Member
Joined 2009
Paid Member
Member
Joined 2009
Paid Member
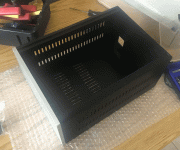
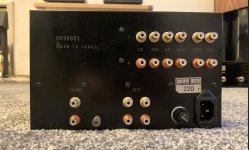
This is my attempt at reproducing it.
This is where a label maker comes in handy!
It’s not an exact clone but certainly in the same vein. I’m not yet decided whether to to install all the inputs because my build will be mono. I may just install some blank covers. Before you wonder why anybody would have stereo inputs for a mono preamp … it’s because there are options to choose, a) take the R channel, b) take the L channel, c) combine L + R channels. I haven’t decided which approach to take yet.
Attachments
Why reproduce it? It will never be Kondo since the caps are in four digit each and you won't buy them, and the wiring is different and you won't have Tango to make you transformers ? Why go Chinese route instead of hiring or asking a friend designer to design a unique case or cobble something yourself which will perfecttly express your ineptitude ?
Member
Joined 2009
Paid Member
Why indeed! well, I think that’s something left to each DIY’er to decide since at the end we have only ourselves to please 🙂
I could just buy one of course, but I have discovered that I’m not that fanatical about my listening and I enjoy the tinkering more than just listening. I spend way more time on fiddling around with my DIY than sat down with a good recording. In particular, I enjoy learning more about the stuff I’m making and furthering my skills.
I could just buy one of course, but I have discovered that I’m not that fanatical about my listening and I enjoy the tinkering more than just listening. I spend way more time on fiddling around with my DIY than sat down with a good recording. In particular, I enjoy learning more about the stuff I’m making and furthering my skills.
Fair enough. I saw nice , pro made Chinese cases for M7-77 and some even have copper interior fairly cheap too. Will watch your progress
Member
Joined 2009
Paid Member
Yeah, it’s amazing also how inexpensive so much of the readily available stuff is. But if I bought a complete chassis I’d never know what it’s like to do metal work with copper.
Usually I build it all from scratch but I did once buy a ready made JLH 1969 Class A amp from AlliExpress ( P-MOS implementation ) which has been in use driving the top end of my Khorn speakers. My plan was to replace the boards with my own design but I have not done so yet.
So much stuff is out there for relatively low prices, it’s a great way for people to get their hands on stuff for sure. If pricing and/or minimal time & effort (or you don’t have a workspace with tools) is a priority you’ll never be able to justify the time cost and effort to DIY. This is a thread for those who like to DIY or are armchair DIY’ers who like watching others burn their fingers, scrape their knuckles, make a balls of it and throw away their cash.
Last edited:
Member
Joined 2009
Paid Member
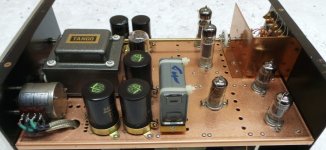
The wiring in the M7, as you might expect, is mostly on the underside. I am surprised though, at the apparent lack of use of rubber grommets which are usually recommended when wiring passes through holes in metal sheet.
The whole thing has that hand built look to it, which no doubt it was. There are instances of circuit boards being used for through hole components (mostly capacitors) but more out of necessity than of want to have any kind of pcb at all.
The whole thing has that hand built look to it, which no doubt it was. There are instances of circuit boards being used for through hole components (mostly capacitors) but more out of necessity than of want to have any kind of pcb at all.
Attachments
- Home
- Amplifiers
- Tubes / Valves
- Build of Kondo M7 -> Kondo-Ashizawa M7H -> G-1000 & GE-10 upgrade
