Project finished after 2 months, great performance and sound,a lot of work to the amplifier,the result are most satisfying. Great project great team, many thanks to Wolverine Team.
Attachments
-
 WhatsApp Image 2023-10-15 at 01.13.41_4f919eb3.jpg688.1 KB · Views: 480
 -
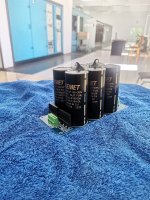 WhatsApp Image 2023-10-15 at 01.13.46_87551e2b.jpg558.3 KB · Views: 417
 -
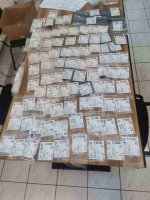 WhatsApp Image 2023-10-15 at 01.13.48_74bf9803.jpg860.6 KB · Views: 409
 -
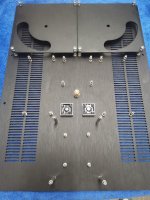 WhatsApp Image 2023-10-15 at 01.13.49_e40f6359.jpg527.5 KB · Views: 406
 -
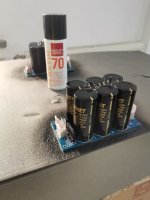 WhatsApp Image 2023-10-15 at 01.13.50_7e1e60a0.jpg354.6 KB · Views: 426
 -
 WhatsApp Image 2023-10-15 at 01.14.45_b72ebaa3.jpg386.4 KB · Views: 438
 -
 WhatsApp Image 2023-10-15 at 01.15.20_7e5b1e33.jpg456.5 KB · Views: 420
 -
 WhatsApp Image 2023-10-15 at 01.15.23_dc138f21.jpg568 KB · Views: 418
 -
 WhatsApp Image 2023-10-15 at 01.15.56_b8d98d18.jpg565.7 KB · Views: 424
 -
 WhatsApp Image 2023-10-15 at 01.16.05_7ad49ff5.jpg626.8 KB · Views: 397
 -
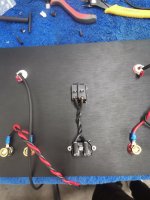 WhatsApp Image 2023-10-15 at 01.16.29_620bc52b.jpg362.7 KB · Views: 358
 -
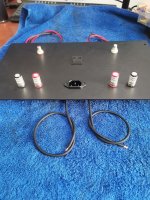 WhatsApp Image 2023-10-15 at 01.16.31_a463ddb1.jpg659.9 KB · Views: 389
 -
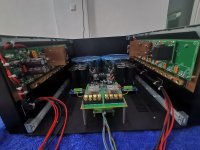 WhatsApp Image 2023-10-15 at 01.16.31_32a02202.jpg311.5 KB · Views: 442
 -
 WhatsApp Image 2023-10-15 at 01.16.32_1cfed1c5.jpg550.3 KB · Views: 486
 -
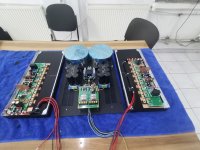 WhatsApp Image 2023-10-15 at 01.16.34_9b22ac6f.jpg362.4 KB · Views: 470
 -
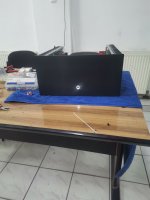 WhatsApp Image 2023-10-15 at 01.16.36_e102f157.jpg212.7 KB · Views: 430
 -
 WhatsApp Image 2023-10-15 at 01.16.43_fc37177f.jpg556.5 KB · Views: 419
 -
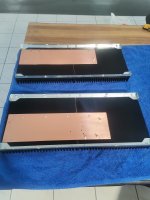 WhatsApp Image 2023-10-15 at 01.16.00_524c26b8.jpg419.8 KB · Views: 428
 -
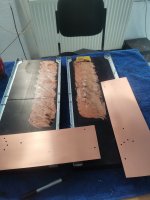 WhatsApp Image 2023-10-15 at 01.16.03_221b9243.jpg379.7 KB · Views: 478
 -
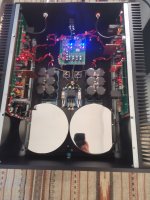 WhatsApp Image 2023-10-15 at 01.16.43_a30753ca.jpg318.5 KB · Views: 488
Very nice job, well done 👏Project finished after 2 months, great performance and sound,a lot of work to the amplifier,the result are most satisfying. Great project great team, many thanks to Wolverine Team.
I can see alot of care and attention has gone into your build. 🫡🫶👌
Please post your images in the build thread for other builders to see.
Wolverine Build Thread
Yes, well done! The only thing I saw which concerned me was the use of the bar to hold the transistors to the sink. The screw points have a lot of separation, which could be of concern is the uniformity of pressure is being applied to each.
To check, get her hot and take some readings to make sure the ones away from the screw point aren't getting hotter than the others, if you haven't done so already.
Again, nice build.
JT
To check, get her hot and take some readings to make sure the ones away from the screw point aren't getting hotter than the others, if you haven't done so already.
Again, nice build.
JT
the copper heat sink in the IPS I like that idea it will absorb heat faster plus will even out between the semiconductors the heat 😊Project finished after 2 months, great performance and sound,a lot of work to the amplifier,the result are most satisfying. Great project great team, many thanks to Wolverine Team.
I mentioned before, but copper isnt the best choice due to the weight. Too much hanging from those transistors. Aluminum is perfect for these. But that build is stunning!! Congrats and great work
Copper is fine, but the benefit is mitigated by the transfer from one surface to another. Put another way, gold is a great conductor, but when you go from one medium to another you have loss in the transfer, especially at the boundaries. It might be fine, it might be better, but it;s an unknown.... Unless you want to risk a reactor scram with fire, you need to check your heat. You spent two months on this animal and it's clear you put a lot of thought to it, but this is not an amp where you deviate without good data. It might be fine for years, but it could also go up like a volcano. Please, check the heat under medium and high stress.
This is an amazing amp, but capable of welding steel, or burning the house down.
Please do temp checks. 🙂_
JT
This is an amazing amp, but capable of welding steel, or burning the house down.
Please do temp checks. 🙂_
JT
I wish it was only 2 months. More like 16 at this point, and I have tested it, and have both in copper and aluminum. The aluminum is more then enough to dissipate the heat. I am just warning future builders that the copper is not the best due to the weight so therefore additional unneeded stress on those transistor legs.
FA, I was speaking to the builder. I know your skill level and know you would have tested for all I have said. We all don't have your skill level and it's best to error on the side of caution. If Jason and Stuart hadn't reeled me in, I would, most likely, have needed an extinguisher. 🙂
My only thought is trying to keep people safe... This amp isn't like a low voltage project.... When I was testing, I welded a probe or two. I didn't want to admit that. but it's why I am vested in floating any safety exceptions I perceive.
My only thought is trying to keep people safe... This amp isn't like a low voltage project.... When I was testing, I welded a probe or two. I didn't want to admit that. but it's why I am vested in floating any safety exceptions I perceive.
No worries, it was the 'animal' in the text that made me think you were referring to me. I re read it and its clear now! LOL. Sorry for the confusion. I agree with you on the outputs, best to make sure that they are all in intimate contact with the heatsink.
about the heat sink thing I think you can also mix one layer of thin copper to a small heat sink too so copper will absorb heat faster then it will transfer to the aluminum and dissipate the heat

The thing you have to keep in mind is every surface you add will reduce the thermal conductivity, so while one material type may be better than another, you might not get what you seek because you are adding to the chain.
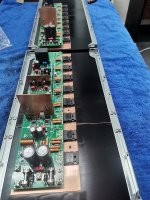
hi, thanks for your concern, the bar wich hold tranzistors is made from brass, because is perforated it has somme flexibility . amp passed burn in and thermal test with no issue.Yes, well done! The only thing I saw which concerned me was the use of the bar to hold the transistors to the sink. The screw points have a lot of separation, which could be of concern is the uniformity of pressure is being applied to each.
To check, get her hot and take some readings to make sure the ones away from the screw point aren't getting hotter than the others, if you haven't done so already.
Again, nice build.
JT
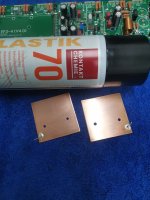
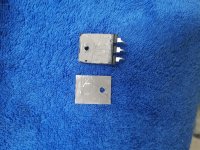
correct , copper whas chosen for heat transfer between semi's, copper underneath amp module whas chosen just for heat footprint, IS a must to add between heatsink and copper plate a lot of copper grease(not thermal grease).about the heat sink thing I think you can also mix one layer of thin copper to a small heat sink too so copper will absorb heat faster then it will transfer to the aluminum and dissipate the heat View attachment 1224599
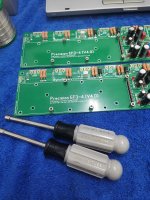
thanks , somme info:1.5mm thick copper plate smaller with about 10% i got about same weight, on ips board the to92 semi's where glued to the copper sink for rigidity, adițional all boards are mild hardness conformal coated.I mentioned before, but copper isnt the best choice due to the weight. Too much hanging from those transistors. Aluminum is perfect for these. But that build is stunning!! Congrats and great work
Your copper grease looks like the stuff used in car brakes, is this what you actually used?
BTW Drove Transfăgărășan in 2010, loved it.
BTW Drove Transfăgărășan in 2010, loved it.
OmeED i do not know if it is used in automotive too, the brand is AG Thermopasty , code: ART.AGT-060, do not use it on semi's with insulation pads(belive me it will eventually short semi) it is verry conductive electrical (safe to use on plastic body semy's). Yeah Transfagarasan is a verry nice road.
Probably it's too late but maybe in future projects one might find it useful. It's a program to calculate load lines for power transistors and drivers I wrote long time ago. The attached version has data I used when building Honey Badger. Cells with BLUE fonts are the user inputs. Magenta and black are program calculations.
cheers,
cheers,
Attachments
The Wolverine team has their own program (thanks to Jeremy) which includes many parameters to ensure you do not exceed the SOA area of the driver and output transistors. This has been mentioned before. If you follow the BOM and the build guide you cannot go wrong.
- Home
- Amplifiers
- Solid State
- DIYA store "Wolverine" (Son of Badger) .... suggestions ??