Hi all,
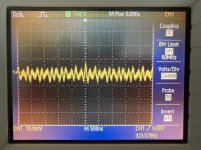
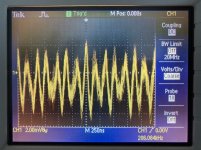
I'm reaching out to the community to discuss and compare others' experience on the ARCAM FMJ CD23 (not CD23T) noise floor.
I bought it a year ago and upon having the laser replaced I used to listen to it from time to time. Recently, however, I've discovered a surprisingly high noise that you can distinguish by wearing headphones and cranking up volume before switching on the player.
Upon the player switch is pressed, for a few seconds the noise level remains as if the player was still off, but as soon as you hear the output relè click activating the channels' output, a subtle but distinguishable noise pops up. I'm not talking about any music reproduction defect but of the noise hearable by simply switching on the unit.
A comment on a slightly higher noise-floor was reported by John Atkinson when he recapped device's measurements in his article, but before digging down to find a potential electrical cause in the DAC board which, being multilayer, is not easy to fix I would appreciate if any other CD23 owner can share their experiences
Cheers, Riccardo
A spectrum is usually more informative about the nature of the noise - that trace shows energy in the 5MHz sort of area, not pertinent to audible noise. A spectrum from 0 to 50kHz or so could be useful.
A common cause of a high noise floor on the CD23 audio outputs are the failure of some capacitors on the DAC9 board. So on the DAC board I would suggest you replace C30, C38, C97, C98, which are 10uf Non Polar electrolytics. Also replace C2, C4, 100uf electrolytics with any good quality low esr, 105 degree components.
Regards - Paul
Regards - Paul
Many thanks Paul! Quick question before messing up with the DAC9: I've read somewhere that's a multi-layer PCB and I wonder if replacing these caps is doable with a standard soldering station. Despite the fact that I'm fine with single layer PCB soldering/desoldering I've no experience onmulti-layer. Can you shed a light?
Cheers, Riccardo
Cheers, Riccardo
Hi Riccardo - Yes, replacing the caps with standard soldering iron should be possible. To help it might be a good idea to flow a little fresh solder on to the board tracks before you pull the old capacitor legs away - or use a solder sucker. Make sure the replacements for C2,C4, are the same physical size as otherwise they may touch the main board when you replace the DAC9 board back in position.
Regards - Paul
Regards - Paul
"multi-layer" relates to the routing of traces, not placement of components.
if you can see and touch the part, you can replacement it!
if you can see and touch the part, you can replacement it!
Many thanks to both of you for clarification. My concern was more on soldering rather than unsoldering.
For the latter I assume it's easy using a solder sucker but, for the soldering process, I wonder how to ensure that the molten tin reaches all the layers whose traces connect to that component. Is it just a matter of adding flux paste?
For the latter I assume it's easy using a solder sucker but, for the soldering process, I wonder how to ensure that the molten tin reaches all the layers whose traces connect to that component. Is it just a matter of adding flux paste?
The PCB should be through-hole plated, so if you solder it in, it will connect to any layer it is intended to. This assumes the through-hole plating hasn't been damaged and it is a quality PCB. You should be good with a solder-sucker or a desoldering iron, but try to take it easy on heat and amount of time. Larger tips are usually helpful for better heat transfer.
Not totally true. Some multi layer boards need a lot of heat to desolder and you run the risk of removing the through hole plating which makes the board useless. A number of occasions I have has the component come out with the plating attached to the leg."multi-layer" relates to the routing of traces, not placement of components.
if you can see and touch the part, you can replacement it!
Hi all and happy new year.
Finally this holiday time gave me the chance to run through the complete CD 23 recap for both Servo/Power and DAC board. I have to admit that whilst recapping the first was easy, working on the latter was more challenging due to the smaller space between pads. The total amount of time required was roughly 6 hours.
All caps were replaced with Rubycon for polar and Panasonic for non-polar. The soundstage, which was already huge is now bigger and lows are, after recap, pretty detailed and sonically "in place". Noise floor has got reduced although, given to the higher output compared to other CD players, it's still hearable at very high volume levels.
For those attempting to do the same I recommend getting a small soldering tip, flux and a decent lighting magnifying glass to be comfortable on doing the job.
Thanks to anyone who contributed to the discussion and made me learning on dealing with multi-layer PCBs.
- Home
- Source & Line
- Digital Source
- ARCAM FMJ CD23 - High noise floor

