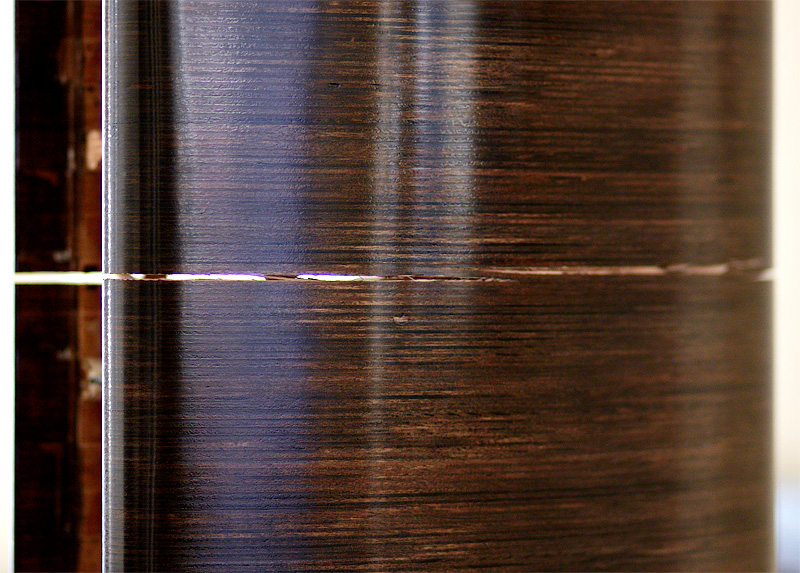
Sadly, this is the problem with translam cabinets. Wood moves, and fully solidifying the layers before finishing is pertinent.
In your current state, I would recommend a vinyl wrap over the paint. As long as the interior is not leaking via the cracks as they appear, this will solve the aesthetic issues and give as time progresses. Remember that under more humid conditions, it may return to its previous state.
I am still messing with a set of translam cabs I built awhile ago and did not complete due to this kind of problem. I'm kinda letting it progress before I do more, that way I fix it less than later.
Here's some inspiration for a possible cure, a repost from an earlier thread on the same subject of cracked translam constructions:
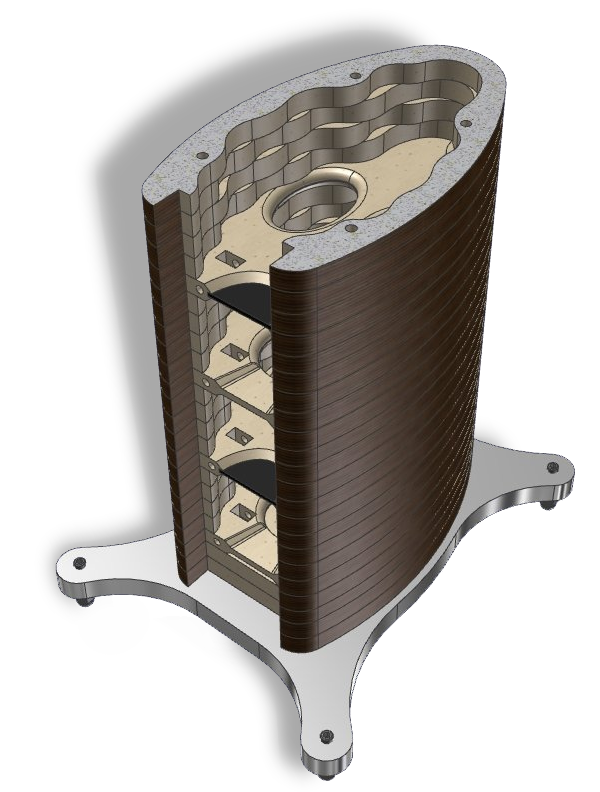
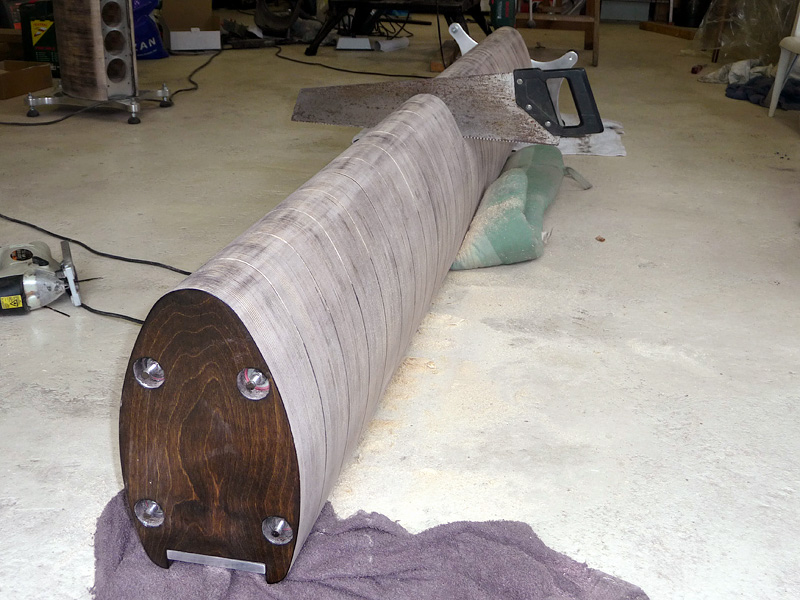
I've build two stacks of 2.25 meter high.
The reason I chose to build it that way is it was the easiest way I envisioned to get the outer shape as I wanted it.

However, a stack as tall as I made it, isn't without drawbacks. Wood will continue to expand/extract and for a birch ply panel, the thickness is the one most varying under different circumstances. Meaning if you have a large changes in humidity, things will start to move. With my stacks this led to severe cracking.

I had long threaded rods inside the stack, the idea was to use those threaded rods to put pressure on the stack to prevent this movement from ever happening, the stack was sealed inside and out with coats of polyurethane lacquer. Nothing is going to stop the wood from moving though. It will expand/contract and find a way to do it.
I don't think the rods I used were the reason for the cracks, as I've seen many samples of other stacked constructions crack, that didn't have that type of construction. It's just that wood will always move, one way or another, something has got to give.
I fixed my broken stacks by dividing them into smaller segments;

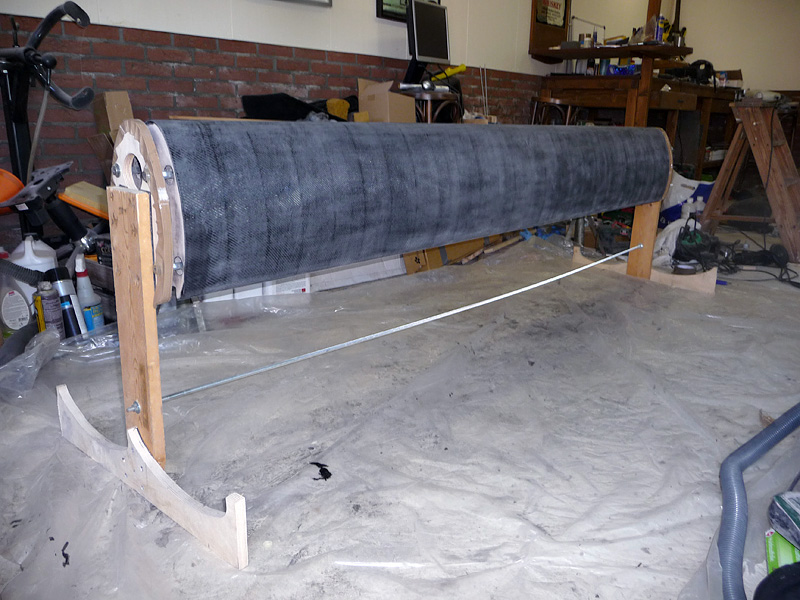
filling the voids with a compressible material and covering the whole sequence of smaller stacks with fiberglass matt and epoxy. I chose epoxy because that doesn't shrink when curing, unlike polyester.

They have been in use ever since I finished them at the end of 2014, and I haven't felt the urge to build other speakers/enclosures, so even though I may have used more raw material in this build, I saved a huge pile of material as I did not need any follow up builds of different shape or sizes. For me this was a one time deal. I'd do it again, but might do it slightly different 😉.

Hope this helps. We're in 2023, no signs of deterioration.
I've done a light cosmetic job on them in 2021 when I changed the drivers from Vifa to Scan Speak.
The complete story can be found from here on.
I've build two stacks of 2.25 meter high.
The reason I chose to build it that way is it was the easiest way I envisioned to get the outer shape as I wanted it.
However, a stack as tall as I made it, isn't without drawbacks. Wood will continue to expand/extract and for a birch ply panel, the thickness is the one most varying under different circumstances. Meaning if you have a large changes in humidity, things will start to move. With my stacks this led to severe cracking.
I had long threaded rods inside the stack, the idea was to use those threaded rods to put pressure on the stack to prevent this movement from ever happening, the stack was sealed inside and out with coats of polyurethane lacquer. Nothing is going to stop the wood from moving though. It will expand/contract and find a way to do it.
I don't think the rods I used were the reason for the cracks, as I've seen many samples of other stacked constructions crack, that didn't have that type of construction. It's just that wood will always move, one way or another, something has got to give.
I fixed my broken stacks by dividing them into smaller segments;
filling the voids with a compressible material and covering the whole sequence of smaller stacks with fiberglass matt and epoxy. I chose epoxy because that doesn't shrink when curing, unlike polyester.
They have been in use ever since I finished them at the end of 2014, and I haven't felt the urge to build other speakers/enclosures, so even though I may have used more raw material in this build, I saved a huge pile of material as I did not need any follow up builds of different shape or sizes. For me this was a one time deal. I'd do it again, but might do it slightly different 😉.
Hope this helps. We're in 2023, no signs of deterioration.
I've done a light cosmetic job on them in 2021 when I changed the drivers from Vifa to Scan Speak.
The complete story can be found from here on.
Sadly, this is the problem with translam cabinets
One of the problems.
dave
wesayso and wolf_teeth
many thanks for your feedback and advice. Fingers crossed that my cabinets hold out a little while longer, whilst I plan for the repair that may coincide with an upgrade. As you can imagine, I’d rather repair than scrap, but due to the orientation of the main internal brace and separate front baffle, I’m not sure they
Wesayso, i’ve already started to read your excellent thread. Very helpful. Have a great weekend.
If you get the paint off, I'd cover the inside with epoxy (put in a color to see if you got it all) and wrap the outside with glass fiber cloth and epoxy.
First wet the outside with epoxy,
next, when it's still sticky, wrap the cloth around it and wet it with epoxy, make sure you get all the cloth soaked in epoxy. For a tight fit you can wrap household plastic foil around it tightly, it won't stick to the epoxy.
As soon as that is cured, you can cover the whole thing with epoxy plus a filler, like microballoons, which would provide a nice surface (after sanding) you can prepare for paint.
Thanks again. due to both cabinets expanding and paint cracking at the first and last section in addition to irregular places, would you say that it’s likely I may also need to be split the cabinet into sections? Maybe 4 or 5. They are about 1.1m tall,
I eventually used to build cabinets like that untill I discovered that no cabinet was even quite a lot better, and much easier to build as well 🙂
looks ok if you like that type of thing, but eats up like half the volume for nothing in return at a higher price?
here`s a guy claiming brass screws in a speakerbox sounds much better than other screws. he also says measurements have nothing to do with sound quality lol.
here`s a guy claiming brass screws in a speakerbox sounds much better than other screws. he also says measurements have nothing to do with sound quality lol.
Thanks again. due to both cabinets expanding and paint cracking at the first and last section in addition to irregular places, would you say that it’s likely I may also need to be split the cabinet into sections? Maybe 4 or 5. They are about 1.1m tall,
I won't tell you what to do, I can only tell you what I did 😉. I do hope you're able to save the cabinets, take your time and think it trough.
I've waited half a year before I was convinced of what to do. (it was too cold in the garage do do anything earlier anyway)
If you look up real close, you can still see where the divisions are with mine. But it has not failed in 9 years.
I deliberately chose to cover it in a more rough finish to hide any blemishes. Using the right roller + microballoons in the epoxy created that pattern.
The re-coat process: https://www.diyaudio.com/community/...range-line-array.242171/page-341#post-6626284
I think someone on diyaudio painted a speaker with textured car paint, I think it was for plastic bumpers.
Reminds me of something I did way back, just a lot easyer. Most diffractors are not wery efficient and they fills out a lot of space. I ended up doing some simple "blinders" that showed to killl ressonances like nothing else.
Thick solid core wiring and a maximum simplified first order filter gives a kind of dynamic that makes horn-lowers drop their jaw
Most of the filter. 9x20W resistors for imp-correction, (siliconeglued)) can take some pulse-power, 3x400V Solen caps a.s.o. Everything tested out over years until I fould the point where I wasn`t able to hear any sound degrading. No Mundorf Supremes here, they ended up in thev trash
If you seal the outside of the cabinet in these laminated cabinets and not the inside you are increasing the expansion/contraction differential and likely to increase the risk of delamination.
The other problem could be that the end grain is very absorbent and any finish you apply will cause swelling and then when it dries contraction.
Coating both inside and outside with a two part liquid epoxy like West Systems might be beneficial before applying a finish.
And avoid water based finishes and glues.
@Alfebear
what about wrapping the sides in carbon fiber? That could look pretty neat. Prep, coat with carbon fiber and polish it. Other than that, maybe a thick veneer researching what the most flexible glue may be.
Keep in mind, I have no experience with the product.
The only issue that I can think of after that is if the MDF shrinks or expands, the outer layer of whatever you put on there could get little waves or bubbles in it
Last edited:
- Home
- Loudspeakers
- Multi-Way
- Now that's what I call a cabinet!