Hi All,
Hoping for some feedback from the community for my proposed design for the TB W5-2143 driver.
This will be my first ever diy speaker project, so my knowledge is pretty limited. Any help or advice is appreciated. I've seen a few other threads on more complex designs such as XKi design posted here, but trying to do a very simple full-range slotted-port bookshelf / stand-mount enclosure to match my pretty basic carpentry skills.
Here's the deisgn I have at this point:

I've modeled this based on the output from the online speaker calculator here as I don't have access to other speaker-design software (I'm on a Mac - any suggestions for something else I should be using or even a simple excel file appreciated if there are flaws with that site)
That site gives the ideal ported volume at 14.02 L based on the driver parameters. I've calculated my net box volume above at 14.1 L (took an area of the cross section less slot volume, lining, and driver and mutliplied it by the net enclosure width less lining - I realize this does not 100% accurately capture the volume of the driver, so actual net box volume will likely be slightly higher, but hoping that's close enough).
Here the outputs from the site:


Does this look good as a starting point? Any and all feedback appreciated. Thanks!
Hoping for some feedback from the community for my proposed design for the TB W5-2143 driver.
This will be my first ever diy speaker project, so my knowledge is pretty limited. Any help or advice is appreciated. I've seen a few other threads on more complex designs such as XKi design posted here, but trying to do a very simple full-range slotted-port bookshelf / stand-mount enclosure to match my pretty basic carpentry skills.
Here's the deisgn I have at this point:
I've modeled this based on the output from the online speaker calculator here as I don't have access to other speaker-design software (I'm on a Mac - any suggestions for something else I should be using or even a simple excel file appreciated if there are flaws with that site)
That site gives the ideal ported volume at 14.02 L based on the driver parameters. I've calculated my net box volume above at 14.1 L (took an area of the cross section less slot volume, lining, and driver and mutliplied it by the net enclosure width less lining - I realize this does not 100% accurately capture the volume of the driver, so actual net box volume will likely be slightly higher, but hoping that's close enough).
Here the outputs from the site:
Does this look good as a starting point? Any and all feedback appreciated. Thanks!
It will work, but i doubt it's the bst alignment. A bit bigger can make it tuned a bit lower as this will have an F3 of about 60Hz. A 22L with a siliar slot (20cm wide 1.8cm high) but only 14.6cm long will have an F3 of 50. Both will be limited with that bass to about 96dB per speaker, 99dB for a pair. But that will be enough in a typical living room setting. Note also that that slot is not an ideal slot as the ratio between the width and the heigth is 10:1 while it should not be more than 5:1 to be ideal. But as the air velocity will never be high (it's a big port for low volume) this will in reality not cause much issues (unwanted port noise) i think. I did the same with a bookshelf for my office with a Mark Audio driver and never got issues in the almost 2 years i daily use it. If you would push it untill an air velocity of +17m/s it would be an issue, but this driver can't handle that kind of power.
I haven’t paid much attention to the sims, but i did have a look at the alignments i have already done for this driver.
http://frugal-phile.com/boxlib/P10free/ClassicGR-Mar-Ken12-1v01-map-200412.pdf
Change the total length of the vent to 148mm.
This is a miniOnken style tuning which uses the high R of the slot vent as part of the alignment. One does have to extrapolate what that does to the response.
This won’t go as low as some more convential boxes but has a greater tolerance to dynamic T/S changes and results in articulate, elegant bass. They also tend to be a bit smaller.
dave

Thanks for the input Dave - to be clear, are you suggesting to leave the rest of my box design unchanged and just shorten the vent nown to 148mm?
Last edited:
Actually one more question - are you saying I should not put the driver on the same side as the vent?
Last edited by a moderator:
My preference is for mounting the driver on the wide side. But (for drivers small enuff to fit) a version for mounting on the “side” is popular. Usually i move the vent to be on the same face as the driver.
This driver is small enuff that you should be able to place it on the baffle with the golden ratio.
This is a visualization of a complete set (the next size smaller than the one above, they have been done for 3.6 to 35 litres so far.
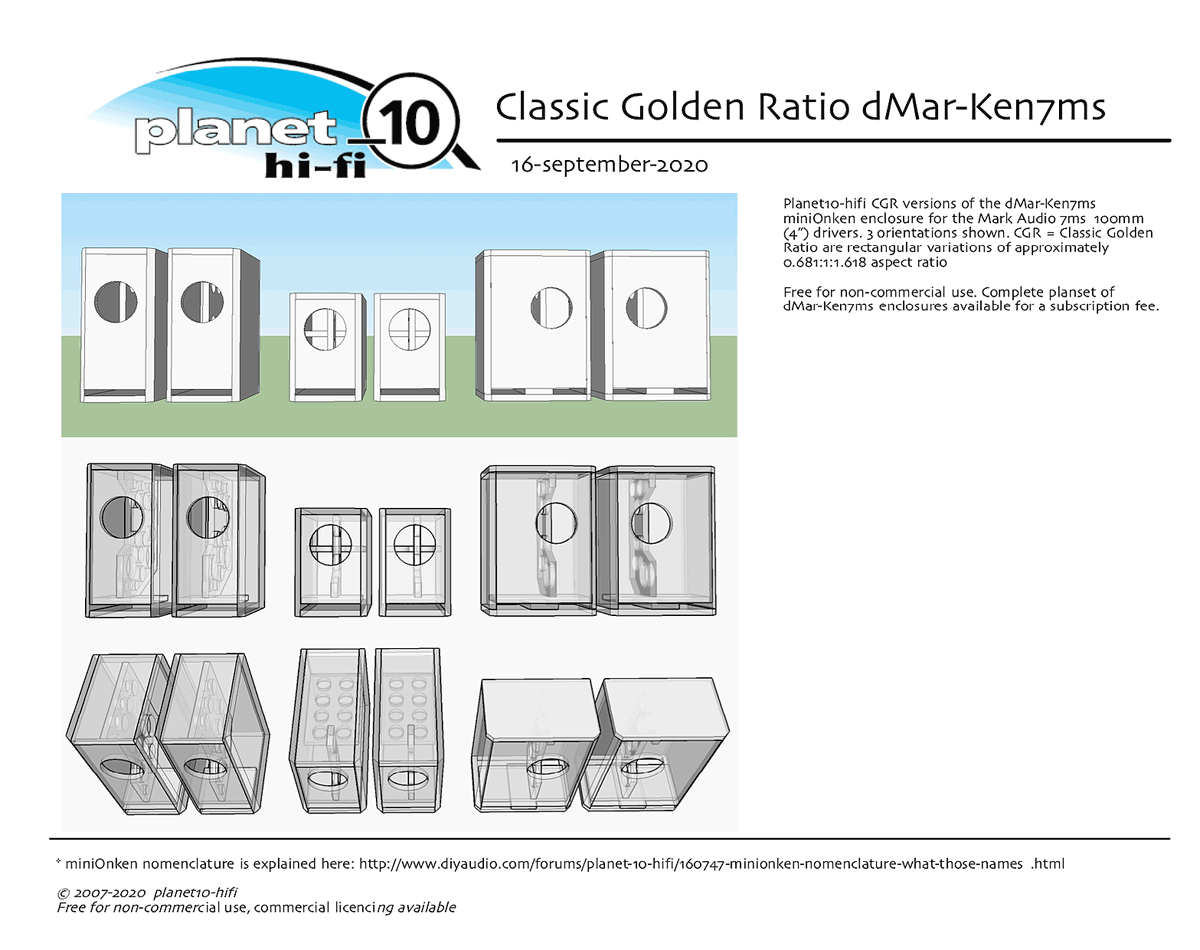
dave
This driver is small enuff that you should be able to place it on the baffle with the golden ratio.
This is a visualization of a complete set (the next size smaller than the one above, they have been done for 3.6 to 35 litres so far.
dave
Ok, that all makes sense. I think I would prefer a narrower speaker overall. Any need to modify the depth of the slot if the driver / slot are on the narrow side? Also, how crucial is the bracing to the design? Will I notice a big difference if I omit it?
Last edited by a moderator:
Some quick calculations give me a slot port depth of 85mm for an equivalent tuning if I place the port on the narrow side (so port dimensions 149w x 15h x 85d for narrow side placement vs. 240w x 15h x 148d for the placement shown on the plans). Sound right?
Last edited by a moderator:
That vent is not long enuff to effectively give a miniOnken tuning so you will need to tune lower.
dave
dave
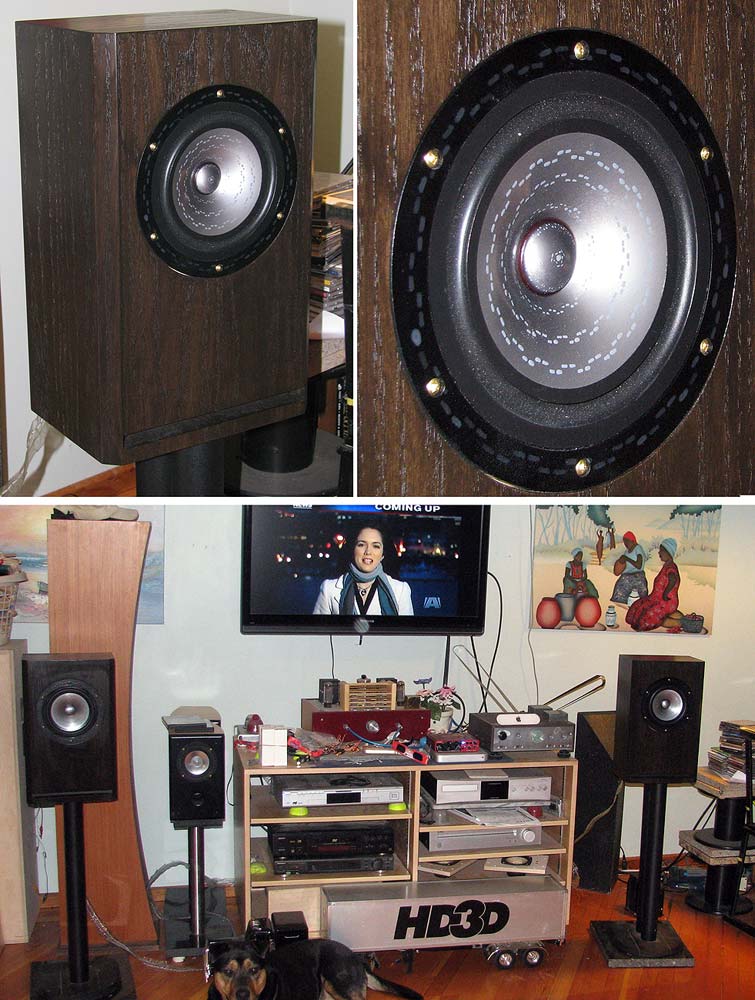
Just an update that I finished building the speakers - photos attached. Forgot to take any photos after adding the insulation / damping beore closing them up. I don't ahve any sophisticated measurement equipment but playing back Treble / Midrange / Bass decades from the Stereophile Test CD2 and looking at SPL levels with the NIOSH SLM app on my iPhone seems to indicate they have a pretty flat response down to 40Hz or so, with maybe a bit of a peak in the 60-55HZ region. They get plenty loud for the living room space I have them in right now and most importantly sound wonderful to my ears! Thanks again for all the feedback / refinement provided by other members to my original post!


Looks cool!Just an update that I finished building the speakers - photos attached. Forgot to take any photos after adding the insulation / damping beore closing them up. I don't ahve any sophisticated measurement equipment but playing back Treble / Midrange / Bass decades from the Stereophile Test CD2 and looking at SPL levels with the NIOSH SLM app on my iPhone seems to indicate they have a pretty flat response down to 40Hz or so, with maybe a bit of a peak in the 60-55HZ region. They get plenty loud for the living room space I have them in right now and most importantly sound wonderful to my ears! Thanks again for all the feedback / refinement provided by other members to my original post!
View attachment 1062218
View attachment 1062219View attachment 1062220View attachment 1062221
I'm also have same units and try to build your design. Having built that do you have any advice for me?
what do you use for damping material ?
Nothing really specific - the build was fairly straightforward.Looks cool!
I'm also have same units and try to build your design. Having built that do you have any advice for me?
what do you use for damping material ?
I built each speaker on its side (using the large side panels as a base, and installing the opposite side as a last step after all the insulation and rear terminals / wiring had been installed. I used clamping squares on each panel as it was glued together to keep things square, and when the final side panel went on it seemed like everything was true +/- 1mm or so. Using a rabbet joint instead of a butt joint for all the panels would probably have made assembly easier, but you'd have to increase the panel sizes in order to end up with the same finished dimensions.
I ended up using a 1/4" roundover bit on my router to ease all the edges as I figured it makes the speakers more resistant to nicks / dents along the edges and I like the way it ended up looking. I wish I had a large enough rabbet bit to recess the drivers so they are flush with the front surface vs. being proud of the surface, but they seem to be pretty hard to find (you'd need someting capable of an 11/16" rabbet).
The damping material I used was this stuff: https://solen.ca/en/products/solen-flex-xel-s-125-recycled-felt-absorbing-product it was thicker than what I wanted so I ended up using a serrated knife to carefully split each piece in half after cutting it to the required size, which gave a final thickness of 7/16" (~11mm). Attached all the insulation using 3M Super 77 spray adhesive, which worked really well. I also lined the entire interior cabinet with it including the back of the front panel around the driver, which isn't really shown in the drawing I posted.
If you have any questions as you go through the build feel free to post and I'll try to offer suggestions.
Last edited:
Nothing really specific - the build was fairly straightforward.
I built each speaker on its side (using the large side panels as a base, and installing the opposite side as a last step after all the insulation and rear terminals / wiring had been installed. I used clamping squares on each panel as it was glued together to keep things square, and when the final side panel went on it seemed like everything was true +/- 1mm or so. Using a rabbet joint instead of a butt joint for all the panels would probably have made assembly easier, but you'd have to increase the panel sizes in order to end up with the same finished dimensions.
I ended up using a 1/4" roundover bit on my router to ease all the edges as I figured it makes the speakers more resistant to nicks / dents along the edges and I like the way it ended up looking. I wish I had a large enough rabbet bit to recess the drivers so they are flush with the front surface vs. being proud of the surface, but they seem to be pretty hard to find (you'd need someting capable of an 11/16" rabbet).
The damping material I used was this stuff: https://solen.ca/en/products/solen-flex-xel-s-125-recycled-felt-absorbing-product it was thicker than what I wanted so I ended up using a serrated knife to carefully split each piece in half after cutting it to the required size, which gave a final thickness of 7/16" (~11mm). Attached all the insulation using 3M Super 77 spray adhesive, which worked really well. I also lined the entire interior cabinet with it including the back of the front panel around the driver, which isn't really shown in the drawing I posted.
If you have any questions as you go through the build feel free to post and I'll try to offer suggestions.
- Home
- Loudspeakers
- Full Range
- Simple Vented Enclosure Design for Tang Band W5-2143