I'm wondering if anyone else is annoyed by the way Modushop have engineered the method of connecting their front and back panels to the sides, when the cases have 10mm front panels - and would be interested in getting them to change the current arrangement?
For instance ... in the case of the Mini Dissipante cases - eg. 1MNPDA02-33-250:
1. you need to use M4 bolts to attach brackets to the top and bottom of each heatsink.
2. then you use short M4 bolts to attach the fronts of the 4 brackets to the back of the front panel.
3. and on the back panel, longer M4 bolts go through pre-drilled holes at each side, through the back end of each of the 4 brackets; these M4 bolts are fixed with a nut on the inside.
I find this is easy to do when the case is empty ... but very hard - if not impossible - to do when the case is full of the amp components! 😡
Whereas if they had engineered it so that:
1. there were recessed M4 holes in the front panels (like they do for Galaxy Maggiorato cases with 10mm front panels)
2. and these bolts went into threaded holes in the front ends of the heatsinks
3. whilst the back panels were 20mm wider - so that the pre-drilled holes lined up with threaded holes in the back ends of the heatsinks,
... you wouldn't need to get inside the cases to attach the front and back panels to the heasinks.
And the top & bottom panels would be attached to the tops & bottoms of the heatsinks by also making them 20mm wider. (And, preferably, rebating the heatsinks so the top & bottom panels are flush.)
The same problem occurs with those Slim Line cases which have 10mm front panels - such as 1NSL03350N. Modushop use brackets to attach the front panels to the sides - whereas what they should have done, IMO, is drill rebated M4 holes in the 10mm front panels which line up with the threaded holes in the fronts & backs of the side panels. If they did this then, again, you wouldn't need screwdrivers inside the case to attach the front panel.
As I said, I thought I'd post to see whether anyone else would like these cases engineered differently, to make them more convenient for filling up with amplifier components. 🙂
Andy
I've only ever made my own "boxes", but did my utmost to ensure that NO screwheads showed on the (1/8" Dural) front panel.
I have a 3ux300mm dissipante and ran into similar issues with attaching the pierced base plate/pan to the heatsink brackets and the front panel.
My solution was
1) to use a 6-32 riv-nut on the pan since that is all I had
2) to use a threaded stud ( cut the head off a long M4 screw) inserted into the front panel. Use a flat washer and nut to attach to the HS bracket.
I have a bag of hardware left over which I have no idea what it is used for. The assembly or lack of instructions needs improvement as well.
Some pretty easy mods to make assembly so much easier for me at least
Last edited:


I've only ever made my own "boxes", but did my utmost to ensure that NO screwheads showed on the (1/8" Dural) front panel.
Congratulations on making your own boxes. 🙂
Modushop do such a good job of drilling the holes in the front & back panels - and engraving text - is the reason I buy their cases.
I just wish they would be open to improving their product for their customers. 🙁
I don't mind screw heads on the front panel - for instance, see pic attached.
Andy
Attachments

Last edited:
Re the front panel see Zen Mods post #315 in the DIY Sony Vfet pt2(N channel) thread on the Pass Lbs section.
I discovered that a flexible shaft screwdriver / nutdriver tool was extremely helpful, when I assembled a few Modushop Deluxe chassis.
Since I didn't really know what would work best, I bought a few different models; the one that turned out to be most useful was this red one and second best was that orange one.
Since I didn't really know what would work best, I bought a few different models; the one that turned out to be most useful was this red one and second best was that orange one.
I discovered that a flexible shaft screwdriver / nutdriver tool was extremely helpful, when I assembled a few Modushop Deluxe chassis.
Since I didn't really know what would work best, I bought a few different models; the one that turned out to be most useful was this red one and second best was that orange one.
Very cool, tool, Mark - thanks for the links.
I may well buy one - but it wouldn't have worked, the way I had laid out the components in my case. 😡
Much easier if Modushop had designed their case assembly the way I suggested. 🙂
Andy
Another option is to use fully CNC’d aluminum cases from AliExpress. They fit together perfectly and many use exposed front socket hex cap screws. I have had excellent results with several cases from different vendors. The last one I got used a clever side access socket cap screws from the heatsink to attach the front panel. It lets you fully assemble or disassemble the chassis without needing access to any internal screws or nuts.
These are monoblocks for my next 100W Class A amp.
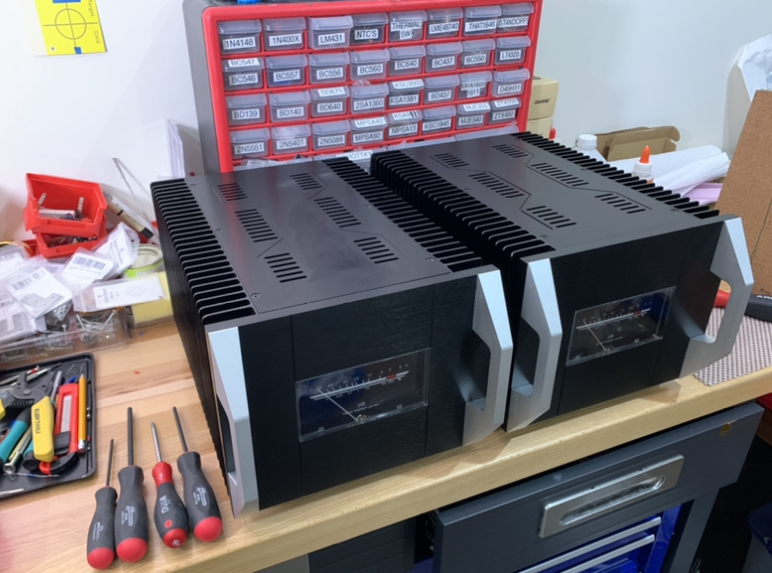
These are monoblocks for my next 100W Class A amp.
andyr:
I agree that attaching the front panel on the various Dissipante models to the rest of the chassis can be a pain, but it's a brief annoyance. I also strongly prefer a clean front panel with no visible fasteners. Your suggestion would make assembly easier to the detriment of the cosmetics. Perhaps that's shallow of me, but I spend far more time enjoying the look of my builds than sweating over bolting the front panel.
Regards,
Scott
Hi Andy,
Very valid points you bring up and I also agree, assembling a "loaded" chassis can become a game of Twister! But, I am most bothered by fit and finish. I have 5 Modushop cases and all involved additional Massaging for proper fitment and support. The VFET chassis required WAY too much effort to get the heatsinks flat. They should never have left Italy.
Cheers!
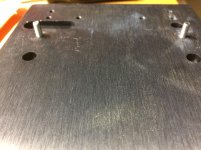
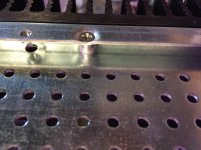
A couple of pics showing my simple mods.
In my case since I am using the chassis for a new design I was assembling and pulling apart a few times so I had enough and did a simple mod to make my life at least easier and not require flexible shaft drivers etc.
Image that, they used a PEM right beside my Aluminum riv-nut 🙂
Also not much on those top and bottom plate mm hex head screws. I wonder how many folks from the US need to go out and buy mm hex allen keys etc?
Other than that, I am content to specify the chassis for construction of a power amp. Although I still have to finish off with the bits that attach to the front and back, details details ...
Attachments
Last edited:
Another option is to use fully CNC’d aluminum cases from AliExpress. They fit together perfectly and many use exposed front socket hex cap screws. I have had excellent results with several cases from different vendors. The last one I got used a clever side access socket cap screws from the heatsink to attach the front panel. It lets you fully assemble or disassemble the chassis without needing access to any internal screws or nuts.
These are monoblocks for my next 100W Class A amp.
Thanks, X.
I had a look on AliExpress and found some aluminium cases. I found one that said "OEM Service: We accept customized hole"; do you simply send them a '.dxf' file, like with Modushop?
Andy
I have not tried that service but based on conversations with some of them, I think many can do from a hand sketch even. They often don’t charge extra if it’s just a few holes.
I generally buy them precut with holes.
I generally buy them precut with holes.
- Home
- Amplifiers
- Solid State
- Modushop cases - is anyone else annoyed? ...