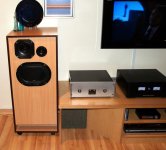
"Something a little different."
is it me or does those remind Mr Hankey from south park.
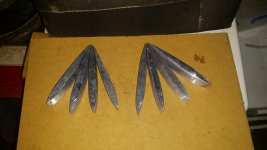
damn they are long!
is it me or does those remind Mr Hankey from south park.
damn they are long!
"Something a little different."
is it me or does those remind Mr Hankey from south park.
damn they are long!
Lol, I see what you mean.
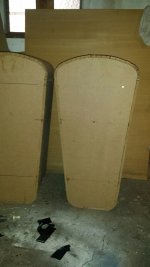
Not sure why but the pictures posted seem to have been elongated. They are not that long in reality.
@lcd950 I see only a subwoofer, where are the main speakers ?
@squiffything You can't call a tweeter something with a diameter larger that 2-3" and having a moving mass > 2-3 g
@squiffything You can't call a tweeter something with a diameter larger that 2-3" and having a moving mass > 2-3 g
...squiffything You can't call a tweeter something with a diameter larger that 2-3" and having a moving mass > 2-3 g
Noted, I mustn't call it a tweeter..... I can call it a tweeter, but I'd be wrong. If it's not a tweeter then it might be a mid/hi speaker and the tweeter will need to be added. I have to find me a little pot to stick a tweeter in.
🙂
Nice, but what is the advantage to use isobaric in TL?
And, is there some kind of horn sub in the equipment rack?
And, is there some kind of horn sub in the equipment rack?
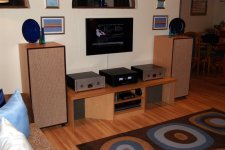
Great look Nick, very clean install.
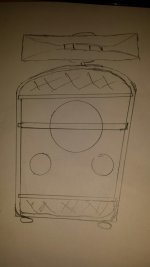
Would also love to know more about the iso-to, do you have a rough drawing?
Regards
Dean
Would also love to know more about the iso-to, do you have a rough drawing?
Regards
Dean
Hi neighbour, I'm in Langwarin.Great look Nick, very clean install.
Would also love to know more about the iso-to, do you have a rough drawing?
Regards
Dean
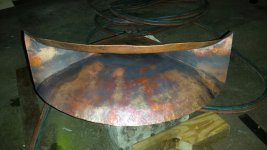
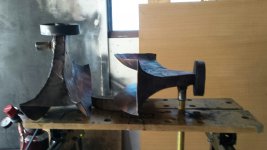
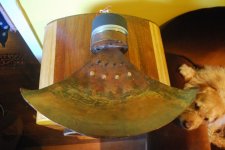
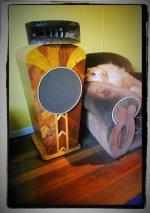
Part 1 My interpretation of Yuichi 480 horn and bass cabinet.
My interpretation of Yuichi 480 horn and bass cabinet.
This is my first attempt at anything horny.
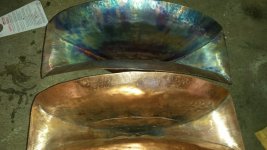
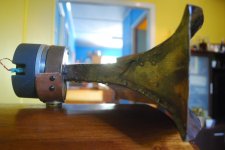
I used copper for the horn cut from 4" type b copper (nice and thick), annealed copper and beaten into shape. Used lead for the fins, made a mould and smelted.
Colourised the throat with any oxy torch to get different colours, (not very good at it,) then used pouring epoxy to keep the colour and make it shinny. The out side was left as is.
My interpretation of Yuichi 480 horn and bass cabinet.
This is my first attempt at anything horny.
I used copper for the horn cut from 4" type b copper (nice and thick), annealed copper and beaten into shape. Used lead for the fins, made a mould and smelted.
Colourised the throat with any oxy torch to get different colours, (not very good at it,) then used pouring epoxy to keep the colour and make it shinny. The out side was left as is.
Attachments


Part 21 My interpretation of Yuichi 480 horn and bass cabinet.
My interpretation of Yuichi 480 horn and bass cabinet.
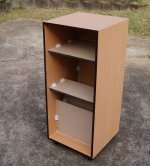
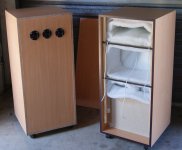
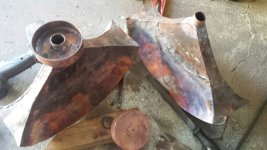
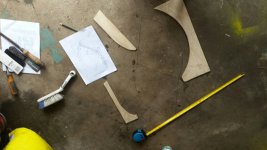
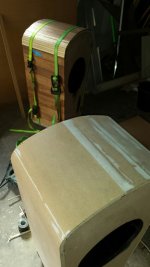
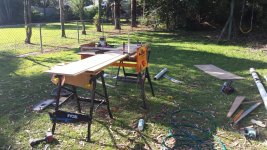
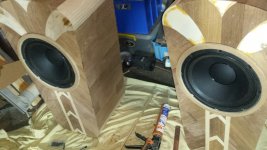
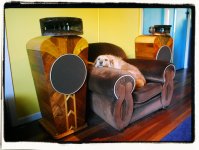
Second stage was the cab, had a rough idea of the shape and went along with it
Was using Eminence Kappalite 3012lf http://www.parts-exp...97zb000bib0005c
In a mid sized vented cabinet of about 50ltrs.
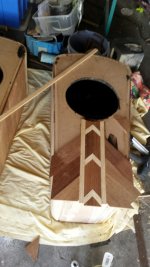
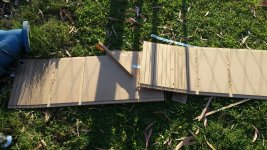
Used 16mm MDF and cladded it with a mixture of 7mm x 70mm Merbau slats and pine.
Kerfed the rounded bits (what a bugger to do)
All joints were rebated for strengthening.
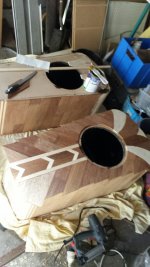
Top and bottom compartments were braced.
Bracing behind the driver.
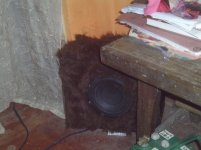
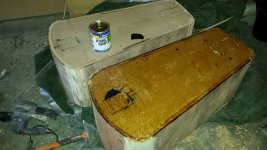
Filled the bottom compartment with dry river sand.
Painted internals with tar paint.
My interpretation of Yuichi 480 horn and bass cabinet.
Second stage was the cab, had a rough idea of the shape and went along with it
Was using Eminence Kappalite 3012lf http://www.parts-exp...97zb000bib0005c
In a mid sized vented cabinet of about 50ltrs.
Used 16mm MDF and cladded it with a mixture of 7mm x 70mm Merbau slats and pine.
Kerfed the rounded bits (what a bugger to do)
All joints were rebated for strengthening.
Top and bottom compartments were braced.
Bracing behind the driver.
Filled the bottom compartment with dry river sand.
Painted internals with tar paint.
Attachments
-
 Eminence l.jpg160.3 KB · Views: 446
 -
 Eminence g.jpg142.5 KB · Views: 391
 -
 Eminence j.jpg185.2 KB · Views: 484
 -
 Eminence m.jpg187 KB · Views: 417
 -
 Eminence h.jpg216.3 KB · Views: 281
 -
 Eminence f.jpg158.8 KB · Views: 239
 -
 Eminence c.jpg374.8 KB · Views: 250
 -
 Woofer box a.jpg121.8 KB · Views: 547
 -
 Eminence b.jpg368 KB · Views: 438
Part 3 final My interpretation of Yuichi 480 horn and bass cabinet.
My interpretation of Yuichi 480 horn and bass cabinet.
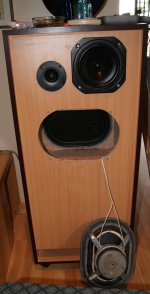
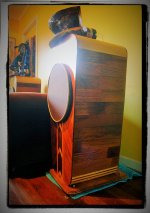
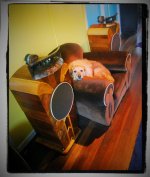
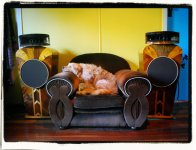
Made a base, attached the horn installed the drivers.
faitalpro hf 10ak http://www.parts-exp...-bolt--294-1011
Mixed up some Shellac and gave it dozen or more coats.
Made a cover for the eminence drivers.
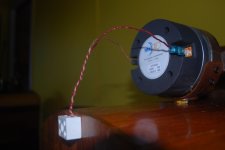
Made some wires
All done (except still working on the minidsp), kindly modeled by Jasper.
My interpretation of Yuichi 480 horn and bass cabinet.
Made a base, attached the horn installed the drivers.
faitalpro hf 10ak http://www.parts-exp...-bolt--294-1011
Mixed up some Shellac and gave it dozen or more coats.
Made a cover for the eminence drivers.
Made some wires
All done (except still working on the minidsp), kindly modeled by Jasper.
Attachments
-
 speakers finished 2.jpg203.4 KB · Views: 481
 -
 speakers finished 11.jpg193.6 KB · Views: 430
 -
 speakers finished 16.jpg208.2 KB · Views: 512
 -
 Eminence r.jpg210.9 KB · Views: 503
 -
 speakers finished 19.jpg173.1 KB · Views: 591
 -
 Speaker full file b.jpg526.8 KB · Views: 739
 -
 Speaker full file d.jpg875 KB · Views: 715
 -
 Speaker full file e.jpg647.3 KB · Views: 786
 -
 Speaker full file f.jpg900.9 KB · Views: 681
 -
 speakers finished 1.jpg188.4 KB · Views: 488
Last edited:
From one builder to another, very well done, stunning...and good on you for making the horns....wow.
Great build. Congratulations.
As always, I recommend varnishing the woofer drivers with Dammar varnish. 😉
Cheers,
M.
As always, I recommend varnishing the woofer drivers with Dammar varnish. 😉
Cheers,
M.
Paul your woodwork is stunning! I have a question about your horns that I hope doesn't offend you. They appear to be made from metal, doesn't that make them ring?
Thetubeguy1954
Thetubeguy1954
- Home
- Loudspeakers
- Multi-Way
- System Pictures & Description