If you mean with the driver mounted in the enclosure - Yes.
It's best to get the driver horizontal when applying the coat, so lay them down if possible. For speakers that aren't precious you can return them to their upright position after a minute or two. You should let the Micro Gloss dry for a few hours before listening though.
Cheers,
Alex
It's best to get the driver horizontal when applying the coat, so lay them down if possible. For speakers that aren't precious you can return them to their upright position after a minute or two. You should let the Micro Gloss dry for a few hours before listening though.
Cheers,
Alex
Thanks for the reply Alex!
They're open baffles with crossovers sitting loosely at the bottom so they can't really be moved at all without breaking something. I may just have to remove the drivers then, but I really can't be doing with taking out all 8 woofers lol
They're open baffles with crossovers sitting loosely at the bottom so they can't really be moved at all without breaking something. I may just have to remove the drivers then, but I really can't be doing with taking out all 8 woofers lol
If removing drivers is too much hassle, just do them in place.I may just have to remove the drivers then, but I really can't be doing with taking out all 8 woofers lol
Apply the Micro Gloss sparingly to avoid runs and you should be fine.
Cheers,
Alex
Simon, were you going to EnABL those woofers? If you do you will OWN the entire neighborhood, whenever you need an 1812 Overture fix. Lot's of folks have no idea how good an EnABL'd woofer is, multiples are just that many times better. Think no extraneous noise, whatsoever, and sharp bass transients that just roll right through walls, floors, ceilings, people and windows. Quite interesting to find you have as much bass in your back bedroom as you do in the listening room in the front of the house. And then you tour down the street, watching the heads stretch out on necks, attempting to discover where the wild animals are.
Bud
Bud
lol, ok I will try doing some thin coats of gloss with the drivers in situ. The drivers are only cheap as this was really a test of whether or not I get on with OB speakers. The mids are EnABL'd (badly) as are the woofers. The mids also have electron pools and they did do good things for these speakers. The woofers are only 7" in series-parallel.
The next speakers are well under way (very slow progress) and will use a 1" compression tweeter in a waveguide, Eminence Beta 8a and 2 x 12" cheap PP woofers augmented by T-bass. Will be active between top/bass when finished unless about 80dB is enough sensitivity...
I must say the reason I'm being so slow with the new speakers is largely because the cheap ones sound so superbly musical with EnABL, EPs, T-bass, phase plugs on mids and of course that open baffle "speed"!
Thanks for the advice guys, I can't wait to hear the proper speakers EnABLed, especially after reading the Beta 8a guide you did Bud!
Simon
It always amazes me, finding out how good speakers really are at reproducing music, as opposed to audio reproduction, once their difficulties with room and air are overcome. I will be very interested in your progress Simon, I am moving towards an open baffle madness myself, but have yet to build up the precursor.
Just for fun, you might try using stick & release 0.003" thick, clear, shelf covering plastic to make an EnABL pattern for your baffle edges. Worked wonders on Rene' Jaeger's Maggies, used out on the two wooden side trims. Fairly quick and easy to do and removable.
Bud
Just for fun, you might try using stick & release 0.003" thick, clear, shelf covering plastic to make an EnABL pattern for your baffle edges. Worked wonders on Rene' Jaeger's Maggies, used out on the two wooden side trims. Fairly quick and easy to do and removable.
Bud
Bud,
You've probably heard dipoles already but there's a certain trade-off you take whereby you lose the smooth, warm full sound of a boxed speaker and take on a completely alien type of sound reproduction, which is both good and bad. Without the whoompa-whoompa box effect it can sound like it isn't solid enough, and to help with this I strongly recommend Graham Maynard's transformer bass circuit. With this and EnABL the sound of my basic 3-ways has been transformed from "something's not quite right there" to "those sound really good".
I did already apply an EnABL pattern to the baffle edges using paint. It's probably too thin to do much but I did feel I could hear some changes, with the sound better coming away from the baffles. It wasn't quite like applying it to the drivers though.
I really need to crack on with my next project and get listening to those ones. I will be asking you questions in that thread!!
Simon
Here is a report on a Fostex F200 A I recently put EnABL on. After some listening to this driver with 500 hours on it I discovered that it needed a slightly revised front of cone treatment.
Here is the link to the comments and I have attached the revised patterns below.
Review of the EnABL process as applied to Fostex F200A drivers.
Anyone who has treated their F 200 A drivers need only add the one adjacent pattern ring set, to achieve what is spoken of in the review. All Gloss coating and backside patterns remain the same.
Bud
Attachments
Considering EnABLing my pair of Fostex 207's in my half-changs. Ordered the kit yesterday so probably will start work next week. Every little bit of improvement counts. Do enough little bits and you've got yourself a whole new animal! 🙂
Please do yourself a huge favor and don't EnABL those drivers.... first. I will assume, hopefully, that you have read the tutorials on how to EnABL drivers with the tools you have ordered. Reading is not a substitute for hand eye coordination practice. You need to have at least 4 drivers under your belt before attempting something you care about. And then there is the whizzer. These are real beasts to tame, it can be done and I do know how but you will need many hours of listening to EnABL'd drivers before you can determine what is wrong and where it is coming from.
The problem here is that the improvement is not just a little bit. It is actually a very different sort of thing from what you will be used to hearing. On one hand it is quite subtle, being more detail at ever lower levels and on the other hand it is quite misleading, with all of the usual clues about speaker stress having disappeared.
I am sure you can deal with these issues, but not for your first speakers EnABL'd and with whizzer's added to the mix.
Bud
Before you tackle the FE207, practise on some lesser drivers.
Much of this thread applies to 207. http://www.diyaudio.com/forums/full-range/133645-coating-phase-plugs-fe167.html
dave
Much of this thread applies to 207. http://www.diyaudio.com/forums/full-range/133645-coating-phase-plugs-fe167.html
dave
And then there is the whizzer.
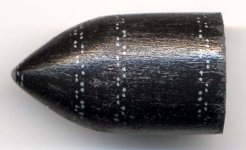
Phase plugs also need EnABLing. (picture is of FE167eN plug)
dave
Attachments
Appreciate everyone's concern. I will not rush the process. Still gathering info.
EnABLed phas plugs, now that's just cool. 🙂
EnABLed phas plugs, now that's just cool. 🙂
Here is a convenient list of many of the threads. There are many more that I haven't added in, due to slacking skills. Mostly we just want you to be happy, so we don't have to turn those phase plugs into Cal's tool to fend off the unbelievers with.
Bud
Bud
Attachments
Hello All,
I am interested in applying the EnABL techniques to my pair of E-waved Advents.

They are using the Selenium D220ti compression drivers on the JBL waveguide. The woofer is a refoamed Advent.
Any help and suggestions would be appreciated.
Depending on how the EnABL process works with the E-waved Advents, my next project will be to install the QSC waveguide and AE TD15M woofer in a pair of JBL 4320 cabinets using the techniques I learn from EnABLing the Advents.
I am interested in applying the EnABL techniques to my pair of E-waved Advents.
They are using the Selenium D220ti compression drivers on the JBL waveguide. The woofer is a refoamed Advent.
Any help and suggestions would be appreciated.
Depending on how the EnABL process works with the E-waved Advents, my next project will be to install the QSC waveguide and AE TD15M woofer in a pair of JBL 4320 cabinets using the techniques I learn from EnABLing the Advents.
Hi Wayne,
Your horn flare may need some patterns. Your woofer will definitely need some patterns and the mounting face, just inside of the decorative round can also benefit, though this will be the most subtle of the three applications.
There are two paths you can take. There is a standard treatment regimen that uses a minimum number of patterns and an acrylic overcoat to control the steering aberrations that transient resonance induces.
Alternately you can learn how to find the specific locations, on all three surfaces, that have non minimum phase problems. Some are as above, just steering nodes. Others will be actual resonance nodes that are due to the physical construction of the three areas of interest
The first choice is a relatively simple application to pattern. The second is more involved but the real time will be spent learning how to find the three different types of contributors to the problem.
For the first choice I can provide a simulated pattern set on the picture you have provided. You then need to purchase the tools and materials to accomplish the task. An easy source is Ed La Fontaine here.
EnABL kit - diyAudio
Ed has a complete kit available and the price is very nice. Once you have the kit you will need to find some sacrificial drivers to practice upon. You need to acquire some unusual, but not difficult to learn, hand eye skills pertaining to holding a calligraphy pen, upside down, on a multi-curved surface, while making small, fairly precise movements with fingers and lower arm. Not as difficult as it might sound.
Since you have to do this anyway, you could also learn tapping skills. The tap test allows you to hear what the surface of the area you want to correct is actually doing to steer the wave forms that get involved with it. The ideal tool is the back end of the calligraphy nib holder, a dense wooden rod with a rounded, tapered end. You lightly tap the surfaces, in a radial fashion, from emitter center to outer periphery and listen to the decay. The decay of the sound, once you have become sensitive to it's properties, will provide you with a "direction" that the decay appears to transit towards.
As an example, in a typical cone, tapping from voice coil cover to surround. Doing this will show you a number of zones of direction that transit from toward the inner portion of the surface being tapped, to no particular direction and out just a few 10th's of an inch the decay will transit toward the outer portion of the device. Right at the poingt where the directionality flips over is the center of the a steering element and an EnABL pattern ring needs to go right on top of it..
There will also be places where the decay just goes dead, seemingly swallowed up in the cone material. A pattern needs to be applied right at the edge of this zone, with the inner ring just before and the outer ring just after the change point.
Once all of the decay direction change points have been dealt with, the decay transit direction will uniformly point outward, radially, from the emitter center to the edge of the mounting fascia, regardless of where on the surfaces you choose to tap.
So, order the kit from Ed and let's see if you can learn this tap test skill. I am sure you can and it is more than worth the effort as once you have a driver and box surface where all of the steering zones have been dispersed, you will have a clear and coherent 90 db down of music to listen to, with complete transients, clear and correct tones and enormous depth of field, regardless of full range or multi-range system construction. Just to top it off with, your dynamic range will loose it's compression characteristics. The difference between the two treatment regimens is the level of coherence and the precision and depth of the illusory sound field. Neither is "better", but the tap test patterned system is definitely more.
Meanwhile, I will photoshop your picture so you can see what a standard treatment set of pattens will entail.
Bud
Last edited:
Bud, can you point us to detailed before and after measurements?
I found these in the txt file:
http://planet10-hifi.com/johnK-test/pics
http://picasaweb.google.com/hpurvine for all pics
http://picasaweb.google.com/hpurvine/HempFR8
http://picasaweb.google.com/hpurvin...ex127ETreatment
http://picasaweb.google.com/hpurvine/LowtherPreTreatment?authkey=VnmOeDveOOk
But there are actually no measurements available in them.
Thanks,
Dan
Last edited:
Thanks you for your time and information, Bud.
I have been in touch with Ed. He is traveling at this time, but I hope to obtain one of his kits when he returns.
I do have a few spare drivers to practice on. I can also supply other pictures of the E-waved Advents, if that would help any.

The rear of the waveguide and the woofer have both been damped with Mortite.


I have been in touch with Ed. He is traveling at this time, but I hope to obtain one of his kits when he returns.
I do have a few spare drivers to practice on. I can also supply other pictures of the E-waved Advents, if that would help any.
The rear of the waveguide and the woofer have both been damped with Mortite.
- Home
- Loudspeakers
- Multi-Way
- EnABL - Listening impressions & techniques