Hi everyone, I'm new to the forum and this is my first post ever.
I apologize in advance for the long post.
As a budget-conscious audiophile, I decided last year to assemble a budget-wise streamer
but of quality, based on Raspberry.
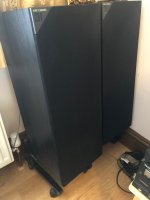
I already had a stereo hifi system composed of:
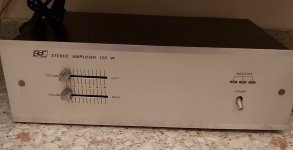
- Advance Acoustic X-i60 amplifier
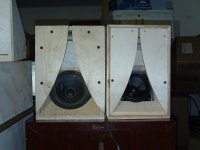
- Totem Acoustic Mite speakers
The whole system is inserted in IKEA cubes hanging on the wall and suspended 1.5 meters above the ground.
So I assembled the streamer with Raspberry like this:
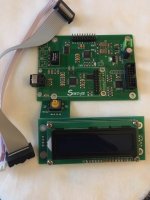
- Raspberry PI 3 B +
- Official Display Touchscreen 7 ’’
- SmartPi Touch 2 Case
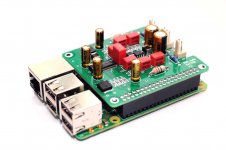
- AUDIOPHONICS Digipi + PRO Digital interface WM8804
- QED Performance Digital Coaxial Audio Cable
- LEICKE power supply 20W 5V 4A
- SanDisk microsd 16 GB
- USB LED to control the shutdown
- Volume as software (
2.779 so far)
[240 euros in total]
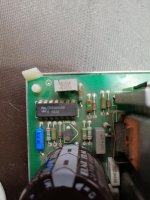
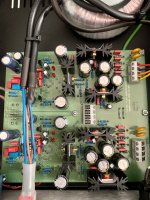
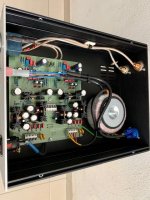
The streamer connects to my amplifier's DAC [the Cirrus Logic CS8416 chip (24 bit 192 kHz) is associated with a CS4344 DAC (24 bit 192 kHz), signal filtering is guaranteed, for the CS4344, by a filter organized around to the operational amplifiers NJM4558 of the manufacturer New Japan Radio Company] via the aforementioned coaxial cable.
After a few months of listening to webradio and Spotify, I am very happy with the purchase.
Some things have happened, however, that push me to an upgrade.
While using the touch display and starting the system, Volumio signaled me an error of "Under-voltage detected!" and a lightning bolt image appeared in the top-right corner of the screen.
I search on the web and I have identified a temporary solution by adopting the CRAAP settings mentioned here:
Archimago's Musings: MUSINGS: Raspberry Pi 3 B+ "Touch" Optimizations; CRAAP Settings, and the "Extremus" Filter Setting.
# Archimago's CRAAP Pi 3 B + Settings ...
arm_freq = 1000
sdram_freq = 500
core_freq = 400
gpu_freq = 300
over_voltage = -3
over_voltage_sdram = -3
# Force max current to USB 0 = OFF (600mA) 1 = ON (1.2A)
max_usb_current = 0
in this way the raspberry is weakened to offer a better sound and the error has never occurred again.
However, I realize that it is necessary to offer adequate power both to the display and to the raspberry plus the Digi HAT in a case suitable for the rest of the hifi system. Finally, I realized the usefulness of a power button that allows me to easily switch the streamer on / off.
I decided to write here, first of all because my skills in electronics and assembly were exhausted with the construction of the first streamer (which is practically child's play, everything is ready for use!) And because I believe that a DYI solution is the most economically sustainable. In recent months I have searched a lot and the idea that I made of the future streamer could be very close to an approach of this type: (I specify that I would like to keep as many pieces as possible made in the first purchase)
Raspberry Pi Hi-Fi Audio Streamer With Touchscreen Control and Max2Play : 9 Steps - Instructables
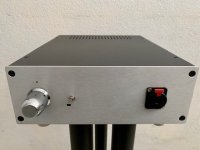
I created a render of what I imagine:
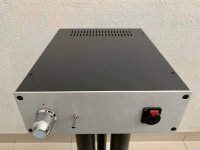
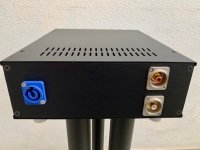
in the front side the touch display, inserted in a ventilated rectangular case, the power button on one side, behind the coaxial socket and the LAN socket, in addition to the power socket of a toroidal linear power supply, a small on / off switch; inside the raspberry, the digi HAT, the linear power supply, possibly all located on the bottom of the case, to avoid extension cables.
My main goal is to get the best possible audio quality with the least expense, in the simplest way possible.
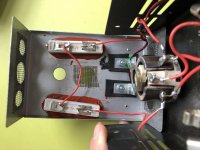
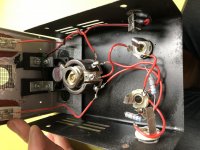
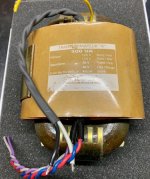
The environment in which the streamer must be inserted is above the current amplifier, which heats up a lot, so the case will have to take up as little space as possible. I attach photos. I specify that it is an IKEA cube suspended and affixed to the wall. The maximum dimensions of the environment are 43 cm wide, 28 cm deep (the same depth as the amplifier), 11 cm high. Considering that I would like to be able to take advantage of the support base of the SmartPi Touch, 18 cm wide, a possible case could be 22x28x10.
As I said, I read a lot and there are beautiful DIY projects that I found, but with few details on the method, made by people who are experts in electronics, welding, carpentry etc:
HifiBerry streamer in a classic audio case | HiFiBerry
Music Server….my way | Sound&Music Blog
HiFi Streamer : Build thread - Diy Volumio Projects - Volumio
https://theartofsound.net/forum/showthread.php?62839-Audiophonics-RaspTouch-case-with-DigiOne
Best way to lay out multiple power supplies (Raspberry streamer)
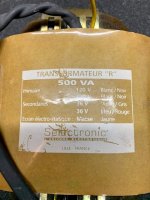
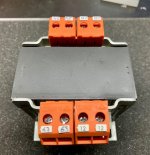
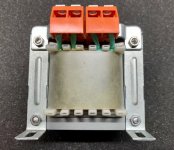
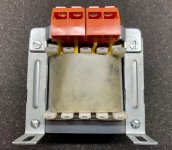
On the topic "best linear power supply for Raspberry" there are a large number of links and tips:
https://community.volumio.org/t/psu-for-raspberry-3/10012/3
https://musicboxit.wordpress.com/2019/04/24/alimentatore-lineare-raspberry/
https://www.dimdim.gr/2018/03/linear-power-supply-for-the-raspberry-pi-is-it-worth-it/
http://www.raspyfi.com/the-best-raspberry-pi-power-supply/
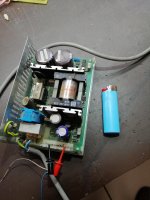
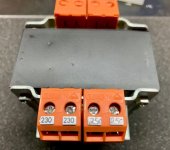
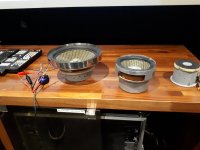
I have a keen eye on the wallet so I have found some PSU from China that could be right for me, honestly I don't understand anything about the differences:
https://www.ebay.it/itm/Assemble-5V...e=STRK:MEBIDX:IT&_trksid=p2060353.m1438.l2649
https://it.aliexpress.com/item/3289...88#3325#6_668#2846#8108#112_668#2717#7565#748
(which is the same but without the connectors)
https://www.ebay.it/itm/HiFi-Walt-J...784995?hash=item594102b1e3:g:QEgAAOSwGTheBwAt
I read that it would be preferable to avoid using the USB connectors present in the first link and to use the stripped cables, but I think it is necessary to carry out soldering. This is definitely the part I ignore most. Do I need something else for power connection?
For the power button I would have found this solution, the RemotePi (only the version for PI 4 is available from their website):
https://www.msldigital.com/collecti...s/remotepi-board-for-pi-4-external-ir-and-led
that together with an extension cable of the GPIO and a ready-made LED button should allow me without soldering anything to have the button together with the HAT (I asked by email directly to them for confirmation, and they said that the RemotePi can power all together correctly with the USB-C socket after the GPIO 18 -> GPIO 17 modification has been done on the RemotePi Board, made by them before purchase).
This solution is particularly convenient, as there is a plugin for Volumio that deals with the software side for the implementation of the various scripts
https://www.msldigital.com/collecti...nated-pushbutton-for-remotepi-board-for-pi-4b
https://www.msldigital.com/collections/all-products/products/gpio-adapter
https://www.msldigital.com/pages/remotepi-board-compatibility-matrix
finally this could be an alternative to RemotePi, but perhaps more complex:
https://www.audiophonics.fr/en/raspberry-pi-and-other-sbc-accessories/audiophonics-pi-spc-ii-power-management-power-supply-for-raspberry-pi-p-11504.html
So let's come to some technical questions with a premise: I have no skills or equipment in soldering, in advanced electronics, in advanced modding of the Raspberry. I am a normal user who has many questions but little experience!
Going into more detail, what I understood is that it would be preferable to separate the power supply of the Raspberry and the HAT, acting on the single pins of the raspberry.
But with my current HAT, fully welded, how can you get such a thing?
Do you think the linked power supplies are valid for what I try to achieve?
What else should I take into organize everything? Shield the various wires inside the case? With what?
But I realized that you don't need a reckocler (like Kali) for the HAT digi:
https://support.hifiberry.com/hc/en-us/community/posts/207749389-HiFiBerry-Digi-Pro-beta-test?page=5
Coming to the case, obviously I am not able to handle aluminum in an advanced way. In your opinion, could wood be a valid alternative? I have seen many projects in this regard, but almost everything involved an aluminum base and a wooden case around it.
I close by saying that I know people who could help me both for the advanced electronic part and for the construction of the case (I hope in wood). I would like to receive advice if the road I am traveling on is right. Maybe someone after me will find it useful.
Thanks!
Greetings from Italy!
Gianluca