First Part - YouTube
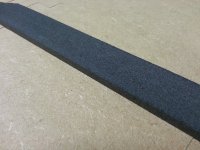
Video of the first test part. Its one of the waveguides for the Apollo. Came out ok in terms of dimensions and accuracy. The 25mm MDF is made from was cheap rubbish and furred up like mad on the waveguide profile cutout. Will be much better with the Valchromat.
Went fairly conservative on the speeds as it was my first part. Its around 3m/min cutting here.
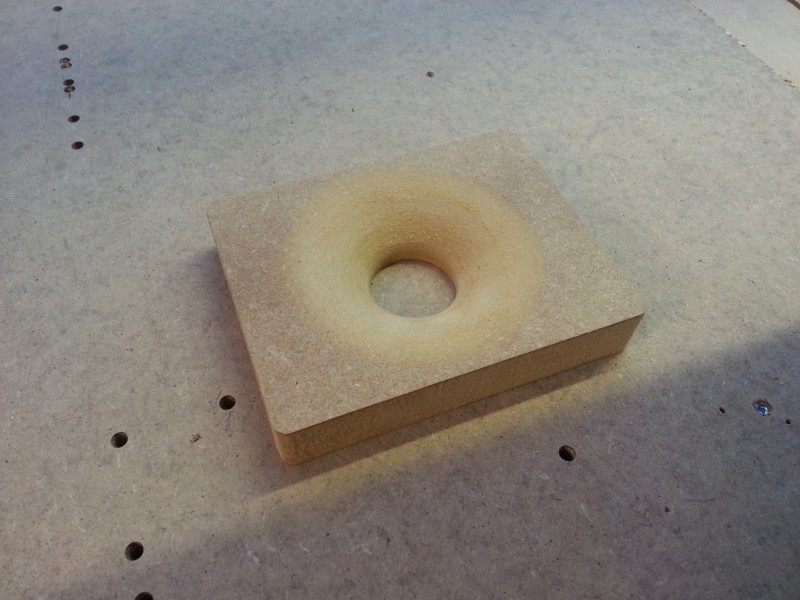
The MDF will come out nicely if you shellac it.
First cut. Exciting isn't it?
")
Member
Joined 2009
BTW, I think you could sell that waveguide plunge-sound as a sample to the local clubs..
I was watching and thinking the same thingThe waveguide cut looks great!
I found myself "dancing" in my seat to it.. How sick is that?
Fresh bed and spoil board going on tomorrow. Got a little carried away with testing and setup and they got maimed/chopped into little pieces
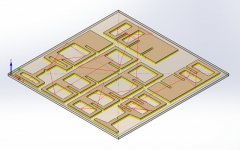
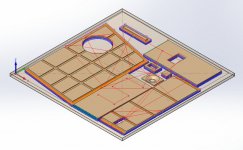
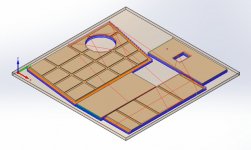
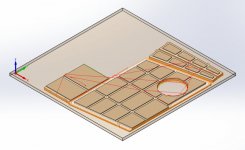
After that it'll be the first of the Apollo parts. Got them all laid out in CAD with tool paths done. Not particularly interesting but they give an idea of how the parts are laid out on the sheets. Which btw is going to take 8x 4ftx4ft 25mm Valchromat and 5x 4ftx4ft 18mm MDF to make just the cabinet portions for a pair. These will certainly make a good dead lift when assembled!
I was going to make a dust shoe before starting but that seems very boring and after waiting nearly a year to cut something I just want to get stuck in.
Attachments
The MDF will come out nicely if you shellac it.
First cut. Exciting isn't it?
Very cool project! I just stumbled across this thread as I normally am over in the Full Range forum. Is there a reason why you don't machine the waveguide out of either aluminum or even plastic like delrin or nylon? Not too big of a piece, as long as you are cnc milling it. Great work, I will be coming back to see how this goes.
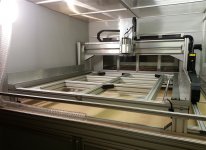
Levelling Bed - YouTube
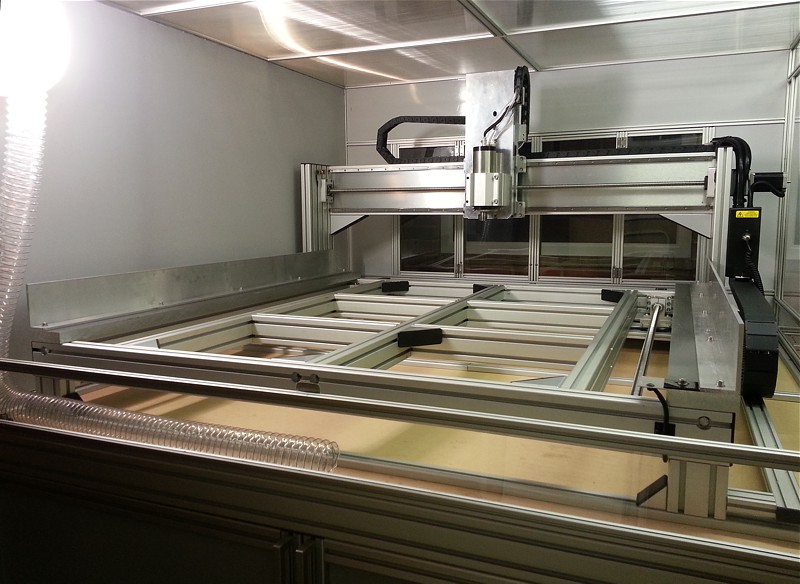
Bed is now levelled and ready for first cuts tomorrow. Can't wait!
Before
After
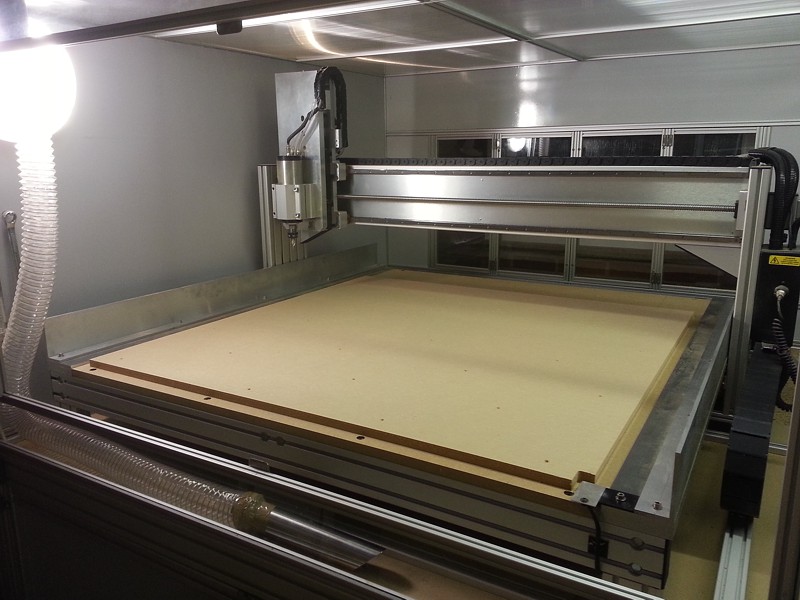
Close up after levelling
Bed is now levelled and ready for first cuts tomorrow. Can't wait!
Before
After
Close up after levelling
Attachments

What a day! Got loads done even with my complete lack of CNC skills. I gotta say even with just a few days worth of cutting experience under my belt I'd have a hard time going back to doing things by hand so its well worth all the effort its taken to get here. There's a certain novelty to drawing something in cad, taking it to the cnc and have it magically cut exactly as you intended. Opens up so many possibilities and I'm only scratching the surface of what I'd like to try at the moment. Its not just the precision but also the speed. What you see here in this post took about 60 minutes total cutting time, the majority is spent checking the code and working out how to safely fix the work piece down but that'll get faster with experience.
I'm quite into videoing at the minute so here's another with snippets of various operations used to create the parts. I've added music and cut the sound this time because after listening to it cut for days it gets a bit old!
Apollo Part 1 - YouTube
Now on to the images
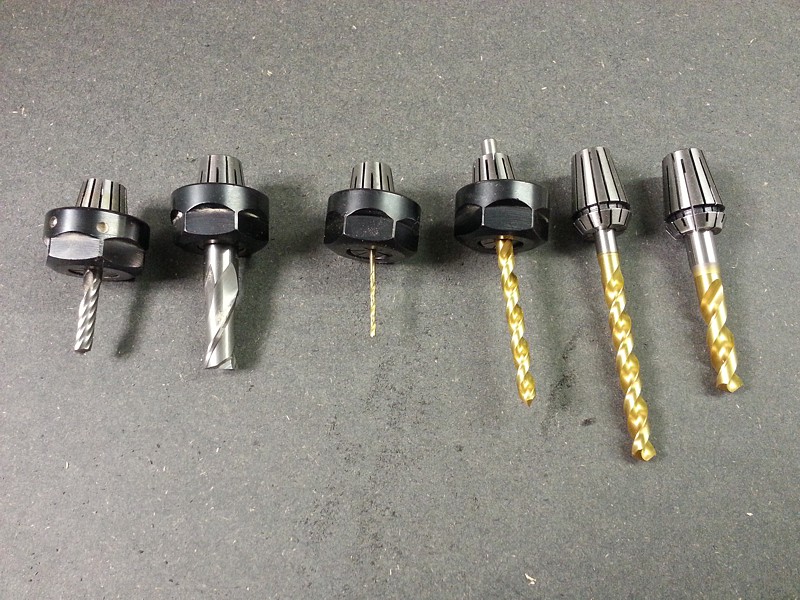
There were a lots of cutters used to create the parts. Really glad I have the semi auto changer otherwise setting up the tool height would quickly become a chore and time sink. This way its done in a matter of seconds.
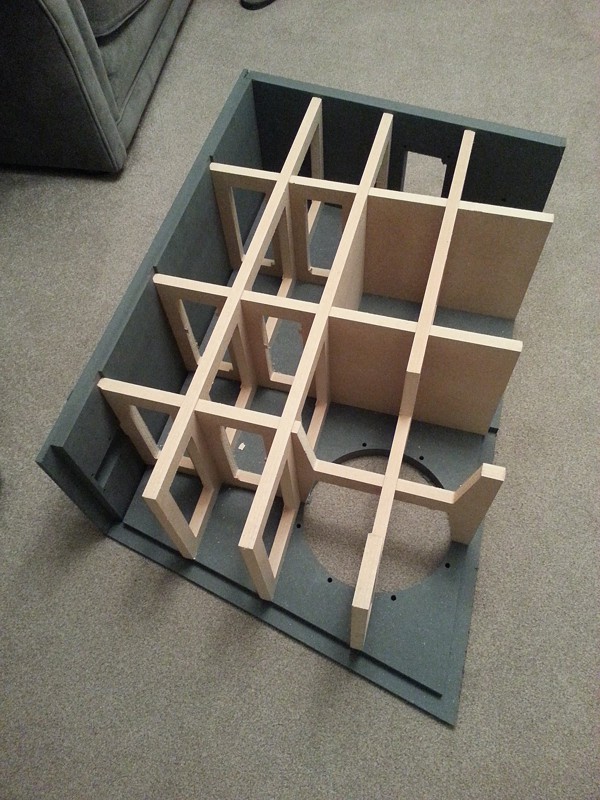
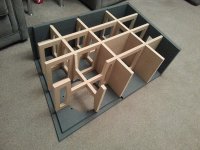
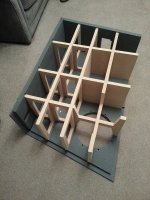
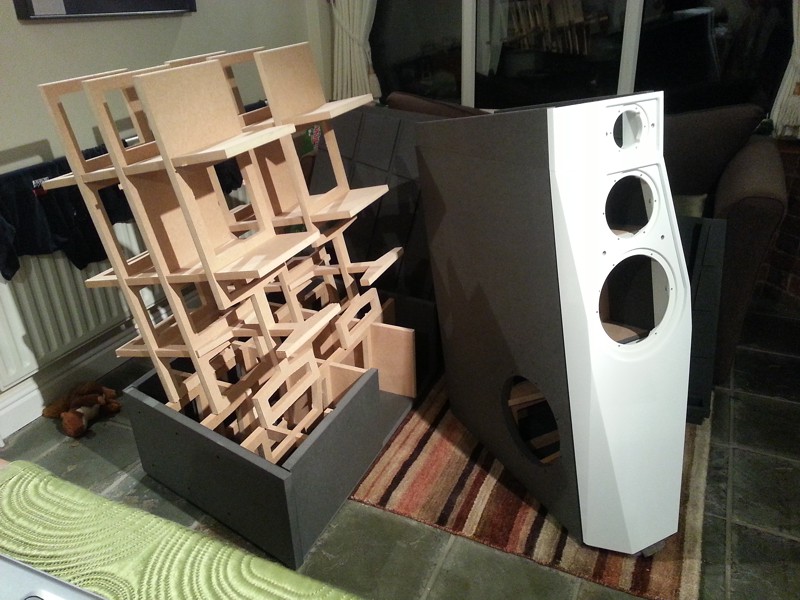
The test fit of the interlocking bracing.

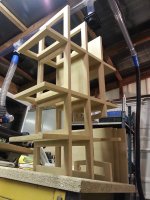
And another test fit after the Valchromat based parts were completed. Let me tell you it felt good when everything just slid together perfectly.

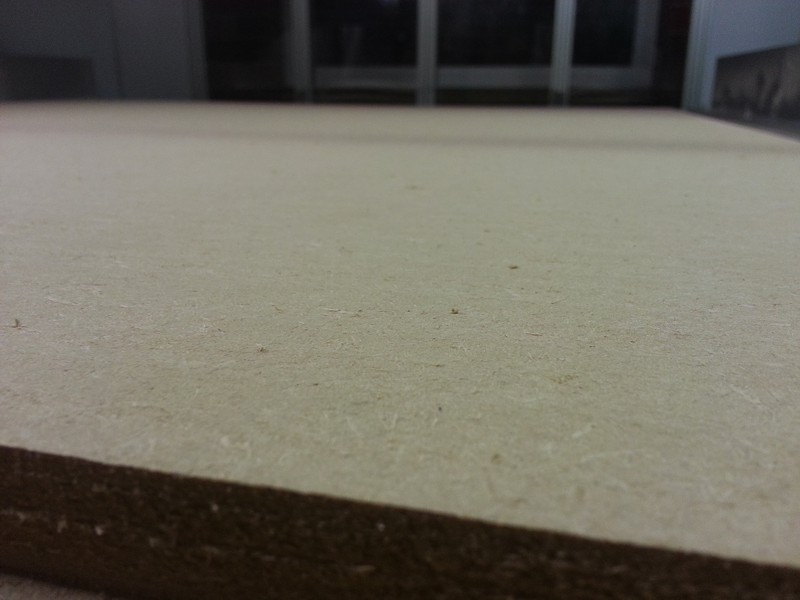
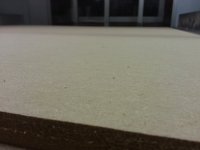
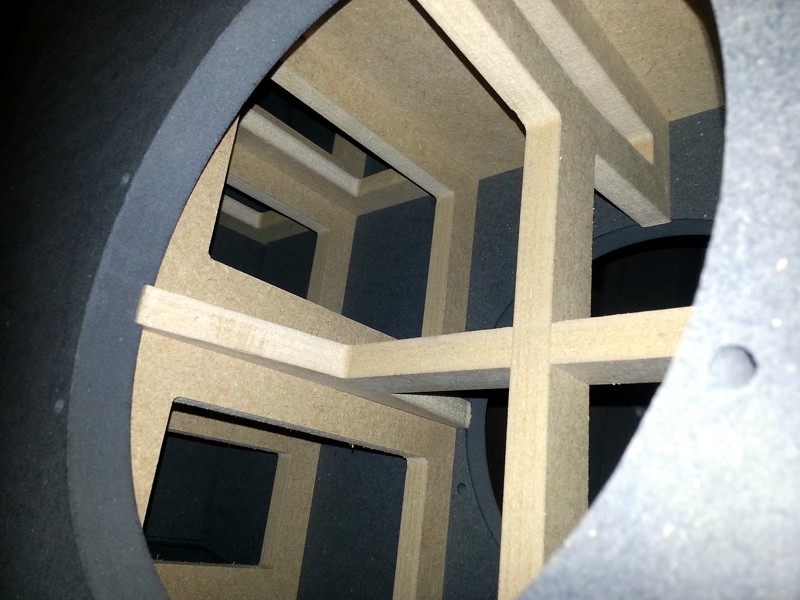
And for the folks considering the valchromat as a replacement. Go for it! This stuff is great. The finish you get is absolutely great. Here's a shot showing a machined edge. I used no finish pass here and what you see is the roughing pass - can't even see the step down marks. You don't get this with MDF, you need that finish pass and even then its nowhere near as clean. Downside is its around 4 times the price of MDF and I've never seen so much dust when cutting.

I'm quite into videoing at the minute so here's another with snippets of various operations used to create the parts. I've added music and cut the sound this time because after listening to it cut for days it gets a bit old!
Apollo Part 1 - YouTube
Now on to the images
There were a lots of cutters used to create the parts. Really glad I have the semi auto changer otherwise setting up the tool height would quickly become a chore and time sink. This way its done in a matter of seconds.
The test fit of the interlocking bracing.
And another test fit after the Valchromat based parts were completed. Let me tell you it felt good when everything just slid together perfectly.
And for the folks considering the valchromat as a replacement. Go for it! This stuff is great. The finish you get is absolutely great. Here's a shot showing a machined edge. I used no finish pass here and what you see is the roughing pass - can't even see the step down marks. You don't get this with MDF, you need that finish pass and even then its nowhere near as clean. Downside is its around 4 times the price of MDF and I've never seen so much dust when cutting.
Attachments

..Let me tell you it felt good when everything just slid together perfectly.
More progress. 2 days in and well over half the parts cut. Everything is dry fitted to check for alignment and it all looks good. A few parts do require hand finishing as the CNC isn't a do it all tool. I'm kinda glad about that because some of the fun and achievement is lost when its this easy. I'm sure I'll be eating those words when it comes to spraying them! Huge surface area + gloss black = lots of work
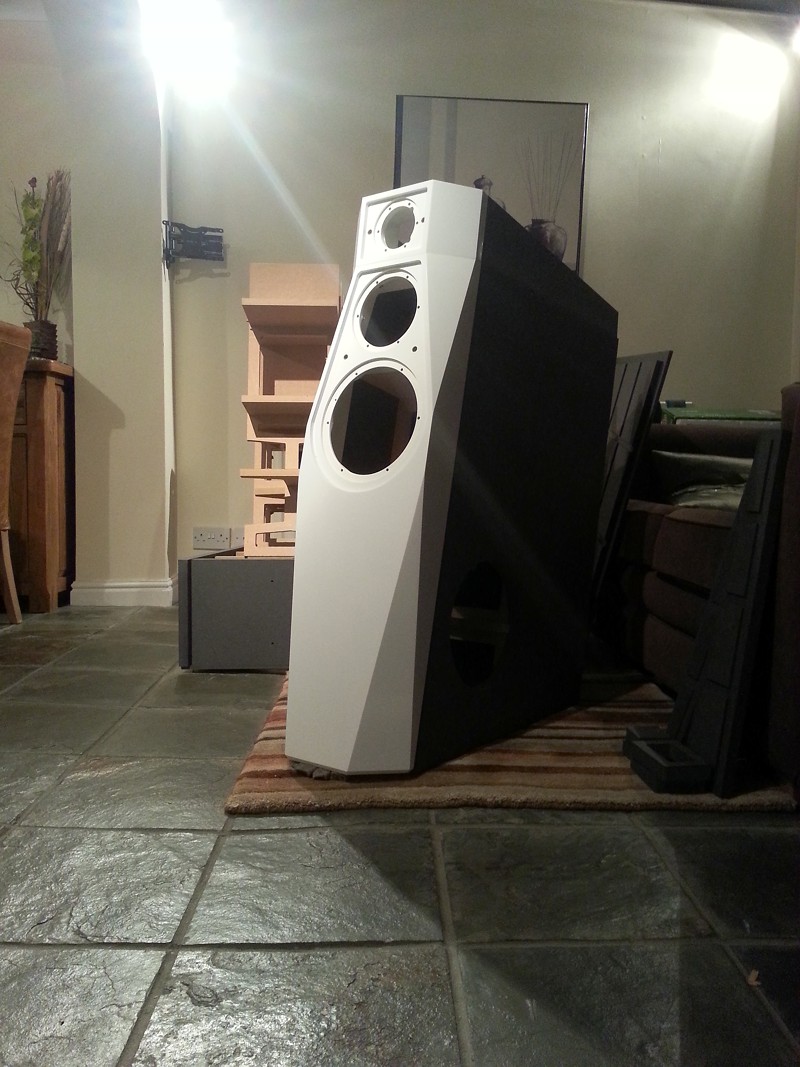
Shot through the sub cut out showing the rebating and bracing.
Shot through the sub cut out showing the rebating and bracing.
Attachments


This is awesome!!!
If I remember correctly you stated that you will be using digital/external crossovers, I'm curious, did you model the complex baffle shape?
And oh yes I can't wait for you to spray them! I am in the process of spraying my speakers (finally!!) but I am a bit low budget hehe, would be awesome to see some more tips from you hehe
I can never get over your builds, they are inspiring. It really makes me want to strive to go to the extra lengths for the finer details.
Have the internal parts that are on a slant, been cut at an angle, so that they sit flush inside of the enclosure? Or is there a small gap there? I am just wondering about how your CNC cuts those parts.
Also, are the side firing woofers not flush mounted? Or is there another part to go on top?
Thanks,
Ryan
Have the internal parts that are on a slant, been cut at an angle, so that they sit flush inside of the enclosure? Or is there a small gap there? I am just wondering about how your CNC cuts those parts.
Hi Ryan and thanks.
If there's any external angles it can get to those. Internal one's it can't due to the cutter always being perpendicular to the work. You can get custom cutters to solve this problem but what I'm doing for now is all the external one's are done on the cnc and the external one's I run over with a cross pull mitre saw.
Also, are the side firing woofers not flush mounted? Or is there another part to go on top?
They need to go back on the cnc and the driver cut out probed to find the center then the rebates will be cut. Shame you can only cut one side at a time with the cnc.
If I remember correctly you stated that you will be using digital/external crossovers, I'm curious, did you model the complex baffle shape?
Its difficult to accurately model such things but for the baffle face then yes. Edge was used to best smooth the ripple.
ShinOBIWAN - CNC porn - I will be flooding you with requests for wild and wonderful cabinet builds now
If I'm not too busy I'm happy to help out DIY'ers with cabinet parts done on the CNC.
- Status
- This old topic is closed. If you want to reopen this topic, contact a moderator using the "Report Post" button.
- Home
- Loudspeakers
- Multi-Way
- Apollo Construction Diary