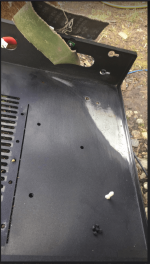
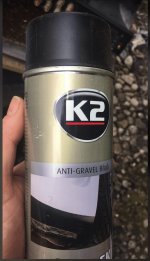
Stone chip paint is a product for cars. It is generally applied to the lower sills or sometimes people apply it to the lowest section of car doors and below when they get a bit rusty. It has that texture that is similar to plastic coating, either way it seemed to match the paintwork on the chassis.
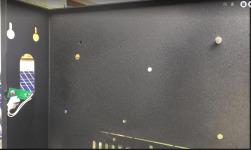
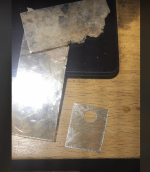
And some home made mica spacers using some old mica from an old stove window and a hole punch. Shame the front panel was not in amazing shape but i suppose he can get it tidied up if he wants to.
And some home made mica spacers using some old mica from an old stove window and a hole punch. Shame the front panel was not in amazing shape but i suppose he can get it tidied up if he wants to.
Attachments
-
 Screenshot 2024-03-03 at 12.31.24.png284 KB · Views: 38
 -
 Screenshot 2024-03-03 at 12.31.37.png255.5 KB · Views: 34
 -
 Screenshot 2024-03-03 at 12.31.51.png972 KB · Views: 31
 -
 Screenshot 2024-03-03 at 12.33.46.png194.4 KB · Views: 37
 -
 Screenshot 2024-03-03 at 12.33.56.png664 KB · Views: 40
 -
 Screenshot 2024-03-03 at 12.34.09.png816.9 KB · Views: 38
I imagine this will be my final update for this project and so sorry for hijacking this thread. Seemed to be the best place to put the info considering it's a less commercial product.
Here are the AC primary voltage settings for the amp i was working on.
Here are the AC primary voltage settings for the amp i was working on.
Attachments

Hi izzzzz6, You are right I digged the board and try to repair but I didn't do it. There is still conductivity on the board. Audio out signal crashing when connect to power board to the bias board. Need to replace complete power board. I hope to find it from UR.Hi. There is one thing you must do that is very important. Before you proceed you must dig out all of the carbon left by the burnout. Carbon is conductive so it will continue to cause problems. Take care not to damage tracks on the underside. some multi layered boards can be almost impossible to save. Once you are happy it is all gone, at least far enough away from any tracks etc you can refill the damage with epoxy and finish it with a uv solder mask.

Did you check the conductivity of the board with your DMM in the megaohms setting? In theory you should be able to dig the carbon out even if it leaves a hole, as long as you can find a way to run jumpers back to the relevant components. Failing this, it might be possible something else is shorted and you didn't find it yet.Hi izzzzz6, You are right I digged the board and try to repair but I didn't do it. There is still conductivity on the board. Audio out signal crashing when connect to power board to the bias board. Need to replace complete power board. I hope to find it from UR.
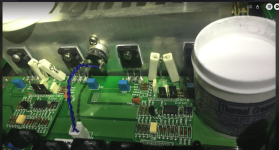
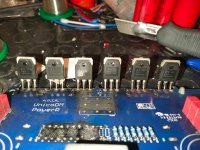
@HighTec Yes, i bought that thermal compound a while back. Will probably last longer then me!
Yes izzzzz6, I measured with DMM with before digging and saw the 40-50 ohm on the board.Did you check the conductivity of the board with your DMM in the megaohms setting? In theory you should be able to dig the carbon out even if it leaves a hole, as long as you can find a way to run jumpers back to the relevant components. Failing this, it might be possible something else is shorted and you didn't find it yet.
@HighTec Yes, i bought that thermal compound a while back. Will probably last longer then me!
After digged there wasn't any value is DMM but I think it conductivitiy changes
with 1.5v DMM value and 60v Original amplifier's power board.
I didn't want to digg the board until it had a complete hole because there would be no place for the components to fit in.
I don't want to spoil the originality of the amplifier if I can find the complete new board
I would be very happy if you could supply the complete board as spare parts.Looking again at Erdi's and other problems let us know the current state,
probably I can supply spare boards, the situation is in advantage for you,
because the local distributor is moving.

- Home
- Amplifiers
- Solid State
- Schematic diagram of Unison Research Unico