camaudio said:but if you are painting it, any bulge should be sanded out thru all the prep work
Hi,
It's not that simple. To get a good paint job on MDF it needs to be as undisturbed as possible. Sanding the bulge will cut through the smooth outer "layer" to the softer stuff underneath.
Believe me, every advantage helps when you're painting MDF. Ant (ShinOBIWAN) and sploo can attest to that as well I'm sure. There have been some long and detailed discussions on the topic here.
camaudio thats just wrong! Yep thats a machine to be jealous of. I feel like Im in the stone ages with my circular saw borrowed table saw and two routers. When I start cutting the neighborhood knows not to wash cars or open windows for at least two days. I create a mdf dust storm.
As for the screw or glue preferance Im a glue clamp only guy. If those joints come lose after gluing Im using the wrong materials anyway. My advice to anyone that is not sure of just glue clamping take two pieces of 3/4 mdf and glue clamp together and the next day try to pull it apart. Ok now get a hammer and chisel and beat it loose. If I run into a situation that requires more support (subwoofer) I will glue in a 3/4" x3/4" support piece from the inside. Screws are to messy.
As for the screw or glue preferance Im a glue clamp only guy. If those joints come lose after gluing Im using the wrong materials anyway. My advice to anyone that is not sure of just glue clamping take two pieces of 3/4 mdf and glue clamp together and the next day try to pull it apart. Ok now get a hammer and chisel and beat it loose. If I run into a situation that requires more support (subwoofer) I will glue in a 3/4" x3/4" support piece from the inside. Screws are to messy.
I want to add some general comments based on my experience with box building. The following is not intended to discourage anyone from building boxes but making boxes is the worst part of building speakers.
You NEED a router. This is a must IMO. Not just for cutting holes but mainly for the recesses so that the driver flange seats properly. Some builders think they can get away without a router because they use hole saws. But how do you seat the driver without a router? A recessed seat is necessary in order for the speaker to sound correct (not to speak of appearance) IMO.
If you plan on painting the finished box then you can save some money. If you plan on applying a wood veneer then consider buying finished speaker boxes due to the work and expense involved. Consider the possibility of failure as well. Many here will disagree with me.
The clean-up involved after cutting a lot of MDF in your basement is not to be taken lightly. IT IS WORK because it gets into everything! Inhaling the dust is also bad business. I am waiting for nice weather so I can cut MDF outdoors for my next project.
But I am seriously considering just buying speaker boxes. The Parts Express boxes with the replacable baffle can be re-used for different projects. It may be a good investment in the long run.
chubby chaser said:Stew wear a respirator when cutting MDF. The dust can be nasty for your lungs.
Camaudio I bet it was nice not dealing with all the MDF dust when building that cabinet.
Thank you for the warning. I am wearing a respirator.
JimOfOakCreek said:You NEED a router. This is a must IMO. Not just for cutting holes but mainly for the recesses so that the driver flange seats properly. Some builders think they can get away without a router because they use hole saws. But how do you seat the driver without a router? A recessed seat is necessary in order for the speaker to sound correct (not to speak of appearance) IMO.
I've bought a router and am waiting on my hole jigs before moving forward. I'm not trying to hack this.
JimOfOakCreek said:If you plan on painting the finished box then you can save some money. If you plan on applying a wood veneer then consider buying finished speaker boxes due to the work and expense involved. Consider the possibility of failure as well. Many here will disagree with me.
One of the reasons I chose the Zaph SR-71 for my first project was in case I made a complete wreck of the cabinets - I could still pay my way out of the problem by buying the Parts Express cabinets and still have something acceptable looking for the living room.
Remember, I'm doing all this as a lead-up to a project I can't buy an enclosure for - an IB subwoofer. This is all deliberate learning.
Hezz said:Stew,
The picture is a little fuzzy but it looks to me like you screw was too big for the hole. Also, if you screw down too tight it will crack. The drill should be a little larger than the inner diameter of the screw threads, and a little smaller than the outside threads. The more material that has to be displaced by the screw the more outward pressure the screw makes on the surrounding material. And the more likely it is too crack. MDF cannot take much so the drill size is critical.
In my defense, the screws, countersink bit, and the driver bits all came as a matched set from McFeeleys, a kit specifically marketed as being excellent for 3/4" MDF. I'm not seriously upset that it didn't work, but I do think the bit matches the screw.
Anyhow, I'm just gluing things from here out.
chubby chaser said:camaudio thats just wrong! Yep thats a machine to be jealous of. I feel like Im in the stone ages with my circular saw borrowed table saw and two routers. When I start cutting the neighborhood knows not to wash cars or open windows for at least two days. I create a mdf dust storm.
As for the screw or glue preferance Im a glue clamp only guy. If those joints come lose after gluing Im using the wrong materials anyway. My advice to anyone that is not sure of just glue clamping take two pieces of 3/4 mdf and glue clamp together and the next day try to pull it apart. Ok now get a hammer and chisel and beat it loose. If I run into a situation that requires more support (subwoofer) I will glue in a 3/4" x3/4" support piece from the inside. Screws are to messy.
Glue does hold pretty damn strong, that's for sure
My screw fetish mostly comes from my car audio spl competition days, and I don't think ill ever be cured from it
Ive painted many boxes as well, and never seen a problem of bulging too.
Dust particles in my paint though
StewLG said:
In my defense, the screws, countersink bit, and the driver bits all came as a matched set from McFeeleys, a kit specifically marketed as being excellent for 3/4" MDF. I'm not seriously upset that it didn't work, but I do think the bit matches the screw.
Anyhow, I'm just gluing things from here out.
if your drill has a clutch, use it on a pretty low setting
this will help keep you from overdriving the screws in to hard/deep
otherwise, just put them 90% in and hand tighten them
Lots more useful advice above, and good to read how others are doing it.
Just seconding the warnings about MDF dust - it's nasty stuff. Remember that most dust extractors/vacs will not filter the really dangerous small particles, so you need to consider your extraction as a clean up of visible mess. Make sure you always wear an MDF certified mask (I'm told that cutting MDF gives off some gasses as well as the dust, hence the proper ones filter both).
camaudio - I hate you. Your CNC machine is way bigger than mine. They don't half create a lot of dust though. If I had the room (I don't) I'd put the CNC machine in a separate garage/closed off space so I could let it run, then go in with a mask and pick up the finished parts.
Oh yea, and John (MJL21193) is spot on about painting MDF - every bit of good fortune you can get is welcome!
Just seconding the warnings about MDF dust - it's nasty stuff. Remember that most dust extractors/vacs will not filter the really dangerous small particles, so you need to consider your extraction as a clean up of visible mess. Make sure you always wear an MDF certified mask (I'm told that cutting MDF gives off some gasses as well as the dust, hence the proper ones filter both).
camaudio - I hate you. Your CNC machine is way bigger than mine
. They don't half create a lot of dust though. If I had the room (I don't) I'd put the CNC machine in a separate garage/closed off space so I could let it run, then go in with a mask and pick up the finished parts.Oh yea, and John (MJL21193) is spot on about painting MDF - every bit of good fortune you can get is welcome!
StewLG said:
In my defense, the screws, countersink bit, and the driver bits all came as a matched set from McFeeleys, a kit specifically marketed as being excellent for 3/4" MDF. I'm not seriously upset that it didn't work, but I do think the bit matches the screw.
Anyhow, I'm just gluing things from here out.
No problems, most of us have done the same thing before and the kit would probably work ok in natural wood fibers. But MDF is a different story.
There are some good arguments against screws but for some of us that don't have a large assortment of big long clamps the screw method is a necessary evil.
Here are some things that I've found help when screwing MDF.
Use small diameter screws with course threads like decking screws instead of wood working screws. You only need the screw tight enough to hold the joint together until the glue drys. You should realize that the glue is the most important part of the joint and where most of the joint strength comes from. The screw is only there to clamp the joint. So the screw does not have to be some thick piece of metal. You want it as small as can do the job.
Use the shortest screw that will do the job. It doesn't need to penetrate more than about 1 inch into the material. Or the second board that you are screwing into.
Make sure the hole is big enough. The drill should be about the diameter that is halfway between the inner diameter of the thread and the outer thread form. When the screw engages the material it deforms it where the screw threads are entering the material and you need to have some room for the material to go back towards the center of the screw or all pressure is pushed outwards.
THe first hole in the first board is better if it is a little larger and just barely grabs the threads. The second board that you are screwing into is where the screw grip comes from. And is where the hole size is critical.
Make sure the hole is a little deeper than the screw at it's deepest depth.
Don't seat the screw with a screw gun or drill. Use the drill to put the screw in most of the way and then finish snugging the screw down by hand.
The best method:
Hold the boards together by some means and drill the hole with the correct size bit. Then drill through the first board with a little larger bit and counter sink or counter bore the hole. Then you are ready to screw the two boards together.
Stew you can hide allot of mistakes if you veneer the cabinets. Use the iron method. You will have to plan ahead if you veneer though. Speaker covers can hide allot of mistakes on the baffles also. Some of these fellas are experts on veneering just give a shout about what you need the finish you want and Im sure someone here has already done it.
You are going to love that router it can do all kinds of stuff. Get a book from the library on using a router if you are not farmiliar with everything it can do. My router came with a circle guide but I tweeked it a bit. I installed a long bolt and lock nut and I drill through the stock then bolt guide to stock for no movement. I then screw the cut out area to my sacrifice board. A plunge router is the way to go. Easier go change depths of cuts.
You are going to love that router it can do all kinds of stuff. Get a book from the library on using a router if you are not farmiliar with everything it can do. My router came with a circle guide but I tweeked it a bit. I installed a long bolt and lock nut and I drill through the stock then bolt guide to stock for no movement. I then screw the cut out area to my sacrifice board. A plunge router is the way to go. Easier go change depths of cuts.
Attachments

Tweeters routed
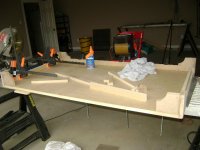
I received my Jasper circle jigs today. Since I've never used a router before, it took me a few hours to read all the directions and figure out how to use the router and the jig.
Even once I thought I understood how to use it, I thought I'd better do a test run on some scrap wood.
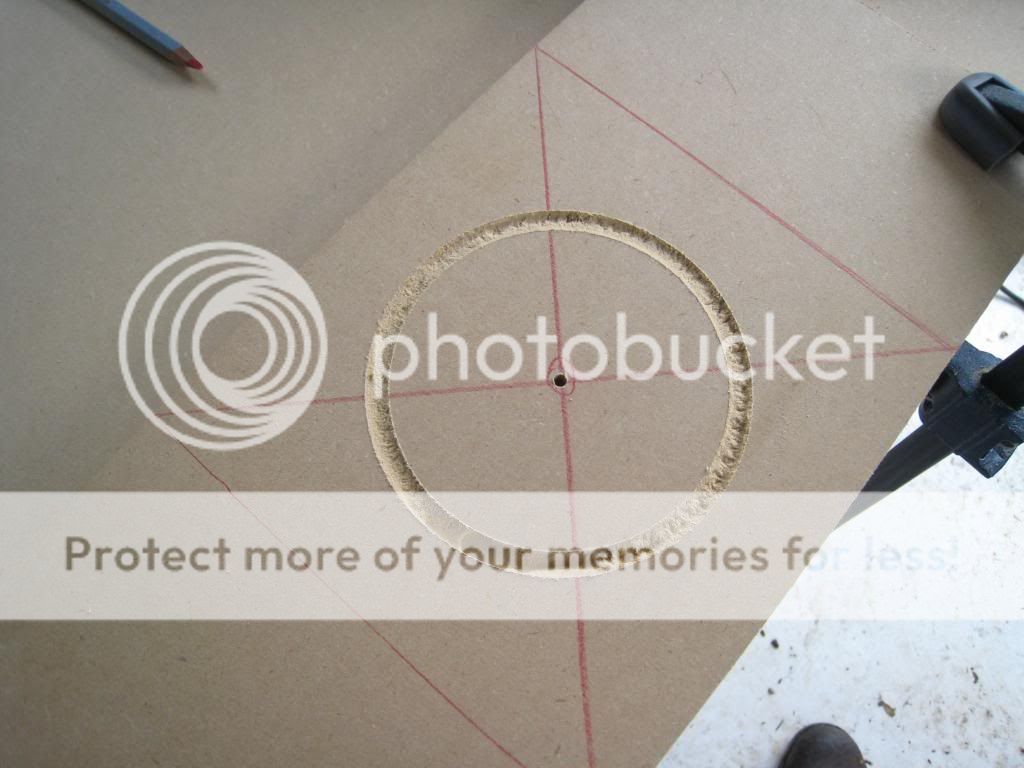
I went from outer -> inner when cutting the rebate (is that the right term?). I incremented the circle jig too quickly, and ended up with a hump.

This was a minor error, but I didn't repeat it. Incrementing 1/8" at a time on the jig is slow, but meditative in a way, and very reliable.
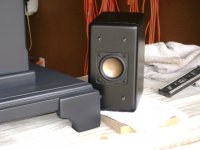
The big mistake I made was cutting the outer hole too small, so the tweeter would not sit flush:
Luckily, this was a test run. I incremented the hole size by 1/16" and it worked for the next test (not shown).
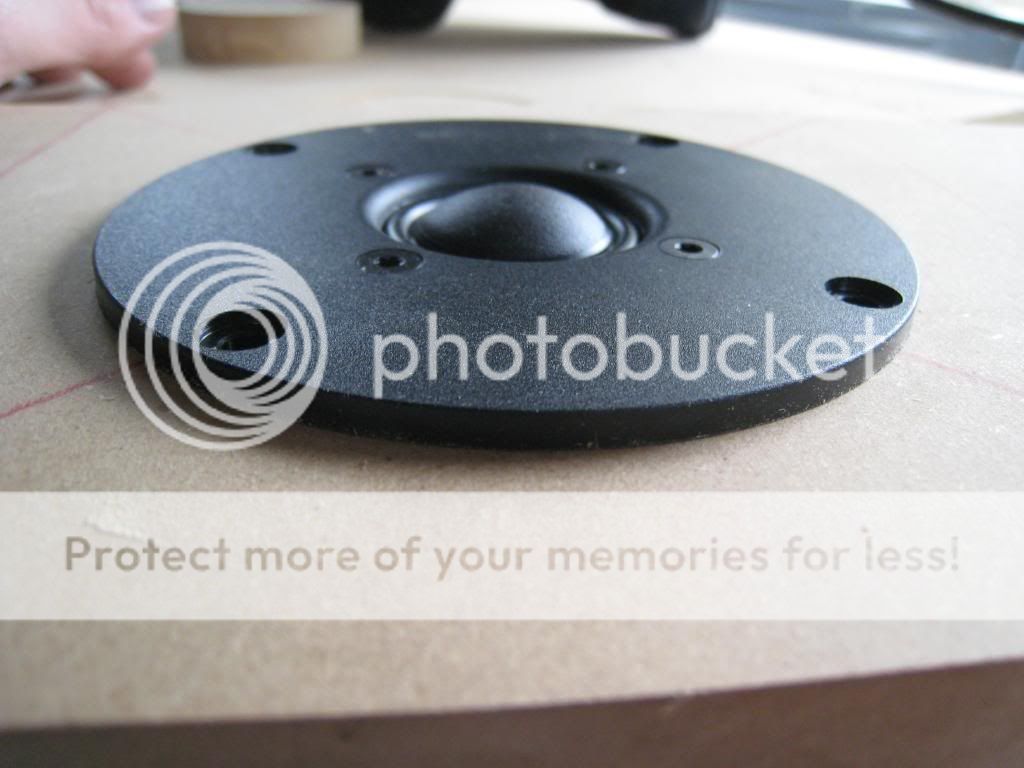
Finally, it was time to route the tweeters into the actual front baffles.

These are maybe out of flush by a hair in either direction, but I guess I'd be astonished if it will be audible.
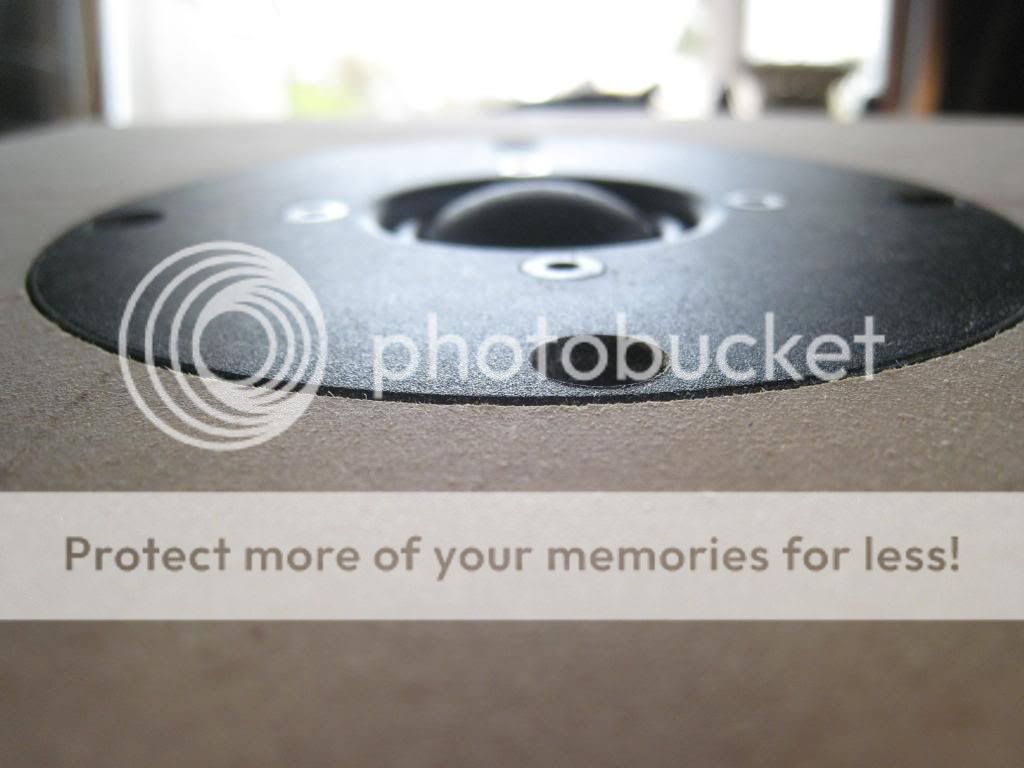

Both baffles, one sample tweeter installed:
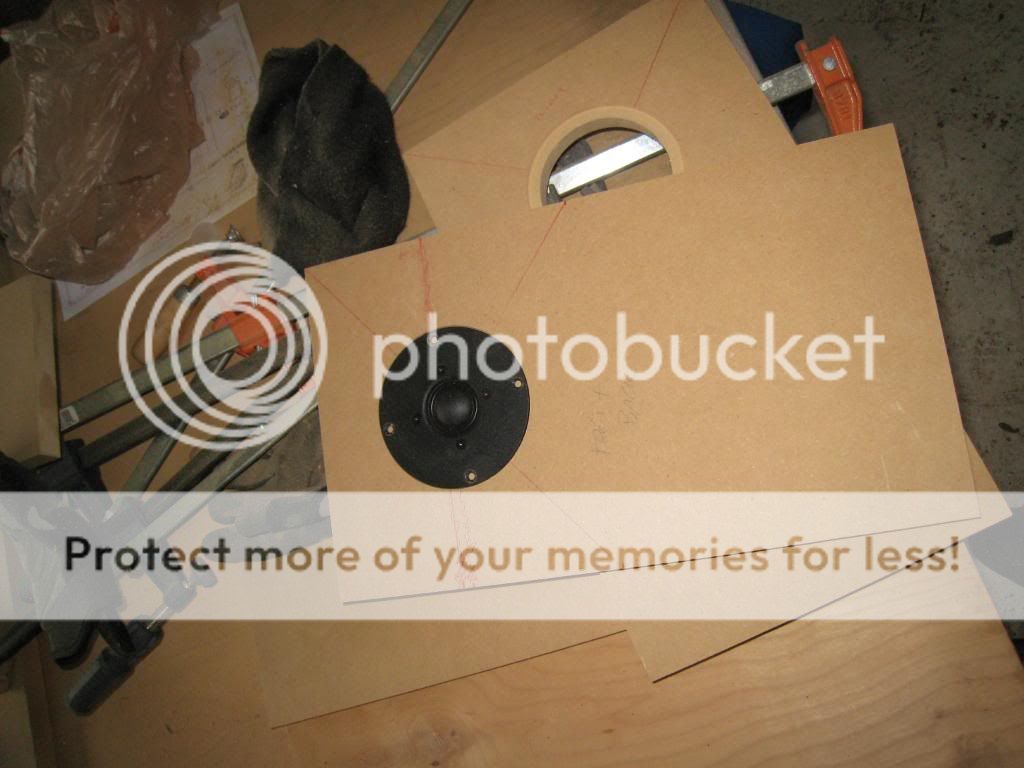
Tomorrow I expect to do the woofers, after cutting as many test holes in scrap as needed.
Also, I'm considering rounding over the edges on the front baffle, but I have no idea how important/unimportant this is sonically. I've been thinking about painting the front black (maybe glossy?) but finishing the sides in veneer. Or maybe veenering the whole thing, but rounded over corners make me nervous.
Any tips or advice appreciated.
I received my Jasper circle jigs today. Since I've never used a router before, it took me a few hours to read all the directions and figure out how to use the router and the jig.
Even once I thought I understood how to use it, I thought I'd better do a test run on some scrap wood.
I went from outer -> inner when cutting the rebate (is that the right term?). I incremented the circle jig too quickly, and ended up with a hump.
This was a minor error, but I didn't repeat it. Incrementing 1/8" at a time on the jig is slow, but meditative in a way, and very reliable.
The big mistake I made was cutting the outer hole too small, so the tweeter would not sit flush:
Luckily, this was a test run. I incremented the hole size by 1/16" and it worked for the next test (not shown).
Finally, it was time to route the tweeters into the actual front baffles.
These are maybe out of flush by a hair in either direction, but I guess I'd be astonished if it will be audible.
Both baffles, one sample tweeter installed:
Tomorrow I expect to do the woofers, after cutting as many test holes in scrap as needed.
Also, I'm considering rounding over the edges on the front baffle, but I have no idea how important/unimportant this is sonically. I've been thinking about painting the front black (maybe glossy?) but finishing the sides in veneer. Or maybe veenering the whole thing, but rounded over corners make me nervous.
Any tips or advice appreciated.
When I recessed my speakers into the baffles my biggest concern was making the recess big enough to accomodate the three coats of primer and three coats of paint. Are your tolerances to tight for paint??? Just a thought.
STEW the best advice I can give is follow Zaphs advice like the law until you get the feel of making enclosures.
Enclosures
All drivers are countersunk, particularly the tweeter. The woofer is also countersunk unless I specify otherwise. About the only time I specify otherwise is when the woofer flange is specifically designed for surface mounting.
These helpful hints listed below are on Zaphs site to help us out and save us time through his trial and error. The chamfered rear baffle is for air flow and looking at the thickness of your baffles you are going to need it.
All baffles are removable, and fastened with socket head cap screws. Normally I'll use 1/4-20 black anodized, with a metric M6 regualr series washer. Why an M6? Because it's 6.87mm inside diameter fits a 1/4" bolt with less slop. The washer is required so I can make the hole in the baffle a little bigger to allow for slight positioning of the baffle before it's tightened down.
Removable baffles are held in place with corner gussets that hold a Parts Express Hurricane nut. These are like normal T-nuts, but are press-fit rather than having teeth that dig into the back side.
I finish most of my baffles with black Rustoleum texture finish. Before that I'll use sanding sealer on bare MDF, and I'll do about 5 coats of it on the edges with 1 or 2 coats on the face. Sand it all smooth before painting. Depending on how well I seal the edges, I'll likely need two coats of texture finish. Then finally I'll put a single clear coat over that for a for a bit of smoothness that makes wiping dust off easier.
In the case of using a Parts Express pre-fab enclosure, I'll cover the baffles with white "Contact" brand stick-on shelving paper. This will protect it from router base scuffs and scratches. If all goes well, I'll leave this protective paper on and then spray-paint the countersinks so no bare wood shows through the cracks. If all doesn't go well - you might have some chipping, or you might have scratched the baffle anyway, then I'll fill scratches with bondo, sand it a little, and use the baffle painting routine specified above.
All woofers 7" and under have the inside of the woofer hole chamfered. Depending on the flange, I may just go all the way around the inside or I may "scallop" the inside to allow some meat for screws to fasten into.
Depending on how the driver looks, I may choose to bolt it in place using socket head cap screws (normally 1" long #8 or #10) or I just use black wood screws. Using the socket head cap screws requires scallops so there is enough wood to support Hurricane nuts on the back of the baffle.
Enclosures of .375 cu ft or larger have a crossbrace from side to side. Of course if I buy a Parts Express enclosure, it has the crossbrace already in it.
All of my designs call for roundovers on the baffle. 1/2" is the minimum, but 3/4" is better if you have a large shank, variable speed router than can handle it. The roundover is required to help smooth out the diffraction ripple response.
For vented boxes, most woofers 6.5" and under use a Parts Express 1.5" flared port. This port is 4" long, approximately 1.6" average diameter, and requires a 2-9/16" hole. If the hole is sized just right, the little ribs will press fit into the hole. Occasionally, 4" is the right length in a smaller enclosure with a small woofer, but when it's not I'll use 2 of these ports, with each cut to half the size I need, then *taped* together. This will have to be done with the port mounted in the enclosure since the flare is too big to make it through the hole. This two piece arrangement gives you a good flare on the inside, which lets you get away with a smaller and therefore shorter port than normal without a substantial increase in turbulance noise. In theory, the safest way to cut these ports is with a bandsaw. I don't have one, so I use a rather unsafe method. Copy this routine at your own risk: I cut them on the table saw with the fence as a stop. I set the fence to 1/2 of the port length required and press the flange part of the port up against the fence with my hand to guide it through. Kickback is possible in this situation, so I use a lot of force against the fence and I stand to the side in case it does kick back. Note that I don't slide it all the way through the saw, just enough to cut it partially, then back it out and rotate, and run through again til I make it all the way around.
8 to 10" woofers will use a 2" flared port. 12 to 15" will use a 3" flared port. These are the pre-made, cut to size "Precision" ports. These are of course adjustable in the middle section. My own experience finds people making their ports *way* larger in diameter than they need to be, which which relates to longer ports.
For damping vented enclosures, I use Whispermat, Sonic Barrier or 1/2" carpet padding doubled up. Whispermat is the best value. Sonic Barrier is expensive but occasionally handy since it comes with adhesive and is sold in small (but expensive) quantities. Carpet padding is surprisingly effective and cheap but it varies in performance. I never use egg crate foam because it just plain does not perform well. For sealed, I feel that "Acousti-Stuff" is the best performing, but standard craft store dacron pillow fiber will do oK for about 1/3 the cost.
Attachments
Stew FYI dont feel like the lone ranger eatting all that MDF dust. Im building a small credenza to put a 48" projection screen mitsubishi tv on. Im using mdf to keep the cost down and because this will prolly be a throwaway piece after the tv goes out or I upgrade. Not much use for a credenza that is 1'5" tall. Thats how tall it needs to be so I can watch TV from bed.
Attachments
chubby chaser said:When I recessed my speakers into the baffles my biggest concern was making the recess big enough to accomodate the three coats of primer and three coats of paint. Are your tolerances to tight for paint??? Just a thought.
Ah crap. Didn't think of that. Maybe I can go light on the paint in the routed holes? Or am I screwed?
1/2" on the roundover, check. And thanks for quoting me all that. I am trying to follow Zaph as closely as I can, but he is expecting you to use the Parts Express enclosures, so I'm already a bit outside his guidelines.
And to whoever asked, the baffles are 3/4" MDF.
StewLG said:Ah crap. Didn't think of that. Maybe I can go light on the paint in the routed holes? Or am I screwed?
Unless the tweeters are very tight in the existing rebates, you should be OK.
You could sand the inside edge of the rebate - very carefully, you don't want to deform it. As you say, going light on the paint will work. You can gently sand the paint too (as long as you don't cut through).
Nice looking work so far.
PS As chubby chaser noted - rounded baffle edges help against diffraction issues. You can read more here: http://www.linkwitzlab.com/diffraction.htm
This is a nice visualization: http://www.silcom.com/~aludwig/Loudspeaker_construction.html (search for "animated cartoon on diffraction")
- Status
- This old topic is closed. If you want to reopen this topic, contact a moderator using the "Report Post" button.
- Home
- Loudspeakers
- Multi-Way
- PDX Zaph SR-71 Build Thread