The height doesn't matter as long as the width is about the same and the volume is about the same. Too large a volume is not an issue as you can either add material inside or shorten the port to keep tuning frequency the same.
THe plan calls for an internal depth of 10.5" as well. The parts express cabinet has an internal depth of 9.5". So the parts express cabinet is taller and not as deep.. DOn't know how this will affect the precut port. I can print out a new port if need be on my 3D printer perhaps one that is shorter?
As long as the port fits with 1 dia of clearance for air flow you are good. I don't think the port of longer than 7in.
Again, in a bass reflex box the inportant dimension is the width and the volume. Of course the driver needs to fit and the port needs to fit. But I don't think those are issues.
But the volume of the XLS plan calls for is about 0.5 cu ft. So you are good there and it was made for a 6.5in driver so good there. I actually used mine in repurposed foam core and XPS foam enclosure from an older project. I got the width about right and volume was close but height and depth can vary somewhat.
Last edited:
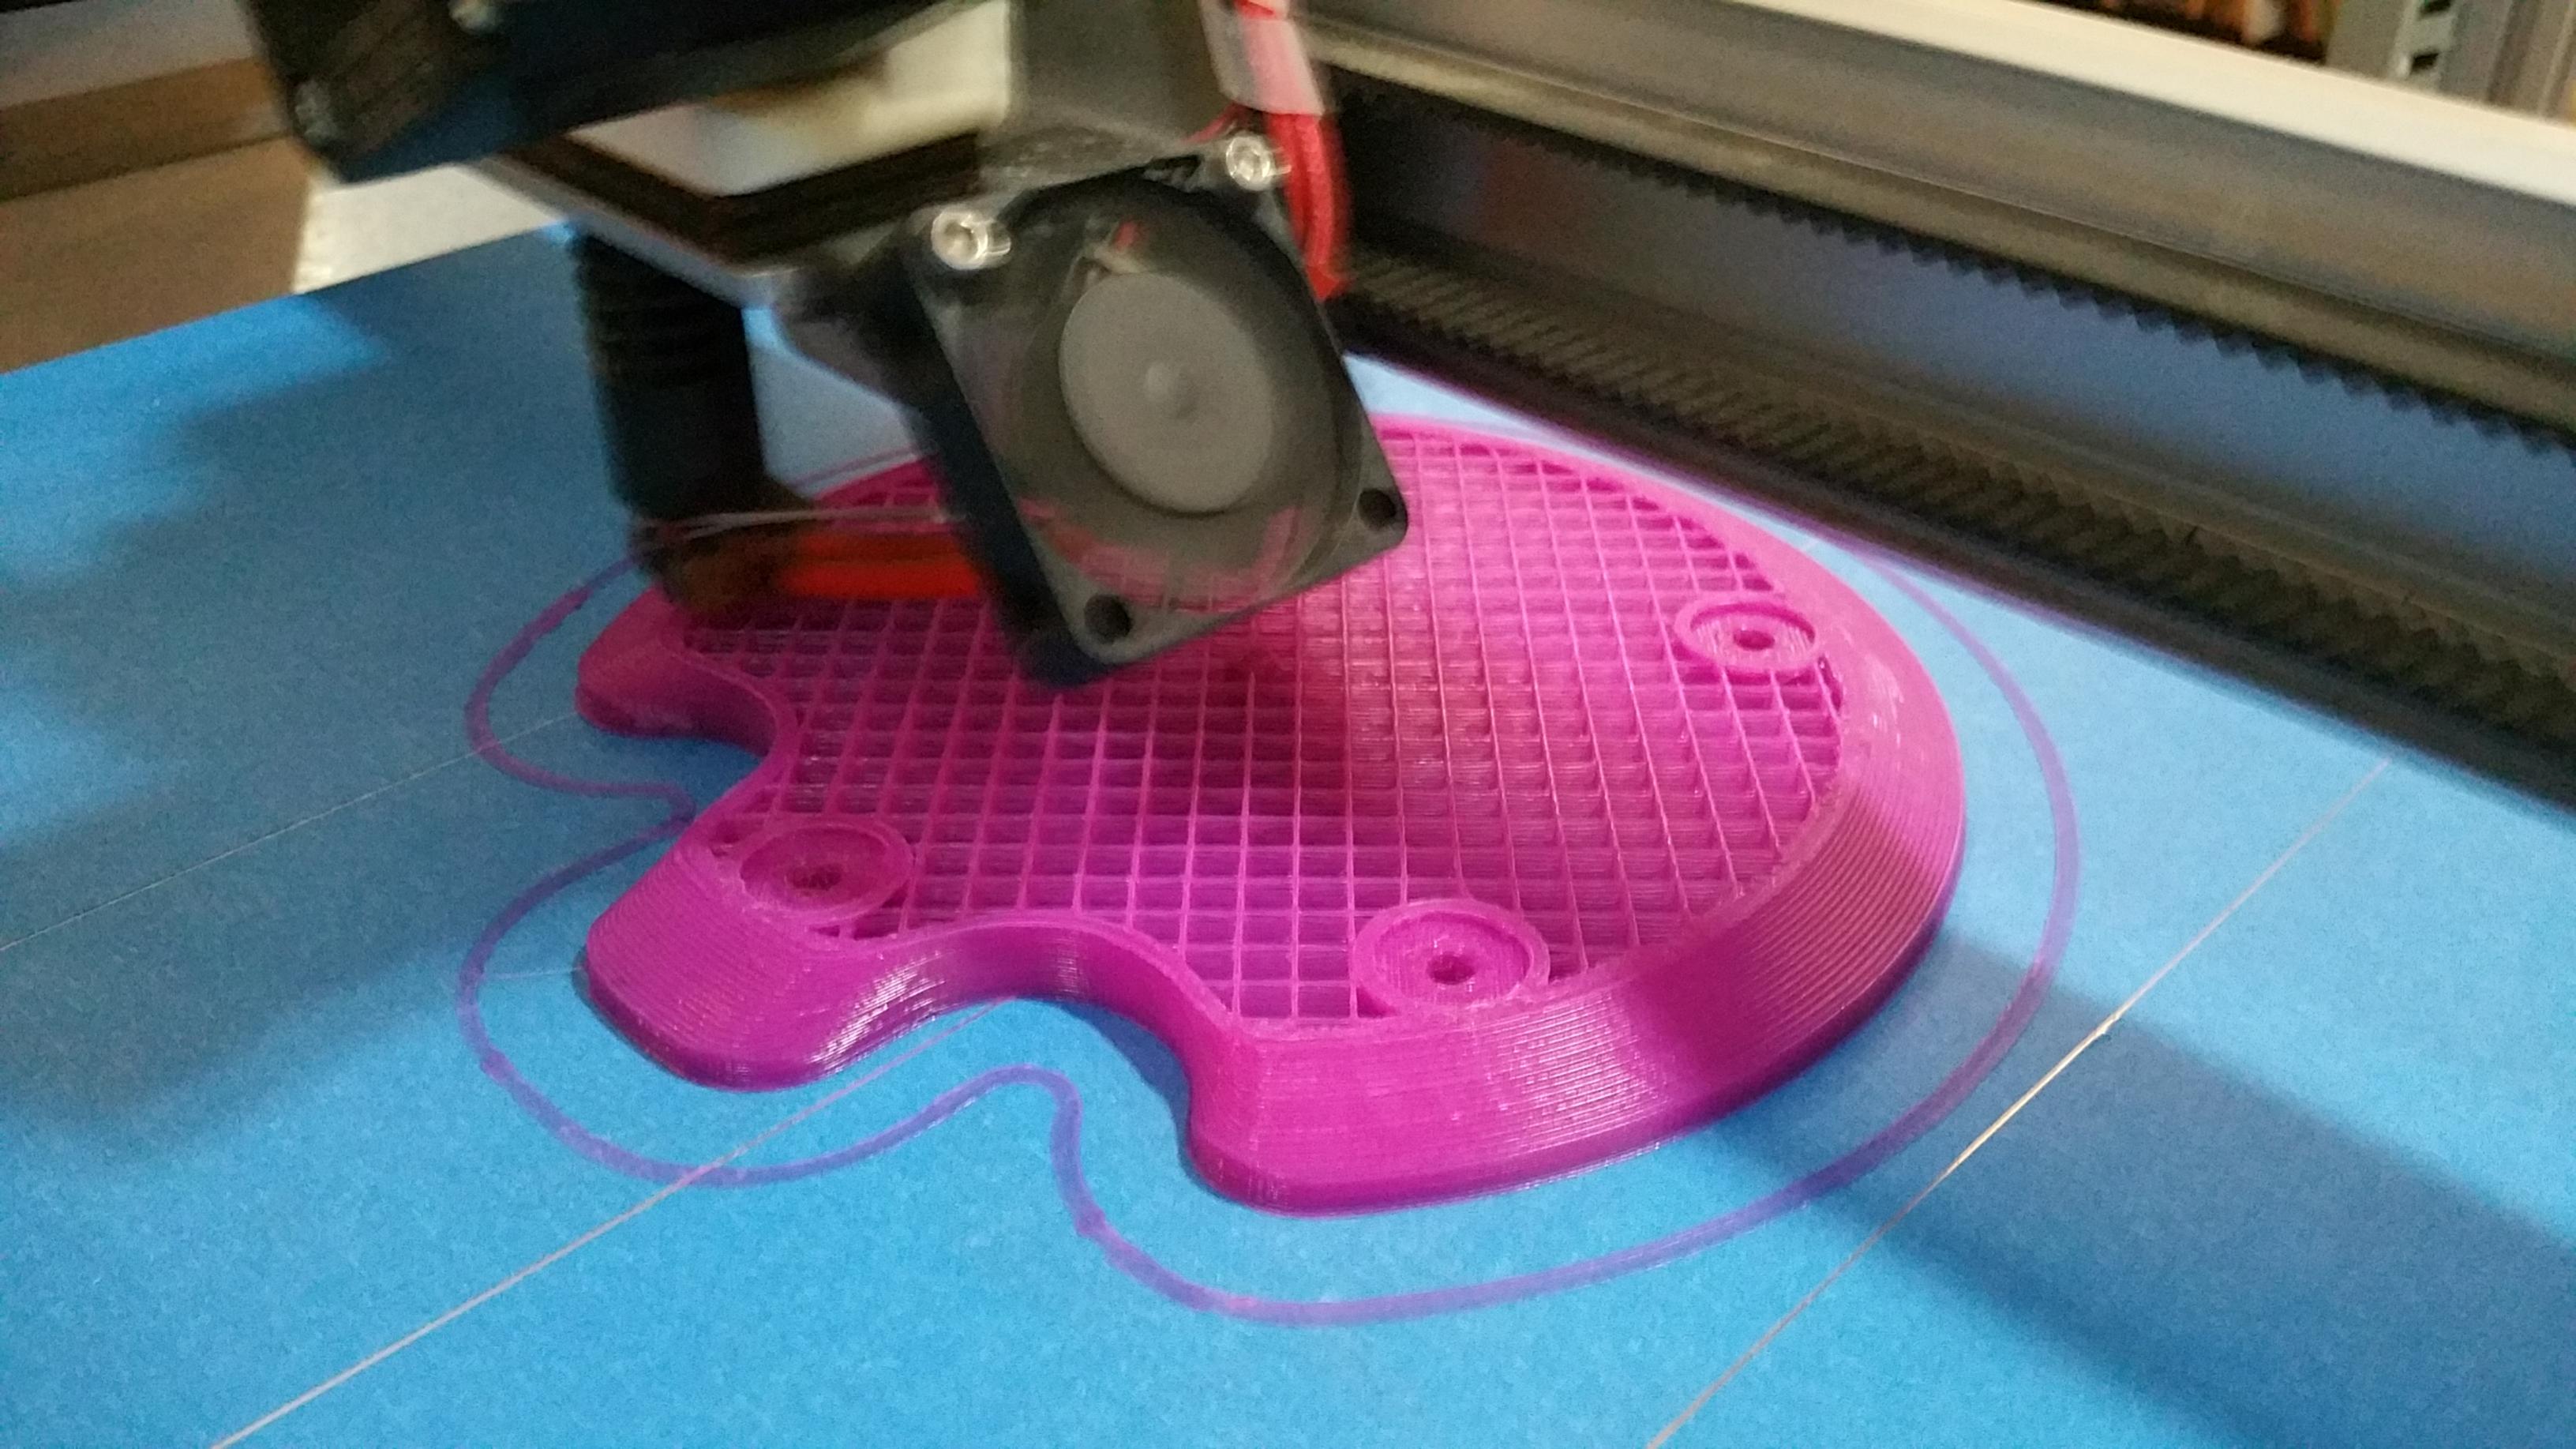
Finished designing the jig for the six circles needed for the x-ls encore:
It's designed to screw onto this $30 trim router from harbor freight (that we own):
1/4 in. 2.4 Amp Trim Router
Going to print out the jig right now on 3D printer in cheap PLA.. about 70 cents to print.
I'll let you know how it works. Hopefully the trim router is strong enough to plunge into 3/4" MDF?
An externally hosted image should be here but it was not working when we last tested it.
It's designed to screw onto this $30 trim router from harbor freight (that we own):
1/4 in. 2.4 Amp Trim Router
Going to print out the jig right now on 3D printer in cheap PLA.. about 70 cents to print.
I'll let you know how it works. Hopefully the trim router is strong enough to plunge into 3/4" MDF?
Well, I think $40 is pretty decent for one box. Yes. you can buy the lumber for less, but that CNC machining is pretty handy when it comes to assembly, and it sure does eliminate a lot of work and hassle. So I don't think you should feel stupid or ripped off. Think of it this way: if you were to buy a complete speaker from a store, probably half of the money spent is for the cabinet. You spend $170 for the components; $80 for the cabinets. I'm betting that you're gonna end up with a LOT better pair of speakers for $250 than you could buy at your local Hi-Fi Emporium!!!Got the parts-express MDF speaker cabinets today in the mail. Quick shipment. Turned out to be only one speaker not two. I was expecting two for the $40. I am pissed and want my money back. No way in heck would I pay $80 for a few pieces of cut MDF.
EDIT: I went back to the web page and realize I guess it's just for one. I think they should of put a note in there and said "THIS IS JUST FOR ONE SPEAKER" so I would of caught that. I would of never paid $80 for them though. I can buy a 4x8 foot sheet of 3/4 MDF for $25 and that'd be enough to make much more than two speakers. The price threw me off I think.. If they had been priced appropriately..like $25 to 30 I might of caught on it was only for one. I feel stupid, yet ripped off at the same time -- it's complicated lol. I suppose I should suck it up and treat it as a learning lesson; and perhaps just make a copy of it for the other speaker out of MDF we have laying around here.
Last edited:
Finished designing the jig for the six circles needed for the x-ls encore:
An externally hosted image should be here but it was not working when we last tested it.
It's designed to screw onto this $30 trim router from harbor freight (that we own):
1/4 in. 2.4 Amp Trim Router
Going to print out the jig right now on 3D printer in cheap PLA.. about 70 cents to print.
I'll let you know how it works. Hopefully the trim router is strong enough to plunge into 3/4" MDF?
400 watts isn't a lot. My (crap/noname) 1/4 inch router is 1020 watts...
I feel you will get dizzy circling the work with many shallow cuts to get through.
")
The plunge routers or maybe the fixed base 2HP model might be a better bet.
Though if you drill your centre hole all the way through you can flip the work and start routing in from the back too.
You seem capable so apologies if this is obvious.... Changing the size of the router bit changes the diameter of the routed hole by the difference in the radius of the bits. I say this as I have 1/4", 3/8", 1/2" inch and 1 1/8" straight cut bits, all of which fit a 1/4 collet router.
J.
`
Thanks. Yeah I have a variable called "bit_diameter" that I use in part of the calculation
Later on, if I have a different speaker I am working on all I have to do is call the guidepin module with the appropriate diameters in millimeters. And it will create a new custom tailored one. Takes 5 hours to print at 100% infill and about 70 cents of material (PLA).
Ignore my choice variable names and lack of some variables Could of chosen better names and typed in less hard coded values BUt I just went crazy at it with the calipers and started typing in
400 watts isn't a lot. My (crap/noname) 1/4 inch router is 1020 watts...
I feel you will get dizzy circling the work with many shallow cuts to get through.
The plunge routers or maybe the fixed base 2HP model might be a better bet.
Though if you drill your centre hole all the way through you can flip the work and start routing in from the back too.
You seem capable so apologies if this is obvious.... Changing the size of the router bit changes the diameter of the routed hole by the difference in the radius of the bits. I say this as I have 1/4", 3/8", 1/2" inch and 1 1/8" straight cut bits, all of which fit a 1/4 collet router.
J.
Thanks. Yeah I have a variable called "bit_diameter" that I use in part of the calculation
An externally hosted image should be here but it was not working when we last tested it.
Later on, if I have a different speaker I am working on all I have to do is call the guidepin module with the appropriate diameters in millimeters. And it will create a new custom tailored one. Takes 5 hours to print at 100% infill and about 70 cents of material (PLA).
Ignore my choice variable names and lack of some variables
Could of chosen better names and typed in less hard coded values BUt I just went crazy at it with the calipers and started typing in
Last edited:
I'm definitely thinking about buying a good quality router with higher horsepower. Any recommendations? Should I get plunge or fixed base?
Once I get one, I'll definitely make an elaborate jig for it similar to the jasper 200 jig that goes for $40. And I'll put it up for free on Thingiverse.. probably about 1.25 or so to print with cheap PLA like I'm using.. one that large that is.
I'll share the OpenSCAD file so someone can easily modify it to match their router as well. Like it will be setup with screw holes for the particualr one I buy.. whichever that might be.
Rather than go with a thinner router hole jig and 100% infill you may have a stiffer more structurally sound jig by making it thicker with 25% infill and 4 solid layers on top and bottom walls but increase overall thickness a bit. The moment of inertia increase gets its stiffness from members near the edges. Amount of PLA and duration to print will be similar.
If you have 3D printing and CAD, your DIY options really open up. You can print many parts that will allow you to make a synergy type speaker.
For example:

Volume filler plug:
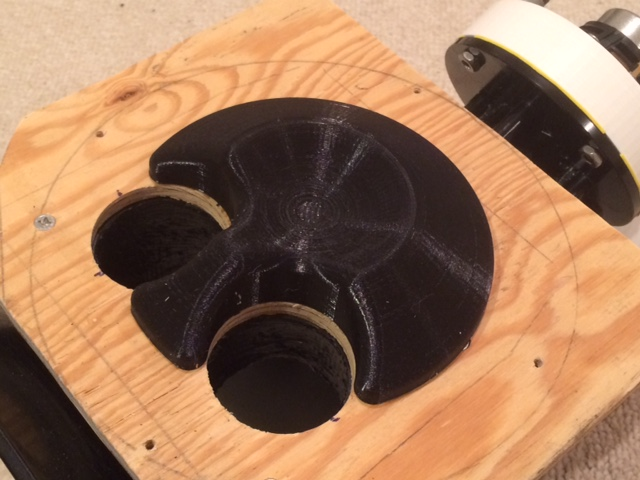
Here is compression driver adapter made by Jennygirl:
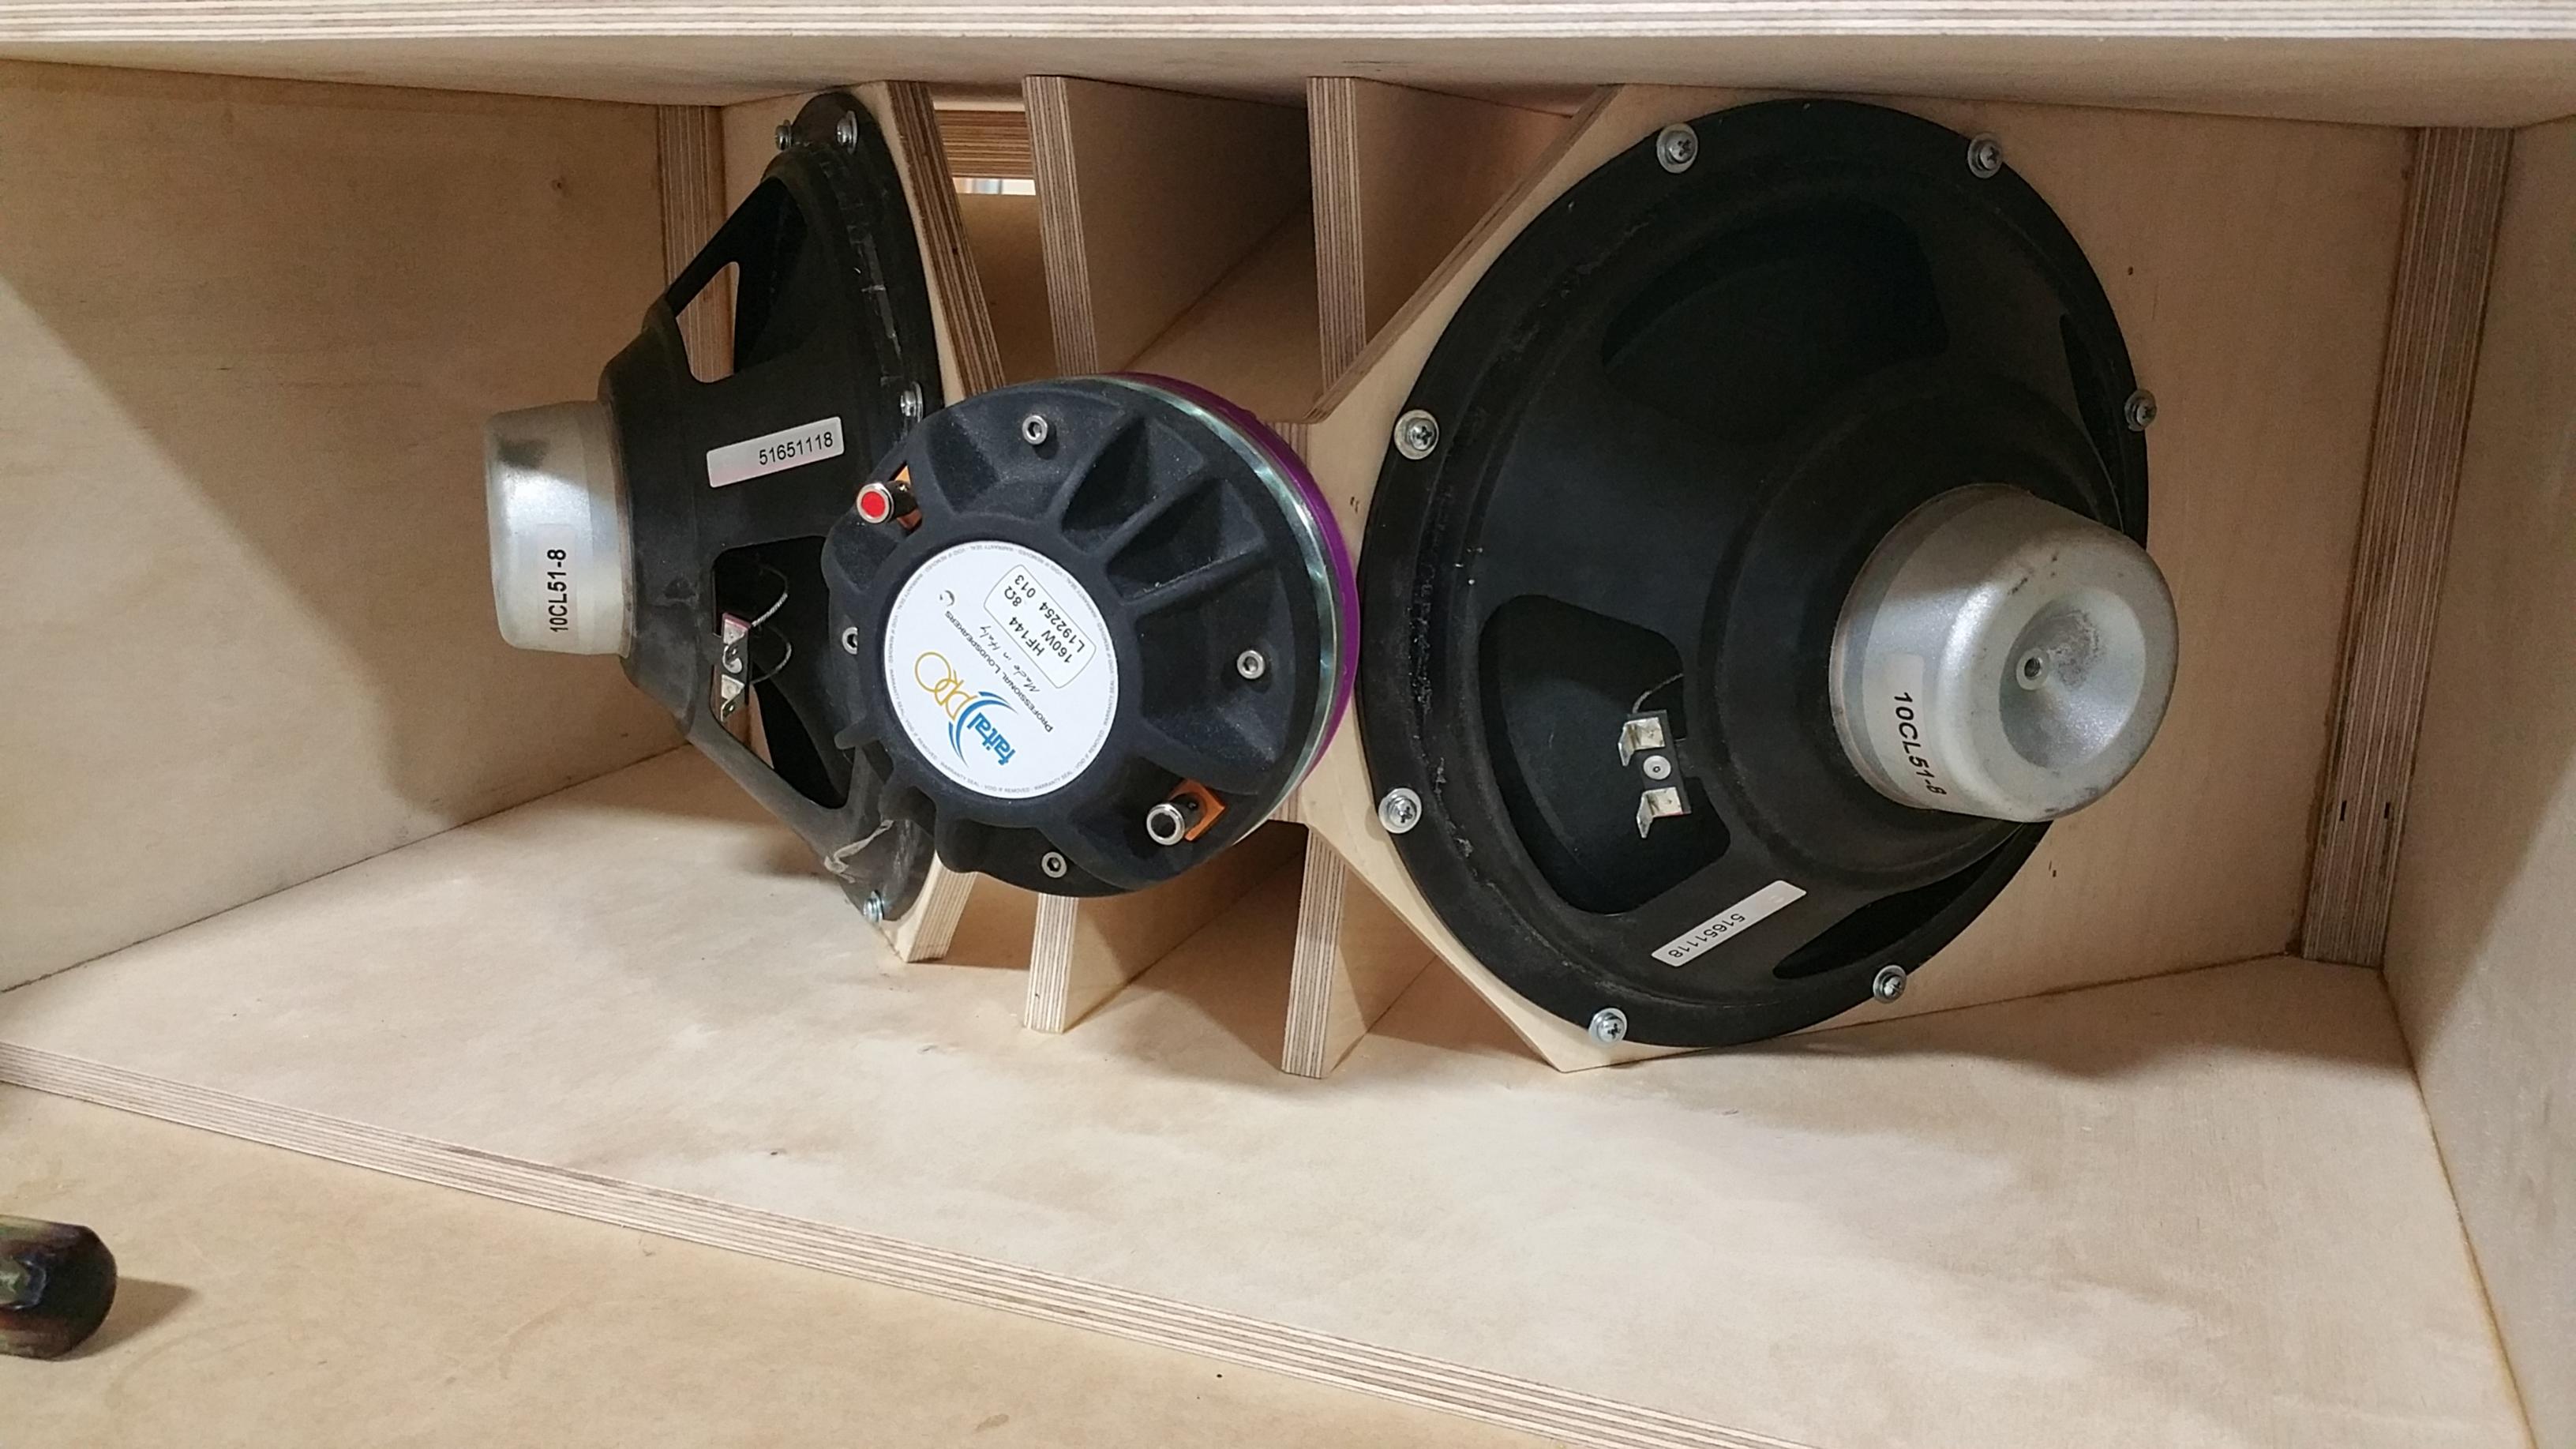
Another volume filler plug:
There is a trend here with members named Jennifer and 3D printers?
If you have 3D printing and CAD, your DIY options really open up. You can print many parts that will allow you to make a synergy type speaker.
For example:
Volume filler plug:
Here is compression driver adapter made by Jennygirl:
Another volume filler plug:
There is a trend here with members named Jennifer and 3D printers?
`
Thanks. Yeah I have a variable called "bit_diameter" that I use in part of the calculation
An externally hosted image should be here but it was not working when we last tested it.
Later on, if I have a different speaker I am working on all I have to do is call the guidepin module with the appropriate diameters in millimeters. And it will create a new custom tailored one. Takes 5 hours to print at 100% infill and about 70 cents of material (PLA).
Ignore my choice variable names and lack of some variables
I took the low tech approach. I made a sliding "truck" on my circle jig. I use a try/combination square butting the far blade of the router to set distance to pin.
An externally hosted image should be here but it was not working when we last tested it.
Well I tested out the 75 cent jig for the inexpensive Harbor Freight trim router. (well 75 cents for the PLA -- the pin for it was 67 cents from Ace Hardware).
It works
Gosh MDF is nasty stuff! Can't stand this dust. Should I just buy some cheap plywood from Home Depot instead? I can't afford the really good birch stuff.. nor do I know where I can get it (Home Depot certainly doesn't have it).
I wonder how nasty the MDF would be if I had my BF right there vaccuuming it (or vice versa) as it is routed.
It works
Gosh MDF is nasty stuff! Can't stand this dust. Should I just buy some cheap plywood from Home Depot instead? I can't afford the really good birch stuff.. nor do I know where I can get it (Home Depot certainly doesn't have it).
An externally hosted image should be here but it was not working when we last tested it.
I wonder how nasty the MDF would be if I had my BF right there vaccuuming it (or vice versa) as it is routed.
Dust collection is must on MDF. Nasty mess and nasty for your lungs! If you're willing to fill some end grain voids, HD plywood will work just fine and MUCH less dust. Ply is harder to get a smooth painted surface but if you aren't going for paint then it doesn't matter.
You're right, I'd have to veneer everything. Impossible to sand smooth.
Would a vacuum cleaner be enough constantly running while routing and each of us wear the paper dust makes over nose/mouth?
EDIT: By the way, how do you guys secure the center of what you are cutting out to a piece of junk wood below? I imagine I need to secure it so it doesn't move as it approaches the end of the cut.
Last edited:
Vacuum is fine but may ruin it with sawdust, typically use a wet/dry vac. You really need a quality respirator. They are about $20 at HD and have replaceable filters. Better to be safe now not sorry later.
Yes countersink a screw in the center to another board so when you are done routing it stays put otherwise watch closely and get a good grip on the router, 1 second lapse at the end and you've ruined you hard work with a gouge.
Yes countersink a screw in the center to another board so when you are done routing it stays put otherwise watch closely and get a good grip on the router, 1 second lapse at the end and you've ruined you hard work with a gouge.
Vacuum cleaner plus minion is a useful addition to any tool shed when MDF is being dustified.
If you run the router through 1/2 the thickness, then flip it, you may find that carpet tape will hold both the work and loose center to the bench. You also have less protruding router bit to snag on things.
If you run the router through 1/2 the thickness, then flip it, you may find that carpet tape will hold both the work and loose center to the bench. You also have less protruding router bit to snag on things.
only issue with @jerms suggestion is if your pilot hole for the pin isn't 100% square/perpendicular, your driver hole will be off as much as 1/8" (your error doubles). I would just measure carefully and barely go through the piece and you can still use carpet tape, just make sure the router bit doesn't catch the tape.
only issue with @jerms suggestion is if your pilot hole for the pin isn't 100% square/perpendicular, your driver hole will be off as much as 1/8" (your error doubles). I would just measure carefully and barely go through the piece and you can still use carpet tape, just make sure the router bit doesn't catch the tape.
I really like the idea of screwing it down. Seems easy
Of course it requires some sacrificial wood but it's ok I got plenty Maybe a jigsaw to cut main hole close then do final trim with route is less dust. HD had birch ply - it's not bad stuff - smoother than regular ply.
Well if I cut out the center, then I won't be able to use my jig for perfect round circle
If I didn't have any flush mount countersunk holes I'd do that Well if I cut out the center, then I won't be able to use my jig for perfect round circle
Jennifer,
I think what X is saying is that you can cut out the center after you've done routing the recess for driver flush mounting.
If you use the router to cut through the whole 3/4" of material it is likely to create more dust vs cutting it out with a jigsaw. But you shall get a closer to perfect circle.
- Status
- This old topic is closed. If you want to reopen this topic, contact a moderator using the "Report Post" button.
- Home
- Loudspeakers
- Multi-Way
- My first DIY speakers -- full range bookshelf.