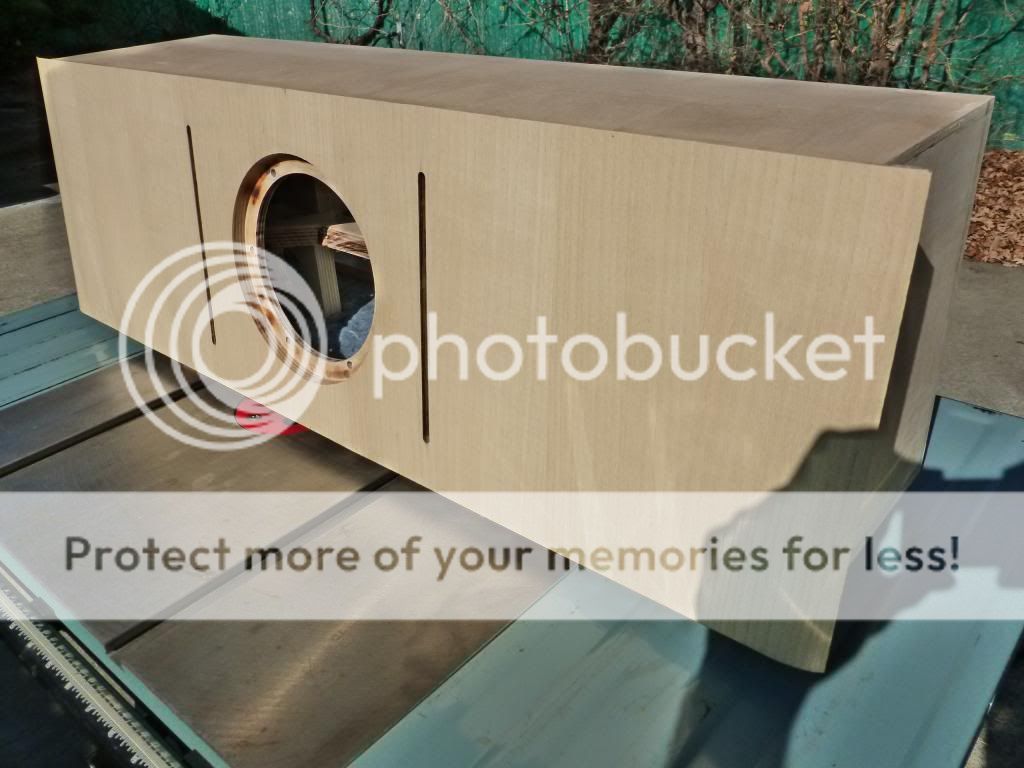
Got the front baffle glued on today. Ran a bead of carpenter's glue around the inside lip of the cabinet body as I have the rabbit joints all around the front baffle. Ran two beads around the edge. Finally, ran a bead along the places on the holey brace where it interfaces with the front baffle.
I did find I had to first trim a little bit of the dampening material where the slot vents were at the bottom, and also a little bit around where the top of the holey brace interfaces to get a good fit.
I tipped the cabinet back and placed a large piece of wood (a bit bigger than the cabinet) underneath and a few scraps on top, making sure they were all longer than the cabinet width so that the strap clamps did not dig into the edge and break the veneer. The clamps dug in very slightly in one place probably due to the high humidity in the air tonight while it was setting up. No big deal, barely noticeable even with close inspection.
The next challenge will be veneering the sides as there is some sanding and filling to do right up against the back of the front baffle veneer. A lot of care will be needed. In retrospect it would have probably been easier to just veneer the whole cabinet after it was complete rather than veneering the front first in order to route the driver hole and slot vents in one go. Although those holes/slots turned out great, it makes things harder later. Probably best to just veneer after and cut the holes in the veneer with a sharp knife. Obviously the driver hole won't be quite as perfect, but the ability to properly sand and/or fill the front side edges is more important IMHO as they usually won't be 100% square and you want your side veneer to have a flat surface all the way to the edge.
Quick update --
pics of progress:

detail:
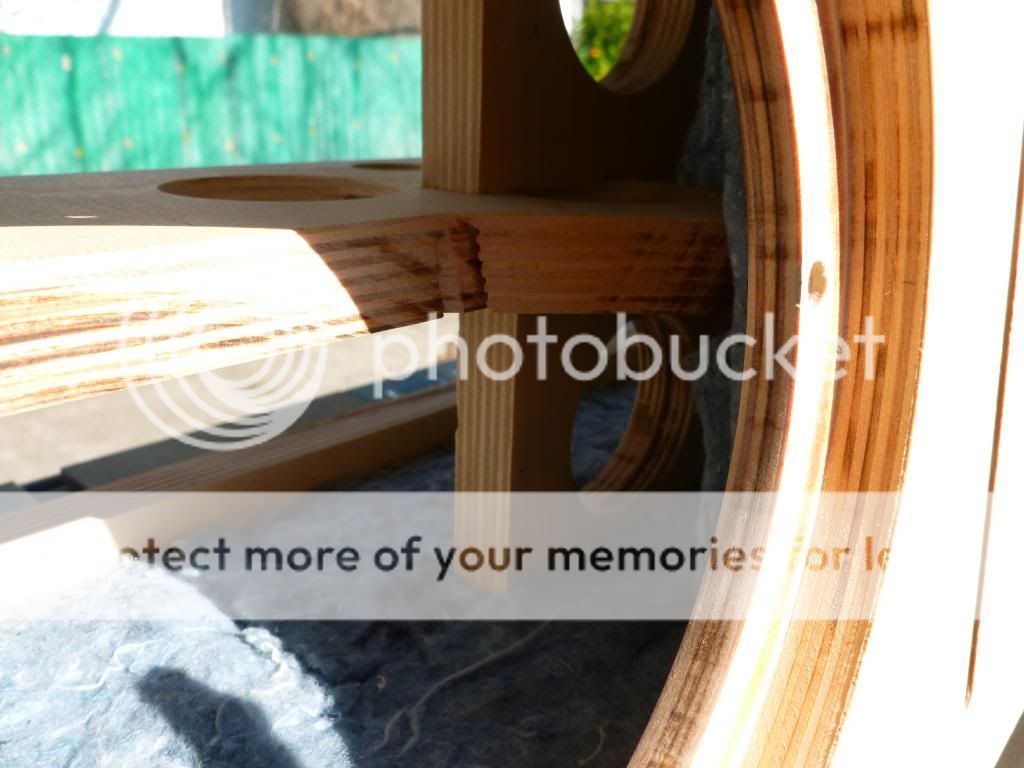
You can see the veneer sticks out from the sides of the front baffle, I did that so it will overlap the veneer I'll be putting on the sides. I'm currently using wood filler and sanding it down along the sides behind the flaps on veneer. Pretty tedious, as I don't want to break through the veneer. Think I'm finally about finished with the filling and sanding. There was no gap, but the joints on the cabinet did not go together at perfect 90 degrees, probably 89.9 degrees! So the front baffle needed a little filling on a couple of corners to ensure a flush fit of the side veneer.
I did veneer the bottom (not shown) before gluing on the front baffle, then realized I had failed to factor in the thickness of the front baffle, so I went back and cut a narrow strip to fill in. Pretty hard to cut veneer straight by hand, much better to get it right the first time and use the flush cut trim bit with a bearing on the router. That's what I've been doing around the back, and it's not too hard to get professional results with it.
I did use a scrap of wood to fill in the back (also not shown) so that the router would have a flat surface to avoid wobble. Wobble is bad because the bit digs into the side. I did find that with the pressure sensitive veneer I'm using, the flush trim bit heats up the adhesive and makes it smear out onto the adjacent veneered surface, so some careful sanding is required to get that remaining goop off of there.
The back is done with veneer around the edges and the back panel separately so it will be removable, it looks great. Forgot to take a picture -- will do so when I have the stainless steel cap bolts and t-nuts installed. I'll need to think of something to use as a gasket too, as the holey brace is a little too tight back there for a perfect fit against the cleats. It's really close, but not quite, I wanted it to have a lot of tension on it.
pics of progress:
detail:
You can see the veneer sticks out from the sides of the front baffle, I did that so it will overlap the veneer I'll be putting on the sides. I'm currently using wood filler and sanding it down along the sides behind the flaps on veneer. Pretty tedious, as I don't want to break through the veneer. Think I'm finally about finished with the filling and sanding. There was no gap, but the joints on the cabinet did not go together at perfect 90 degrees, probably 89.9 degrees! So the front baffle needed a little filling on a couple of corners to ensure a flush fit of the side veneer.
I did veneer the bottom (not shown) before gluing on the front baffle, then realized I had failed to factor in the thickness of the front baffle, so I went back and cut a narrow strip to fill in. Pretty hard to cut veneer straight by hand, much better to get it right the first time and use the flush cut trim bit with a bearing on the router. That's what I've been doing around the back, and it's not too hard to get professional results with it.
I did use a scrap of wood to fill in the back (also not shown) so that the router would have a flat surface to avoid wobble. Wobble is bad because the bit digs into the side. I did find that with the pressure sensitive veneer I'm using, the flush trim bit heats up the adhesive and makes it smear out onto the adjacent veneered surface, so some careful sanding is required to get that remaining goop off of there.
The back is done with veneer around the edges and the back panel separately so it will be removable, it looks great. Forgot to take a picture -- will do so when I have the stainless steel cap bolts and t-nuts installed. I'll need to think of something to use as a gasket too, as the holey brace is a little too tight back there for a perfect fit against the cleats. It's really close, but not quite, I wanted it to have a lot of tension on it.
Last edited:
Update:
It's been rainy here for a week (the first time since the veneering phase started) and I noticed that the speaker, stored in the garage, has some ripples in the veneer on the front along with the grain, especially around the ends of the slot vents as that's the narrowest part. I assume the elevated moisture in the unheated garage air caused this, as it was glass smooth before. This caused me to enter "full panic" mode and I used four clamps to apply pressure to the area, with a piece of BB ply in between to protect the surface. I then brought it inside where the HVAC heating will provide dryer air. It is a shame because of the care that went into making it perfect, and I know it was glass smooth before the rainy days.
(The veneer in use for this project is a quality paper backed pressure sensitive adhesive (PSA) quartersawn ash in case you don't recall.)
This experience makes me regret not going with my initial inclination to use woodgrain formica as the finish, but hopefully it will work out well enough that I can live with it.")
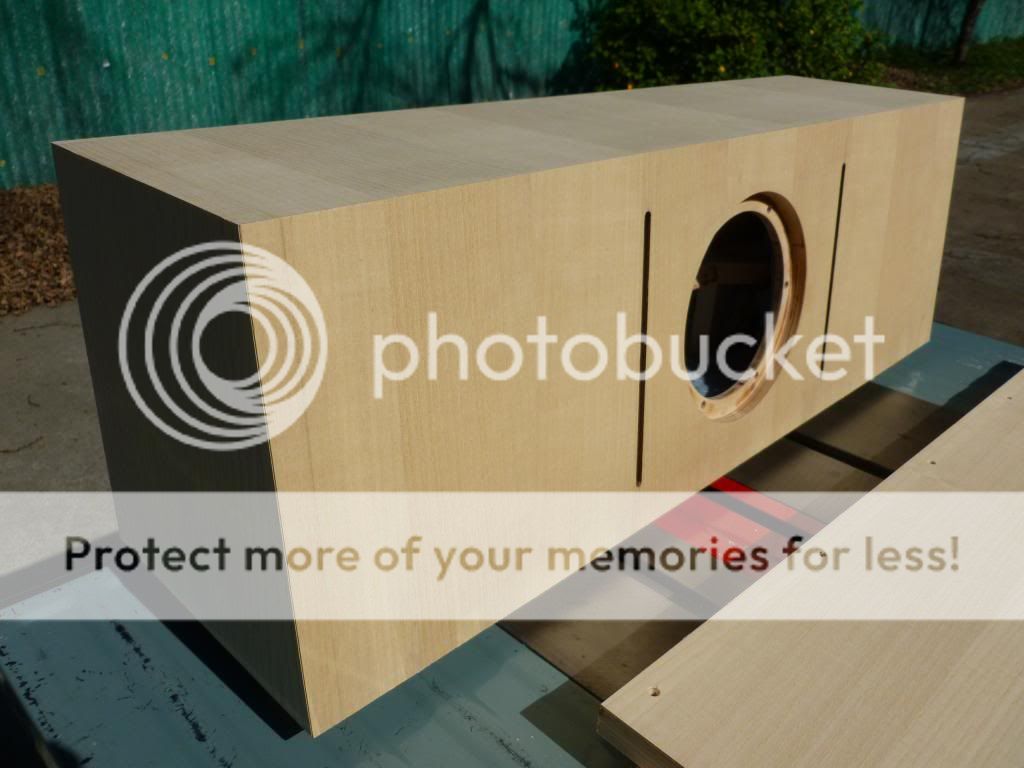
Other than that, I put on some more veneer (a side) and used a razor blade to trim the front baffle veneer along the bottom and then did some sanding to make the edges flush. Just one more side to go (top). Then I'll get into the dye (not water based so it won't raise the grain.... but nature foiled that plan).
It's been rainy here for a week (the first time since the veneering phase started) and I noticed that the speaker, stored in the garage, has some ripples in the veneer on the front along with the grain, especially around the ends of the slot vents as that's the narrowest part. I assume the elevated moisture in the unheated garage air caused this, as it was glass smooth before. This caused me to enter "full panic" mode and I used four clamps to apply pressure to the area, with a piece of BB ply in between to protect the surface. I then brought it inside where the HVAC heating will provide dryer air. It is a shame because of the care that went into making it perfect, and I know it was glass smooth before the rainy days.
(The veneer in use for this project is a quality paper backed pressure sensitive adhesive (PSA) quartersawn ash in case you don't recall.)
This experience makes me regret not going with my initial inclination to use woodgrain formica as the finish, but hopefully it will work out well enough that I can live with it.
Other than that, I put on some more veneer (a side) and used a razor blade to trim the front baffle veneer along the bottom and then did some sanding to make the edges flush. Just one more side to go (top). Then I'll get into the dye (not water based so it won't raise the grain.... but nature foiled that plan).
Still watching this build. Way to go hangin' in there for the long haul, it'll be worth it.
Thanks!
I've been trimming and sanding all of the edges. The veneer will be done soonish. I believe the ripples are a bit better after the clamping and would not be noticeable to all but the most critical eye (that would be me).
Another update!
Sanded down holy brace carefully on the back to make the back panel fit perfectly without gasket. I found a short scrap that could bridge the upper and lower cleats very handy to run back and forth and find any high spots.
Finished all of the veneer. What a job that was! I'd say the bracing was the hardest, closely followed by the veneering. I can see why many people opt to just paint their cabinets.
View showing a side, top, front (I know it's similar to recent photos, but those were not fully veneered yet):
Back (first time I've shown this):

Notice I have provided countersinking (and predrilling, with larger diameter for the shanks) for the eventual screw heads.
Finally, I leave you with a sample I whipped up of the dye I'm using (that driver cutout is always useful for something, eh?):

Sanded down holy brace carefully on the back to make the back panel fit perfectly without gasket. I found a short scrap that could bridge the upper and lower cleats very handy to run back and forth and find any high spots.
Finished all of the veneer. What a job that was! I'd say the bracing was the hardest, closely followed by the veneering. I can see why many people opt to just paint their cabinets.
View showing a side, top, front (I know it's similar to recent photos, but those were not fully veneered yet):
Back (first time I've shown this):
Notice I have provided countersinking (and predrilling, with larger diameter for the shanks) for the eventual screw heads.
Finally, I leave you with a sample I whipped up of the dye I'm using (that driver cutout is always useful for something, eh?):
Update - I did my final pass with 400 grit sandpaper. Then, I dyed the cabinet, which is veneered with quartersawn ash, with Transtint purple dye thinned 50/50 with denatured alcohol and lacquer thinner. Took a couple passes to get a more even dye across the whole workpiece. Some of the slices of veneer did not absorb as much dye. I waited a day in between, but don't really have to wait that long as it dried fast as the solvents evaporate.
Currently looks nice. Definitely royal purple tone (like the best Purpleheart examples) as I was hoping for.
Now the only issue is what to use as a finish coat as everything contains a solvent that could lift the transtint. I asked an expert via email (the guy that I bought the Transtint and veneer from), if he responds I'll be sure to share his opinion. If you have an opinion, that would be welcome too!
The guy said to use lacquer or conversion varnish. Since I don't want to bother with catalyst, I'll be going with lacquer. Probably a rattle can and try to spray very lightly for the first coat or two. Now to figure out what brand is best, Mohawk, Watco, Minwax, etc. Not going to choose Deft as some guy on a guitar building forum could not get it to cure after weeks -- no thanks! Also avoiding water bourne lacquer as I don't want to raise the grain at this point -- keep it simple.
FWIW the catalyzed conversion varnish or lacquers are more than worth the effort on larger scale /commercial projects but do require an investment in application tools. For small one-offs I quite like the Mohawk catalyzed aerosols, or even something like Circa 1850 Antique Paste varnish- I had no problems applying with disposal foam brushes, and it caused no streaking or leaching of a well dried Watco oil based stain.
I had no problems applying with disposal foam brushes, and it caused no streaking or leaching of a well dried Watco oil based stain.
I'm guessing this is our last bespoke build Chris is talking about, turned out really well.
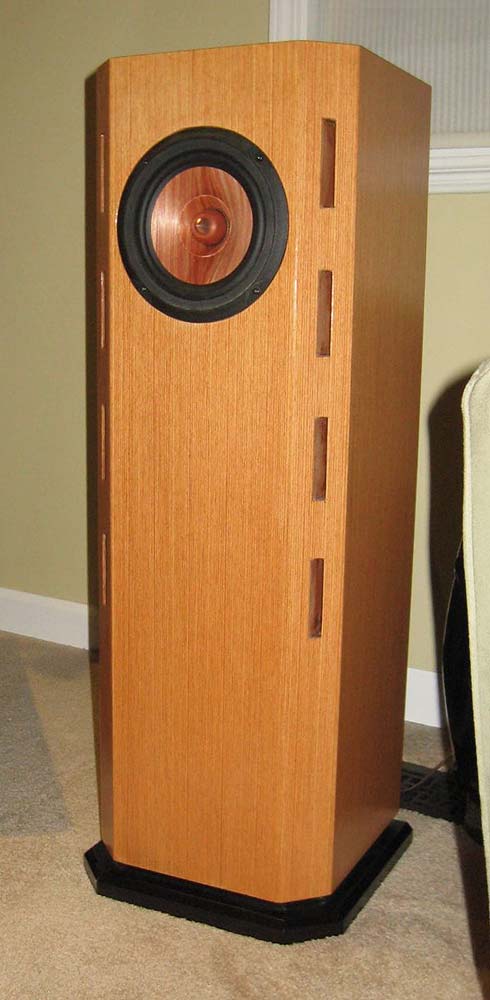
dave
Thanks Chris and Dave! That example looks great! Reading about all the issues with lacquer, I may just go for a clear shellac and pick up an HVLP spray gun for 25-40 dollars. I have a compressor that may work. I think I could do a good job with rattle cans but the HVLP route may be worth it. Trying to avoid any brushing/rubbing for the clear finish as Transtint dye does not have any binder in it unlike stains (at least the way I did it, one *could* mix Transtint with other stuff like Shellac as a toner).
What exactly are the "issues" with lacquer causing your concern?
If you plan on spraying shellac with an HVLP pot or gravity feed gun, and don't have some practice yet, I'd wager you'd get better results on this size an enclosure with 2 or 3 "rattle" cans of the Mohawk clear lacquer or shellac product.
I've used the lacquer myself - built a side table at home a few years ago just for kicks, including the staining and finishing coats - did miss the space of the full shop though.
What exactly are the "issues" with lacquer causing your concern?
If you plan on spraying shellac with an HVLP pot or gravity feed gun, and don't have some practice yet, I'd wager you'd get better results on this size an enclosure with 2 or 3 "rattle" cans of the Mohawk clear lacquer or shellac product.
I've used the lacquer myself - built a side table at home a few years ago just for kicks, including the staining and finishing coats - did miss the space of the full shop though.
In the info I linked he mentions that bugs love to land in wet lacquer (I have to do this outdoors), and many people have mentioned online that lacquer offgasses for a very long time, unlike shellac which is non-toxic after a day. That means I can enjoy the project much sooner. Just a couple examples why I'm leaning toward the natural product.
I do have some experience with airbrushing, I don't think an HVLP gun would be that much different. It is a pain to have to clean it every time though, whereas a rattle can you just turn it upside down and spray for a second, wipe the nozzle opening, and that's about it. I'm just thinking it may be a bit easier to get the really thin coats I'm after with the HVLP.
If I went for the rattle cans, I would imagine that the Zinsser Bulls Eye "Clear" Shellac 12 oz spray would be the only choice around here.
I appreciate your experienced input as always!
That's a good tip on the paste varnish, I've looked at it but not used it.FWIW the catalyzed conversion varnish or lacquers are more than worth the effort on larger scale /commercial projects but do require an investment in application tools. For small one-offs I quite like the Mohawk catalyzed aerosols, or even something like Circa 1850 Antique Paste varnish- I had no problems applying with disposal foam brushes, and it caused no streaking or leaching of a well dried Watco oil based stain.
Time to give it a try.
I've been using a Benjamin Moore product, "Stays Clear" No streaking, water cleanup and a nice durable finish.
That's a good tip on the paste varnish, I've looked at it but not used it.
Time to give it a try.
I've been using a Benjamin Moore product, "Stays Clear" No streaking, water cleanup and a nice durable finish.
I'd definitely seriously consider the paste varnish if I had not already applied Transtint dye, which has no binder, so I must spray very lightly.
Anything water based is out as I don't want to raise the grain.
I also want a very fast drying, non-toxic product.
Narrows it down quite a bit (for me).
Good discussion and input!
Well you could always ruin the look with a Varathane product - OK, that's just my bias - I hate the look of it on wood surfaces, but it's OK enough as top coat on some things.
Yes, true NC lacquers, no matter how applied will definitely off-gas for up to many weeks before cured. I can't speak to shellac as final finish - the last time I used it was as a sanding sealer on a jr high school project, almost 50yrs ago- but if it's available in aerosol, it could be your best bet. Just don't expect the durability on final coats of a catalyzed lacquer or conversion varnish.
I'd be inclined to seal with spray shellac, then apply a more durable top coat (brush or spray) - note that almost all will have a certain amount of off-gassing during the initial drying period, even the water-based or polyurethanes. The Circa 1850 paste varnish and Saman hybrid water/oil varnish I recently tried are the most benign of the bunch.
I'd be inclined to seal with spray shellac, then apply a more durable top coat (brush or spray) - note that almost all will have a certain amount of off-gassing during the initial drying period, even the water-based or polyurethanes. The Circa 1850 paste varnish and Saman hybrid water/oil varnish I recently tried are the most benign of the bunch.
Yes, a top coat over shellac for durability is pretty much what most of the other experts online say. Wipe-on poly was mentioned a few times. A few of them though say that you can get away with just a few coats of shellac, but it won't be very resistant to water or alcohol or scratches. Good resistance vs. water VAPOR (expansion/contraction) though.
However, this item will not see any abuse (other than the unforeseen) so the extra work of an additional coat beyond the shellac seal may not be worth it.
Would the paste varnish raise the grain? I'd guess no, but I don't know anything about it yet. Do you think it would work well over dewaxed shellac (Zinsser "Clear" shellac rattle can product)? Supposedly "anything" will adhere to that but I'm a newbie when we get past the usual water bourne poly and Varathane.
Thanks again Chris.
no, the varnish won't raise the grain - but if applying more than one coat you'd want to give a very light scuff sanding with 150-180g foam sanding pads (in grain direction) between coats to enhance adhesion
I'll make no bones about not being a fan of any of the poly finishes on solid wood or veneered surfaces - and I've tried several - it'd be a surprise if other folks didn't offer different advice on the subject, or have their own favorites. Once you find a product / method that works, you tend to stick with it.
Should look very cool once it's finished
cheers
It's kind of hard to get a nice even coat with shellac if you're not experienced with it.
FWIW a sort of traditional pro lacquer based finish schedule for this would be:
2 coats sanding sealer
Sand lightly with 320-400 stearated paper
2-3 light coats NC lacquer
Whatever you do, always TEST ON SCRAP first.
The mohawk rattlecans are pretty good, but usually add another coat or two to the above recipe if using rattlecans instead of a gun.
Last edited:
- Status
- This old topic is closed. If you want to reopen this topic, contact a moderator using the "Report Post" button.
- Home
- Loudspeakers
- Full Range
- HT Front Stage Designs Using Markaudio Alpair 10.2 - Plans, Feedback and Build Log