1/4" is narrower than i typically like, but i would go with the higher aspect ratio slot.
dave
Great! I'll leave it as planned then. 7" x 1/4". Thanks again. - Ben
1/4" is narrower than i typically like
dave
I could go out and buy a 3/8" bit if you think the extra 1/8" would be a big deal. The vent would be about 4.06" wide then to keep the length and tuning about the same.
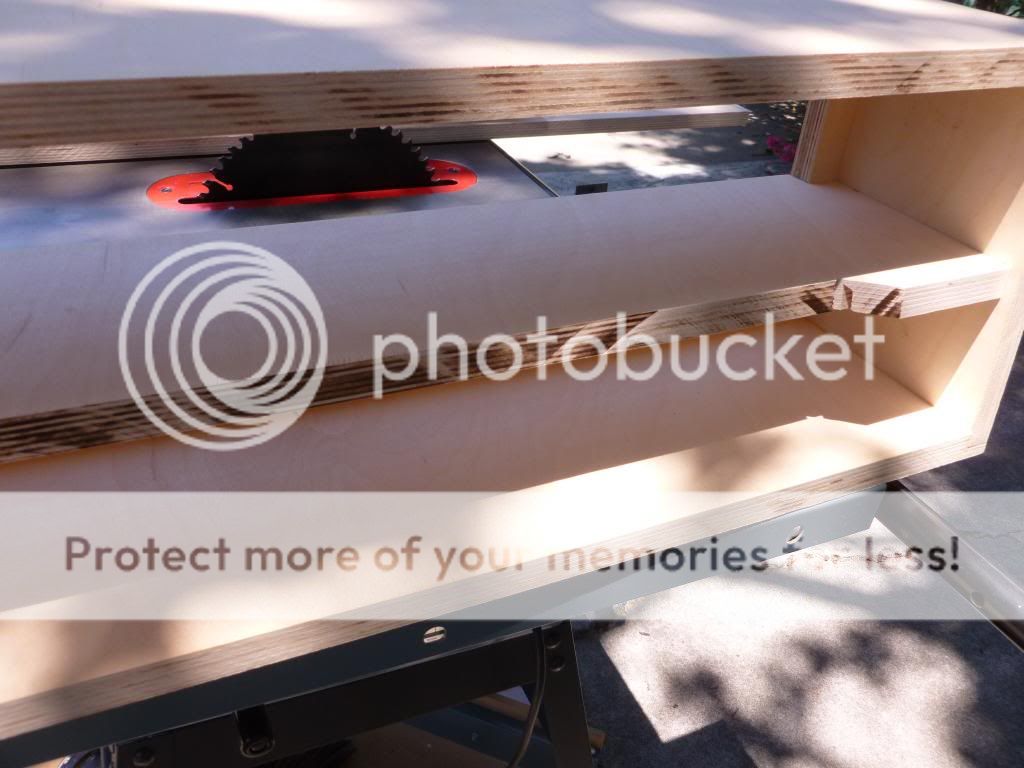
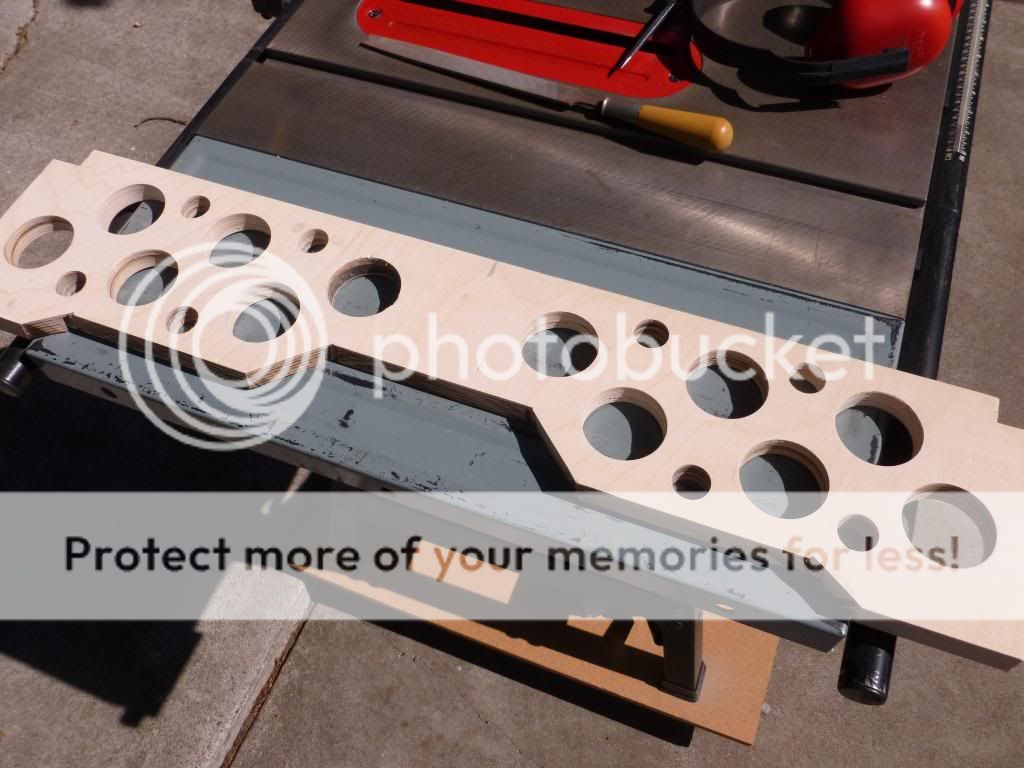
Cut the vent pieces:

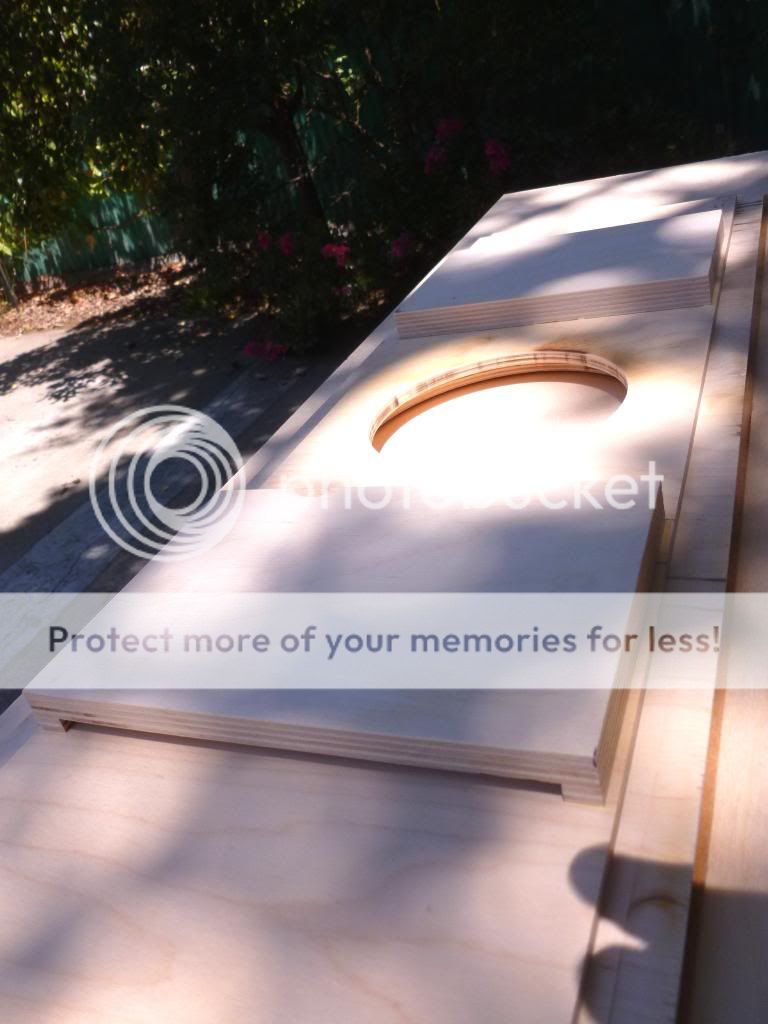
The final dimensions of each vent piece:
7-7/8" x 5-3/8" x 3/4" bb ply
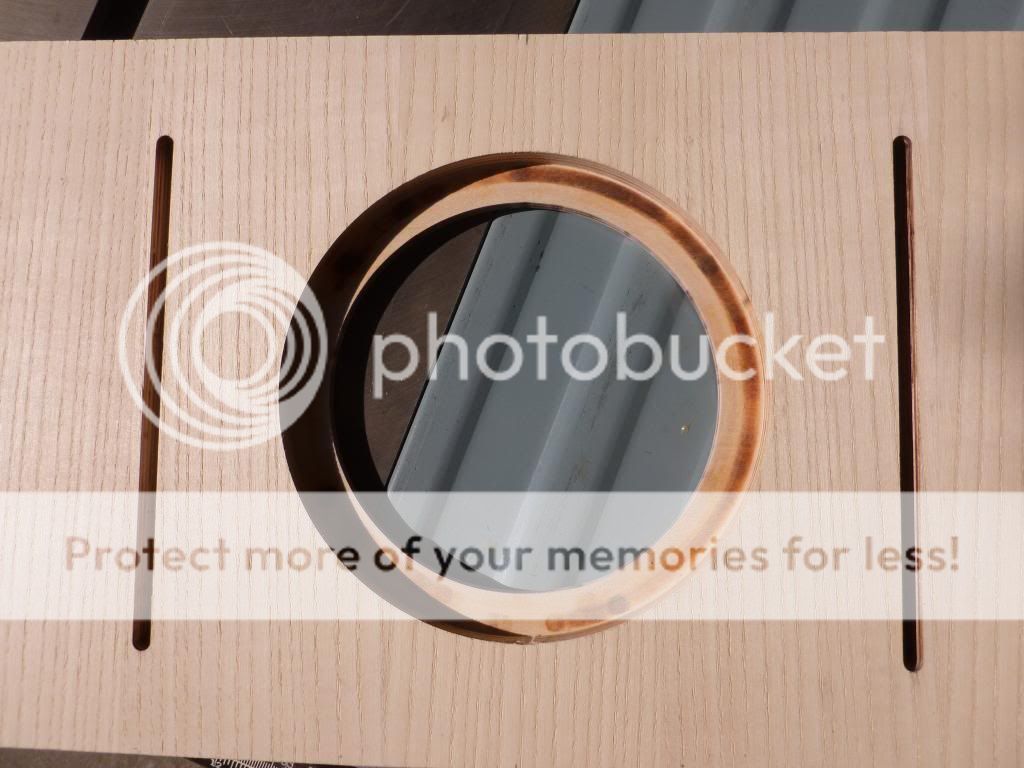
.....With a 7" x 4-15/16" x 1/4" deep recess routed out of it as shown in the above photo.
Although slightly more work, this should reinforce the front baffle better than having separate pieces for the sides and back of the vents.
The final dimensions of each vent piece:
7-7/8" x 5-3/8" x 3/4" bb ply
.....With a 7" x 4-15/16" x 1/4" deep recess routed out of it as shown in the above photo.
Although slightly more work, this should reinforce the front baffle better than having separate pieces for the sides and back of the vents.
Last edited:
Modest progress update!
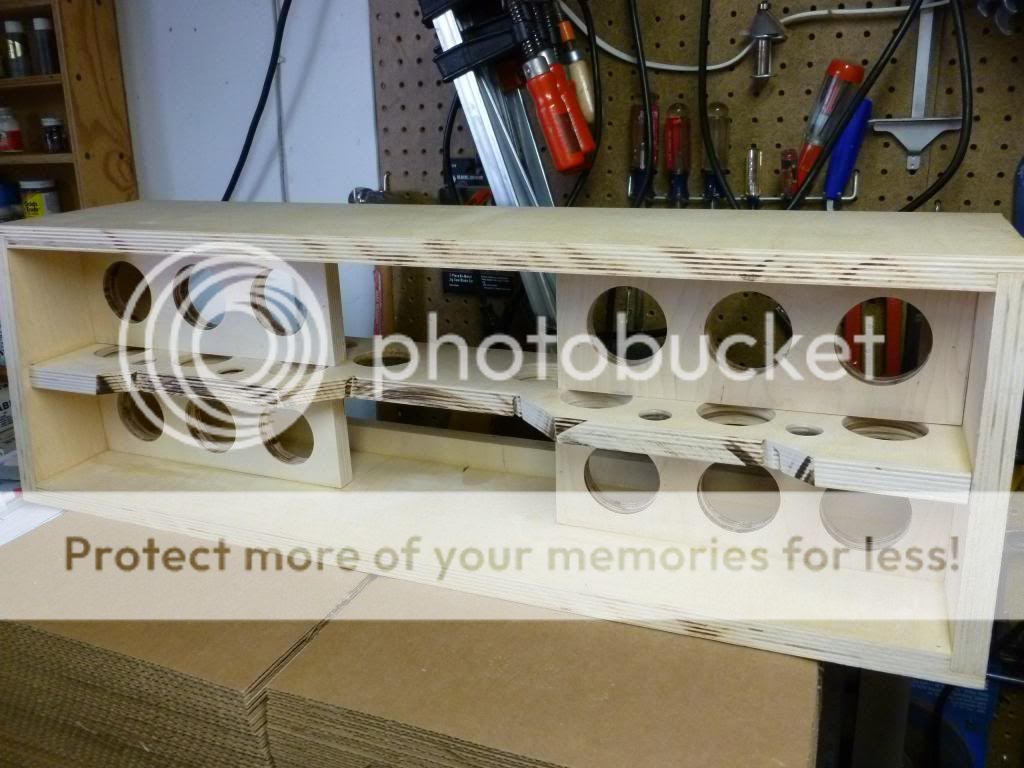
Here we have the vents glued to the back of the front panel:
You can see how the black paint in the vents causes them to disappear a bit better from the front:

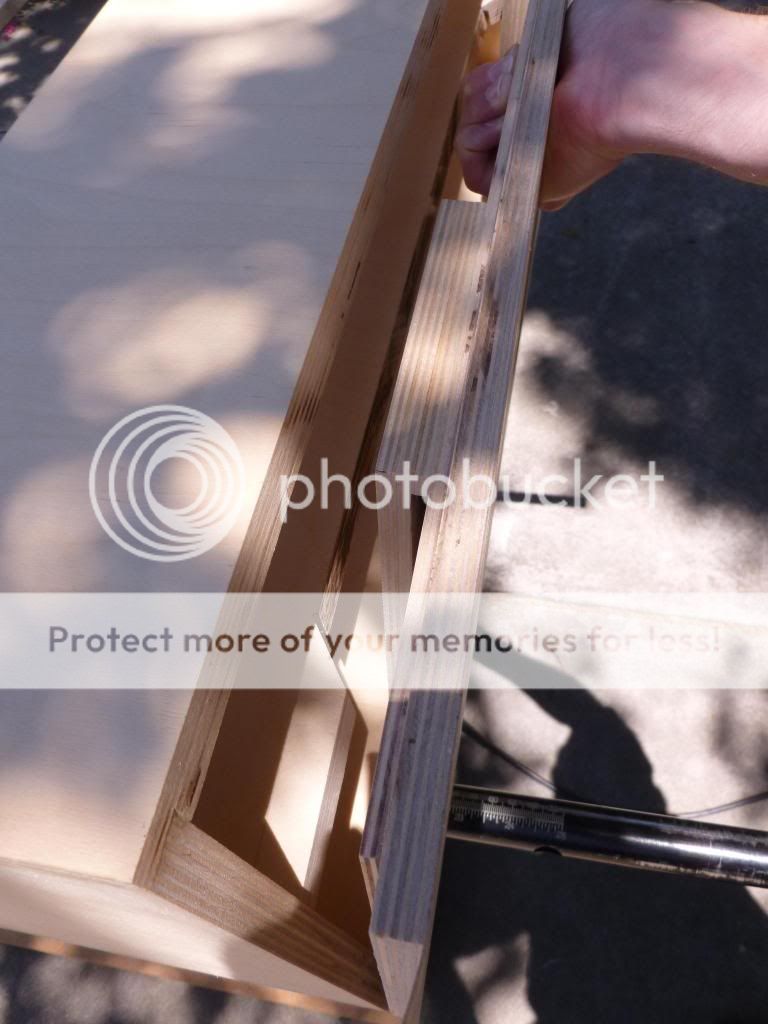
Here I show the fit of the horizontal holey brace:
Obviously the holey brace is not glued in yet as I still need to cut out the place for the driver magnet to rest upon..... and cut the actual random holes to make it, you know... holey.
And finally for this time, here is a picture showing how the front baffle nests into the sides and brace:
Here we have the vents glued to the back of the front panel:
You can see how the black paint in the vents causes them to disappear a bit better from the front:
Here I show the fit of the horizontal holey brace:
Obviously the holey brace is not glued in yet as I still need to cut out the place for the driver magnet to rest upon..... and cut the actual random holes to make it, you know... holey.
And finally for this time, here is a picture showing how the front baffle nests into the sides and brace:
A number of other projects have been consuming my time, but I did periodically work on the holey brace this summer.
")
It's done as you can see in the above photo.
The leading edge is cut at the correct angle and around the contour of the vents and driver.
The holes are 2" and 7/8". I cut all of the holes with a hole saw. I advise using the router instead for the larger holes. The Jasper jig goes down to 2-1/4". A 2" hole saw can really kick back. The Milwaukee Magnum Holeshooter (all you need to know is it has torque to spare) drill flew across the room many times when it got bound up at all, pretty dangerous. I did minimize burning by cutting through about half way then flipping the workpiece and finishing it from the other side.
In any case, this piece is done! I now have it glued in and everything is perfect as calculated - the driver magnet snugs right up to the brace. Lots of tedious measuring to get it just so. I know I could have cut off more than necessary and used thin cardboard to shim, but I wanted to at least try for perfection first.
Onward to the spar braces which will be a bit easier.
Chris was right -- the braces are as much work as all the rest of the cab.
Ben - yup them Milwaukee holeshooters have enough torque to tear your rotator cuff if you're not careful - they're used a lot by plumbers for tearing 3 - 4" holes with scary auger bits through 2x4/6 wall studs / floor plates and subfloor decking. Secure clamping of the work piece to a stable surface is mandatory.
Too late for this project I surmise, but a trick I discovered a while ago that really helps reduce burning when using the hole saw is to block the work piece and sacrificial scrap piece (prevents tear-out on the bottom side) on a couple of pieces of flat 2x4s, initially score the hole about 1/16" deep, then use a brad point bit (so it doesn't skate) and drill several 1/4 or 3/8" " holes just inside the hole through both pieces. This allows a gravity exit for the chips/sawdust, reduces burning to a minimums and greatly increases the speed of the operation - but that's still a lotta holes. For the smaller ones ( 1 1/2" or less) , Irwin has some nice self-feeding spade bits that do a quick job - but you definitely need to clamp that sacrificial waste piece to avoid tearout on the bottom surface.
Of course with plywood particularly, it helps to have a new or freshly resharpened hole saw or router bit. The combination of heat and glue in higher density plywood dulls tooling much quicker than the same thickness of MDF - and a dull bit/blade takes much longer to do a much poorer job.
but then you knew that already
Secure clamping of the work piece to a stable surface is mandatory.
Funny thing, I did clamp it but when it got really bound up, the workpiece shot out from under the really secure clamp. I could not believe it.
Thanks so much for the other tips, I appreciate it, I'm sure they will help when I go to build the main speakers.
On the spar braces I think I will use the router for the holes since the 2-1/4" setting on the Jasper jig is pretty close.
Funny you mention auger bits, I have to use one today on a different project with this same drill - hoping for the best.
PS I wish I had space (and a proper dust collection system) for stationary tools like a drill press and router table. Maybe someday.
Small update!
I finished cutting to exact size and boring the holes in the four bracing spars and have now glued them in. With some pretty exact custom cutting and sanding, these spars correct the slight bow in the top panel very nicely.
Here's a picture:
Now to go to HD and pick up a roll of Ultratouch to line this cab and then button it up. After that, I'll finish the veneering. Planning several months out is fun, no?
To those who are not following this thread too closely, and who can blame them..... yes... I'm still working on the center channel.
Just thought I'd mention that I found a 1" product similar to the 3/8" and 1.8" Ultratouch typically available. This will be better for lining the cabinets than the 1.8".
It's sold under the Frost King brand in the USA.
Model CF1: "No Itch" Natural Cotton all Purpose Insulation | Frost King® Products
It can be ordered online from home depot (they don't carry it in-store, supposedly), but I bought mine on Amazon as it sounded a bit quicker and the cost was actually a little lower.
I picked up 5 rolls to do all three speakers, hope that will do it. If not, it's not the end of the world, just another small shipping charge.
It's sold under the Frost King brand in the USA.
Model CF1: "No Itch" Natural Cotton all Purpose Insulation | Frost King® Products
It can be ordered online from home depot (they don't carry it in-store, supposedly), but I bought mine on Amazon as it sounded a bit quicker and the cost was actually a little lower.
I picked up 5 rolls to do all three speakers, hope that will do it.
If not, it's not the end of the world, just another small shipping charge.Here are the back and front panels showing the cotton insulation. It turned out to be the perfect material for lining speakers as it is basically 1/2" thick ultratouch. Not too thick and not too thin.
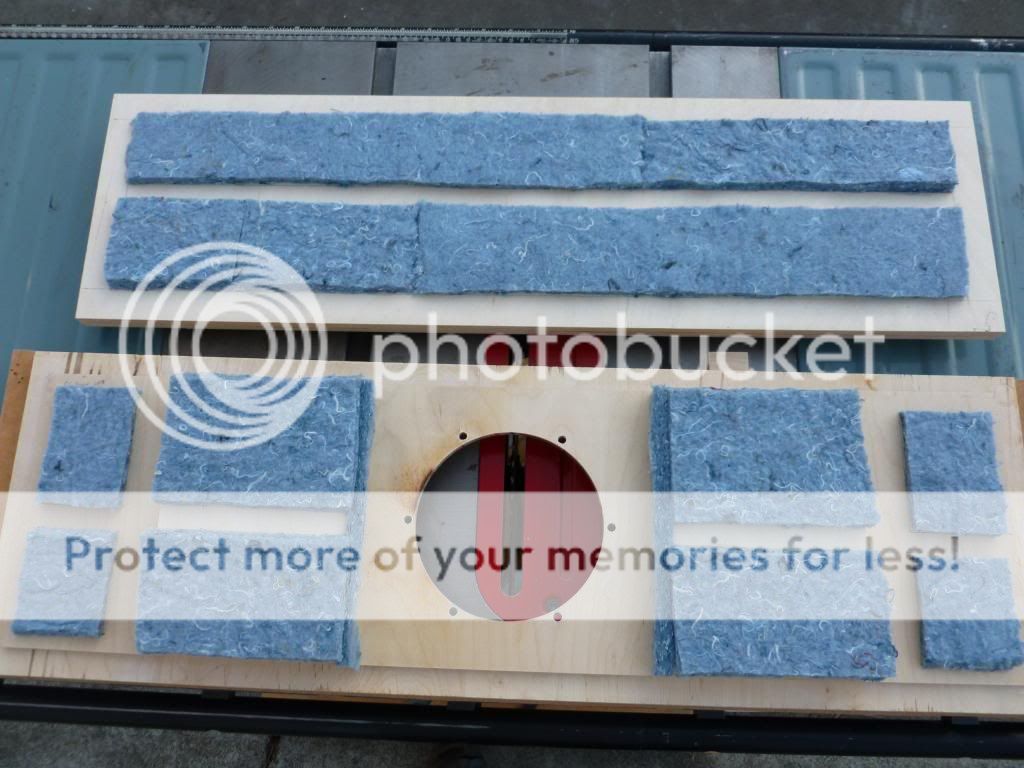
You can see I did not put any lining where the holey brace will meet with the front and back, and left 1.5" of bare wood out away from the interior vent terminus on both sides so as not to block the airflow.
Next, here is a pic showing the cabinet body with the lining in place:
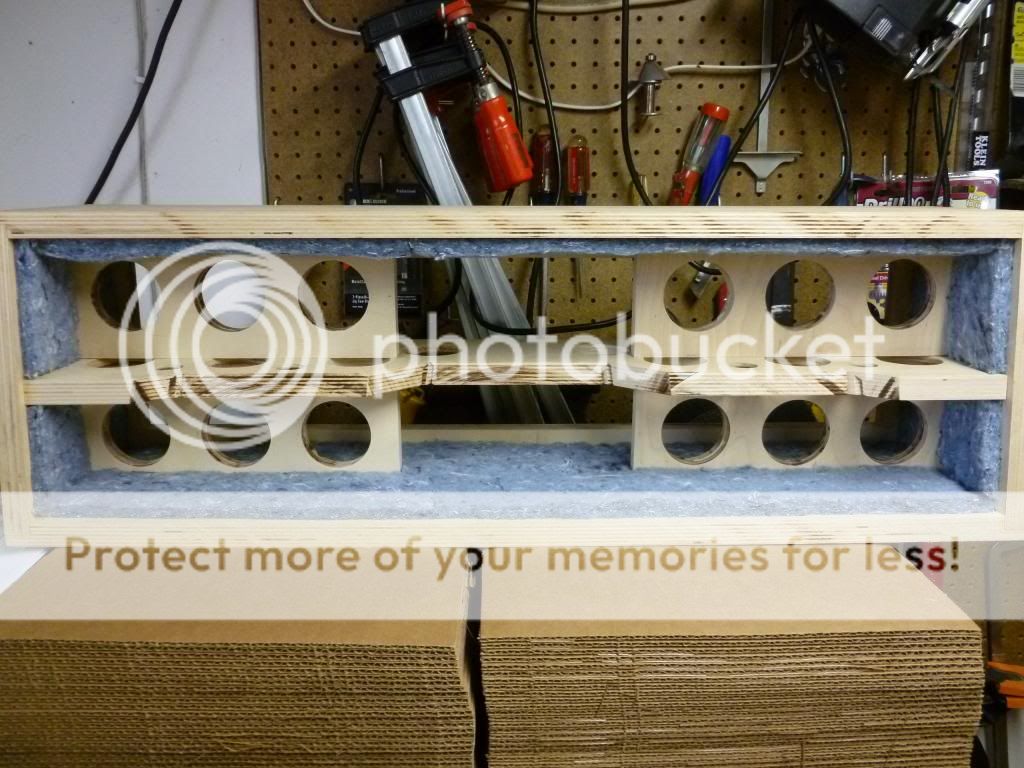
Only thing I'm debating is if I should put a piece of lining on the part of the holey brace behind the driver. I left that area of the brace solid wood to transfer vibrations better, so there is a surface there where it might do with some dampening on top and bottom. Perhaps the edges of the spar braces too. Thoughts?
You can see I did not put any lining where the holey brace will meet with the front and back, and left 1.5" of bare wood out away from the interior vent terminus on both sides so as not to block the airflow.
Next, here is a pic showing the cabinet body with the lining in place:
Only thing I'm debating is if I should put a piece of lining on the part of the holey brace behind the driver. I left that area of the brace solid wood to transfer vibrations better, so there is a surface there where it might do with some dampening on top and bottom. Perhaps the edges of the spar braces too. Thoughts?
gee, that might be a little obsessive
seriously, you're probably fine - nice work - looks vaguely familiar
time to button it up and enjoy I'd say
input terminals?
I have a set of these:
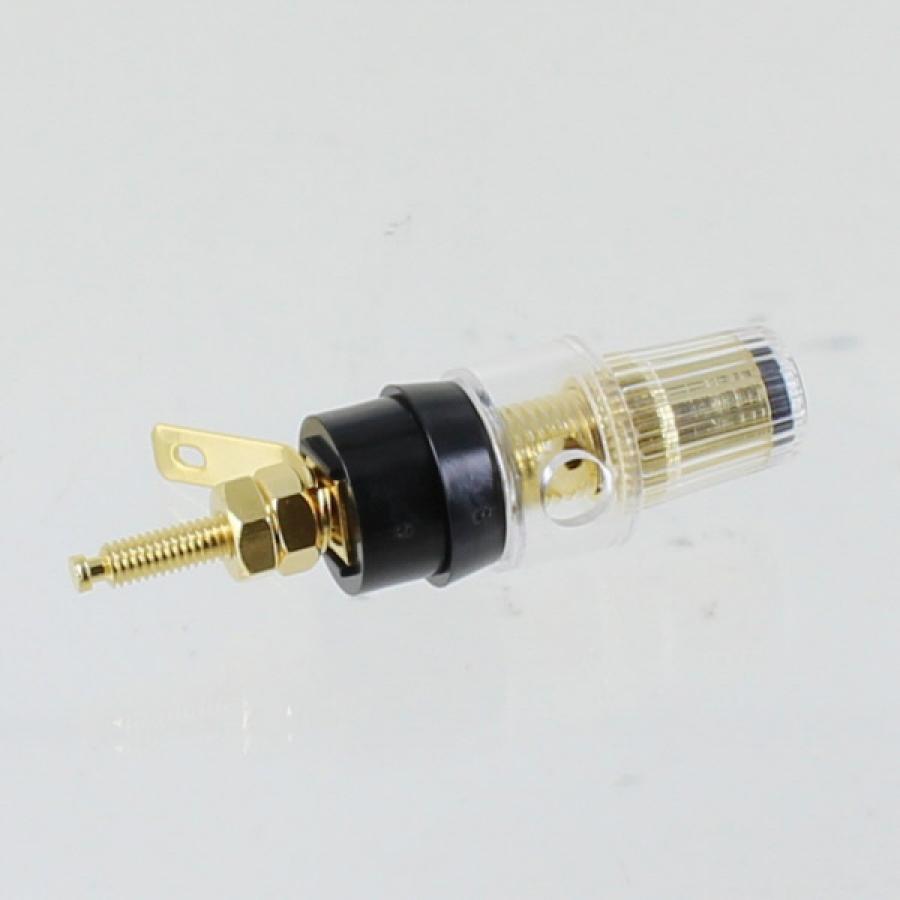
Safety Binding Post from Madisound. They seem really nice for $7 a pair.
Obsessive? This is an audiophile forum, is it not?
I kid.t is basically 1/2" thick ultratouch.
Looks just like the Ultratouch i was cutting up Friday.
dave
Safety Binding Post from Madisound.
I always like posts on a removable plate/cup to make 1/ rewiring easy, 2/posts are recessed into the box so they don't accidentily get knocked off or bent.
Remember that standard spacing is 3/4". Be ready to get sweared at if you bring them around here and they are not standard
dave
I always like posts on a removable plate/cup to make 1/ rewiring easy, 2/posts are recessed into the box so they don't accidentily get knocked off or bent.
Remember that standard spacing is 3/4". Be ready to get sweared at if you bring them around here and they are not standard
dave
I hear you - I used to use those terminal cups with the gold binding posts. But, I now prefer to make smaller holes and have taken to having removable back panels for full access after past experiences wishing I could access the internals once again. More of a problem with multi-way and isobaric style configurations than what I'm currently into here though. I also think the terminal cups look cheap-ish.
Point taken about standard dual banana width. Before you do an actual cut sheet measure the real thickness of your material. 5x5 sheets come in a nominal 18mm (+/- a couple tenths).If you just assume it is 3/4" you will be sad when you start putting it together.
dave
LOL! This just happened to me today. Building a speaker (TABAQ) enclosure and it's measurements are based on 12 mm thickness, the lumber store didn't have 12 mm, but had 1/2" mdf. Because I was in a hurry I didn't compensate and had the top and bottom cut to a width of 4-7/8", instead of 5"...Now I have to cut myself the top and bottom, after paying for them to cut it. My darn fault!!! Thank God it's only those pieces, everything else is right on the money!...Back to our regular scheduled thread

- Status
- This old topic is closed. If you want to reopen this topic, contact a moderator using the "Report Post" button.
- Home
- Loudspeakers
- Full Range
- HT Front Stage Designs Using Markaudio Alpair 10.2 - Plans, Feedback and Build Log