I'm not 100% sure how church pipe organs work but I think you're on the right track. Search Google for Voigt Pipe and you'll find plenty to read. Here's a snippet from the Wikipedia page...
The concept is that the sound emitted from the rear of the loudspeaker driver is progressively reflected and absorbed along the length of the tapering tube [the front portion of Larry's design], almost completely preventing internally reflected sound being retransmitted through the cone of the loudspeaker. The lower part of the pipe [the back portion of Larry's design] acts as a horn while the top can be visualized as an extended compression chamber.
The concept is that the sound emitted from the rear of the loudspeaker driver is progressively reflected and absorbed along the length of the tapering tube [the front portion of Larry's design], almost completely preventing internally reflected sound being retransmitted through the cone of the loudspeaker. The lower part of the pipe [the back portion of Larry's design] acts as a horn while the top can be visualized as an extended compression chamber.
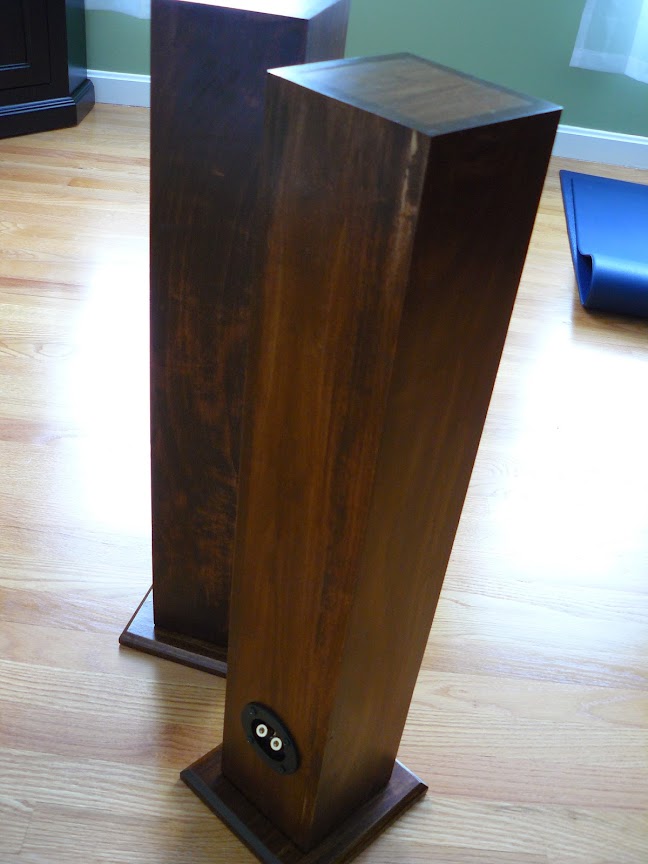
Tom, note that the vent on Larry's speakers, reaches thru the divider. Ignoring room loading effects, it could be front or rear facing withno differences.
One dimension (length) is much longer than any of the others which changes the physics from a BR to a quarter-wave (TL).
dave
Thanks for that additional info Dave. I believe I have an understanding of what's happening now. As I said when I responded to chuyler, "It's like tuning a pipe on a church organ." However if a I'm truly still following this correctly. It's a quarter-wave because the length of the internal "pipe" per se is exactly 1/4 of the wavelength you're tuning to.
Thus "IF" you were building a TQWT that was tuned to 20Hz. First you'd calculate 20Hz has an airborne wavelength of 56.6'. That automatically means the 1/4 wavelength of 20Hz is 14.125'. Which in turn would be the length that's needed to be used of the internal "pipe" in a TQWT. Do I finally have it?
Thetubeguy1954 (Tom Scata)
It's a quarter-wave because the length of the internal "pipe" per se is exactly 1/4 of the wavelength you're tuning to.
It is a quarter-wave pipe because any pipe open at one end has a 1/4 wave resonance. You tune a pipe by asjusting its length (althou that is complicated when the pipe is mass loaded.
dave
It is a quarter-wave pipe because any pipe open at one end has a 1/4 wave resonance. You tune a pipe by asjusting its length (althou that is complicated when the pipe is mass loaded.
dave
Well Dave I guess I have a "ballpark" understanding of what a TQWT is. That's certainly much better than what my understanding was before I asked the question...
Thetubeguy1954 (Tom Scata)
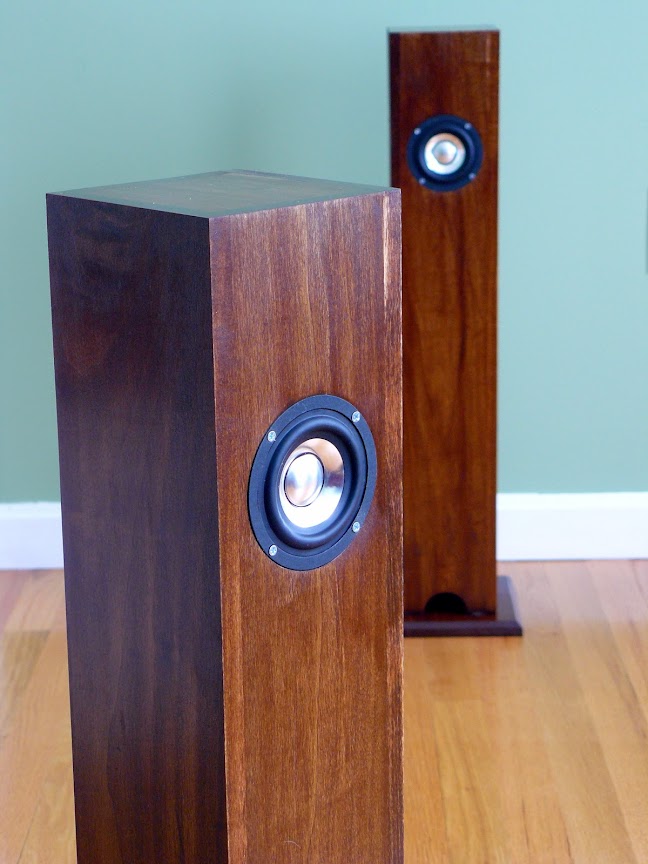
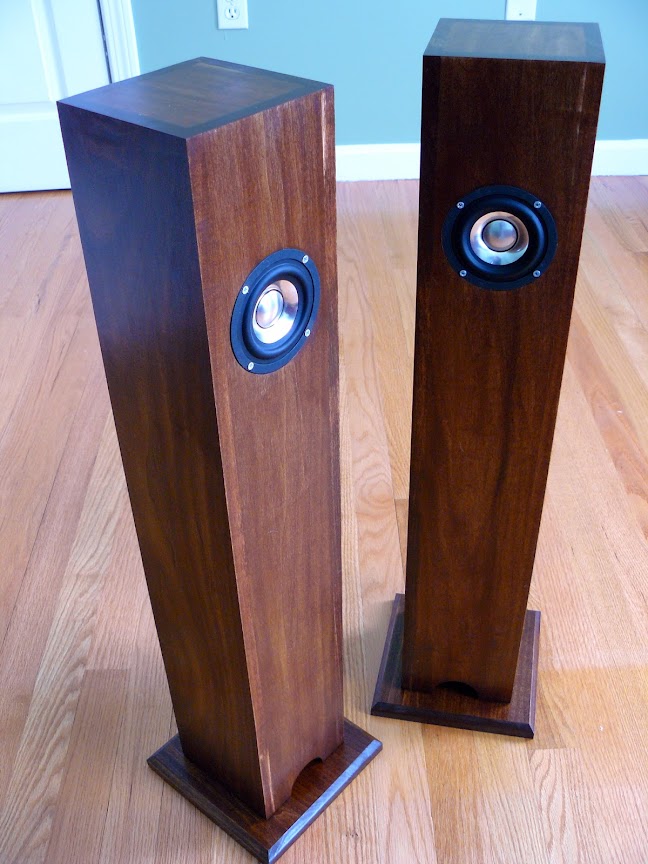
Back to the photos... I completed two of the "Fountek Five" this week which will be gifts for family...
The 'Ken Lite was made with 6x1/2" maple from Lowes. Because the boards were only 139mm wide I modified the plans slightly to add more height and adjusted the port accordingly. Finished with 2 coats of Dark Walnut stain and 2 coats of semi-gloss polyurethane.


The Fenceposts were made from 6x1/2" poplar. I was trying to keep costs down but I will likely never use poplar again in a project. I just don't like how the stain came out. This was after 3 coats of chestunt and 2 coats of poly.
I'll leave listening impressions until they are broken in.
The 'Ken Lite was made with 6x1/2" maple from Lowes. Because the boards were only 139mm wide I modified the plans slightly to add more height and adjusted the port accordingly. Finished with 2 coats of Dark Walnut stain and 2 coats of semi-gloss polyurethane.
The Fenceposts were made from 6x1/2" poplar. I was trying to keep costs down but I will likely never use poplar again in a project. I just don't like how the stain came out. This was after 3 coats of chestunt and 2 coats of poly.
I'll leave listening impressions until they are broken in.
I'd assume it is slightly better than using pine, however it would be hard to tell with this project. 3" drivers don't really throw off a lot of bass and the boards are pretty small and well braced. The cuts came out nice without splintering or chips (but not as nice as maple) and I was surprised to see the dark and light hues take the stain about the same...but there were parts of the boards that didn't take well at all even with using pre-stain conditioner.
:O
From the interior picture it is clearly a folded ML-Voigt, not an MLTL (as usually defined)
dave
I'd assume it is slightly better than using pine, however it would be hard to tell with this project.
Thanks. I like the green tones of poplar and used it as a faceplate of an amp. See avatar on left. I'd like to build another Voigt pipe for an 8" driver this time.
Thought maybe having some of the boards pre-cut would save time rather than ripping sheet of MDF. Also would be one step closer to a proper finish.
tqwt_15 - My Photo Gallery
Thought about spraying the inside with car door deadening material, like used in car audio.
Nice looking work. Thanks for your input.
Back to the photos... I completed two of the "Fountek Five" this week which will be gifts for family...
The 'Ken Lite was made with 6x1/2" maple from Lowes. Because the boards were only 139mm wide I modified the plans slightly to add more height and adjusted the port accordingly. Finished with 2 coats of Dark Walnut stain and 2 coats of semi-gloss polyurethane.
I'll leave listening impressions until they are broken in.
You make absolutely beautiful looking speakers!
Thetubeguy1954 (Tom Scata)
chuyler - if you've got scraps of poplar left, you might want to experiment with a sanding sealer coat before applying any type of color - i.e. separate stains of any type, or "one-step" color /top coats (polyshade, etc) the latter of which I've had my own share of bad luck
sure takes paint nice though - I use it a lot for speaker plinths
sure takes paint nice though - I use it a lot for speaker plinths
Thanks Chris. I did the following...
80 grit (portable belt sander)
120 grit (portable belt sander)
220 grit (by hand)
Minwax prestain
Minwax stain (2 coats)
Minwax poly
320 grit (by hand)
Minwax poly
Maybe I'll try a sealer instead next time. Some of the boards came out great...but then some just came out horrible.
80 grit (portable belt sander)
120 grit (portable belt sander)
220 grit (by hand)
Minwax prestain
Minwax stain (2 coats)
Minwax poly
320 grit (by hand)
Minwax poly
Maybe I'll try a sealer instead next time. Some of the boards came out great...but then some just came out horrible.
well, it certainly looks like you followed a sound sanding routine (I tend to use an air driven RO sander as I find I have much better control than with belt sanders), and in theory  , the "sanding sealer" (wash coat of highly thinned lacquer for the lazy buggers who will be spraying NC lacquer top coats ), shellac, or the like should effect the same pre stain treatment as the Minwax product
but it sounds like you're not discouraged enough yet to not try something else "next time" - almost an aphrodisiac those two words
, the "sanding sealer" (wash coat of highly thinned lacquer for the lazy buggers who will be spraying NC lacquer top coats ), shellac, or the like should effect the same pre stain treatment as the Minwax product but it sounds like you're not discouraged enough yet to not try something else "next time" - almost an aphrodisiac those two words
Well I think my sanding has a little to do with the finish. There are spots where I didn't go deep enough to remove the glue. Any suggestions on keeping the glue off the boards? Should I mask all the ends? I was diligent about wiping off the excess with a damp cloth after clamping but it looks like I smeared it in a few spots instead.
Oh, and I was just remembering, my parents still have the napkin holder I made in 8th grade shop class...so I'm sure they'll love these speakers even with the flaws.
Oh, and I was just remembering, my parents still have the napkin holder I made in 8th grade shop class...so I'm sure they'll love these speakers even with the flaws.
Well I think my sanding has a little to do with the finish. There are spots where I didn't go deep enough to remove the glue. Any suggestions on keeping the glue off the boards? Should I mask all the ends? I was diligent about wiping off the excess with a damp cloth after clamping but it looks like I smeared it in a few spots instead.
Hi chuyler wiping off the glue with a wet rag in not the answer, as chris said it will thin it and let the wood absorb it particularly in end grain, let it sit for about a hour then use a sharp chisel and pare it off wiping off the chisel after each pass
maple,birch,pine etc are notorious for staining blotchy, so conditioner is recommended to even out the rate of absorption, i have never used store bought but instead make it much cheaper using about 8 parts paint thinner or varasol to 1 part boiled linseed apply like stain wipe off then stain normally.
a belt sander is one of my favourite go to power tools for levelling larger panels but it takes some getting us to, it is very aggressive and cuts fast and can damage your piece easily if it is not kept flat at all times, i usually throw the cord around my neck to avoid it getting in the way or pulling it tight causing it to lift the sander
The idea of proper sanding is the first grit should remove all of the defects,glue,scratches etc the rest of the grits are to remove the scratches left behind by the previous grit, if i use say 120 as my last belt sanding grit i will usually go to 120 on my random orbit next, followed by 150/180/220. since the bs is so aggressive you really need to work your way down to your final grit especially if you don,t have a ro sander.
Last edited:


- Home
- Loudspeakers
- Full Range
- Full Range Speaker Photo Gallery