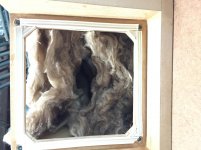
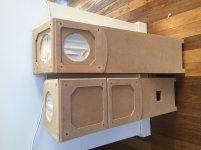
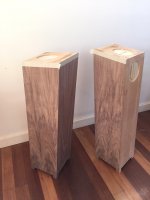
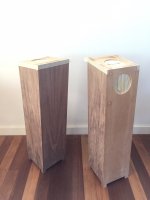
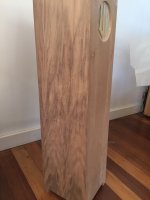
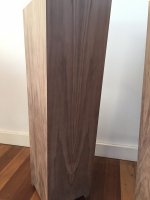
Thanks for the responses guys. This is the area I am least confident about (bar my first veneer attempt, still to come) and the reason I went for a removable base! It looks like I will be doing a fair bit of 'stuffing to taste'. As an insulation roll it is a bit of a homogenous mass which I have teased out to fill the cabinet space. I have attached a few pics below which show the amount used prior to teasing and putting into the cab. This was based on the 2 x 2' or 1 x 4' wall insulation tip.
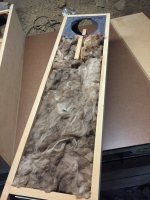
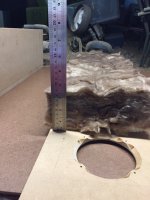
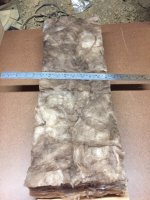
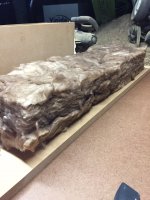
Any more feedback gratefully received on whether it was teased enough and just looks scary because it's brown! If you still think its too much I'll remove some prior to installing drivers etc.
I did get a bit excited and before getting the response from you both last night glued the first front baffle on so it will be an up to the armpit exercise to make the changes! I'm now getting images of vets and bovines... Sorry for the imagery but I was laughing so I thought I'd share.
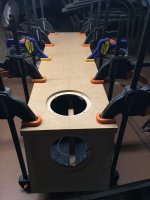
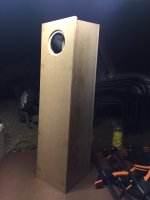
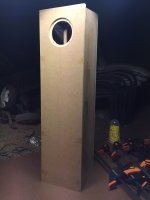


Since you've got a removable base on it, it should be quite easy to adjust. However, I'd probably have been inclined to line the box initially, and add stuffing if required. Be that as it may, give it a shot & see what you think. If you feel the enclosure output is weak, you'll want to start removing some of the material.
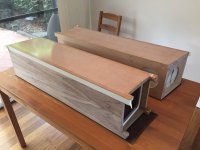
I've had the veneer roll for a while now and have finally put the knife through it. Measure a thousand times and cut once, very nervous about this as a mistake would have been very expensive. It all went well in the end and was not too bad. I used the cabinets themselves to pencil outline the cut leaving about 7mm outside of every edge of the cab. I then used a steel rule and a stanley knife to cut the pieces using a bit of MDF as a backing board.
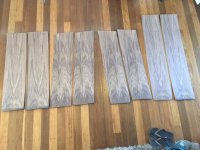
There were a few scraps that could not be used for any future box so I have used these to do some test pieces both to try the iron on veneer method and what finish I will use.
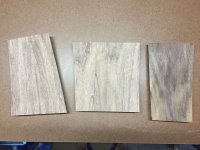
First attempt at iron on went pretty well I think. I used Titebond II following the Brines method outlined here:
http://brinesacoustics.com/Pages/Veneering.html
I did cheat a little in the test piece by only applying one layer to the substrate as I was impatient. It worked out fine, the other test pieces will have two coats of glue on the substrate. The iron was set to cotton, 2nd hottest setting, and I used kitchen baking paper between the iron and the veneer. I used a downward cut trim bit on the router which is the same as a normal flush cut bit but the two cutting blades are angled down at about 7 degrees, this seemed to work well with a very clean cut along the grain and only the slightest 'fluff' on the cross cut.
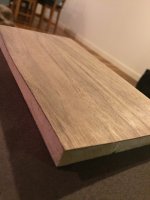
Then I tried my first effort with Danish Oil (Feast Weston Scandinavian Oil - Aus product), the pic is after the first application of DO and you can see a piece of unfinished veneer behind to give an idea of the colour change. I will use this piece as per the can instructions and then another piece will be wet sanded using the method linked here (https://www.firearmsforum.com/Firearms/Article/3037) and the final piece will use the wet sanding method followed by a wipe on poly (satin). I will not do the first part of the method linked raising the whiskers etc as I think this is a little overkill but will do a light application first, let dry and then continue with the wet sanding as stated.
I am trying the last option with wipe on poly due to both the dog and a wife who thinks the speakers are too big and will take great pleasure in bashing them with the vacuum cleaner
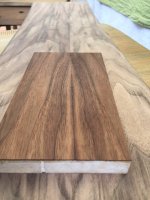
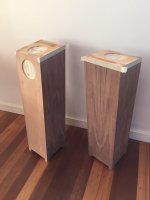
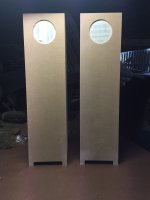
Finally I have also prepped the cabinet for veneering having cut the holes for the port and bondo'd the router mistakes and dents where I have bashed them on the ground or ceiling rafters...
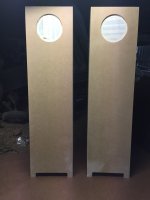
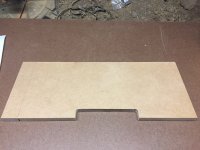
I used this scrap of MDF as a template for cutting the holes

There were a few scraps that could not be used for any future box so I have used these to do some test pieces both to try the iron on veneer method and what finish I will use.

First attempt at iron on went pretty well I think. I used Titebond II following the Brines method outlined here:
http://brinesacoustics.com/Pages/Veneering.html
I did cheat a little in the test piece by only applying one layer to the substrate as I was impatient. It worked out fine, the other test pieces will have two coats of glue on the substrate. The iron was set to cotton, 2nd hottest setting, and I used kitchen baking paper between the iron and the veneer. I used a downward cut trim bit on the router which is the same as a normal flush cut bit but the two cutting blades are angled down at about 7 degrees, this seemed to work well with a very clean cut along the grain and only the slightest 'fluff' on the cross cut.

Then I tried my first effort with Danish Oil (Feast Weston Scandinavian Oil - Aus product), the pic is after the first application of DO and you can see a piece of unfinished veneer behind to give an idea of the colour change. I will use this piece as per the can instructions and then another piece will be wet sanded using the method linked here (https://www.firearmsforum.com/Firearms/Article/3037) and the final piece will use the wet sanding method followed by a wipe on poly (satin). I will not do the first part of the method linked raising the whiskers etc as I think this is a little overkill but will do a light application first, let dry and then continue with the wet sanding as stated.
I am trying the last option with wipe on poly due to both the dog and a wife who thinks the speakers are too big and will take great pleasure in bashing them with the vacuum cleaner

Finally I have also prepped the cabinet for veneering having cut the holes for the port and bondo'd the router mistakes and dents where I have bashed them on the ground or ceiling rafters...


I used this scrap of MDF as a template for cutting the holes

Last edited:
Looking great so far - nice grain pattern alignment - a couple of notes
Bob did not invent the iron-on method, it's been around for decades, but short of a video, that's about the best description of the process I've seen.
You've got a dog that does the vacuuming? I knew that Kelpies were talented, but that's quite something.
Bob did not invent the iron-on method, it's been around for decades, but short of a video, that's about the best description of the process I've seen.
You've got a dog that does the vacuuming? I knew that Kelpies were talented, but that's quite something.
I'm super excited about the veneer. I think it's going to look great. Should I paint the driver recesses black or is this not necessary...?
Yep I saw a number of videos and many other descriptions on the iron on method mainly from woodworking forums/sites. I just found Bob's page succinct and informative.
Kelpies are awesome dogs but our dog is a long haired Weimaraner. Bigger and way too smart and energetic for its own good (or maybe that should be mine!)


Should I paint the driver recesses black or is this not necessary...?
Not necessary from any acoustic benefit/quality point of view...
Not necessary from any acoustic benefit/quality point of view...
Haha, thanks for the feedback zman. I guessed there would be no audio quality change its more of a cosmetic thing wrt to the edge of driven and recess.
Speaking of grills I made up some prototypes this morning. A full rectangular grill to cover the top of the tower and a square plus segment (or a chevron... still not decided...?) for the front. I have yet to route out the curve but you can see the intent with the pencil mark. I have made these from 6mm mdf.
Does anyone have any input on the driver cutout... I am wondering whether a circle or square will be best for minimising impact on sound. The circle will have a consistent gap between driver and grill but will be closer to the driver, not sure on the benefits/cost relationship here. Of course they will be champhered much like the outside. I will also leave enough 'meat' in the corners for some neodymium magnets. I have got 3 x 6mm magnets which will be embedded in both the grill and the cabinet. All grills will have the same polarity and magnet spacing and a set of magnets will be placed on the rear of the cabinet to store the grills when not in use.
I have also toyed with the idea of circular grills but nor sure if they will look good or not especially given the spacing of the drivers and the top/front cabinet corner.
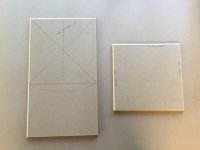
I have also thought about creating an oversize grill for the front much like you would see on a 2.5 or 3 way tower but think it may obscure more of the walnnut than necessary.
Does anyone have any input on the driver cutout... I am wondering whether a circle or square will be best for minimising impact on sound. The circle will have a consistent gap between driver and grill but will be closer to the driver, not sure on the benefits/cost relationship here. Of course they will be champhered much like the outside. I will also leave enough 'meat' in the corners for some neodymium magnets. I have got 3 x 6mm magnets which will be embedded in both the grill and the cabinet. All grills will have the same polarity and magnet spacing and a set of magnets will be placed on the rear of the cabinet to store the grills when not in use.
I have also toyed with the idea of circular grills but nor sure if they will look good or not especially given the spacing of the drivers and the top/front cabinet corner.

I have also thought about creating an oversize grill for the front much like you would see on a 2.5 or 3 way tower but think it may obscure more of the walnnut than necessary.
Does anyone have any input on the driver cutout....
You want to keep the driver to grill frame distance varyinging. A rectangle (with driver off-centre) is a fine compromise. The inside edge should ideally have a 45 on it (so that it opens up as you get further from the baffle)
dave
Grills coming along nicely now. Magnets are in and alignment looks good. I used 7x3mm neodymium magnets to hold 6mm mdf. Seems to be holding strongly but not so strong that it is hard to get off. I think it will still be good even when the grill cloth and veneer increase the distance between the magnets. Time will tell!
I still need to put a 45 degree champher on the inside edge and fill the holes around the magnets ready for veneer on the cabinet and also in the grill so that it can be painted black ready for the grill cloth.
I used a template for the magnet holes so that I could also place magnets on the back of the cab. This also needs to be done.
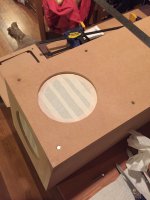
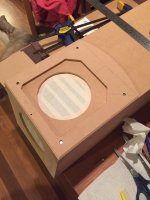
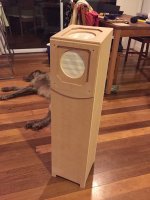


apologies for the sideways photo, seems to happen whenever a pic comes from the phone...
True, but you can rotate the pictures in the Windows Picture Viewer, or any other competent viewer prior to posting. I prep all of my pictures with IrfanView prior to posting. Resize to 600x800 and compress to 85k or less.
Bob
- Status
- This old topic is closed. If you want to reopen this topic, contact a moderator using the "Report Post" button.
- Home
- Loudspeakers
- Full Range
- Castle Microtower Build
