here is link to Troels where he review the amber caps
if i only have the money to try this``````
a must on the speaker is to use passive filter and one good amp,,,sounds absolute better
than Hypex version
Amber-Z-Cap
if i only have the money to try this``````
a must on the speaker is to use passive filter and one good amp,,,sounds absolute better
than Hypex version
Amber-Z-Cap
Making some upgrades. Purchased the Visaton super tweeters. Ordered Amber-Z caps for it and the compression driver/tweeter. Also ordered the parts that add a LCR circuit to the 18” crossover section.
Currently I’m using the semi+active version with the Hypex driving the 18”. Looks like from the info provided in Troels details of the TL1 and TL2 this drops the overall amp requirements from 200wpc to 100wpc.
I like the looks of the Visaton better, I’ll report back after I make the required crossover changes.
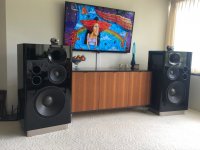

Tuyen, thanks for your interest and question.
As I upgraded the caps for both the compression driver and the tweeter as well as changed the tweeter I don’t have a basis to quantify just the tweeter change.
But I can say that the change/upgrade as a whole was a great improvement. I feel like it brought the high frequency in line to match the quality of the midrange. I felt this area was the weak point before.
I also like the looks of the tweeter much better with the design of my cabinet.
Hope this helps.
As a side note, I’m planning on building new cabinets, more in line with the TL-2, along with the cap upgrade for the midrange.
Hi
really interesting to hear that the cap upgrade sound good,,,
after i have got my new amp from Aksa ( Maya version ) the problem i have in the
horn area is gone,,,the Maya give no hard sound in the compression driver,,but sound very good now
will you make the TL-2 a bit bigger in volume to keep the deep bass ?
Best Bjarne
Great to hear your getting better sound!
At this point I’m still designing in my head. Since I’m so happy with the current version I feel it will be worth it to build an even more beautiful cabinet.
But yes, the goal will be the narrower width, but with the volume of TL-1.
I really like the shape of the Ekta Grande’s I built a few years ago. Thinking along the lines of expanding that footprint to get to the volume/panel width I need. Keep the face black but a high gloss wood veneer for sides and rear.
Due to Corona travel restrictions in Hawaii we are staying at our home in Vegas, planning to go back to Honolulu in October. Will probably start building then.
Will follow how it goes with the cabinet build..
i can see that more people her in Denmark use Miflex cu cap ,about 0.1 uf to use as bypass cap over the ordinary cap in speaker,,and say that it give better sound,,,
it is a cheap way to make a god cap better,,i will try later this year
i can see that more people her in Denmark use Miflex cu cap ,about 0.1 uf to use as bypass cap over the ordinary cap in speaker,,and say that it give better sound,,,
it is a cheap way to make a god cap better,,i will try later this year
At this point I’m still designing in my head... we are staying at our home in Vegas, planning to go back to Honolulu in October. Will probably start building then.
If you get the urge to "double-down on your hand", you can replace the 18" front woofer with a push-pull pair of 12" woofers low down on the side panels. Two Dayton RSS315HF-4 in series or two RSS315HF-8 in parallel would work well in an 18" wide cabinet. Troels = 25.6"
If you get the urge to "split your hand" consider a coaxial compression driver like the BMS 4594Nd-HE which covers 20kHz down to 400-500Hz with a 24" wide horn.. SEOS24=24.3" wide ... close to Troels 25.6" wide the Loudspeaker. Building a taller cabinet will reduce the "short and fat look" on Troels the Loudspeaker.
Once again i tried active on the Loudspeaker,,this time i use Groundsound DCN24 filter
1...DCN24 to 18" and rest (no analog filter on 18",, and no filter on lower middle ) 2 amp
2...DCN24 to 18" (same as use Hypex) 1 amp to rest (analog filter) 2 amp
3...2 amp -- bi-amping to analog filter (signal from preamp)
4....only one amp
my conclusion :::i still prefer 1 amp ,,something is not right true DCN24 ,, and bi-amping to analog ,the same
have any tried the LCR to the 18" and how does it sound
Been a crazy year, sorry for the late comment.
I agree the sound is a little better powered by a single amp. Unfortunately I lose quite a bit of bass as my amps are only about 125w.
As I think this speaker is better than my system, I’m planning on changing everything. I think I’m going to try Devialet. Looking at the pair that output 440 each.
Then Troel’s had to come out with a narrower cabinet design. So back in the cabinet shop!
This time the cabinet will be Sapele Pommel with a Piano Black front.
Cabinet will be 1/2” Baltic Birch internal built around a 1” x 1” Maple frame with 3/4” Medex, external.
I’m calling this construction TL-2x, for narrow front, but making deeper to keep same volume as TL-1.
Rough cut the Baltic Birch and gave a quick coat of sanding sealer to maintain stability.
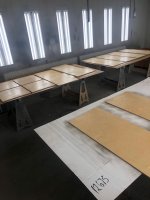

about the missing bass with only one amp,,,it can be something to do with placement of
speakers in the room,,,you have no help from sidewall ,,so maybe it explain why the
solution with Hypez amp is better
i have no ideal placement of my speaker,,but i have help from walls and corner,,and
absolute no muddy bass, maybe therefor i can get a Aksa Lifeforce 100w amp, to play
with really great bass ,and my new Aksa Maya amp 200w ,give me bass and punch
very close to my Gryphon amp (and in all other area the Maya amp is better )
so i think ,it is not necessarily your amp ,that is the reason, why you mis bass (125w is
more than enough to play very loud )
so before you buy new amp,,i think you shall try to borrow one ,,,and hear if this way to go
Best Bjarne
Thanks as always for your replies. Actually I swapped out the Hypex and changed the crossover on one speaker, listened, then did the other speaker and listened. So placement was the same. Besides power I’m looking to minimize the stash of equipment and wires required by my current system in this condo. Space is smaller and one remote to control everything is appealing right now.
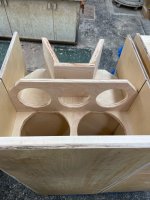
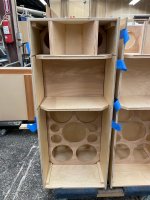
Progress continues on the new cabinets. Construction details are similar to Troel’s, panels notched together, etc.
All the plywood inner box, divided areas for each driver, and bracing is complete. This time I ordered all the felt, Accustilux and Lambs wool from HiFi Collective, same materials Jantzen supplies to Troel’s. Materials arrived this week.
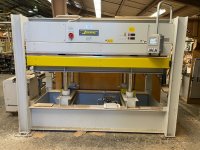
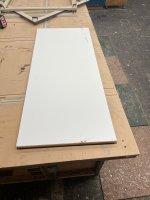
Been working on the outer cabinet panels. Yesterday and today wood glued and pressed the veneer on one side and a stabilizing liner on the other of the 3/4” Medex. Tomorrow I’ll spray a coat of sanding sealer on the veneer to further stabilize and balance the panels. This will also protect the veneer for assembly.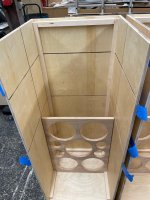
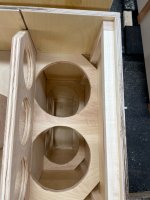
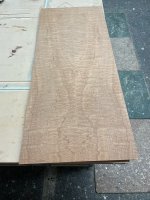
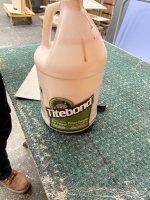


This will be great Cabinet ,,i am envious
I have to much sparetime ,,so i need to try something,,,will this time change the crossover
from 1300hz between 10" and nsd1095 horn to 1800hz (18db on 10" and 24db on nsd1095)
this is just for fun,,no idear how the result will be,,,,but i have heard from other that the
horn behave better with a higher and sharper crossover.
Best Bjarne
Interesting. Maybe once I get a cabinet I like I can start dialing it in like you!
Disassembled the cabinets, sprayed clear on all the bracing, installed the felt, then slid all the bracing back in place. About ready to close up the inner cabinet.
Now that all the outer panels are laid up I sprayed them with a coat of sanding sealer to protect the veneer, then routed off the excess liner and the veneer, hand sanded with 400 grit. On my 3rd round of sanding sealer and hand sanding. Going for round 4 tomorrow. Grain is deep. This will make about a gallon of sanding sealer so far.
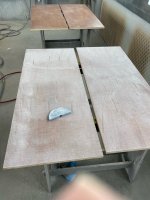
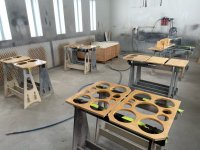
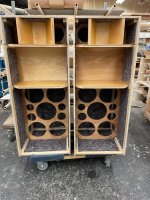


Nice built! A lot of effort. I just want to remind you all that felt or other porous material stucked to the wall is a waste of energy time and cost.
Thats because of the wavelength of the sound you try to absorb.
THE place to put all your whooly stuff is in the middle and close to the driver.
Thats because thats the only place where the air is MOVING. Ok?
So without a movement of the air no effect of damping.
Close to the wall you have a pressur maximum and velocity minimum... so just skip the felt and pile up the wool from top to bottom. A felt 10mm thick is dampening in the 10kHz region and up!! Not below 10khz. Sorry but that how it works. It look nice and everyone keeps doing it, but its still useless...
Small step completed today.
I have concerns about humidity being able to put pressure on the cabinet finish. There are multiple layers and pieces for the final cabinet. Also, I am build the cabinet in Honolulu but will be shipping to our place in Las Vegas, so almost one extreme to another. That’s a driving factor to make sure all the wood is sealed.
That being said, all the interior bracing could expand and contract, even to a small degree. So I’m trying out an idea that could maybe be a benefit sonically. All the braces are notched to fit together and I purposely made everything slightly loose fitting, maybe as much as a 1/16”. So instead of all the panels being wood glued/nailed/screwed, I used a polyurethane adhesive sealant, no fasteners, to hold everything together. This should give just a smidge of allowable movement functionally but maybe remove some unwanted vibrations transferring from brace to brace, brace to cabinet.
I am also taking my time assembling and fabricating so that each piece has time to settle and solvents evaporate.
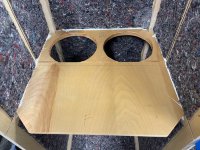
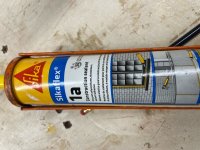


Took a couple weekends off for the holidays. Back in the shop. This weekend finished installing the accoustilux. Then sealed up the inner box. I had previously sprayed all the panels with sanding sealer. In preparation to install the Bitumen pads I sanded the whole exterior with 100 grit. Then hit it with compressed air and a tack cloth and then sprayed with contact cement.
Even though the bitumen pads come with adhesive on one side I still sprayed them with contact cement. All the panels, less the front, get covered with the bitumen pads.
Spent a little time with our CNC tech to organize the cutting of the front panel.
Tomorrow I will start the installation of the external panels and 9/16” Maple corners.
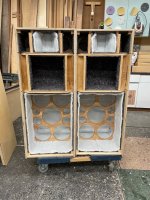
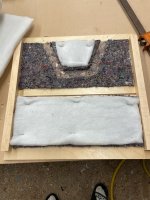
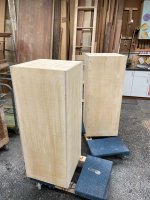
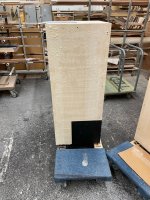
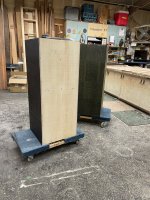
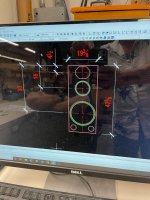


After finishing the Bitumen pads I moved onto installing the exterior panels. This has taken a few weeks as I can only install one panel at a time. The panels are attached by 1/16” Urethane adhesive trowel on. I applied the adhesive to the cabinet in the long direction and to the panel in the short direction.
Then using alignment blocks tape was used to hold the panel till the adhesive setup. So basically one panel a week as no mechanical fasteners were used.
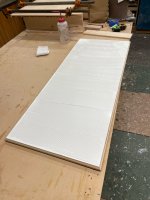
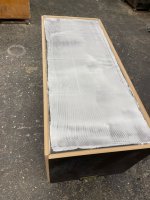
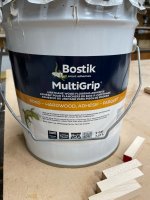
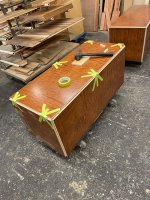
Then using alignment blocks tape was used to hold the panel till the adhesive setup. So basically one panel a week as no mechanical fasteners were used.


- Home
- Loudspeakers
- Multi-Way
- Big Speaker Project, 18” + 10” + CD/horn, super tweeter