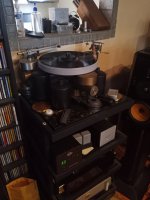
I thought I'd share a project I've been working on for the past few months.

It started when I decided to make some upgrades to my Technics SL-20. I updated the RCA wires to terminals and a new ground connection. Upgraded the cartridge and rewired the tonearm with silver wires. The improvements were eye-opening. But soon after, It began to have some speed issues.
That's when I decided to look into buying a new turntable. I liked the Rega and Fluance offering, but if I was going to upgrade, I really wanted something with a separate motor, and arm board that would allow easy upgrades to the tonearm in the future. Anything I found with features like that was far beyond my price range, so I decided to try to build my own.
Here are the parts I used:
Plinth: MDF (three layers) with walnut veneer


Arm board: Curley maple (solid)

Sub platter: Tango spinner with bearing sleeve
Platter: Rega acrylic

Micro Seiki MA-202L tonearm, which I rewired with Cardas 4X33 Tonearm Wire Cryo Treated from Take Five Audio.

Nagaoka MP-110 cartridge with Nagaoka headshell.
Adjustable feet from Amazon
I initially wanted to use a Maxon motor, but I stumbled upon a Portescap 28L28-416E.49 motor for $55 on eBay. It was new-old-stock, so it's Swiss-made, rather than the newer ones made in India.

The spindle for the motor is just a brass motor shaft coupling that I machined a groove into for the belt I made from polyester thread.
How To Make Well Tempered Labs Turntable Belts - YouTube

The most difficult part by far was the motor control. I lost count of how many different threads I've read on this subject. Lots of good ideas out there. In the end, I decided to go with an open-loop system using an Arduino Uno and Adafruit Motor Controller. It's not perfect, but It will do until I learn more, and build a closed-loop system.


I'm posting all my plans, photos, schematics, and Arduino sketch. Hopefully, this post will help someone who wants to take on a project like this.


The green board in the image represents a DC/DC converter used to convert the 12v incoming to 5v to power the Arduino. The 12v feeds off the incoming terminals and goes to the power input of the Adafruit Motor Shield.

Arduino Sketch
===========
#include <Wire.h>
#include <Adafruit_MotorShield.h>
#include "utility/Adafruit_MS_PWMServoDriver.h"
Adafruit_MotorShield AFMS = Adafruit_MotorShield();
Adafruit_DCMotor *myMotor = AFMS.getMotor(2);
int low = 4;
int high = 8;
int off = 13;
void setup() {
// put your setup code here, to run once:
pinMode(low, INPUT_PULLUP);
pinMode(high, INPUT_PULLUP);
pinMode(off, INPUT_PULLUP);
AFMS.begin();
}
void loop() {
// put your main code here, to run repeatedly:
if(digitalRead(low) == LOW)
{
myMotor->setSpeed(131); //0-255 - experiment with this number till you get 33.3 rpm on platter using stribe disc
myMotor->run(FORWARD);
}
// for 45 speed
if(digitalRead(high) == LOW)
{
myMotor->setSpeed(176); //0-255 - experiment with this number till you get 45 rpm on platter using stribe disc
myMotor->run(FORWARD);
}
// for stop
if(digitalRead(off) == LOW)
{
myMotor->setSpeed(0); //0-255
myMotor->run(RELEASE);
}
}
It started when I decided to make some upgrades to my Technics SL-20. I updated the RCA wires to terminals and a new ground connection. Upgraded the cartridge and rewired the tonearm with silver wires. The improvements were eye-opening. But soon after, It began to have some speed issues.
That's when I decided to look into buying a new turntable. I liked the Rega and Fluance offering, but if I was going to upgrade, I really wanted something with a separate motor, and arm board that would allow easy upgrades to the tonearm in the future. Anything I found with features like that was far beyond my price range, so I decided to try to build my own.
Here are the parts I used:
Plinth: MDF (three layers) with walnut veneer
Arm board: Curley maple (solid)
Sub platter: Tango spinner with bearing sleeve
Platter: Rega acrylic
Micro Seiki MA-202L tonearm, which I rewired with Cardas 4X33 Tonearm Wire Cryo Treated from Take Five Audio.
Nagaoka MP-110 cartridge with Nagaoka headshell.
Adjustable feet from Amazon
I initially wanted to use a Maxon motor, but I stumbled upon a Portescap 28L28-416E.49 motor for $55 on eBay. It was new-old-stock, so it's Swiss-made, rather than the newer ones made in India.
The spindle for the motor is just a brass motor shaft coupling that I machined a groove into for the belt I made from polyester thread.
How To Make Well Tempered Labs Turntable Belts - YouTube
The most difficult part by far was the motor control. I lost count of how many different threads I've read on this subject. Lots of good ideas out there. In the end, I decided to go with an open-loop system using an Arduino Uno and Adafruit Motor Controller. It's not perfect, but It will do until I learn more, and build a closed-loop system.
I'm posting all my plans, photos, schematics, and Arduino sketch. Hopefully, this post will help someone who wants to take on a project like this.
The green board in the image represents a DC/DC converter used to convert the 12v incoming to 5v to power the Arduino. The 12v feeds off the incoming terminals and goes to the power input of the Adafruit Motor Shield.
Arduino Sketch
===========
#include <Wire.h>
#include <Adafruit_MotorShield.h>
#include "utility/Adafruit_MS_PWMServoDriver.h"
Adafruit_MotorShield AFMS = Adafruit_MotorShield();
Adafruit_DCMotor *myMotor = AFMS.getMotor(2);
int low = 4;
int high = 8;
int off = 13;
void setup() {
// put your setup code here, to run once:
pinMode(low, INPUT_PULLUP);
pinMode(high, INPUT_PULLUP);
pinMode(off, INPUT_PULLUP);
AFMS.begin();
}
void loop() {
// put your main code here, to run repeatedly:
if(digitalRead(low) == LOW)
{
myMotor->setSpeed(131); //0-255 - experiment with this number till you get 33.3 rpm on platter using stribe disc
myMotor->run(FORWARD);
}
// for 45 speed
if(digitalRead(high) == LOW)
{
myMotor->setSpeed(176); //0-255 - experiment with this number till you get 45 rpm on platter using stribe disc
myMotor->run(FORWARD);
}
// for stop
if(digitalRead(off) == LOW)
{
myMotor->setSpeed(0); //0-255
myMotor->run(RELEASE);
}
}
Last edited:
Arduino sketch and Schematic

The green board in the image represents a DC/DC converter used to convert the 12v incoming to 5v to power the Arduino. The 12v feeds off the incoming terminals and goes to the power input of the Adafruit Motor Shield.
#include <Wire.h>
#include <Adafruit_MotorShield.h>
#include "utility/Adafruit_MS_PWMServoDriver.h"
Adafruit_MotorShield AFMS = Adafruit_MotorShield();
Adafruit_DCMotor *myMotor = AFMS.getMotor(2);
int low = 4;
int high = 8;
int off = 13;
void setup() {
// put your setup code here, to run once:
pinMode(low, INPUT_PULLUP);
pinMode(high, INPUT_PULLUP);
pinMode(off, INPUT_PULLUP);
AFMS.begin();
}
void loop() {
// put your main code here, to run repeatedly:
if(digitalRead(low) == LOW)
{
myMotor->setSpeed(131); //0-255 - experiment with this number till you get 33.3 rpm on platter using stribe disc
myMotor->run(FORWARD);
}
// for 45 speed
if(digitalRead(high) == LOW)
{
myMotor->setSpeed(176); //0-255 - experiment with this number till you get 33.3 rpm on platter using stribe disc
myMotor->run(FORWARD);
}
// for stop
if(digitalRead(off) == LOW)
{
myMotor->setSpeed(0); //0-255
myMotor->run(RELEASE);
}
}
Last edited:

#include <Wire.h>
#include <Adafruit_MotorShield.h>
Wasn't this formatted as CODE 2 days ago? Have we lost that function? Or just lost in transit?
C:
#include <stdio.h>
int main() {
   // location the current input file.
   printf("%s",__FILE__);
}
Ah, the new CODE even has languages, some I never want to hear.
You can get the supplies for the controller through amazon.Hi, Nice job, could you link to were you bought the controller. Also you would get a much lower speed & wow by changing your string belt to a Mylar Tape belt. Little bit of a BITA to make up but well worth it in the finish.
Cheers
https://www.amazon.com/dp/B008GRTSV6?psc=1&ref=ppx_yo2_dt_b_product_detailshttps://www.amazon.com/dp/B00JI99DX4?psc=1&ref=ppx_yo2_dt_b_product_details
I'm experimenting with different belts. I tried using some 1/4" reel to reel tape for a belt, but It was giving me some unwanted vibration.
I have been playing around with dc motor turntable drives for a few years so can let you know key things I have learned.
You really need to drive the motor with pure dc voltage in closed loop control with decent resolution. You also need a drive circuit with load feedback so it compensates for varying load. This gives the motor far more torque on start up and does the bulk of the speed regulation. The closed loop control can give you very good speed accuracy and takes care of effect of temperature where the motor will tend to speed up as it warms up. You just need proportional control, don’t bother with I or D. I found this website useful for the circuit design.
https://www.precisionmicrodrives.com/ab-026
The latest circuit I’m working on uses a microcontroller to control a MCP4822 DAC which works really well as voltage source.
The motor will vibrate less at low rpm so you really need a pulley on the motor shaft, suggest 15 to 20mm diameter. The pulley must be accurately made turned on an arbour to ensure concentricity.
Is your motor carbon brush? Maxon state precious metal is better for vibration however there is a catch. When running precious metal dc motors at very low speed the brushes can degrade effecting speed stability. I have two Maxon DCX motors now unusable due to this. I don’t know if this problem effects carbon brushes. Maxon told me the precious metal brushes need to have gold flake coating to work well at low speed. Unfortunately these are not standard motors joe public can buy. Having said that Maxon did sell me a Linn Radikal 1 motor which has this, since they have surplus old stock. I can let you know details if you are interested.
Last edited:
Thank you for such a detailed answer. I can see that I am at the beginning of the way of using DC motors to drive the turntable. I started with the idea of using the Arduino PWM (platter speed measurement), but such control does not stabilize the motor rotation fast enough. Stabilization should be in the engine power supply system. I will be grateful for all the advice, especially the use of the MCP4822 in the control system.I have been playing around with dc motor turntable drives for a few years so can let you know key things I have learned.
You really need to drive the motor with pure dc voltage in closed loop control with decent resolution. You also need a drive circuit with load feedback so it compensates for varying load. This gives the motor far more torque on start up and does the bulk of the speed regulation. The closed loop control can give you very good speed accuracy and takes care of effect of temperature where the motor will tend to speed up as it warms up. You just need proportional control, don’t bother with I or D. I found this website useful for the circuit design.
https://www.precisionmicrodrives.com/ab-026
The latest circuit I’m working on uses a microcontroller to control a MCP4822 DAC which works really well as voltage source.
The motor will vibrate less at low rpm so you really need a pulley on the motor shaft, suggest 15 to 20mm diameter. The pulley must be accurately made turned on an arbour to ensure concentricity.
Is your motor carbon brush? Maxon state precious metal is better for vibration however there is a catch. When running precious metal dc motors at very low speed the brushes can degrade effecting speed stability. I have two Maxon DCX motors now unusable due to this. I don’t know if this problem effects carbon brushes. Maxon told me the precious metal brushes need to have gold flake coating to work well at low speed. Unfortunately these are not standard motors joe public can buy. Having said that Maxon did sell me a Linn Radikal 1 motor which has this, since they have surplus old stock. I can let you know details if you are interested.
P.S.
(sorry for my english)
My DC-Motor is controlled (finetuned) by variable resistors,
i think it is possible to add DigitalPotentiometer (https://www.arduino.cc/en/Tutorial/LibraryExamples/DigitalPotentiometer) in this loop to control the speed with an Arduino without fast calculations and PWM's.
https://www.osioptoelectronics.com/standard-products/default.aspx
i think it is possible to add DigitalPotentiometer (https://www.arduino.cc/en/Tutorial/LibraryExamples/DigitalPotentiometer) in this loop to control the speed with an Arduino without fast calculations and PWM's.
https://www.osioptoelectronics.com/standard-products/default.aspx
I'm interested in the "lift the arm with a servo" bit. Could you explain a little more on what you used and how you trigger the lift etc?My Last Audio-Project was also a DIY-Turntable, now it have an ESP-Chip with OLED to Messure and Display the Speed and Lift the Arm with a Servo, i can also 'control' it via WIFI")
Nice table . Mixing wood finishes in design is always the sign of DIY ...Nothing wrong with it just saying. ..That's mine and ultimately a fiasco fir many reasons . Started with DC Maxon motor and Mark Kelly controller , stumbled on Kuzma 4 motors and controllers from 4XL table . I thought it would compete with my old Acoustic Signature Final Tool which can be bought for maybe $1.5 k nowadays but no chance..Turntables are a tricky business
Attachments
Nice! I'm building a couple of TT's right now and using a Nano and servo to control arm lift and lower. I think it'll work well.My Last Audio-Project was also a DIY-Turntable, now it have an ESP-Chip with OLED to Messure and Display the Speed and Lift the Arm with a Servo, i can also 'control' it via WIFI
View attachment 1082306
Can I put my two bob's worth in?I'm interested in the "lift the arm with a servo" bit. Could you explain a little more on what you used and how you trigger the lift etc?
I don't know how odippel has configured his operation, but I am controlling my arm using an Arduino Nano with a servo. The servo is mounted so that the output shaft is horizontal, with an arm that will push against a normal tonearm lifter (without the associated mechanism that is redundant) once the arm reaches the record end. In my case, I trigger the Nano via a reed switch magnet attached to an arm at the bottom of the vertical spindle of the tonearm. It's important to have a balanced fitting, so I've used a four arm (cross) fitting with a magnet at opposite sides to prevent yawing. I've tried a simple servo trigger which is simpler than a Nano but It became faulty after a few operations. It may have been something that I did so I don't want to rubbish the trigger. The Nano is very small and easy to install underneath the plynth. I also raise and lower the tonearm via momentary switches for cueing. I'll get around to posting some pics of my TT build. I also made my own tonearm mated to a technics gimbal that's turned out nicely.
Regards Johnno
Do you have any reference turntable available to check your results against or it's rather wherever the chips fall process ? I'm asking because I committed to a refurb of Thorens TD124 with custom plinth and was so proud until I took the table to a friendly dealer and I compared it to a VPI scout or some other cheap VPI model. The dealer just smiled melancholically and that was that. Years later I told the story to an owner of a famous outfit refurbing idler clunkers for deaf geriatrics so they can post pictures on the forums and congratulate themselves. He smiled too and said that TD124 is a lifestyle table and a nice conversation object but performance wise is quite mediocre and Garrard is much better. The other table is the table I pictured which is wrong on many levels , wrong bearing (Teres), wrong platter , wrong concept and wrong saving the project ideas. Still it sounds nice if little restricted as long as you don't have anything else of fairly decent quality to compare to. Indirectly I participated in my friends attempt to make a copy of the Acoustic Solid turntable. Copy turned out to be almost as expensive as used table since it was a former entry level and it was rather disappointing and supposedly aluminum is aluminum , right??Nice! I'm building a couple of TT's right now and using a Nano and servo to control arm lift and lower. I think it'll work well.
Regards, L
- Home
- Source & Line
- Analogue Source
- DIY Turntable build with motor and controller