
He thinks I'm building him a new perchBtw cute cat...

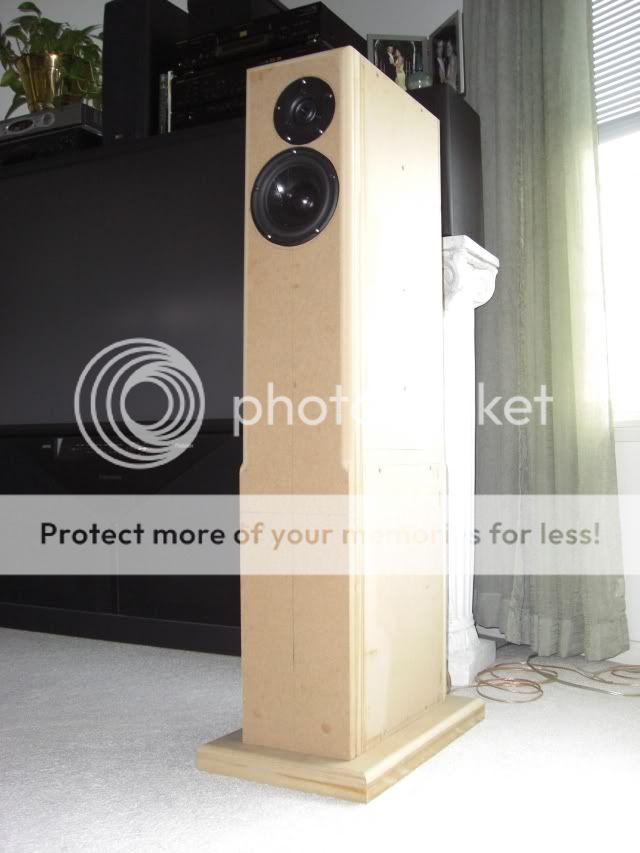
I got one front baffle finished this morning....lots of other stuff I could have been working on but I couldn't take it.
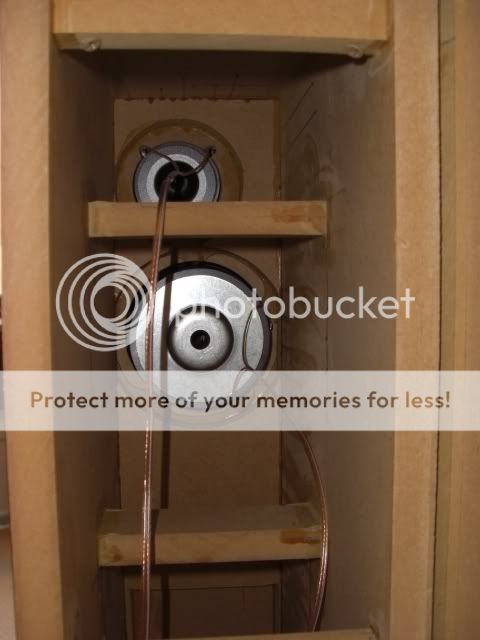
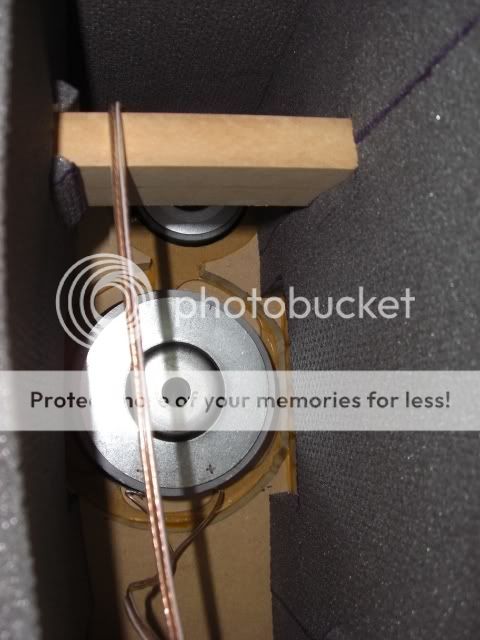
I had to wire it up and take it for a test drive....no damping , no vent
As you might guess,not much accomplished after that.
Best Part - It's sounds great! 😀
Great moment! First notes...its alive! At least you know that LF and HF goes where is supposed to for the moment. You can wire the next one with confidence, since there is a complex network involved. Congrats!
Thanks!
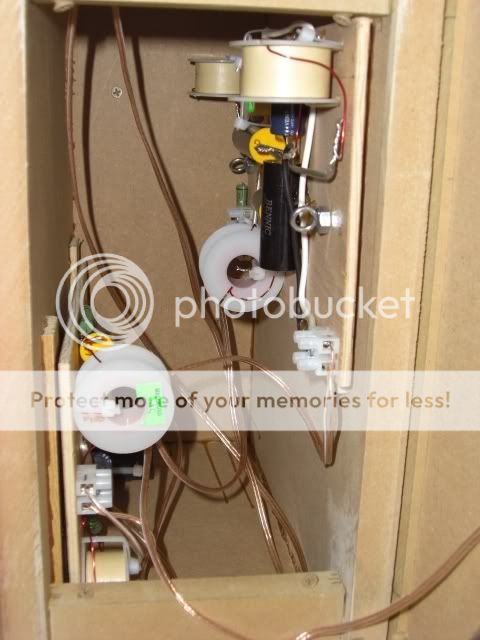
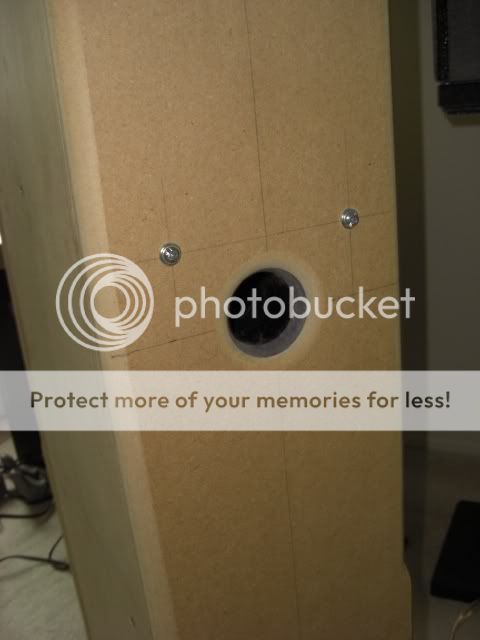
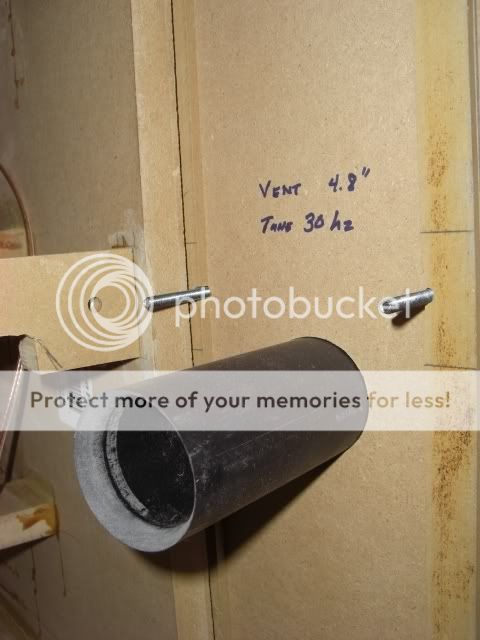
I've got the other crossover and both vents in .
I made these vents from abs because I only ordered 1 pair of vents from PE.
I wasn't sure how to install the PE vents. Looks like they were made to be driven (hammered) in. I was able to get fairly close to the same roundover with the router.
Both have been playing for a day or 2.
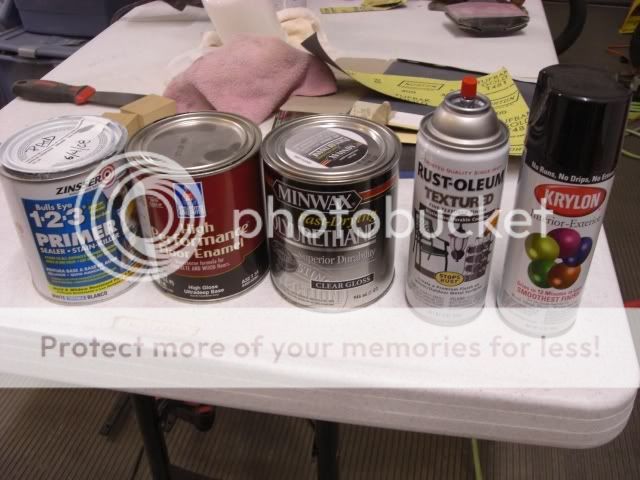
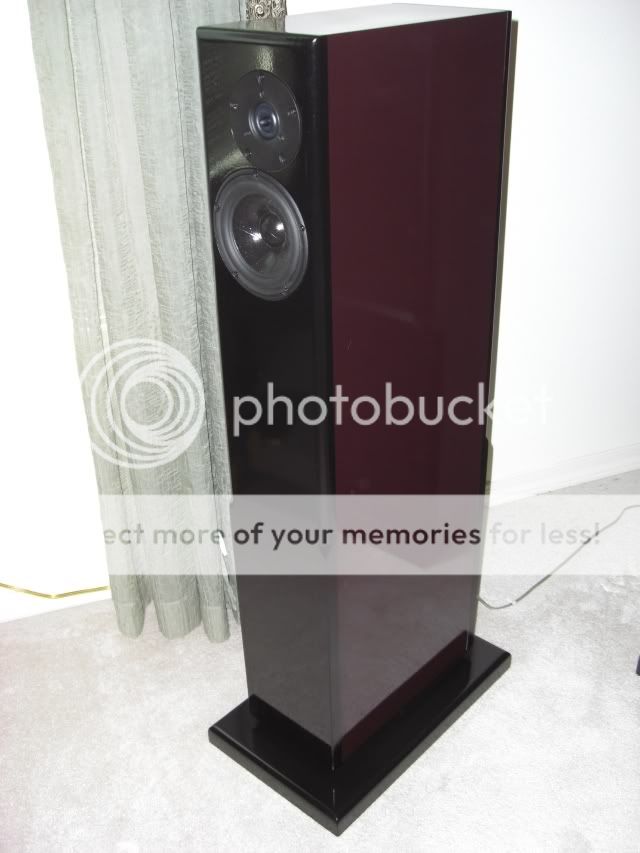
I'm afraid the hardest part lies ahead......dark cherry or black piano finish.
I've got the other crossover and both vents in .
I made these vents from abs because I only ordered 1 pair of vents from PE.
I wasn't sure how to install the PE vents. Looks like they were made to be driven (hammered) in. I was able to get fairly close to the same roundover with the router.
Both have been playing for a day or 2.
I'm afraid the hardest part lies ahead......dark cherry or black piano finish.
cj.9 said:I'm afraid the hardest part lies ahead......dark cherry or black piano finish.
Both! Piano baffle, top, bottom, back, and dark cherry cheeks!
Expecting your sonic evaluation in detail too! Nice work indeed.
I haven't managed to make much progress since I got both playing 😀
I did open them up today and add the damping. Of course this took longer than anticipated.
I won't stick it down until they have been painted. It'll be a couple of weeks before I get back to work on them.
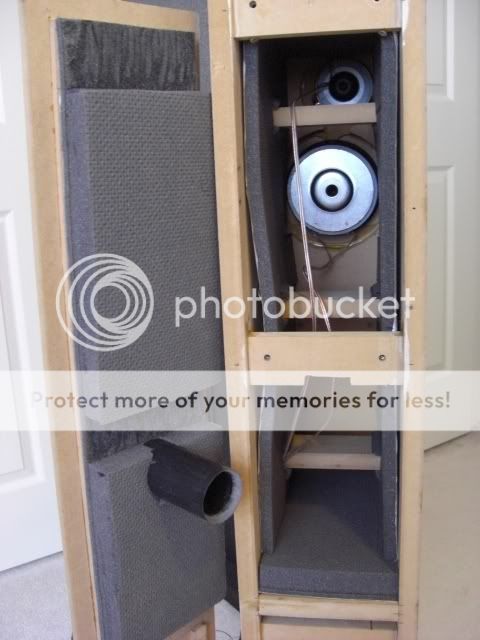
Not shown, but I did add about 3/4 of a pound of acousta-stuf to the bottom of each.
Thanks, They sound excellent. Incredible detail. Exceeded my expectations.
Many thanks to Mr. Krutke !🙂
I did open them up today and add the damping. Of course this took longer than anticipated.
I won't stick it down until they have been painted. It'll be a couple of weeks before I get back to work on them.
Not shown, but I did add about 3/4 of a pound of acousta-stuf to the bottom of each.
Expecting your sonic evaluation in detail too! Nice work indeed.
Thanks, They sound excellent. Incredible detail. Exceeded my expectations.
Many thanks to Mr. Krutke !🙂
very nice work, and thanks for the photos.
Can you share more photos of them finished?. can you make a little review on their sound?.
i will try to build a pair in a few moths, but sealed ( a floorstanding).
i want to replace my front wharfdale 9.1 by this sealed zd5 (i think is a good bet , althought i've never hear zd5). and if the changes justify i also will buy a new amp for zd5.... i'm thinking of diy kit of hypex (400W). i think that the zd5 have no prob with this kind of power.
You can see all the photos taken so far at the photobucket link below..
ZD5 Photobucket link
I hope to get them painted in the next couple of weeks.
I'm thinking of building a smalller sealed set of enclosures while I still have the tools out. I would love to have a second pair in the bedroom.
ZD5 Photobucket link
I hope to get them painted in the next couple of weeks.
I'm thinking of building a smalller sealed set of enclosures while I still have the tools out. I would love to have a second pair in the bedroom.

Thanks!
Yea, It's lots of work but I think my builder is the real problem. He is really slow, makes plenty of mistakes,complains a lot and has absolutely wrecked my garage.
I really should consider firing him......opps! that's would be me
On the plus side, his hourly rate is really low. Practically works for coffee and donuts.😉
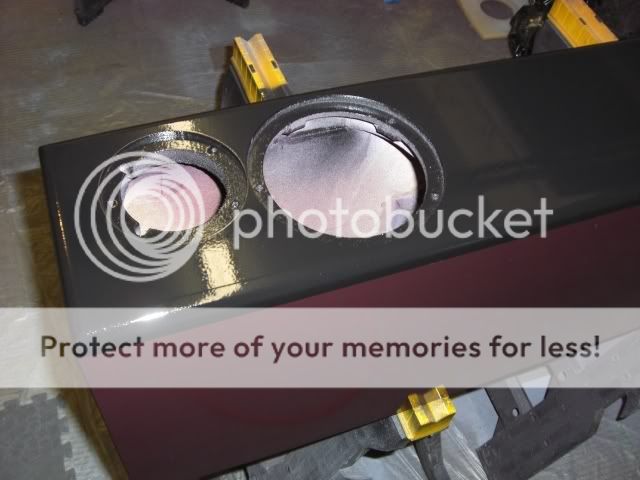
I think/hope I'm done with the painting. I may start putting them back together in the morning. If I don't, it will be a couple of weeks before I can get them back together.
Yea, It's lots of work but I think my builder is the real problem. He is really slow, makes plenty of mistakes,complains a lot and has absolutely wrecked my garage.
I really should consider firing him......opps! that's would be me
On the plus side, his hourly rate is really low. Practically works for coffee and donuts.😉
I think/hope I'm done with the painting. I may start putting them back together in the morning. If I don't, it will be a couple of weeks before I can get them back together.
The woodwork looks quite good.
Has anyone got any suggestion on how to assemble the crossover in the original small sealed enclosure?
Has anyone got any suggestion on how to assemble the crossover in the original small sealed enclosure?
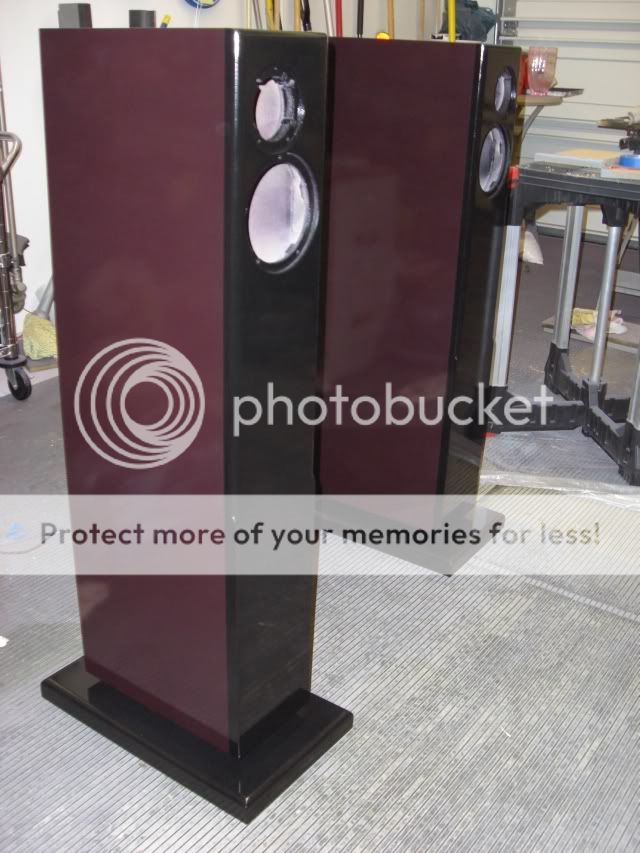
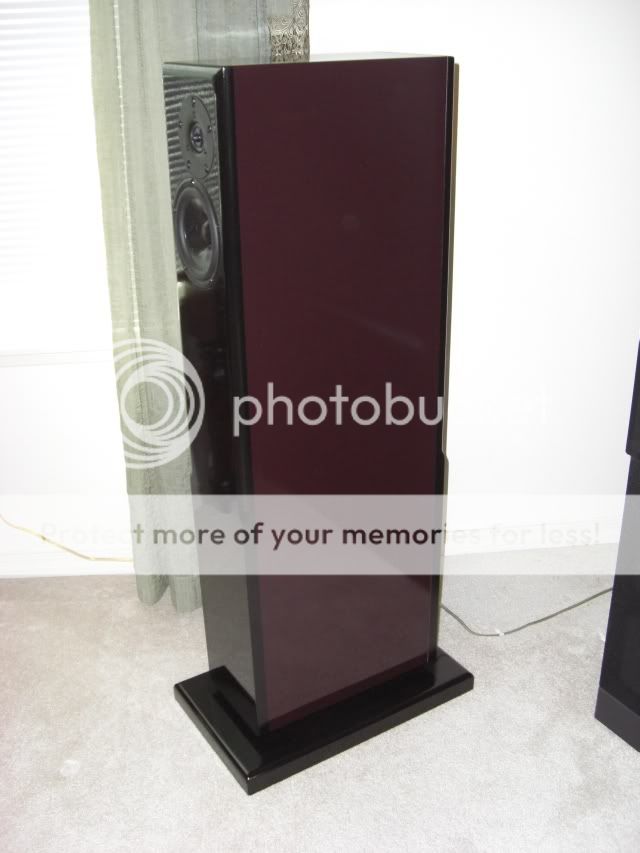
Not very good pictures but there back together and playing.
I'll be gone for a couple of weeks so won't get to enjoy them for a while....
I'll be gone for a couple of weeks so won't get to enjoy them for a while....
Member
Joined 2003
You know you could probably get a near flawless gloss finish if you did some sanding/buffing. It's almost there already.
They look great btw. 😀
They look great btw. 😀
Thanks!
I should have spent an extra day on the bondo/glazing putty....there are a couple of screwheads that I covered and the tops on both could be better. In general though, I was really surprised at how well the came out.
Now that I know I can get a good job with the paint gun I have, I may take them apart this winter and do a refinish.
I only have 3 good coats of clear. I have burned through to paint on one small area using rubbing compound.
Things I would do different:
Clamps and glue only or only screws from the inside if needed.
Tops should be one piece, I cut the top to fit inside the 4 sides. Could have cut and glued full size tops for a double thick top that is perfectly flat.
Follow "A 'how to' for High Gloss Finishing" thread, these guys know what there talking about and get excellent results.
Plan to spend couple of weeks or more on the paint and finish. The drying time kills.
you could probably get a near flawless gloss finish if you did some sanding/buffing
I should have spent an extra day on the bondo/glazing putty....there are a couple of screwheads that I covered and the tops on both could be better. In general though, I was really surprised at how well the came out.
Now that I know I can get a good job with the paint gun I have, I may take them apart this winter and do a refinish.
I only have 3 good coats of clear. I have burned through to paint on one small area using rubbing compound.
Things I would do different:
Clamps and glue only or only screws from the inside if needed.
Tops should be one piece, I cut the top to fit inside the 4 sides. Could have cut and glued full size tops for a double thick top that is perfectly flat.
Follow "A 'how to' for High Gloss Finishing" thread, these guys know what there talking about and get excellent results.
Plan to spend couple of weeks or more on the paint and finish. The drying time kills.
ZD5 Parts from Madisound and Part's Express
Total $926.63
does not include paint,mdf,......
I expect my real total is between $1150 to $1250 .
Link below is the actual orders.
(there are a couple of items not related but not much)
http://docs.google.com/Doc?id=dcbsh5b7_8f4sp3bg5
I would like to know what others are using for R0 in the ZD5.
Haven't had time to experiment yet....
cj
That puts it in the same price range as the new ZRT kit... Decisions, decisions.. I wonder which one sounds best.
I just completed a pair of ZD5's in a sealed enclosure.
Fantastic, vibrant sound. Absolutely worth every penny.
We showed them at the Burning Amp festival yesterday, driven by a pair of Krell KSA50 clones. People were amazed at the tight controlled bass (especially considering the roof size) and the overall balance.
My last pair of monitors were Jordan/G2 ribbon 2-ways. No comparison. Where the Jordans sounded shrill and mushy the Zd5's were tight and balanced.
I have a to scale PDF file of the xover layout for locating the parts at the monitor base. IT was really helpful considering the complexity of the crossover and potential for inductor noise. I will try to post this file but if anyone wants a copy in DWG or PDF format send me an email
Thank you Zaph
Attachments
- Status
- Not open for further replies.