Shiny metal is a poor infrared radiation absorber. But Kapton is excellent.
I was under the impression Kapton's raison d'etre was as a heat and electrical insulator, so in my head some other solution is probably more performant...but I don't know very much so I could be dead wrong.
I'm also curious what advantages raptorlightning's load sharing board offers over the dirt cheap and seemingly ubiquitous TP4056 module? 5PCS Micro USB 5V 1A 18650 TP4056 Lithium Battery Charger Charging Board New | eBay
To me, they look like they perform the same function and I was under the impression the draw of the PCA is <1A, but once again, I know very little.
I was under the impression Kapton's raison d'etre was as a heat and electrical insulator, so in my head some other solution is probably more performant...but I don't know very much so I could be dead wrong.
It is a good electrical insulator that is heat resistant. It conducts heat well enough to be used as a radiative absorber then conduction to the metal.
I'm also curious what advantages raptorlightning's load sharing board offers over the dirt cheap and seemingly ubiquitous TP4056 module? 5PCS Micro USB 5V 1A 18650 TP4056 Lithium Battery Charger Charging Board New | eBay
To me, they look like they perform the same function and I was under the impression the draw of the PCA is <1A, but once again, I know very little.
I use the cheap eBay ones and they work fine.
Thanks for the link, jebivitar. I had a hard time with the RaptorLightning load sharing board. First one I destroyed due to my own soldering incompetence, and second one never worked right for me (probably for the same reason) and then the micro USB jack broke off the board before I could debug it, because I didn't get slot drills when I got them printed. When I see those eBay cheapies, I get renewed hope that I can pull off the Lithium battery mod, for only a couple bucks!
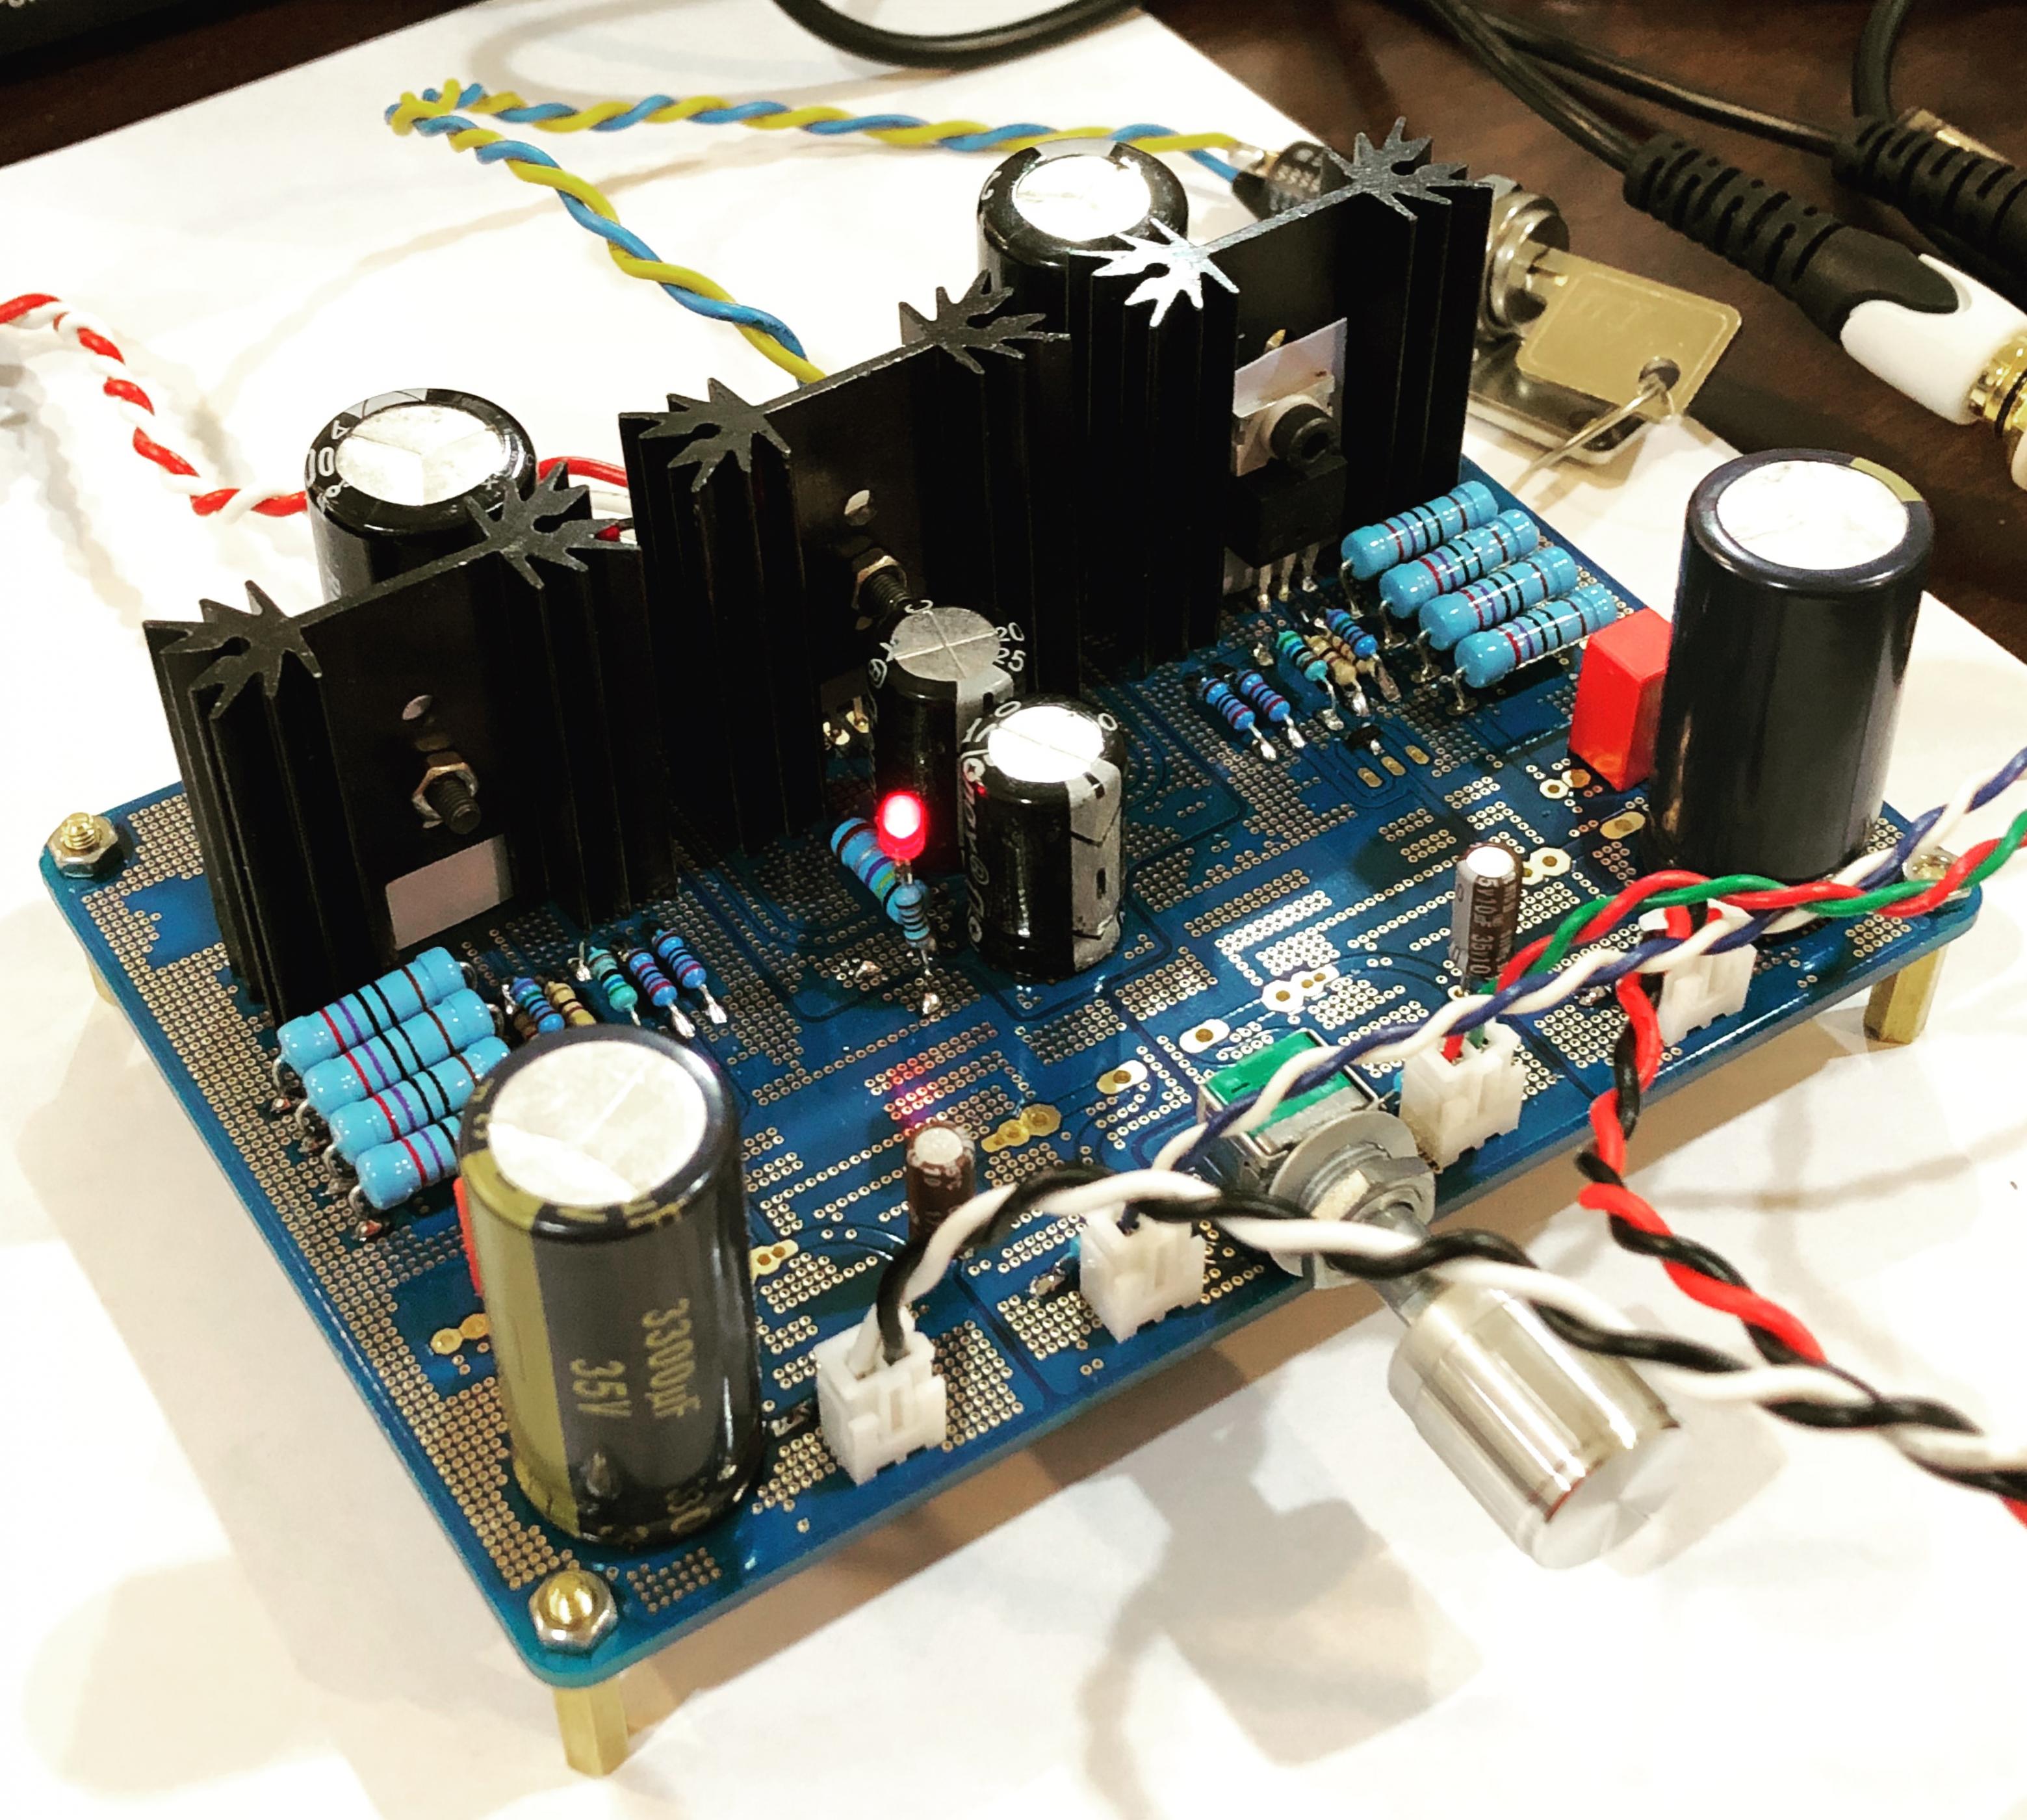
is this how the CRCRC is supposed to be wired?
idea is to use 1w SMD resistors (since through hole .47ohm are pretty expensive) and 2200uF house brand caps from LCSC, of which 5 fit no problem but no idea if it'll turn on, heh
xrk, i noticed that you had a CBB cap sticking out of your CRCRC in an earlier screenshot - what's the idea there?
idea is to use 1w SMD resistors (since through hole .47ohm are pretty expensive) and 2200uF house brand caps from LCSC, of which 5 fit no problem but no idea if it'll turn on, heh
xrk, i noticed that you had a CBB cap sticking out of your CRCRC in an earlier screenshot - what's the idea there?
Attachments
It’s always a good idea to put either a low ESR 0.1uF x7R ceramic cap or 0.1uF film cap across the final C of a CRC to filter (or each C is even better) out high frequency noise. I also add a 51R and 330pF in series but across input cap in CRC as snubber to absorb DC switch noise.
It’s always a good idea to put either a low ESR 0.1uF x7R ceramic cap or 0.1uF film cap across the final C of a CRC to filter (or each C is even better) out high frequency noise. I also add a 51R and 330pF in series but across input cap in CRC as snubber to absorb DC switch noise.
sigh, I knew that was going to happen...I don't have any 330pF caps...and I already pulled the trigger on my order since the stars aligned and all of the items in my cart were in stock, which can be a challenge
ordering again is still cheaper than shopping at digikey though, unless there's another way to make that work
should the wire across the first cap be 51R->330pF->100nF or is 51R->330pF in parallel with the 100nF cap?
The 330pF and 51R snubber is not mandatory. You may not even need it. The 0.1uF film caps are good to have a bag of 50 around because you never know when a bypass is needed. Even Wima 0.1uF 100v are quite cheap.
You know how to do this? Just keep ordering small feee shipping orders of small caps resistors etc from Aliexpress. Start a pipeline. It will all show eventually and 2 weeks goes by before you know it you have it. And you have a big bag of 50 or so. 330pF 1000v ceramic (blue) caps are what I use for this.
You know how to do this? Just keep ordering small feee shipping orders of small caps resistors etc from Aliexpress. Start a pipeline. It will all show eventually and 2 weeks goes by before you know it you have it. And you have a big bag of 50 or so. 330pF 1000v ceramic (blue) caps are what I use for this.
Last edited:
The 330pF and 51R snubber is not mandatory. You may not even need it. The 0.1uF film caps are good to have a bag of 50 around because you never know when a bypass is needed. Even Wima 0.1uF 100v are quite cheap.
i realized as I was making that "diagram" that I could get boards printed for a couple bucks so since i'll be sending these to the fab i'd like to do it right
do those 330pF and 51R go in serial or parallel with the first 100nF cap?
do you think there's benefit in using film caps over the same 100nF AVX MLCCs from the PCA? maybe just 1 film at the end? none would be best due to constraints with physical space and challenge in pcb layout
You know how to do this? Just keep ordering small feee shipping orders of small caps resistors etc from Aliexpress. Start a pipeline. It will all show eventually and 2 weeks goes by before you know it you have it. And you have a big bag of 50 or so. 330pF 1000v ceramic (blue) caps are what I use for this.
yeah i've been on that...i didn't have any electronics equipment 6 months ago, and 200 packages later here we are
i still prefer to order from lcsc when i can because it's stupid cheap, cheaper than ali even; the shipping is pretty fast 1-2weeks; and stuff comes packed better than digikey. heck now they even have promos where you can essentially add up to $6 of components from selected vendors for free if your order is over $5.
sorry for derailing the thread, hopefully this is still on topic somewhat
The 330pF and 51R are connected serially to each other. Then parallel across cap leads. The 100nF X7R caps from PCA are perfect for this.
The 330pF and 51R are connected serially to each other. Then parallel across cap leads. The 100nF X7R caps from PCA are perfect for this.
ok. thanks bunches.
i've got the layout done, just doing the routing and also have to select connectors...which brings me to ask...
have you measured the inrush current of your board with the capmx? i don't really have space for a XH and the 1.25/1.5mm connectors are rated for 1A, and i've seen the initial current spike to 1.5A once on my multimeter (that i don't really trust that much for such measurements), and my understanding is that the capmx relaxes that a little.
No, but I rush with cap Mx should be almost nothing as that is the point. It ramps up slowly from nothing.
Hey stellar, I still have my bag of raptor and cap mx boards around. The raptor ones do have the slots for the connector if I remember correctly. If you want I could send a few your way and you can have another go - pm me
Thanks for the link, jebivitar. I had a hard time with the RaptorLightning load sharing board. First one I destroyed due to my own soldering incompetence, and second one never worked right for me (probably for the same reason) and then the micro USB jack broke off the board before I could debug it, because I didn't get slot drills when I got them printed. When I see those eBay cheapies, I get renewed hope that I can pull off the Lithium battery mod, for only a couple bucks!
Thought I'd jump in here and report back on a problem I had with my own version of a
desktop build I posted on p. 163, Post 1624.
I was having a problem with hum. Long (very) story short, it turned out to be the four
large Silmic cap's I was using for C3. I've replaced them for now with a couple of Nichi
2200uF UVK's, and the hum is gone.
Not sure why it was happening. I have heard that the Silmic's are now being made in
China, and the quality is not what it was. The hum btw, was skewed toward, but not
completely in, the left channel, so one of the two Silmic's there could have been a bit
wonky. FWIW
Thanks for that info, Funch. We take electrolytics for granted sometimes. On the Alpha amp, a member was having lots of problems on startup of what should be an easy amp to start. Turned out to be bad electrolytics on both channels. Same “Sanyo” 1000uF 35v (probably fakes). They were shorted internally.
It seems I may have been a bit premature in my assessment of the source of the hum.
After my amp had been running for a while fully warmed up, the hum returned. It wasn't as loud as before, I believe because I had also dropped the value of R4 from 68R to 51R.
Today, I dropped it down to 47R, and the hum is almost inaudible. Although I'm hearing
it biased toward the left channel, I think it's due to some HF hearing loss in my right ear.
The 'phones I'm using with this amp are Massdrop Fostex TH-X00's with an impedance
of 25 ohms. The amp is running at just under 18 VDC. I may lower R4 even further to
see if I can eliminate the hum altogether.
Is your amp wall powered? What type of PSU are you using and is there a cap multiplier?
Is your wall PSU have its -ve connected to earth ground? If so, connect a 10R 2w resistor between the negative of the PSU and negative of the amp.
Here is my guaranteed way to eliminate hum/noise etc so the wall plug is as quiet as a battery.
Use a ungrounded linear class 2 wall wart like GCI Technology 12v 800mA. This drives a DC to DC step up (the bigger 10amp ones with two aluminum heatsinks). The DC step up goes to a cap multiplier, the cap multiplier goes to a CRCRC with 0.47R up to 3.3R 2W (depending on how much filtering you need) on both +ve and -ve of 10mF caps x 3. Big Caps bypassed with 0.1uF film caps. Output of this is voltage regulated via DC step up and noise floor is -125dB at 60Hz. Basically used DC switched to being the audible 60Hz hum up to 400kHz where it’s easy to filter out steeply.
Last edited:
Post 1624 on p. 163 shows the amp, with a link to the PS doc's. My wall wart is rated at
18VAC/1A. Ungrounded. My cap bank is made up of six 820uF cap's, bypassed with 1uF
film cap's.
I've never dealt with the type of PS you describe, and have tried in the past to research the CRCRC and cap multipliers with not much success sad to say. I'm no engineer, just a lowly hobbyist.
18VAC/1A. Ungrounded. My cap bank is made up of six 820uF cap's, bypassed with 1uF
film cap's.
I've never dealt with the type of PS you describe, and have tried in the past to research the CRCRC and cap multipliers with not much success sad to say. I'm no engineer, just a lowly hobbyist.
If you get the DCA you only need to add a DC step up as it has cap Mx and CRCRC built in.
xrk971 Desktop Class A (DCA) Headphone Amp
xrk971 Desktop Class A (DCA) Headphone Amp
- Home
- Group Buys
- xrk971 Pocket Class A Headamp GB