Hi ...
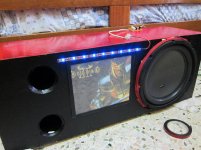
Another new subwoofer project being build again
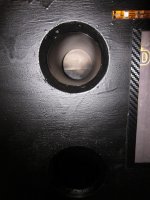
For this project i encounter an unknown leaking spot nearby the subwoofer ... double confirm already is definitely not from the joins of the box ... already seal them with double sided foam tape
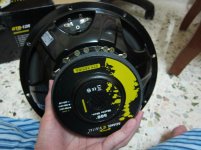
For the subwoofer driver i use modelling clay behind them and mounted them to my subwoofer box and wrap the perimeter with double sided foam tape ... unfortunately still have air leak problem at high volume levels
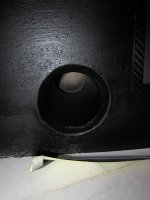
Another problem it seems like one only of my ports was having port noise problem ... the second port did have port noise problem too but not as bad as the first one ... i did flare the ports but why there is still port noise ... the box is using 2 3inch PVC pipes with 8in length tune the box to 42Hz ... Box Volume of about 62 Liters ...
I hope i can get a correct answer and opinion to overcome my two problems above ... thanks ....
Another new subwoofer project being build again
For this project i encounter an unknown leaking spot nearby the subwoofer ... double confirm already is definitely not from the joins of the box ... already seal them with double sided foam tape
For the subwoofer driver i use modelling clay behind them and mounted them to my subwoofer box and wrap the perimeter with double sided foam tape ... unfortunately still have air leak problem at high volume levels
Another problem it seems like one only of my ports was having port noise problem ... the second port did have port noise problem too but not as bad as the first one ... i did flare the ports but why there is still port noise ... the box is using 2 3inch PVC pipes with 8in length tune the box to 42Hz ... Box Volume of about 62 Liters ...
I hope i can get a correct answer and opinion to overcome my two problems above ... thanks ....
Attachments


Last edited:
It looks like the ports are close to the back of the cabinet, how much space is there between the back and the entrance of the port inside?
foam tape has almost no sealing effect.
To seal the inside of the cabinet use silicone rubber caulk or cheaper is acrylic latex caulk, or a similar material.
Any gap behind the driver's mounting rim will cause a leak.
Modelling clay is ok, but you should roll a thin cylindrical length of it on a surface, like formica or glass and then stick that to the rear of the driver, then the screws will press it into an even flat gasket.
screw holes and surrounds can leak to some extent as well.
vented dust caps or porous dust caps leak too...
How do you know it is leaking?
The 2" to the rear is a bit tight... you have to figure if that is more or less area than the area (cross section) of the round port... also check where the port is maximum output - that is the tuning frequency.
You can check that by hanging a thin strip of tissue paper over the port exits and at a modest sound level runing different frequencies (sine wave) into the speaker, look for the most motion of the tissue paper.
_-_-
oh ... thanks ... just now open the driver to remount it ... realise that the foam tape didnt do a good sealing job also ... now it is solved ... no more leak around the driver anymore
but second problem the port noise is still there ... if i were going to replace the port with a 4in diameter and 5in long tuned to the same Fb 42Hz ... will i can completely eliminate port noise ... that is my target ...
but second problem the port noise is still there ... if i were going to replace the port with a 4in diameter and 5in long tuned to the same Fb 42Hz ... will i can completely eliminate port noise ... that is my target ...
oh ... thanks ... just now open the driver to remount it ... realise that the foam tape didnt do a good sealing job also ... now it is solved ... no more leak around the driver anymore
but second problem the port noise is still there ... if i were going to replace the port with a 4in diameter and 5in long tuned to the same Fb 42Hz ... will i can completely eliminate port noise ... that is my target ...
If you're going to go that large, you might want to consider a slot port. I think they're even easier to do than tubes, and you can get the length you need by shaping it like an L.
Two 3" ports have more surface area than a single 4" port, 14.14 square inches versus 12.57 square inches. Using real flared ports should eliminate the problem as long as the port intake is at least 3" away from the back wall.
Precision Port 3" Flared Port Tube Kit 268-350
If you don't have enough room for clearance at the back of the cabinet you can use Schedule 40 PVC elbows to turn the ports.
Precision Port 3" Flared Port Tube Kit 268-350
If you don't have enough room for clearance at the back of the cabinet you can use Schedule 40 PVC elbows to turn the ports.
- Status
- Not open for further replies.
- Home
- Loudspeakers
- Subwoofers
- Unidentified leaking spot around subwoofer mounting and port noise