Certainly! Not much to see really.Pictures?
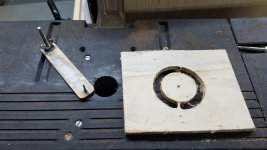
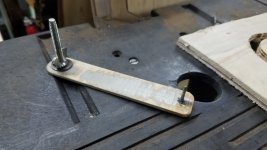
I need to make the arm longer, and move the pivot point further away from the bit to prevent the work piece from hitting the pivot bolt so easily. I used that point just because there was already a bolt there for the guide. I'll just drill a new hole where I want it. The arm itself also could be a little stiffer. It's just a scrap piece of Ash I had left over from another project. The center locator pin is a screw I turned down on the lathe. It really needs to be a little bit larger to fit the 1/8" center hole tighter.
Otherwise, it works fine. I should have no trouble cutting the driver holes, and even the recesses.
Attachments
Oh man, you guys are bad influences!!
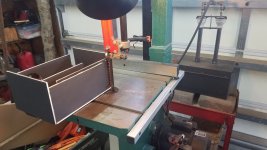
While I'm waiting for the drivers to arrive, I figured it wouldn't be a bad idea to grab some foam board and mock up the box to make sure I have the idea in mind, and check the overall size and such. I'll probably drop a driver in there to see how it sounds for giggles before building the real enclosures.
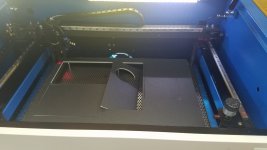
So I figure, hey, I have a laser cutter, why not use it? The first image is the foam being cut on the laser. It works pretty well, but the laser has a nasty tendency to ignite the paper and/or melt the foam. I need to tweak my settings to minimize that effect.
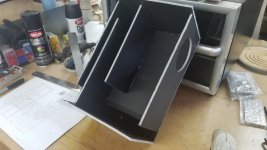
The 2nd & 3rd images are me trying to recall how to use a glue gun, and mostly failing. 🙄
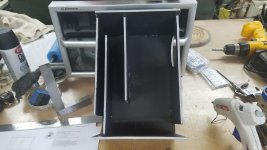
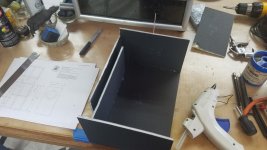
The 4th & 5th images are where I realized how much of a dimensional difference it makes when you don't account for the material thickness difference between foam board and 1/2" plywood. Not to worry, we have power tools for that! 😀
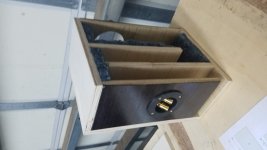
The 6th image is the "solution". Whack 'er down and glue 'er up!
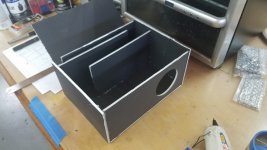
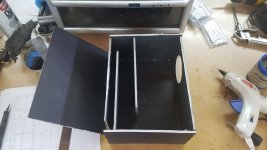
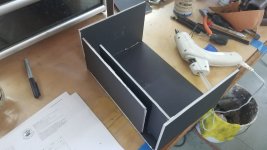
The 7th & 8th images are the (terribly) finished boxes, minus the side cover and any sort of damping.
That's going to be my next question...
I've read the build notes for the Woden Bloodhound about 6-8 times, and I just cannot wrap my head around where the damping material goes, and how much. 😕
Is anyone able to point me to a diagram or something that shows it graphically, or maybe even draw something in on one of these images if you're feeling really bored, err, I mean generous?
By the way my wife blames you people for the hobby hole I'm already falling into.
While I'm waiting for the drivers to arrive, I figured it wouldn't be a bad idea to grab some foam board and mock up the box to make sure I have the idea in mind, and check the overall size and such. I'll probably drop a driver in there to see how it sounds for giggles before building the real enclosures.
So I figure, hey, I have a laser cutter, why not use it? The first image is the foam being cut on the laser. It works pretty well, but the laser has a nasty tendency to ignite the paper and/or melt the foam. I need to tweak my settings to minimize that effect.
The 2nd & 3rd images are me trying to recall how to use a glue gun, and mostly failing. 🙄
The 4th & 5th images are where I realized how much of a dimensional difference it makes when you don't account for the material thickness difference between foam board and 1/2" plywood. Not to worry, we have power tools for that! 😀
The 6th image is the "solution". Whack 'er down and glue 'er up!
The 7th & 8th images are the (terribly) finished boxes, minus the side cover and any sort of damping.
That's going to be my next question...
I've read the build notes for the Woden Bloodhound about 6-8 times, and I just cannot wrap my head around where the damping material goes, and how much. 😕
Is anyone able to point me to a diagram or something that shows it graphically, or maybe even draw something in on one of these images if you're feeling really bored, err, I mean generous?
By the way my wife blames you people for the hobby hole I'm already falling into.
Attachments
-
 20200613_155340 (Medium).jpg179 KB · Views: 115
 -
 20200613_155337 (Medium).jpg166.8 KB · Views: 93
 -
 20200613_154034 (Medium).jpg225.6 KB · Views: 90
 -
 20200613_153915 (Medium).jpg181.8 KB · Views: 96
 -
 20200613_153910 (Medium).jpg199.7 KB · Views: 79
 -
 20200613_153427 (Medium).jpg182.8 KB · Views: 179
 -
 20200613_153422 (Medium).jpg201.8 KB · Views: 179
 -
 20200613_150310 (Medium).jpg171.3 KB · Views: 174
Welcome to the "club!" It gets even worse when you hear how good they sound. Then you'll ask yourself what else you can do.. and then...........
If you notice the notes on the Bloodhound page, you'll find damping information.
The foam core boxes look good. I did my first set of Nola Brio clones in foam core. I had an Exacto knife and a ruler instead of a CNC, but it all worked. 🙂
If you notice the notes on the Bloodhound page, you'll find damping information.
The foam core boxes look good. I did my first set of Nola Brio clones in foam core. I had an Exacto knife and a ruler instead of a CNC, but it all worked. 🙂
Welcome to the "club!" It gets even worse when you hear how good they sound. Then you'll ask yourself what else you can do.. and then...........
If you notice the notes on the Bloodhound page, you'll find damping information.
I'm already asking those questions... 😱 You people are evil. 😀
Bloodhound page? I did a search for 'bloodhound', but I just got several pages that mention it, nothing that seemed to be a dedicated page for that particular design.
EDIT: I did find this image. Is that placement damping correct? Does the inside of the side cover (the one that's not shown in the photo) get anything?
Last edited:
You must have missed this link posted earlier: http://wodendesign.com/downloads/Woden-BabyLabs-241018.pdf
Bloodhound is the 5th box in. The damping plan right after the 1st one, Lance, translates acrosss all the boxes.
dave
Bloodhound is the 5th box in. The damping plan right after the 1st one, Lance, translates acrosss all the boxes.
dave
The damping plan right after the 1st one, Lance, translates acrosss all the boxes.
Ah! I had that document, that's the one I was referring to, I just didn't realize that the damping plan for the Lance applied to all the designs. In fact, I didn't even see that plan, since I wasn't building a Lance. Thanks!
See how much fun this is!!! You never know where information will pop up. Just keep the questions coming.
🙂
🙂
Hi all,
Just wanted to do a quick follow-up to thank everyone for all the input and advice, and report back on how things turned out.
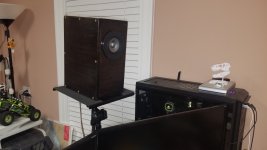
I finally got the speakers done, and I'm really happy with them for the most part.
I made lots of mistakes along the way, mostly with the physical building of the enclosures. I won't be making those same mistakes next time. It'll be all new ones! 😀
Anyway, they sound great, and I can't wait to find my next project.
I'm already scrounging parts and thinking about what design I want to try out next. Of course you guys knew this would happen, right?
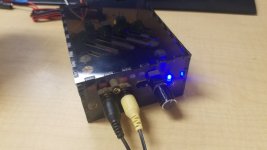
I even built a little amp for testing purposes...it's a disease. lol
Thanks again for all the help! What a great community of experts we have here.
Just wanted to do a quick follow-up to thank everyone for all the input and advice, and report back on how things turned out.
I finally got the speakers done, and I'm really happy with them for the most part.
I made lots of mistakes along the way, mostly with the physical building of the enclosures. I won't be making those same mistakes next time. It'll be all new ones! 😀
Anyway, they sound great, and I can't wait to find my next project.
I'm already scrounging parts and thinking about what design I want to try out next. Of course you guys knew this would happen, right?
I even built a little amp for testing purposes...it's a disease. lol
Thanks again for all the help! What a great community of experts we have here.
Attachments

- Home
- Loudspeakers
- Full Range
- Suggestions for complete newb - PC/desktop speakers?