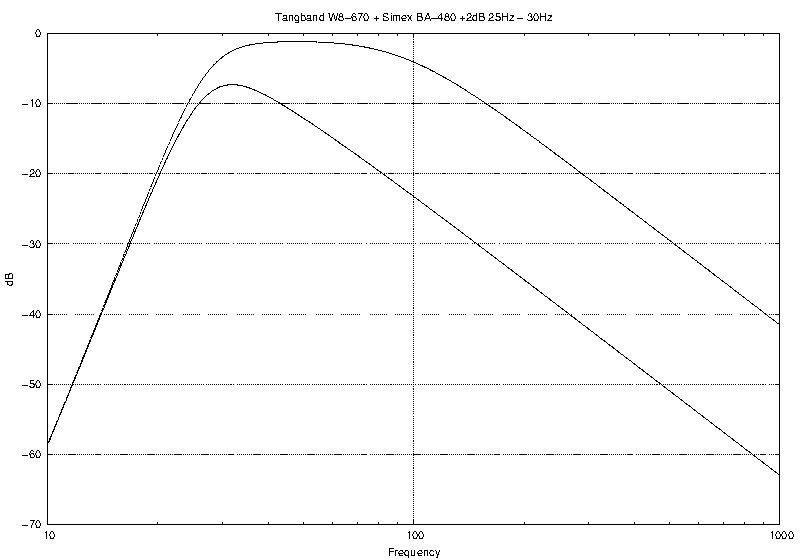
Ok, I did some simulating with LTspice as well and added the outputs to the output of the WinISD. The results are here. The first one what the amp now has, +2dB between 25Hz and 30Hz:
And here is what I could achieve by changing one resistor, +3dB between 25Hz and 30Hz:
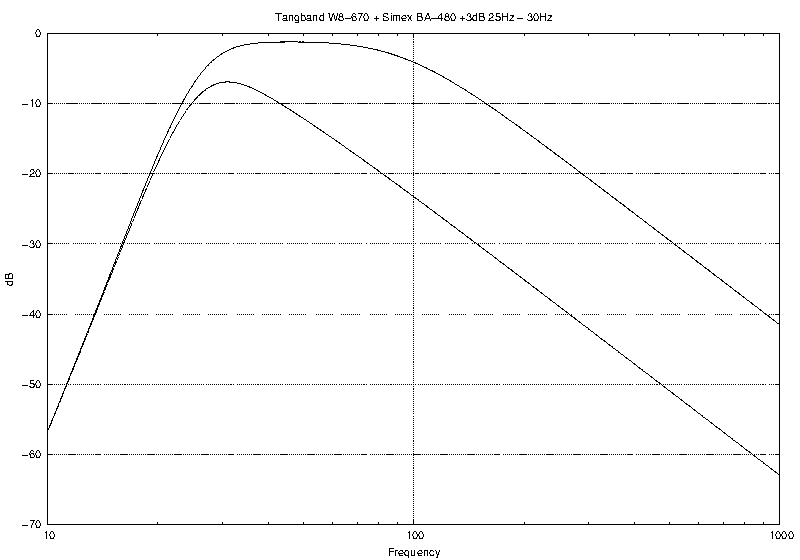
The difference is minimal, so I'll leave it as it is. Back to woodworking...
And here is what I could achieve by changing one resistor, +3dB between 25Hz and 30Hz:
The difference is minimal, so I'll leave it as it is. Back to woodworking...
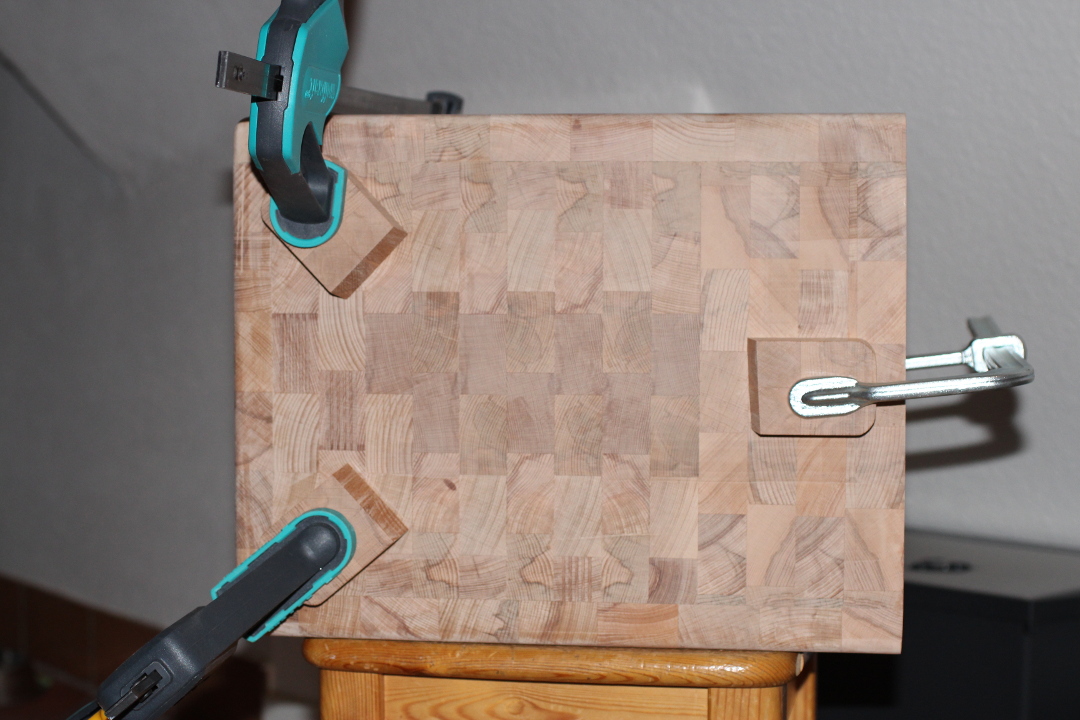
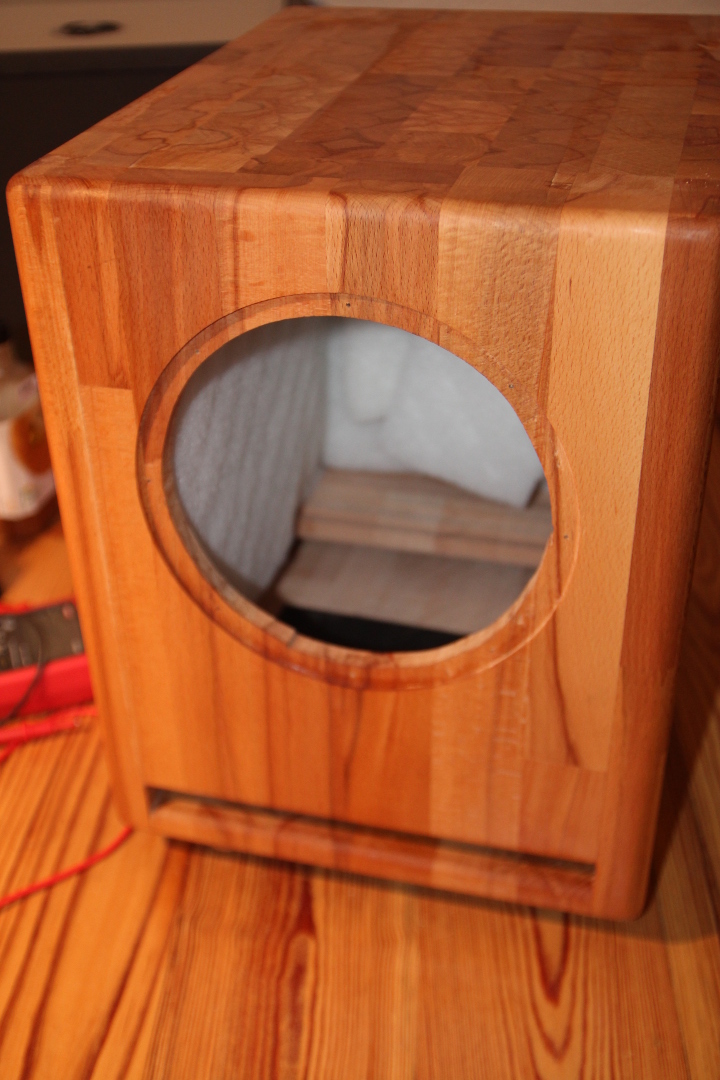
I had a little operation yesterday, so I was written sick for two days. What a possibility to go on with this project! So I glued, sawed and sanded, sanded even some more... So now the subwoofer has small feet made from wood and it is ready to be oiled.
I bought a bottle of wood oil (€9.30) from a local organic construction materials shop. It is mostly made of flax oil with some other ingredients as well. I already did the first round with it, but I'll post the pics later when it has settled.
Money spent: €142.10
Time spent: 65 hours
I bought a bottle of wood oil (€9.30) from a local organic construction materials shop. It is mostly made of flax oil with some other ingredients as well. I already did the first round with it, but I'll post the pics later when it has settled.
Money spent: €142.10
Time spent: 65 hours

Ok, now it is oiled twice, so the surface seems to be pretty even. I took a look in my closets and found something useful. First, some surplus anti vibration mats, 3 and a half pieces. So I slapped one full piece on both side walls, one on the top and the half on the bottom in front of the port. I also added some rubber feets under those wooden ones to keep the thing stable on the floor.
I found some Sonofil as well. It did fit pretty nicely on the side walls. I made some cuts, so the rest of it will form a wall between the amplifier and the element. And there will be enough free space between the element and the port.
Oh yes, a couple of photos again... The feet and the anti vibration mat.
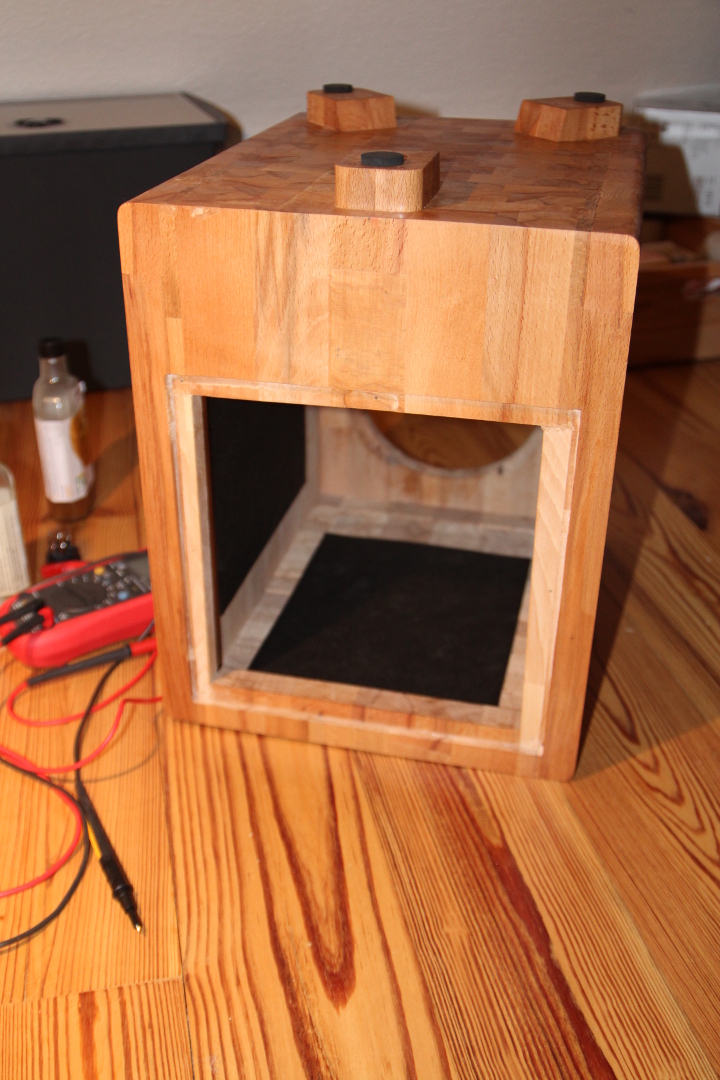
And the the Sonofil filling.
Tomorrow it is time to get the the last ace out of the sleeve.
Money spent: €142.10
Time spent: 67 hours
I found some Sonofil as well. It did fit pretty nicely on the side walls. I made some cuts, so the rest of it will form a wall between the amplifier and the element. And there will be enough free space between the element and the port.
Oh yes, a couple of photos again... The feet and the anti vibration mat.
And the the Sonofil filling.
Tomorrow it is time to get the the last ace out of the sleeve.
Money spent: €142.10
Time spent: 67 hours
Ok, the idea was to put all together today. The last sub I used with this amplifier had nasty on and off pops, so I started implementing a delay circuit with a relay that would keep the element off while turn on and cut it right off at the shutdown.
I managed to find this little project, the plans for it and was able to take a look what I still would need. Yes, the DMM in the previous photos was to measure the rail voltages of the amplifier to have power for this little extra circuit.
But then mr Murphy hit me hard. First my soldering station didn't heat up. Last time I used it, it did, although it has been transported after that. The first DMM at hand to dig into this problem did nothing. I had to come down to pick up the one on the photos to see that yes, there's nothing wrong with the fuse of the soldering station and there's still 8.92V in the first DMM's battery. It did nothing even with a lab power.
So, project will go on some other time then...
At the moment I'd like to get some sound out of it. This means leaving the idea of a soft start for a later time. I ordered a new handle for my soldering station, but now it won't even turn on. And it has drilled out screws, so opening it will be a pain. Most likely I'm going for the local brands for my next soldering station, like Weller or Ersa. No more cheap chinese.
But that will be at some later point. So my plan is to put it together with alligator clip leads as I cannot even solder the amplifier leads to the tabs on the element. And getting something out of the system and tweaking it to working nicely with my speakers.
Money spent: €160.00
Time spent: 69 hours
- Status
- Not open for further replies.
- Home
- Loudspeakers
- Subwoofers
- Subwoofer with Postal Money