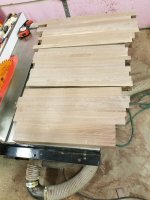
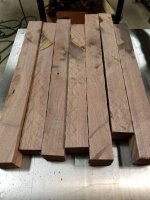
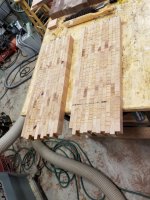
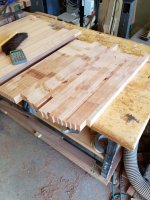
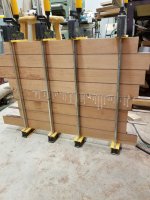
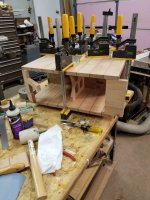
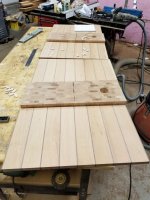
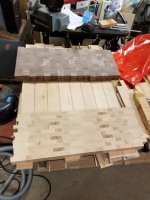
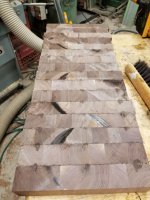
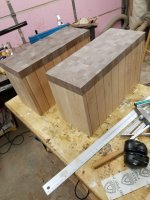
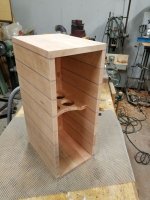
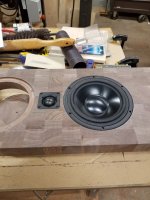
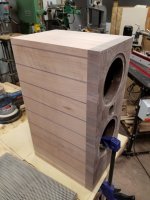
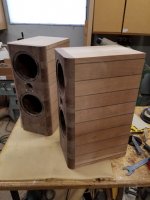
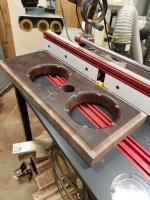
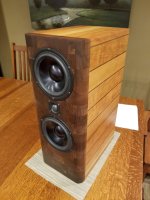
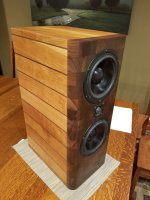
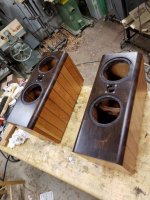
Here are some pictures of my solid cherry & walnut MTM build.
You are not supposed to build a speaker out of solid wood because of crossgrain wood movement.
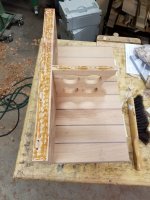
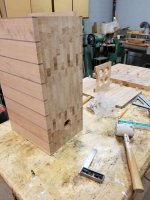
All the wood grain in this speaker goes the same way.
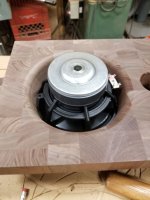
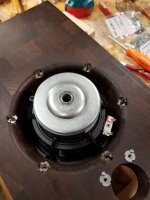
Drivers are a pair of custom Seas 6-1/2″ L18RNX/P based Prestige 4Ω Woofers and a Morel Morel MDT-40 1-1/8" Compact Dome Tweeter.
Crossover is at 1900Hz.
You are not supposed to build a speaker out of solid wood because of crossgrain wood movement.
All the wood grain in this speaker goes the same way.
Drivers are a pair of custom Seas 6-1/2″ L18RNX/P based Prestige 4Ω Woofers and a Morel Morel MDT-40 1-1/8" Compact Dome Tweeter.
Crossover is at 1900Hz.
Attachments
-
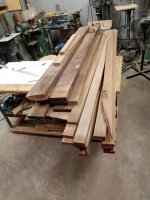 1 pile of walnut and cherry.jpg144.3 KB · Views: 771
 -
 10 cherry sides rough crosscut.jpg168.4 KB · Views: 162
 -
 9 walnut dressed blanks.jpg151.5 KB · Views: 175
 -
 8 walnut glued blanks.jpg167.8 KB · Views: 188
 -
 7 starting walnut baffle glueup.jpg190.2 KB · Views: 196
 -
 6 walnut strips dressed.jpg147.1 KB · Views: 161
 -
 5 walnut ripped.jpg148.3 KB · Views: 745
 -
 4 walnut front baffle rough.jpg164.2 KB · Views: 757
 -
 3 tops and bottoms glueup.jpg175.7 KB · Views: 779
 -
 2 high tech layout.jpg114.9 KB · Views: 773
more pics...
Attachments
-
 20 backs covered in glue.jpg176.5 KB · Views: 224
 -
 19 baffle glueup.jpg142 KB · Views: 248
 -
 18 baffle strips.jpg150.4 KB · Views: 239
 -
 17 back glueup.jpg139.2 KB · Views: 184
 -
 16 cherry stips for speaker back.jpg172.5 KB · Views: 163
 -
 15 crosscutting back cherry baffle.jpg175.7 KB · Views: 159
 -
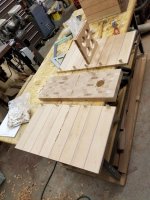
 14 large pile of panels.jpg155.1 KB · Views: 153
 -
 13 cherry backs blank.jpg144.2 KB · Views: 177
 -
 12 cherry sides double width.jpg166.5 KB · Views: 166
 -
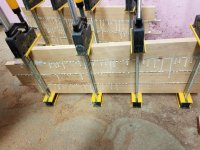 11 cherry sides glueup 1.jpg184.9 KB · Views: 168
more pics 2...
Attachments
-
 27 brace glued in.jpg172.9 KB · Views: 174
 -
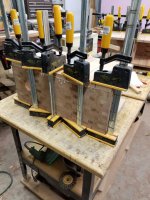
 28 gluing sides.jpg151.8 KB · Views: 151
 -
 29 glueing side.jpg164.2 KB · Views: 158
 -
 30 gluing side back.jpg169.9 KB · Views: 173
 -
 26 test fit back.jpg147.5 KB · Views: 199
 -
 25 test fit joinery.jpg150 KB · Views: 175
 -
 24 biscuits and dominos.jpg156.8 KB · Views: 163
 -
 23 laying out box parts for glueup.jpg143.2 KB · Views: 158
 -
 22 front and back surfaced.jpg137.7 KB · Views: 186
 -
 21 baffle glued up.jpg151.6 KB · Views: 220
more pics 3...
Attachments
-
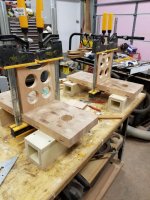
 40 laying out drivers on baffle.jpg139.6 KB · Views: 271
 -
 39 baffes slightly oversized.jpg146 KB · Views: 323
 -
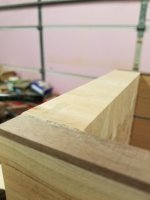
 37 everything flush and sanded.jpg171.6 KB · Views: 266
 -
 36 lapping front of boxes on giant sanding block so perfectly flat.jpg143.7 KB · Views: 242
 -
 35 boxes glued up.jpg141.6 KB · Views: 241
 -
 34 glueing top on.jpg163.9 KB · Views: 193
 -
 33 biscuits for top and bottom.jpg150.7 KB · Views: 180
 -
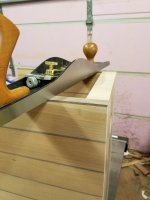 32 back planed flush with sides.jpg86.7 KB · Views: 171
 -
 31 back slightly larger than sides for cleanup.jpg64.3 KB · Views: 190
More Pics. ..
Attachments
-
 50 flats for woofer tt nuts.jpg92.8 KB · Views: 241
 -
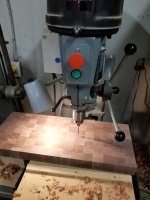
 49 drilling flats for woofer tee nuts.jpg113.5 KB · Views: 248
 -
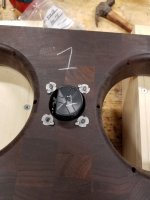 48 screws to hold teenuts.jpg97.5 KB · Views: 294
 -
 47 test fit drivers.jpg136.1 KB · Views: 279
 -
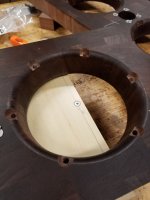
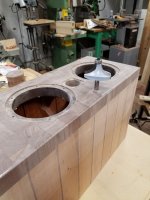
 46 releif for back of woofer.jpg102.8 KB · Views: 250
 -
 45 drilling for tweeter.jpg158.1 KB · Views: 198
 -
 44 rebate for tweeter.jpg118.9 KB · Views: 215
 -
 43 rebates done.jpg159.8 KB · Views: 212
 -
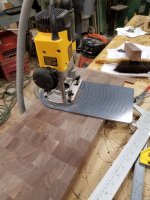 42 starting rebates for drivers.jpg158.8 KB · Views: 198
 -
 41 good start hole for driver cutout circle jig.jpg118.9 KB · Views: 219
Yeah more pics, brilliant job, great detail and accuracy.
Just one question, what would you charge to build these for fellow members ?
Just one question, what would you charge to build these for fellow members ?
Agreed keep them comming 😛... imagine giving those baby's their first oilReally nice! Don't stop with the photos...

More pics . .. .
Attachments
-
 57 box all sanded.jpg134.7 KB · Views: 182
 -
 58 now for a little roundover.jpg113.9 KB · Views: 194
 -
 59 roundovers done.jpg104.8 KB · Views: 220
 -
 60 boxes finished.jpg142.4 KB · Views: 374
 -
 56 flush trimming baffles.jpg94.2 KB · Views: 180
 -
 55 gluing baffles on.jpg174 KB · Views: 199
 -
 54 rebated baffle on box.jpg114.4 KB · Views: 207
 -
 53 rebating baffle to fit on box 2.jpg156.8 KB · Views: 183
 -
 52 rebating baffle to fit on box.jpg182.1 KB · Views: 204
 -
 51 woofer tee nuts in.jpg120.7 KB · Views: 242
Amazing! More pics of the wood finishing, please! What did you use there? Danish oil or something similar?
That is stunningly beautiful. I can't even imagine the craftsmanship and skills
required to do something like that.
More pics when you have them please. 🙂
required to do something like that.
More pics when you have them please. 🙂
Amazing! More pics of the wood finishing, please! What did you use there? Danish oil or something similar?
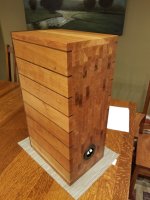
For a finish I use a 1:1:1 mix of satin oil based polyurethane:boiled linseed oil:turpentine. Brush on, leave for 30 min to an hour depending on heat and humidity, wipe off. Speakers got two coats inside, three coats outside. This is a finish for dummies. Super easy to do. Just make sure you dispose of the rags correctly by burning them or hanging them to dry, otherwise they could self combust (I am serious about this!).
Here are some final pics...
Attachments
-
 woof 1.jpg84.5 KB · Views: 243
 -
 1 68 final seas morel freq response.jpg127.6 KB · Views: 301
 -
 1 67 - final 3.jpg454.1 KB · Views: 335
 -
 1 66 - final 1.jpg543.4 KB · Views: 348
 -
 1 65 - final 1.jpg525.8 KB · Views: 426
 -
 64 - crossovers in.jpg117.1 KB · Views: 422
 -
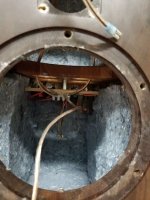
 63 - boxes stuffed.jpg118.1 KB · Views: 423
 -
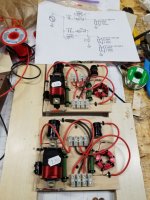 62 - crossovers done.jpg162.7 KB · Views: 436
 -
 61 boxes finished 2.jpg167.7 KB · Views: 425
 -
 four measurements dec 7.jpg121.6 KB · Views: 235
Are those real measurements? If so, how did you make them? What kind of room? What microphone did you use?
Are those real measurements? If so, how did you make them? What kind of room? What microphone did you use?
Hello,
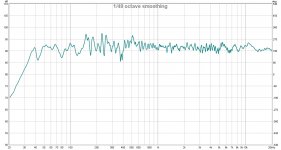
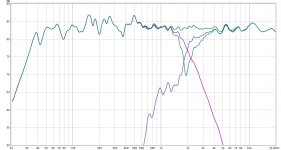
Yes, those are all real measurements. I used a UMIK-1 and REW for the measurements.
They were all taken at about 25" on axis to the tweeter.
For crossover purposes the woofer was also measured at 1/4" and merged with the 25" measurement, baffle step compensation was added with,
FRD Blender and Minimum Phase Extractor
My living room, which is a good size room.
David.
This is what happens when a craftsman builds speakers 😀 Not only will audiophiles admire your speakers, but others' furniture will envy it as well 😀
Hello,
Yes, those are all real measurements. I used a UMIK-1 and REW for the measurements.
They were all taken at about 25" on axis to the tweeter.
For crossover purposes the woofer was also measured at 1/4" and merged with the 25" measurement, baffle step compensation was added with,
FRD Blender and Minimum Phase Extractor
My living room, which is a good size room.
David.
Interesting. I would have expected a much less flat response when taking the measurements in a normal room but perhaps that's the applied smoothing.
Well done!
- Status
- Not open for further replies.
- Home
- Loudspeakers
- Multi-Way
- Some pics of my Solid Cherry & Walnut MTM build