I've been doing a lot of reading on this forum and have learned a lot. I'm building a bookshelf sized version of one of my Klipsch speakers using 3/4" MDF. It will have the same internal volume but will be about 10" shorter in height and about 5" deeper.
I have my panels cutout and was wondering about what joints to use. After doing a few searches, I think I'm just going to go for the typical butt joint instead of a 45 miter. My question is:
1) would you have the bottom and top panels the full width of the cabinet with the side panels sandwiched between them
2) or have the sides the full height with the top/bottom panels sandwiched.
I'm thinking option 1 would be better, or does it even matter.
Also,
What about an electric brad nailer (which I have) instead of going with the cabinet screws? I looked at the inside of one of my Klipsch towers, and it looks like they have their panels mitered at 45 degrees with 4 .75"x.75" braces, glued and braded, in each corner running the depth of the cabinet. I do plan on putting an oak veener with a medium finish on it to match my towers. I want it to look as "factory" as possible.
Another thing. Clamps. I have been reading where there is no such thing as too many, but what would be the minimum amount? I have 2 36" long Irwin clamps (the blue and yellow quick release kind) that I got at Home Depot. Do you all think that would be good enough, or would I need more?
Sorry for the long post. I appreciate the help and suggestions. Thanks.😎
Yesfan70 said:1) would you have the bottom and top panels the full width of the cabinet with the side panels sandwiched between them
2) or have the sides the full height with the top/bottom panels sandwiched.
Either way will be fine
What about an electric brad nailer (which I have) instead of going with the cabinet screws? [/B]
That's fine also. If you are using butt joints, consider using inside corner blocking. (no outside fasteners)
I want it to look as "factory" as possible.[/B]
Do you mean good? With a little time you can make them look better than factory.
I have 2 36" long Irwin clamps (the blue and yellow quick release kind) that I got at Home Depot. Do you all think that would be good enough, or would I need more?[/B]
You will need a dozen or more. I would consider inside corner blocking instead.
Cal
That's fine also. If you are using butt joints, consider using inside corner blocking. (no outside fasteners)
If that's what I think it is, I think that's how Klipsch put together my towers. There's four braces that run the depth of the cabinet in each corner. It looks like they used brad nails (from the inside) and then wood glue to seal it. The brad nails I have are 1 &1/4" length.
Do you mean good? With a little time you can make them look better than factory.
Yeah. I want it to look like Klipsch made it instead of me.
You will need a dozen or more. I would consider inside corner blocking instead.
😱 😱 😱 😱 😱
You kidding? Man, I can see where this hobby can get expensive. How many for the inside corner bracing?
Appreciate the replies Cal. Thank you.😀
I have to say that while it is nice to have a lot of clamps. However I've built fairly large cabinets with no screws or nails, and just three strap clamps. You just have to be careful to keep all the edges straight when cutting, and when you start to clamp keep everything square. You just need a little more patience.
Joe
Joe
Yesfan70 said:How many for the inside corner bracing?
None, you use the brads or screws to hold it together while the glue is setting. With MDF sometimes it's better to use screws.
Cal
Putting wood in the corners as braces is a complete waste of time. The corners are the strongest part of your cab. Bracing needs to break up the longest unbraced dimensions of the panels (the middle of your panels). The purpose of bracing is not for strength. It is to reduce the flexing of the panels to minimize resonances, and strengthening the corners does very little. Shelf type braces attached to 4 sides of cab are best.
If you plan to veneer anyway, just use the nail gun. You won't even need to use clamps with a properly glued and nailed enclosure as long as your panels are cut accurately.
If you plan to veneer anyway, just use the nail gun. You won't even need to use clamps with a properly glued and nailed enclosure as long as your panels are cut accurately.
johninCR said:Putting wood in the corners as braces is a complete waste of time. The corners are the strongest part of your cab.
John, you're misunderstanding the purpose of the blocking. It is used to prevent the need for outside fasteners. It has nothing to do with panel stiffening.
Bracing needs to break up the longest unbraced dimensions of the panels (the middle of your panels). [/B]
Agreed but that is panel stiffening, not corner blocking.
If you plan to veneer anyway, just use the nail gun. [/B]
Or preferably screws
You won't even need to use clamps with a properly glued and nailed enclosure [/B]
The screws are the clamps.
Cal
If you can cut the 45 deg corners accurately you won't need fasteners or clamps.
Lay out the box all flat with the mitres down towards a flat bench. Use white 1" masking to tape the corners and then flip all the sides over and run glue in the beads. Fold up wiping the excess glue. Should fit fine and exert 15lbs per sq inch easily. corner blocking should be glued and pushed in place, the suction again reaching 15lbs per sq in and in a few minutes you cannot bust it apart if you wanted.
I began assembling high end veneered bank and office furniture this way nearly (gawd) 30 years ago.
99% of all consumer spkrs are assembled this way. Cut on a Vee groove machine all the way through the panel save for the veneer (or plastic) to act as the hinge.
Have used masking tape on very llarge cabinets and tables where clamps would mar or otherwise not work and fasteners are always a nono anyway (except on TV)
TC
TC,
Using your method requires corner blocking for a strong bond doesn't it. I've tried lower pressure shortcuts before (without the corner blocking) and I've yet to get a good bond. I believe a higher pressure is required so you get a good wood to wood bond instead of just having glue between 2 pieces of wood, at least using normal wood glue. Do you use a different kind of glue?
Using your method requires corner blocking for a strong bond doesn't it. I've tried lower pressure shortcuts before (without the corner blocking) and I've yet to get a good bond. I believe a higher pressure is required so you get a good wood to wood bond instead of just having glue between 2 pieces of wood, at least using normal wood glue. Do you use a different kind of glue?
johninCR said:I believe a higher pressure is required so you get a good wood to wood bond instead of just having glue between 2 pieces of wood, at least using normal wood glue. Do you use a different kind of glue?
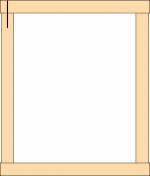
For MDF, I first assemble the 4 sides using yellow glue and pin nails or staples every 3 inches, leaving a small overhang as illustrated. After the glue is dry I trim off the overhang with a router. I then add the top and bottom in the same manner. If you are going to roundover, be careful where you place the fasteners - you don't want your roundover bit cutting into them! You could make a 4'x4' cube this way and it would be plenty strong. If you use a stapler you need a good one and about 110# of air to drive a 1 1/2 inch staple into MDF.
BTW, there is no such thing as a wood to wood bond: it's always glue between two pieces of wood. The glue joint is stronger than the wood itself.
Attachments
Using your method requires corner blocking for a strong bond doesn't it. I've tried lower pressure shortcuts before (without the corner blocking) and I've yet to get a good bond. I believe a higher pressure is required so you get a good wood to wood bond instead of just having glue between 2 pieces of wood, at least using normal wood glue. Do you use a different kind of glue?
No. The joint if cut right will be plenty strong without pins blocks or even clamps. But it has to be cut precisely. I use regular cow glue made for carpenters (titebondll or Borden).
15lbs per sq inch is required pressure. This is easy with masking tape. Even easier with clamps except that with 45 deg corners you will do alot of sliding.
High end assembly does not allow for nails through nice veneer. Don't try biscuits.
Glue is elastomeric, it shrinks as it dries. Shrinking adds 10lbs per sq. in pressue alone. For an experiment, simply glue 2 blocks of wood together with hand pressure for 5 seconds. Let sit for 15 minutes. Then try to pull apart.
TC
I agree with Terry. It is all too comon to try and make a joint fit by over clamping and pushing the pieces together. If it does not fit it does not fir. I have used the tape trick with great results. It also helps to dry fit with tape before you open the glue bottle up. Id using solid wood another nice way is to spline the joint with a contrasting wood. This is for show mostly yet it sure helps to align the corners.
Fino puento.
Theres one more -trick- for perfect joints when mitering veneer. Burnishing. When you tape together assemblies like boxes out of veneer, the glue (and wet rag wiping excess) softens the very outer edge of the veneer for about 10 minutes before dry. During this time you can take a round object (screwdriver, hammer handle, dowel) and with medium force run down the edge and "burnish" and actually fold each (wet, softened)edge of the very end of the mitre together making round edges and closing the last of the -gap- should one exixt. Cutting 45 mitres is hard even with a 9ft sliding table saw. "burnishing" edges make them look seamless and -pro-. Only in high end millwork many years ago have I seen this trick done. Glue wettened edges can be burnished to a nice 1/8" radius and when lightly sanded reflect light and are far more pleasing than oversanded or sanded through edges.
TC
Wow Terry:
You are the master woodworker everyone speaks of! I have not done this with veneers as I am keen on real wood. I really like the idea of trying it. I have done a similar thing at finishing with polymerized oils.
I will apply an oil and let it stand for 15 - 20 minutes then "wet" sand with 220 grit paper. "wet" being with a bit of oil, this fills in the pores of the wood as well as any glue joint gaps. I can fill any minute gaps with this technique, yet carefully rolling the corner may also add a nice softening touch. I do not really like the crisp edges as they often do not stand the test of time.
I found that a slurry of fine sawdust and oil is far better than any commercial filler I have ever used. The commercial filler does not oxidize and change over time yet the wood does. A colour matched plastic filler is only colour matched for a little while as most woods change over time. So by using a filler made from the same material tends to age the same as the cabinet. Final oil application is "wet" sanded with 320 grit then spray or brush finish with the finish of your choice. I currently like eurathane finishes as they nice and hard and can be easily cleaned.
One thing I have learned is that the finishing process takes as long or longer than the wood working part, and it is way more important. I can make a poor woodworking job look good or a good woodworking job look bad depending on how much effort I out into the finish.
Remember if you screw up black paint will cover just about anything..
And lastly no matter what it will still burn!
Some great info here.
So when you all are starting a DIY speaker project, do you cut all your panels at once, or do you do a panel at a time after the first 2-3 are cut?
On mine, I have cut all my panels out. I still have to cut the hole for the binding posts on the back panel, but for the most part my panels are ready to be assembled.
So far, so good it looks like it's going to come out pretty good. I did a mock up assembly with some clamps just to see how it looks. So far, I'm happy.😀
Shop Techniques
When ever I am making a project it being audio or other. I always start with a very detailed study of the plans. By the time my plans make it into the shop they usually have a coffee ring on them and a blob of peanut butter or something and are covered in little diagrams of the joinery.
I try to figure out the "critical" path before making the pieces from my wood supply.
As I use solid wood the first thing is to make the boards to rough oversized length, width. I always make an extra piece or two to be used to set up the tools (router, table saw, drill press). Usual process is cut pieces 1 inch over length, glue panels, plane to thickness, joint one reference edge. I now have three sides done. Next I will make the biggest panel piece first, working my way to the smallest pieces. I try not to change the machine settings until it is time. ie I really hate setting the saw, make a cut, then change, make a cut, then reset to a previous setting. I find it really hard to reset to the exact cut. So I try to cut all the same width pieces with a single saw set up.
I cut out the holes for drivers and binding post before I glue. I find it a lot easier to work the planks rather than the boxes. On a recent Tapered Quarter Wave project I glued a cotton wall lining in before I put the box together.
When glueing up a project I alway make sure I am completely ready and have lots of time. I dry fit complicated projects. The glue has a lot strange stuff associated with it and all crap seems to break out once you open the top. I do not know why but my heart seems to pick up a beat or two once I start to glue up. If I take the time to get the path figured out things usually go smooth but not always. I have had to stop and wipe off the glue on a few projects, wait, and start again. I try not to put too much glue on the joints, it should just ooze out when the joint is tight. Not enough means a dry weak joint, too much means a messy clean up. I will often not wipe up the wet glue. This will smear the glue and it will get into the pores. It will not show until you get to the finishing. I often use oil finishes to seal and tone wood. These finishes do not penetrate the glue. It is no fun trying to sand out glue in the middle of oiling a project. So instead I use a scrapper after the glue has dried and scrap the little blobs off.
I usually do not fine sand before gluing. I will rough sand to 120grit if I made a panel for a lot of pieces but no finer. Handling the pieces eems to mark the u and I like to use a sopt pencil to write on each piece. The fine sanding work is done after glueing depending on the project. Although, inside corners are often best fine sanded before, the glue job must be impecable.
Oh yah clamps are good. Lots of clamps. Gentle squeeze on 4 in spacing. I use leather pads to protect the surface or clean scraps of wood. I like the 1/2" pipe clamps because they are lighter than 3/4" clamps and I do not need a great amount of closing preasure.
Nuff said for now
I hope this helps
- Status
- Not open for further replies.
- Home
- Loudspeakers
- Full Range
- Some more info on cabinet construction