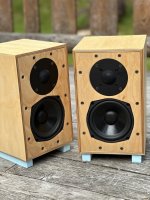
Some espresso brown stained ones with satin finish undergoing some break in and listening tests.


Last edited:

great job! These look fantastic! Hope they're a big success. Do you know how much they're gonna retail for?
Man they really make my builds look crappy. Heavy sigh. Bet they sound the same though( smile )
They really look great X. All your pics seem to make them look bigger than they are. Maybe just me.
They really look great X. All your pics seem to make them look bigger than they are. Maybe just me.
Thanks, SignalLost. I can tell you I am not good at woodworking. These look great because they are made by experienced craftsman and true professionals. All CNC’d but final assembly and finish is by hand.
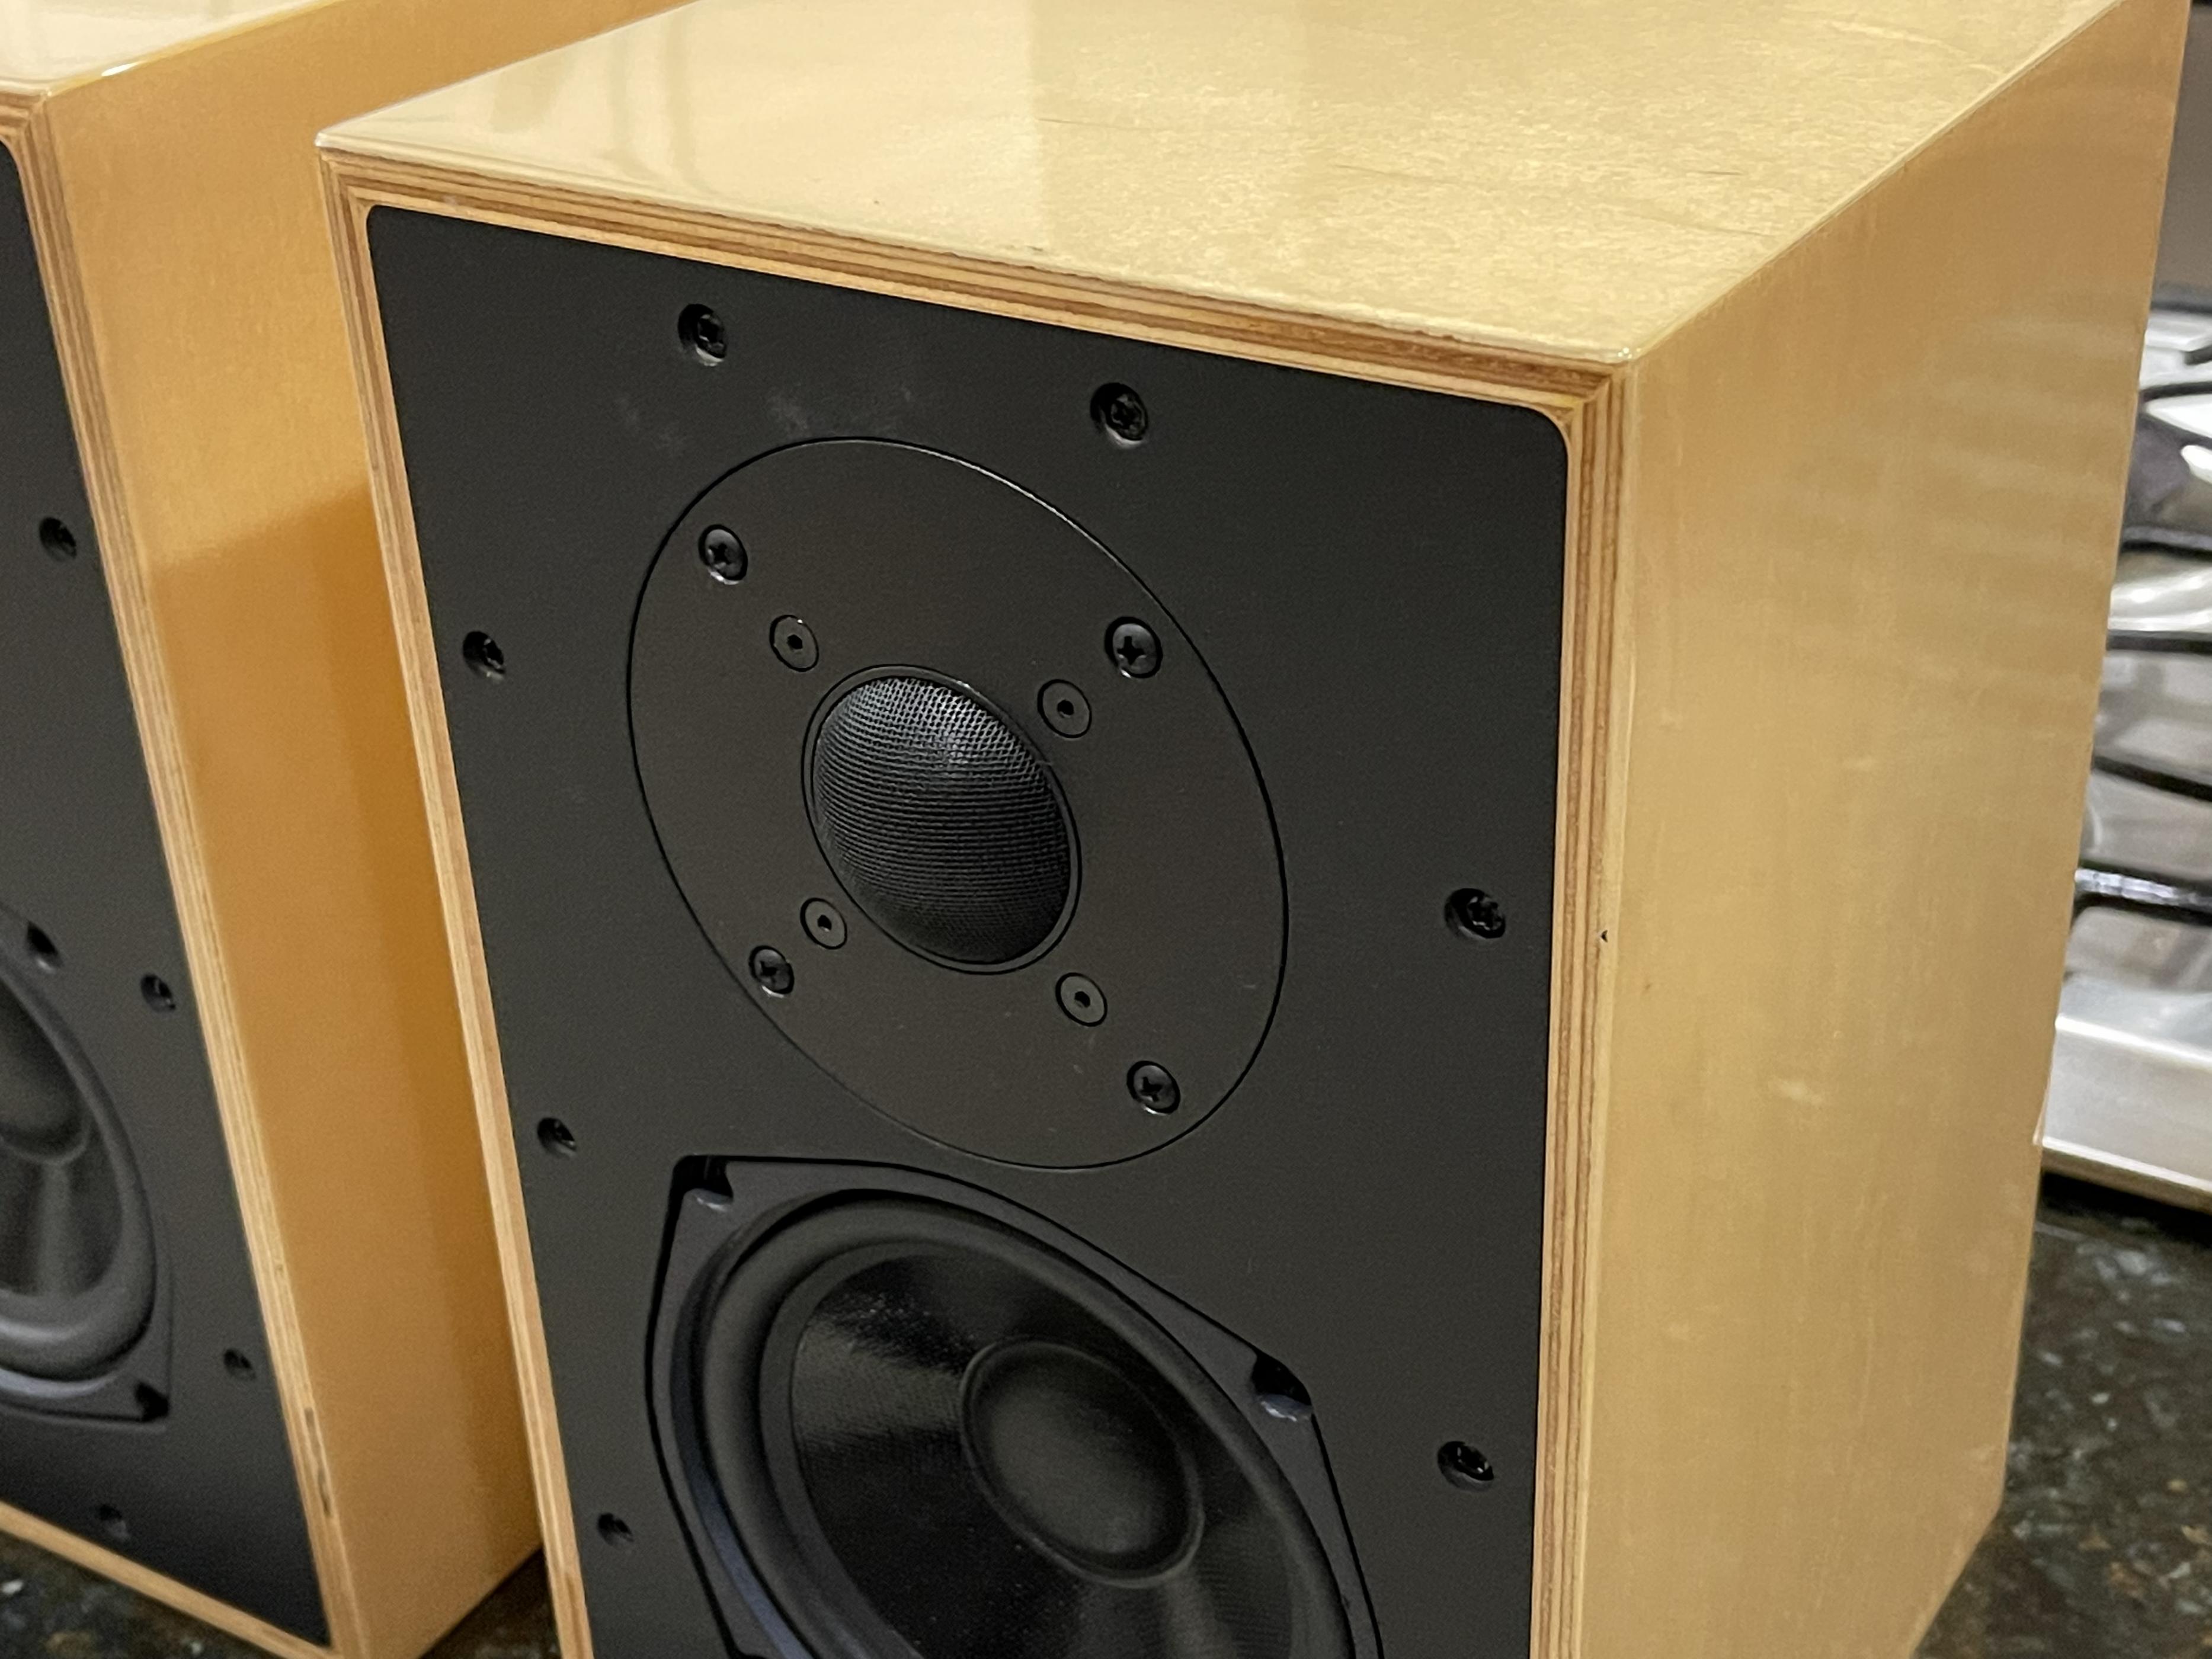
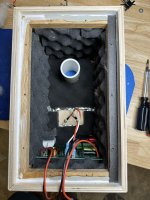
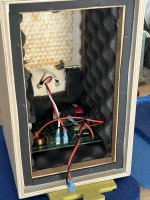
Size is per the plans 7.5in wide x 12in tall x 8in deep.
I think they do indeed sound the same as yours (and that means they sound great) as long as you have the same XO values.
Size is per the plans 7.5in wide x 12in tall x 8in deep.
I think they do indeed sound the same as yours (and that means they sound great) as long as you have the same XO values.
Last edited:
How did you do that gloss? looks amazing.High gloss Baltic birch:

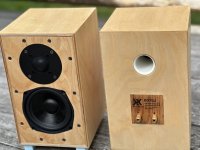
With grills:

They sound great with a Pass designed DIYA VFET Class A amp:

Do you have HD plot from the dayton RST28F tweeter?
I did not make the cabinet. That’s a factory job by very skilled professionals. 🙂
I have measured the RST28F before and it’s a great tweeter. There is a measurement in post 1, the bump at 2kHz is from the woofer as the XO is higher up. It’s about -45 to -50dB THD at 2Vrms.

I have measured the RST28F before and it’s a great tweeter. There is a measurement in post 1, the bump at 2kHz is from the woofer as the XO is higher up. It’s about -45 to -50dB THD at 2Vrms.
Good spray equipment is the easiest way to get that kind of polished gloss look. Two-part clear topcoats can deliver that look with just 2 applications and no sanding needed between coats. It takes practice to get it right. I have a friend who does automobile collision repair, and he could do that in his shop.
Without spray equipment (me), I would brush on a clear finish. I like oil-based polyurethane, but some people don't like the slight amber color they add to white woods such as birch or maple. There are water based finishes that do not add any color, but they are harder to work with IMO. Shellac and brushed-on lacquer can also be used, but I have no knowledge of those.
The quality of the polyurethane matters a lot when striving for this kind of finish. I prefer General Finishes Arm-R-Seal.
I would sand up through 220 (100, 150, 220), then apply 3 coats, letting it dry at least 12 hours between coats. I use a cheap brush at this stage. Then I would let it fully cure for 24 hours, then sand it smooth with 150. Sanding at this stage is important, I would carefully look for imperfections. Wiping with a damp cloth can reveal imperfections, and I use a handheld light to get the light angle right on each surface.
Now I switch to a high quality brush. When I am happy that it is smooth and defect free, I apply coat #4, let cure for 24 hours. Sand with 220. Apply coat #5, let cure for 24 hours, sand with 320. Apply coat #6, let cure for 24 hours, sand with 320. Apply coat #7, let cure for 24 hours, sand with 600. Now apply the final coat.
It takes a lot of practice and experience to get this right. I have actually done it twice, and I am in no hurry to do it again.
A lot of elbow grease and time, in other words.
I feel like the factory applied several coats to get it thick. It’s like glass - you can see the depth. They probably wet sand it like lapping a granite surface. It’s glass smooth and very flat.
I feel like the factory applied several coats to get it thick. It’s like glass - you can see the depth. They probably wet sand it like lapping a granite surface. It’s glass smooth and very flat.
A nice TL version of this speaker by jmascreen.


From plans I posted on this thread:
https://www.diyaudio.com/community/...-dc130a-and-dc28f.281778/page-12#post-7184179
From plans I posted on this thread:
https://www.diyaudio.com/community/...-dc130a-and-dc28f.281778/page-12#post-7184179
Hi X. I'm going to be making a pair of these next week. I'm wondering if the DC130B Dayton woofer would work. On Parts Express it shows a very slightly different FR and spec sheet, but they seem to be basically the same driver with a differently shaped basket.
Alternatively, would you be willing to private message me the 3D model you made of the baffle? Maybe I could just CNC the weird pincushion shape.
Alternatively, would you be willing to private message me the 3D model you made of the baffle? Maybe I could just CNC the weird pincushion shape.
Hi Bryguy,
The DC130B-8 is probably fine. I don’t really know why the T/S parameters are slightly different since the shape of the bezel should not impact the suspension or voice coil. Perhaps just unit to unit variations?
Which cabinet were you considering? The sealed or the TL?
We’re you going to use the passive crossover?
I was also thinking unit to unit variations.Perhaps just unit to unit variations?
Which cabinet were you considering? The sealed or the TL?
We’re you going to use the passive crossover?
I was thinking of using the sealed cabinet, with the passive crossover. Trying to go for something like your Vanguard speaker. My plan is to cut the flat packs this week, and to do final assembly with my girlfriend (they are for her).
My only concern using the DC130B is it would likely change the CTC spacing, as the bezel is slightly wider than the DC130A.
Thanks x! I am excited to get this show on the road!I can get you the solid model for the bezel shape if you wait. I can’t get to my computer for another 8 hrs.
Finally made some cuts today for the Vanguard's I've been planning on making. I bought some BB cutoffs from an industrial workshop (they make PA speaker cabinets), 11.5"x60" pieces of 12mm Baltic birch for 8 bucks a sheet!
I think I got a heck of a deal, but those dimensions are a bit unfortunate.. it gets even worse though, because I used all of the sheets I bought on another project, so for the Vanguard's I have to use the cutoffs of my cutoffs!
It worked out mostly okay, but unfortunately I have to make the baffles and the backsides with the grain going horizontally... Will probably look wonky as heck, but oh well. I can always just paint the baffle black, but the back panel will stay unpainted.. good thing it's on the back 🙂
Hey BG,
Yeah that is a good score per piece, go stock up! 😉
I just finished a modification to my Rockvilles (aka Vanguards) that might interest you....
I built these speakers a few years ago when X had a small batch of cabinets built. The speakers sound very good in the mid and highs but I need a bit more oomph in the bottom end to enjoy the music I listen to. So they were set aside and not used. Recently I've been looking for a small speaker to use at my workbench area and wondered if adding a rear port to the Rockvilles would be worthwhile. I asked X and a mutual friend about this thought and within the evening we had a plan to add a 38mm x 80mm port directly behind the tweeter. Checked the plumbing section in my garage and had a perfect section of 1.5"ID PVC pipe, time to get busy! Fast forward one week, mod is complete with final port length of 90mm, and cabs finally got sanded with multiple coats of tung oil and final buff with 2000 grit sand paper. Smooth as silk.
IMO, this modification saved the Rockvilles from becoming a listing on the Swap Meet. Very noticeable improvement to my ears, fuller sound without ruining the midrange. 🙂
Here are some basic measurements taken:
Frequency generator and Radio Shack SPL meter
..........Stock - Ported
70Hz - 77dB - 77dB
60Hz - 68dB - 76dB
50Hz - 65dB - 74dB
Whoops! Somehow my assistant got in the pics.😊
Attachments


Heya Vunce 🙂70Hz - 77dB - 77dB
60Hz - 68dB - 76dB
50Hz - 65dB - 74dB
Wow, those are impressive figures. I actually have a pair of flared 1.5" ID ports just kicking around somewhere, so this mod would absolutely be doable for me. It's a funny prospect though, porting these speakers... Almost feels sacrilegious... LS3/5A inspired: like the LS3/5A, it is a speaker 😎
I do actually like the idea though. I am thinking it could be cool to install the ports, then to just fashion some port plugs to use or omit depending on room placement. Such small speakers like these move around a lot, at least in my experience 🙂
The Vanguard's will be going to my girlfriend, so I will consult her. I am thinking she will likely be placing them closer to the walls than most users on this site would ever dream of, so she'll likely get some solid room gain from that.
I'm definitely tempted though, especially since X approves as you say. If I were to keep these for myself, I think I'd just add a sub with the stock speakers, but for my gf (who is subless) this might be perfect. Thanks for the tip!
Gorgeous speakers by the way! Almost as gorgeous as your assistant 😃
X, if you're reading this: if I take Vunce's advice and install a port, would you advise increasing the dimensions of my cabinets slightly to maintain the original intended sealed volume, factoring in the volume of the port? The idea being that I could mostly return the speakers to their stock sound with the stuffing of a port?
Last edited:
Hi Bryguy,
Just keep the box dimensions exactly the same. The port when sealed with a plug doesn’t significantly change the volume (thickness of the tube is negligible). You are right, a stopper/bung placed on the vent exit will return these to original sealed alignment. Remove plug when extra bass is needed.
My Rockvilles are still unfinished. Maybe I should give them some boiled linseed oil now that they are really going to be staying in my office as near field speakers. The cabinets were made by my friend C.B., now retired but he used to be the carpenter/model maker for the Smithsonian. The oak used in the battens were salvaged from a razed civil war era barn near Rockville MD. Hence, the name. The same oak is used on the laser wood burned badge on the back.

Vunce did a nice job with the roundover radius on the vent. I like the white PVC color too.
Just keep the box dimensions exactly the same. The port when sealed with a plug doesn’t significantly change the volume (thickness of the tube is negligible). You are right, a stopper/bung placed on the vent exit will return these to original sealed alignment. Remove plug when extra bass is needed.
My Rockvilles are still unfinished. Maybe I should give them some boiled linseed oil now that they are really going to be staying in my office as near field speakers. The cabinets were made by my friend C.B., now retired but he used to be the carpenter/model maker for the Smithsonian. The oak used in the battens were salvaged from a razed civil war era barn near Rockville MD. Hence, the name. The same oak is used on the laser wood burned badge on the back.
Vunce did a nice job with the roundover radius on the vent. I like the white PVC color too.
Last edited:
- Home
- Loudspeakers
- Multi-Way
- RST28F and DC130A Foamcore Homage to LS3/5A