I've just gone through the last two sets of pictures (31 in total) and put them in to a better order and written explanation notes for each one - hope that helps.
_____________
I would like to use a RAAL tweeter but it's a bit too expensive. Also, I only need the crosover to take place at 1 to 1.5K and I just don't need the low end properties of the RAAL.
_____________
I would like to use a RAAL tweeter but it's a bit too expensive. Also, I only need the crosover to take place at 1 to 1.5K and I just don't need the low end properties of the RAAL.
So I popped round to Mark's today and took my little camera with me to snap a few pics.

This one shows the finish he's got with his laminate, it's super glossy with the finest diffusion pattern to it. It's not a mirror finish, it's more subtle and softening than that. This shot also really catches the effect from that glass edge acrylic.

This one nicely catches the contrast in materials between his new mid and tweeter surrounds and the laminate, the closed cell foam provides a textural contrast and really makes the ally driver surrounds 'pop'.

Here's the back panel with the crossover panel blanking plate fitted. The camera doesn't quite capture it but these are a perfect fit into the recess.
Here's a real moment of truth shot as Mark peels back the protective wrap for the first time. The tension, and relief was palpable.

A little closer up on the crossover plate, plenty of nice detail here, the finish is impeccable.
Ok, enough with the peel and reveal.
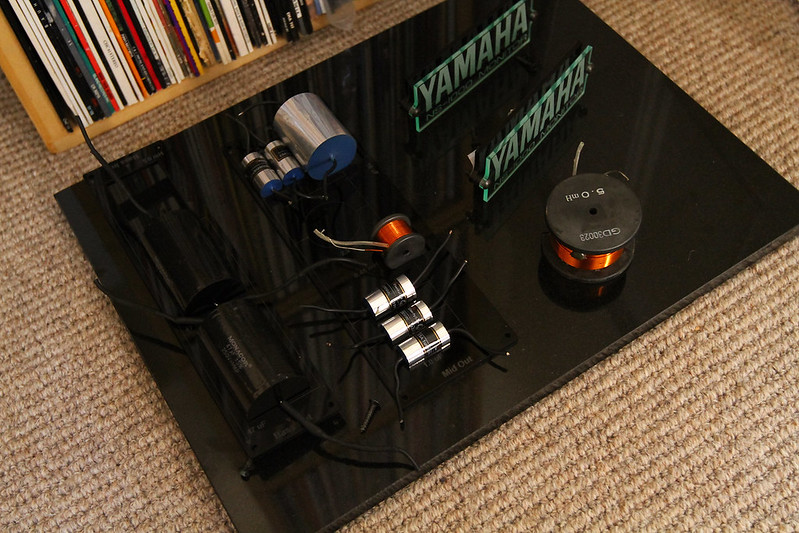
Extracts from the crossover, mid and bass sections laid out. I think these are soem way from being the final parts, some tinkering to do yet.

Close up of the new badges, these are etched on two sides to give a 3D parallax effect. When you look at them dead on you can see only one line of text, as you shift to the side the depth of the panel becomes apparent and the back lettering is revealed.
Nearly the whole shebang.
Close up of the brace, that's a beast, that bass driver isn't going anywhere once that is torqued up.
One last shot of the new badges, this one catches the full depth of the panel.
And that's it for now I'll take soem more once they are finished and back in place. There's still some spraying to be done on the drivers and the edges need a clean.
But bloody hell they do look quite remarkable.
This one shows the finish he's got with his laminate, it's super glossy with the finest diffusion pattern to it. It's not a mirror finish, it's more subtle and softening than that. This shot also really catches the effect from that glass edge acrylic.
This one nicely catches the contrast in materials between his new mid and tweeter surrounds and the laminate, the closed cell foam provides a textural contrast and really makes the ally driver surrounds 'pop'.
Here's the back panel with the crossover panel blanking plate fitted. The camera doesn't quite capture it but these are a perfect fit into the recess.
An externally hosted image should be here but it was not working when we last tested it.
Here's a real moment of truth shot as Mark peels back the protective wrap for the first time. The tension, and relief was palpable.
A little closer up on the crossover plate, plenty of nice detail here, the finish is impeccable.
An externally hosted image should be here but it was not working when we last tested it.
Ok, enough with the peel and reveal.
Extracts from the crossover, mid and bass sections laid out. I think these are soem way from being the final parts, some tinkering to do yet.
Close up of the new badges, these are etched on two sides to give a 3D parallax effect. When you look at them dead on you can see only one line of text, as you shift to the side the depth of the panel becomes apparent and the back lettering is revealed.
An externally hosted image should be here but it was not working when we last tested it.
Nearly the whole shebang.
An externally hosted image should be here but it was not working when we last tested it.
Close up of the brace, that's a beast, that bass driver isn't going anywhere once that is torqued up.
An externally hosted image should be here but it was not working when we last tested it.
One last shot of the new badges, this one catches the full depth of the panel.
An externally hosted image should be here but it was not working when we last tested it.
And that's it for now I'll take soem more once they are finished and back in place. There's still some spraying to be done on the drivers and the edges need a clean.
But bloody hell they do look quite remarkable.
Never really liked the '70s appearance of yams but these are bloody marvellous!
Nitrous or DIYNick depending which forum we are on😉
Nitrous or DIYNick depending which forum we are on😉
Thank you 🙂 - I'm not a fan of the 70's look either.
I will have a day of soldering tomorrow and get the insides of the external crossovers built (the cases are already complete), wire up the insides and make the umbilical cables that join the external crossovers to the speakers. I'm just waiting on some resistors I ordered to replace the L-pads. Then all I have to do is reinstate the internal wadding, solder up the drive units and bolt them in to place (tighten up the bass driver brace).
I will have a day of soldering tomorrow and get the insides of the external crossovers built (the cases are already complete), wire up the insides and make the umbilical cables that join the external crossovers to the speakers. I'm just waiting on some resistors I ordered to replace the L-pads. Then all I have to do is reinstate the internal wadding, solder up the drive units and bolt them in to place (tighten up the bass driver brace).
wow , I like that finish , really great job , what s that laminate stuff you r using ? any links for info ?
regards
regards
Hi, glad you like it, details of the laminate are in the main thread:
AudioFlat Forum • View topic - The giant 'Refurbishing my Yamaha NS-1000M's' thread
However, being in the UK I purchased it from the UK distributor who imports an Italian product (I believe). I have used very similar laminate in the past and found that to be particularly brittle and prone to chipping - this particular laminate appears to be better quality (though this is still a danger).
An externally hosted image should be here but it was not working when we last tested it.
An externally hosted image should be here but it was not working when we last tested it.
An externally hosted image should be here but it was not working when we last tested it.


An externally hosted image should be here but it was not working when we last tested it.


An externally hosted image should be here but it was not working when we last tested it.
An externally hosted image should be here but it was not working when we last tested it.
An externally hosted image should be here but it was not working when we last tested it.


An externally hosted image should be here but it was not working when we last tested it.

All future updates will be posted here:
AudioFlat Forum • View topic - The giant 'Refurbishing my Yamaha NS-1000M's' thread
AudioFlat Forum • View topic - The giant 'Refurbishing my Yamaha NS-1000M's' thread
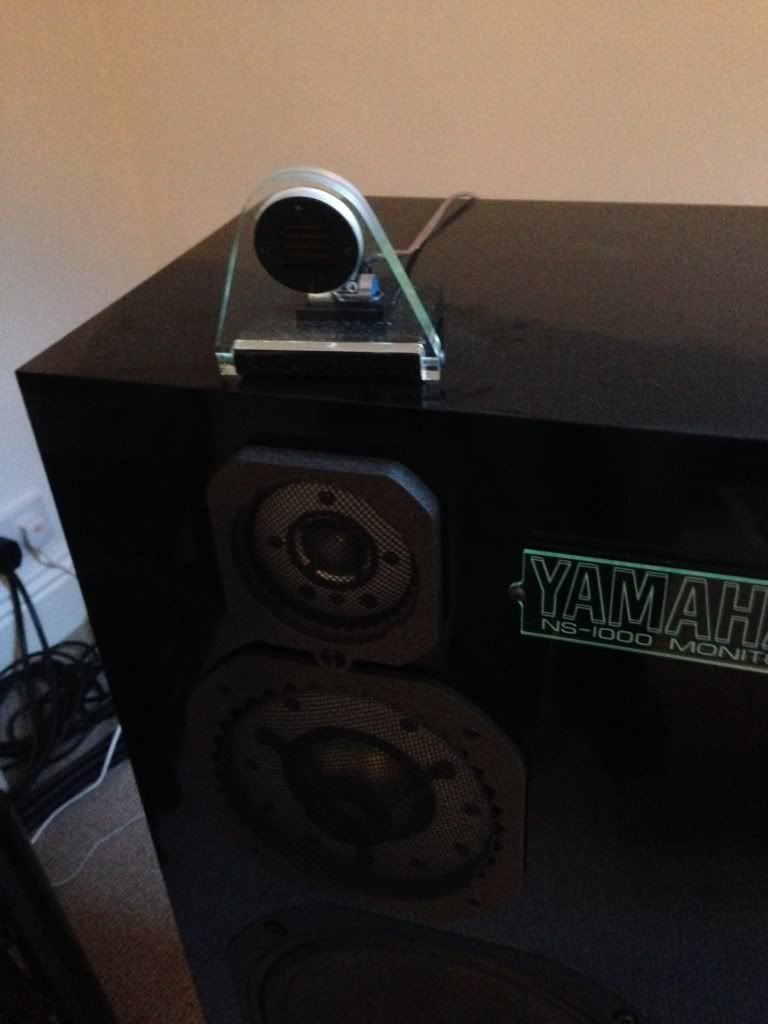
Built a pair of super-tweeters to go with my Yamahas.
I have to say, so far I am very pleased with the results 🙂.
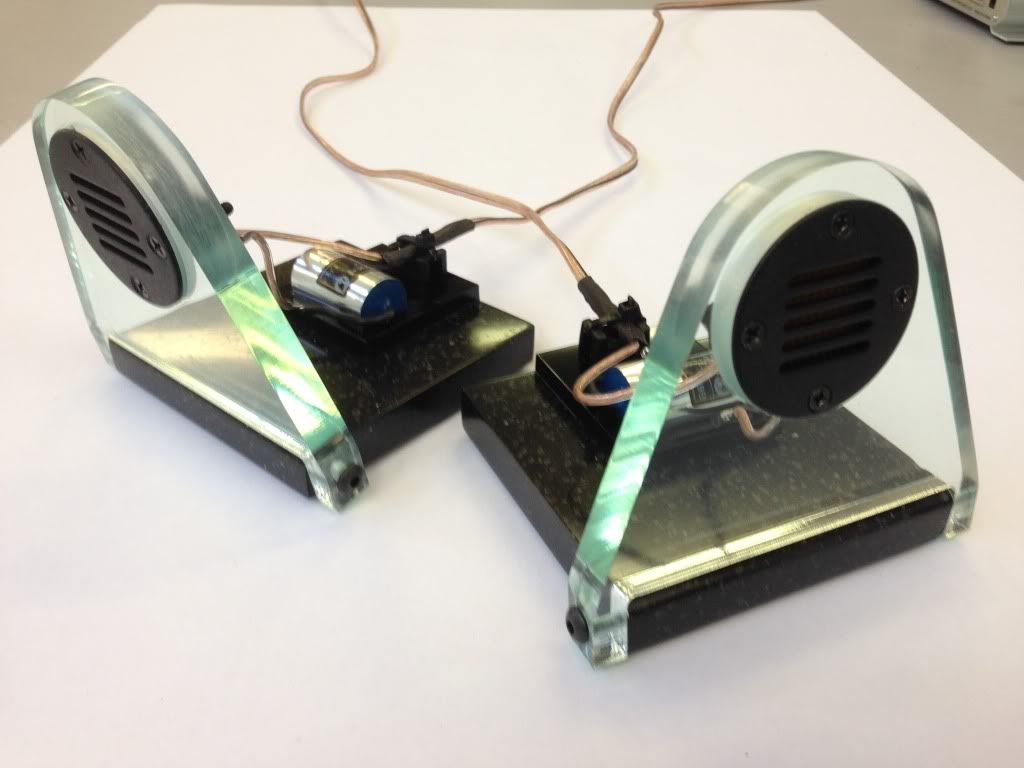
Now with tiny little anti-diffraction foam rings 🙂.

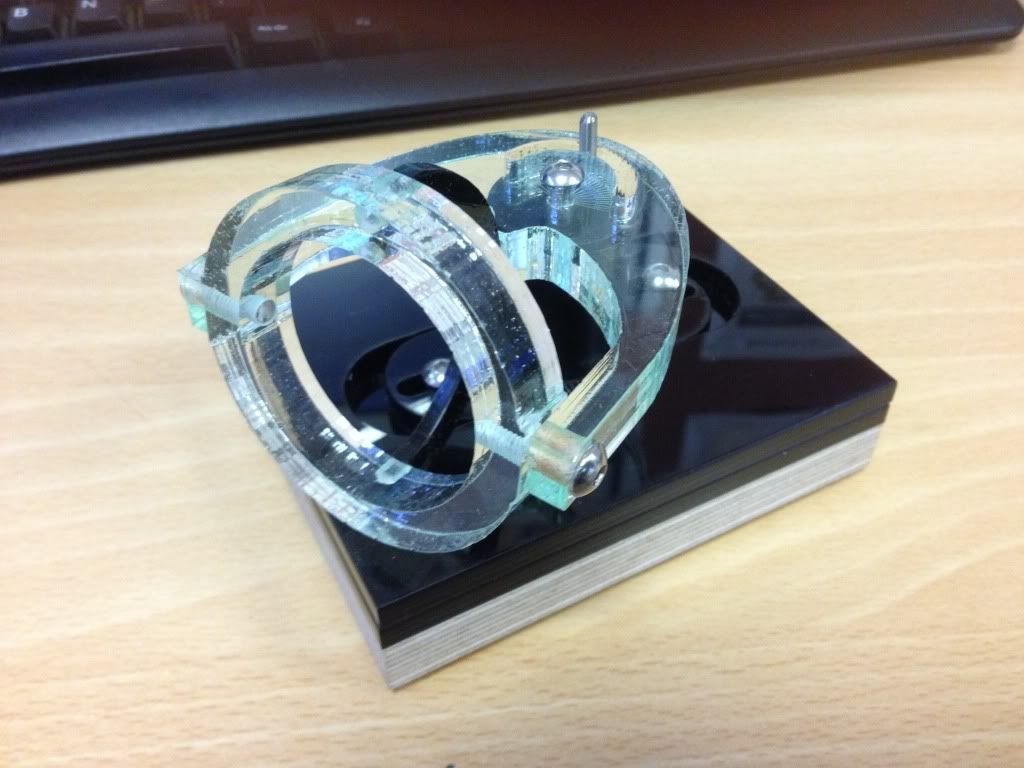
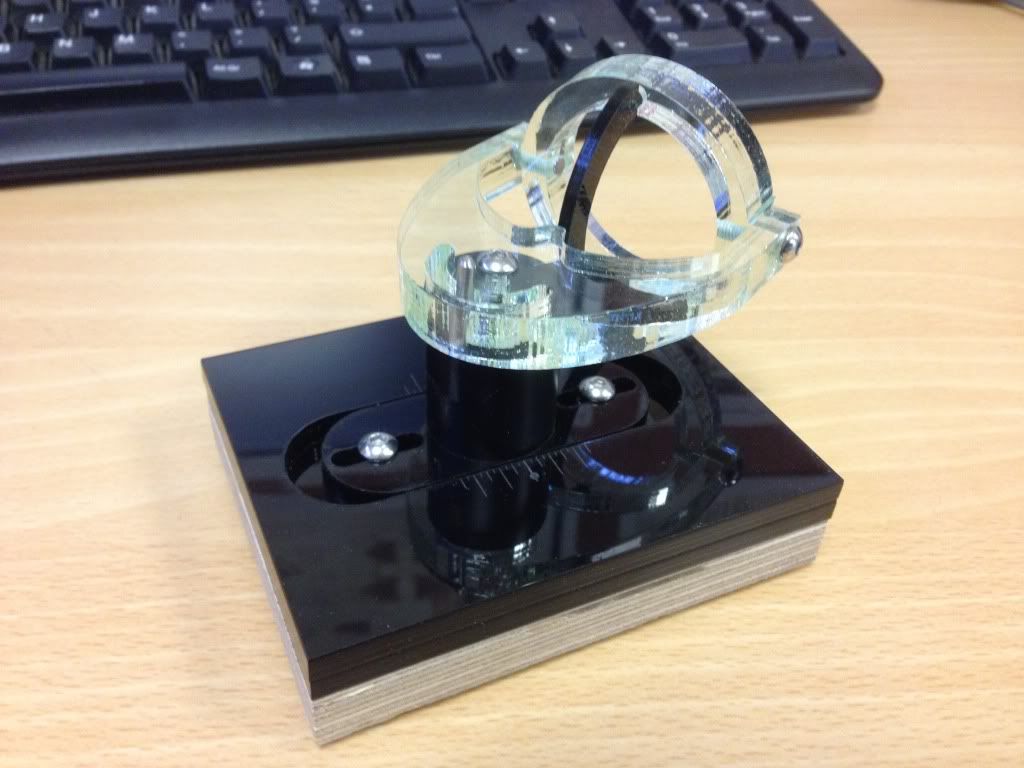
Today I made a prototype of an alternative housing for my super tweeters that allows more controlled adjustment. In this one the three planes of adjustment have calibration marks. There are still a few aspects that need further development - but there is some promise.
I have to say, so far I am very pleased with the results 🙂.
Now with tiny little anti-diffraction foam rings 🙂.
Today I made a prototype of an alternative housing for my super tweeters that allows more controlled adjustment. In this one the three planes of adjustment have calibration marks. There are still a few aspects that need further development - but there is some promise.
Last edited:
Where I can Find anti-diffraction rings for the mid and tweeter ?
I can't see this post
http://www.audioflat.co.uk/phpBB3/viewtopic.php?f=7&t=159
Maybe it is necessary to be registered on this site but I cannot answer this question
What is Linn famous for?
I tried Turnable - Hi-Fi etc...
but nothing helps
I can't see this post
http://www.audioflat.co.uk/phpBB3/viewtopic.php?f=7&t=159
Maybe it is necessary to be registered on this site but I cannot answer this question
What is Linn famous for?
I tried Turnable - Hi-Fi etc...
but nothing helps
- Home
- Loudspeakers
- Multi-Way
- Refurbishment of my Yamaha NS-1000Ms