Recently acquired a couple of vintage Threshold SA/1s (two from 1985 and two from 1988) both with optical biasboards (the one from 1985 is updated)
Do have the biasprocedure from Threshold called the 'Standard Amplifier Bias Procedure' from February 1991.


Wish to check the bias and found an old post from myself regarding this matter but I wonder if it's the right (alternative) way to do this.
"I got the best result with popping out one of the railfuses and connecting the leads of a multimeter in high ampere mode (usually 10A) instead.
With the proper connections in place you start the amp and you can monitor the quiescent current for approx. two hours.
What you will observe is a rapidly ascending bias (for shortening the warmup time) over 4 Amps in the first couple of minutes and then after it peaked it will gradually taper of to the proper setting of approx. 3A.
To get the 160 Watts of Class A rating @ 8 Ohms you need 3.2 Amps of bias
(3.2 x 2) = 6.4 (because it's a complementary design not single ended one) then ((6.4 x 6.4) x 8)/2 = 163 Watts. If the heatsinks stay around 50 degrees Celcius in two hours you're basically okay."
When I read this table from Threshold it seems that I'm totally wrong in case of the railfuse currentfigures in the above quote.

Or should I follow the standard bias procedure and take a emitterresistor somewhere in the middle of the crop?
Do have the biasprocedure from Threshold called the 'Standard Amplifier Bias Procedure' from February 1991.
Wish to check the bias and found an old post from myself regarding this matter but I wonder if it's the right (alternative) way to do this.
"I got the best result with popping out one of the railfuses and connecting the leads of a multimeter in high ampere mode (usually 10A) instead.
With the proper connections in place you start the amp and you can monitor the quiescent current for approx. two hours.
What you will observe is a rapidly ascending bias (for shortening the warmup time) over 4 Amps in the first couple of minutes and then after it peaked it will gradually taper of to the proper setting of approx. 3A.
To get the 160 Watts of Class A rating @ 8 Ohms you need 3.2 Amps of bias
(3.2 x 2) = 6.4 (because it's a complementary design not single ended one) then ((6.4 x 6.4) x 8)/2 = 163 Watts. If the heatsinks stay around 50 degrees Celcius in two hours you're basically okay."
When I read this table from Threshold it seems that I'm totally wrong in case of the railfuse currentfigures in the above quote.
Or should I follow the standard bias procedure and take a emitterresistor somewhere in the middle of the crop?
Last edited by a moderator:

Haha, I was soliciting of course at such a remark...that last one
AC intake spec:

It should be 400 Watts according to the adhesives at the back but is that
a. 400 VA (cos phi 0.74) or
b. 400 Watts
with my energy meter?
Attached at the SA/1 cartons from1985 (Reagan era... ;-))
.jpeg")
Last edited:
ZM no habla in power meters
who cares, Pa firmly said - trust only in palm-meter and your DVM across emiter resistors, "just" to have another check point
if using temperature meter, trust in contact ones; IR guns can be tricky - surface emissivity, parallax between red dot and actual measurement area etc.
I mean - they usually work for semi-shiny black heatsinks, but I've been burned few times expecting those to measure tiny area of interest, so abandoned them for anything
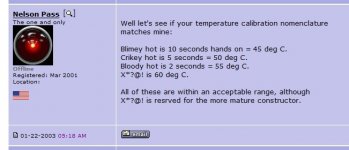
in case of not having temp gizmo, usual Papatable (palm-meter silkscreen)
who cares, Pa firmly said - trust only in palm-meter and your DVM across emiter resistors, "just" to have another check point
if using temperature meter, trust in contact ones; IR guns can be tricky - surface emissivity, parallax between red dot and actual measurement area etc.
I mean - they usually work for semi-shiny black heatsinks, but I've been burned few times expecting those to measure tiny area of interest, so abandoned them for anything
in case of not having temp gizmo, usual Papatable (palm-meter silkscreen)
Attachments
Just bought a IR device. MM with contact temp rod broken....
I will start with the 125 mV across the emitters.
Another thing are the eight Mallory 29.000uF 80V large cans per set. I used to change the asap but a former Threshold tech from WBS (Germany) said these were still okay. I'm reluctant now to change them although their datecodes are from 1985 and 1988...
if there is no hum, do not change them
though, besides measurement with really proper ESR meter, or some really expensive Cap testing gizmo ........ you know what is only way to test them - to replace them with new ones and - if sound is better - they are old and tired
if sound is not better, they're still good
in many cases, when you change oil in your car, oil is really still perfectly good, but ...........
in the end - really your call - if you're happy with sound ....... then no brainer
now - measurement across emiter resistors - that really being observing value which is giving you instant confirmation of changes you're making, while heatsink temperature being most important factor/value to observe and finally set
also - good to make a table of all emiter resistors (voltage sags), which will tell you several things - are they all OK and matching level
They're dead quiet..if there is no hum, do not change them
I have a dedicated ESR meter and cap meter.though, besides measurement with really proper ESR meter, or some really expensive Cap testing gizmo
I'm old and tired too... but still functioning according to my wife.o replace them with new ones and - if sound is better - they are old and tired
if sound is not better, they're still good
Okay that's an idea I would not come up with. You mean their Ohmic rating I suppose?also - good to make a table of all emiter resistors (voltage sags), which will tell you several things - are they all OK and matching level
That's almost impossible with the emitters at the bottom:nope, voltage across each one
.jpeg")


Highest ESR reading is 0.05 Ohms.
Table from PEAK states that it should be lower as 0.01 Ohms for such a large cap.
while there, replace tiny ring connectors
if I see it proper, that one right up seems like flea size
if I see it proper, that one right up seems like flea size
I found it also rather small indeed.
Can't remember that it was that small on my S/1000's or S/500.
But it seems original as the rest of the amps.
Bought it from the first owner who ran them on a Infinity RS1B along with the other SA/1 pair.
So I presume they are all original apart from the updated optical bias board in the older set from '85.
Do you think I should replace them or wait till they get really noisy?
as I said - if there is no hum, it's really your call
matter of ease of sleep vs. wallet manipulation .......
regarding wire connectors - that's trivial to change and almost no wallet manipulation
when hot-roding, each detail counts
matter of ease of sleep vs. wallet manipulation .......
regarding wire connectors - that's trivial to change and almost no wallet manipulation
when hot-roding, each detail counts
Okay clear I understand. It's a matter of essence as having a peace of mind or not...
Thanks for your answers and observations as usual.
Thanks for your answers and observations as usual.
there is a sorta tedious way of deciding/investigating is it clever to replace main caps, even if there is no hum
simply connecting additional caps across original ones, then listening and (God Forbid!) measuring - is there any positive change
of course, that must be done in a way that connecting wires are shortest possible, fattest possible etc.
and - of course, one must have on disposal adequate caps for test
I mean - there are cases where caps are tired.....not so tired to hum becomes present, but tired enough to sound start deteriorating
I know that I didn't help now at all, but that's the fact, and I had experiences as that in the past (say Hafler DH200 and 220 - huge difference in sound, even if tehre was no hum in speakers; Quad 405 - same case..... and interesting - main caps aren't so important for hum, as small caps on pcb are ... )
remember that amp (active part of it) can be seen as black box which is doing nothing else than governing PSU energy to speaker, in convenient manner
https://www.diyaudio.com/community/threads/threshold-sa-1-hiss.380904/post-6906037
So it's 4.7uF cap or bigger but preferably a filmcap.
Yesterday I've seen your post on the above thread regarding a "hissing" SA/1 and I've taken notice.play with something more substantial - from 4u7 upwards
100n is in realm of placebo
So it's 4.7uF cap or bigger but preferably a filmcap.
Solen has Polypropylene filmcaps all the way up to 200uF I believe.
Ordered 50 miniature dual pin 14V 80mA bulbs from Digikey for the obvious reason...
So if they work I have some surplus stock for other users in need of Threshold light metering duties.

Ordered 50 miniature dual pin 14V 80mA bulbs from Digikey for the obvious reason...
So if they work I have some surplus stock for other users in need of Threshold light metering duties.
I think the suggestion for measuring each emitter resistor from ZenMod is just to make sure that each output device is pulling its weight. Once you do that, you can really refer just to one to adjust the bias.
If you want to go through the trouble, there are eight screws on the back panel that come off. Four screws in the bottom six screws on the front faceplate and four screws for each heatsink that go into the secondary base plate.
Then the amp channel comes apart with the binding post RCA etc all attached to one piece. It's actually a pretty nice design. Makes things easy to work on.
I tend to start low when biasing amps. If your amp is already warming up, you can check to see where it's at. Let it get the full temperature and if it's at say 90, crank it up 10 millivolts give it an hour see what It does.
Don't expect all the emitter resistors that had the same voltage across them. It should be within a certain range. Say if you're at 90 millivolts you could expect to see 85 on one 95 on another. That is not unusual.
I'm going to pitch it here because I like this little trick. Add a snubber circuit. I believe rhthatcher sells the little snubber boards that fit on the bridge rectifiers that your amp should have. You use a tool called the Quasimodo to measure the transformer ringing. That made one of the biggest changes that I've had with my stasis amp.
Also Nelson pass came out with a new stasis front end in I believe 2020. Although that would be a little bit more of an endeavor. I have the new front end on mine and it sounds fantastic!
Also Nelson pass came out with a new stasis front end in I believe 2020. Although that would be a little bit more of an endeavor. I have the new front end on mine and it sounds fantastic!
- Home
- Amplifiers
- Pass Labs
- Proper biasing Threshold SA/1s