Thank you! I did this amp for almost a year.
Here is a link to the process ???????? ????????? ???????.
Here is a link to the process ???????? ????????? ???????.
It took me a lot of time to find the old hand drawn schematic (somewhere very deep in a file cabinet, and scan it into my computer and resize it.
But i found it so enjoy
Thanks!
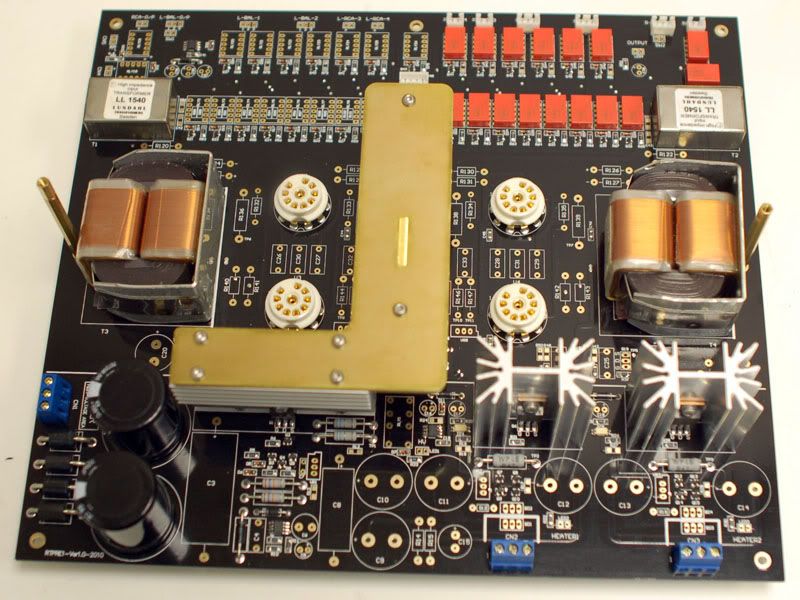
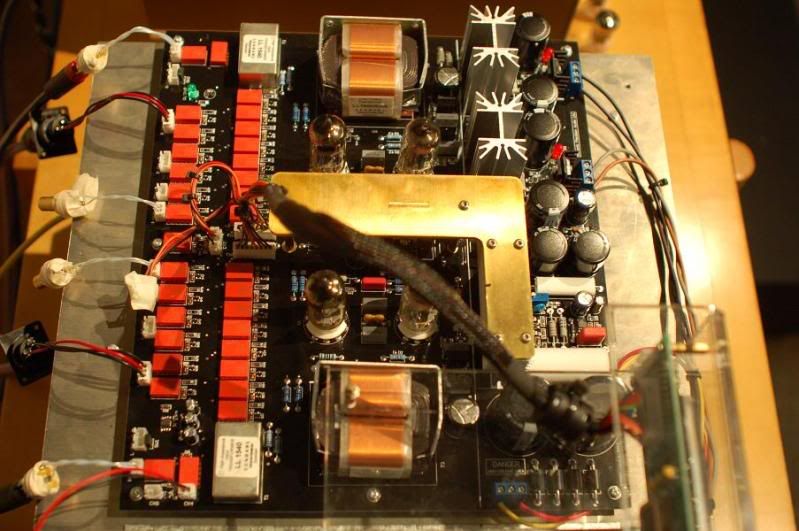
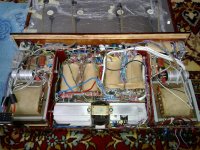
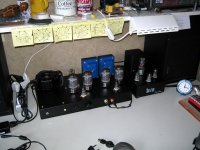
Here is three of my creations.
On the left the 6N1P Headphone Amp schematic by bruce bender.
Middle Phonostage and the right one the Power supply. Both schematics by TriodeDick.com.
Friend of mine has photography as hobby. And he made this awesome picture for me.

On the left the 6N1P Headphone Amp schematic by bruce bender.
Middle Phonostage and the right one the Power supply. Both schematics by TriodeDick.com.
Friend of mine has photography as hobby. And he made this awesome picture for me.
vlad, that is a work of art - very nice job and congratulations on completing it! 🙂
vlad, that is a work of art - very nice job and congratulations on completing it!
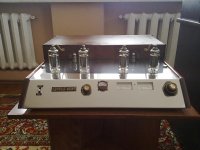
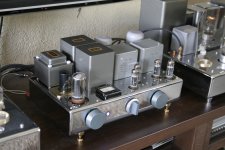
Balance Line Preamp
Balance Line Preamp with remote control, use 12au7 and 5687 class a push pull without global feedback.🙂
Balance Line Preamp with remote control, use 12au7 and 5687 class a push pull without global feedback.🙂
An externally hosted image should be here but it was not working when we last tested it.
An externally hosted image should be here but it was not working when we last tested it.
Last edited:
Balance Line Preamp with remote control, use 12au7 and 5687 class a push pull without global feedback.🙂
PIX ONGEN - Phono/RIAA tube amplifier
Hi guys
For a couple of years now I have worked with a phono/RIAA amp, which I´ve named PIX ONGEN, please take a visit at the complete built tread (link below) with schematics and all (Text in Swedish)
HiFiForum.nu - Pix Ongen - ljudkällan

Regards
Pix
Sweden
Hi guys
For a couple of years now I have worked with a phono/RIAA amp, which I´ve named PIX ONGEN, please take a visit at the complete built tread (link below) with schematics and all (Text in Swedish)
HiFiForum.nu - Pix Ongen - ljudkällan
Regards
Pix
Sweden
Here is three of my creations.
On the left the 6N1P Headphone Amp schematic by bruce bender.
Middle Phonostage and the right one the Power supply. Both schematics by TriodeDick.com.
Friend of mine has photography as hobby. And he made this awesome picture for me.
TM
What iron did you use? Or rather, where did you get the covers. Love the look of the SS plate with the hex head cap screws.
TM
What iron did you use? Or rather, where did you get the covers. Love the look of the SS plate with the hex head cap screws.
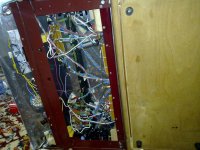
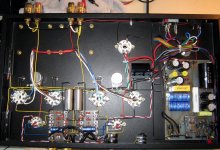
You mean the transformer covers ? Or the grey plate ?
Both are actualy the same type of thin metal.
I welded those cover my self. And sprayed black mat paint.
And the grey plates are sand blasted with pearl sand. And later sprayed with "Plastik Spray ".
Here you can see both metal parts without paint/sandblased.
An externally hosted image should be here but it was not working when we last tested it.
You mean the transformer covers ? Or the grey plate ?
Both are actualy the same type of thin metal.
I welded those cover my self. And sprayed black mat paint.
And the grey plates are sand blasted with pearl sand. And later sprayed with "Plastik Spray ".
Here you can see both metal parts without paint/sandblased.
Nice job! Half of me was hoping they were custom, half of me was hoping they were off the shelf as I'll need covers for some caps and iron.
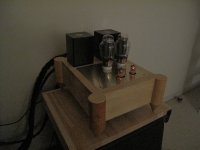

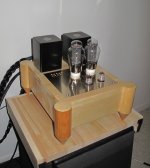
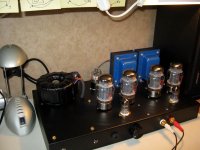
KT88 OddWatt Amplifier in his new home
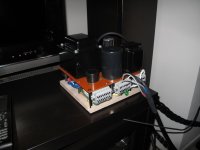
I build the OddWatt amplifier as schematic is provided by Bruce Heran, but my first try didn't work out too good, because everything was in a too small enclosure. Now I have everything in a much bigger Hammond and no more noise. I put the PSU on a little PC board, keeps the amp nice and tidy. Here are some pics.
Kind regards from Holland
Attachments
Sorry about no additional info.
My plan was to make a kit for beginners, that I can use too for workshops.
Main priority was easy to complete (octal instead of noval because of more space between pins), easy to get parts (6V6, output transformers and mains because equal to EL84) and good prepared chassis.
So I prepared a drawing of the board with EI84 size for transformers and three octals.
Backsite with spaces for connectors.
The Aluminiums were CNC made by a factory round the corner.
So some amps were finished and worked well.
Hoping now some more about that project.
No picture-sorry. It seems I am a little disorientated in this forum.
(ans sorry about my bad English)
Here my amps: Home - audiogaleries jimdo page!
(ans sorry about my bad English)
Here my amps: Home - audiogaleries jimdo page!
- Home
- Amplifiers
- Tubes / Valves
- Photo Gallery