Reply to post
The bottom of the plinth is open and the table will have adjustable tip toes for leveling so the motor will have some ventilation. Does this kind of motor have overheating issues?
The bottom of the plinth is open and the table will have adjustable tip toes for leveling so the motor will have some ventilation. Does this kind of motor have overheating issues?
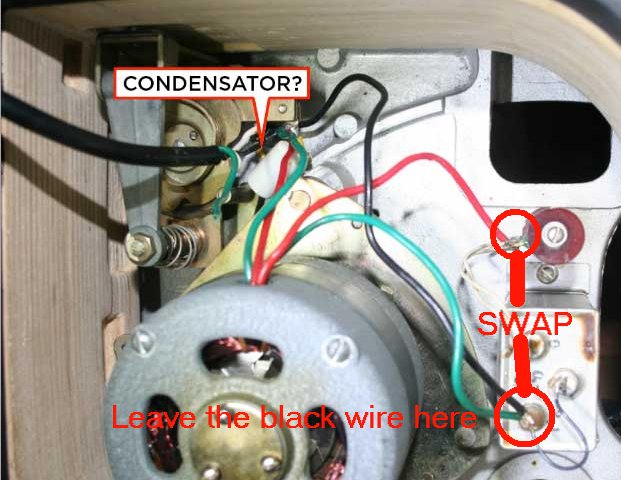
I don't know, but is seems to be a resistor decreasing the voltage for one coil but not for the other.
That is strange.
That is strange.
reply to post
My friend assembled the table from the parts that I found with it. If there's something else you suggest I add I'll be glad to try to accomplish it. He did tell me that there was a bit of a smell after a bit - not much - but he though it was either from an element needing replacement or just old parts being used after years of non-use. I'll keep an eye on the motor temp.
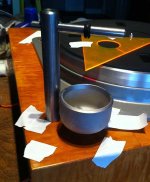
I sent the idler wheel off to Terry today and made another simple part for my WT clone arm. Beveled the 3/8" ss rod by putting it in a drill and running it against a hand grinder. ;-) I still need to cut a 3/4" d stainless steel rod and drill a hole (a friend with a drill press)… and bevel one end's edge a bit in the best low tech way (it's just for looks). Thinking…
My friend assembled the table from the parts that I found with it. If there's something else you suggest I add I'll be glad to try to accomplish it. He did tell me that there was a bit of a smell after a bit - not much - but he though it was either from an element needing replacement or just old parts being used after years of non-use. I'll keep an eye on the motor temp.
I sent the idler wheel off to Terry today and made another simple part for my WT clone arm. Beveled the 3/8" ss rod by putting it in a drill and running it against a hand grinder. ;-) I still need to cut a 3/4" d stainless steel rod and drill a hole (a friend with a drill press)… and bevel one end's edge a bit in the best low tech way (it's just for looks). Thinking…
Last edited:
What are the voltage in your house and the voltage of the motor ?
If the resistor is needed, it is necessary that it decrases the voltage of both coils of the motor.
If the resistor is needed, it is necessary that it decrases the voltage of both coils of the motor.
I'm in the US, so house voltage is 110v. Motor is 117v.
btw: I beveled my 3/4" d solid ss rod by duct taping one end to a hand drill and spinning the other end on a hand grinder I held down on the work surface with bungie cords.
btw: I beveled my 3/4" d solid ss rod by duct taping one end to a hand drill and spinning the other end on a hand grinder I held down on the work surface with bungie cords.
Plinth refinishing completed. Ordered tubing for replacing lube lines. Only one line of old tubing was partially connected when I found the table… What grade oil should I use to lubricate the Denki Onkyo hysteresis motor? There are two oil ports on the top of the turntable. I see one line goes to the back of the motor, where does the other generally go? I don't see another place to connect line. A few more parts coming in - I'll be assembling soon.
One of the photos in the link Lexx21 posted back at #15 shows two tubes, one going to the bearing at the bottom and one going to the top. That's pretty typical. There should be a metal tube stub leading into the top bearing. Accessing it may be a a bit of a nuisance.
I'm more than a little envious of your NEAT. Congratulations and good luck with it.
I'm more than a little envious of your NEAT. Congratulations and good luck with it.
Thanks Doug. I'll look more closely - thought a line would go to the bearing… The plinth turned out awesome. Shellac and luster polyurethane with a French polish. Waiting for more parts to assemble the WT clone arm.
Reply to post
Can anyone tell me how to fit plastic tubing on a stub? I bought 1/16" ID tubing for my motor lube line(s), the same diameter as the worn out piece that came on the turntable. Somehow I've got to expand the ends to fit the stub ends… any ideas?
'One of the photos in the link Lexx21 posted back at #15 shows two tubes, one going to the bearing at the bottom and one going to the top. That's pretty typical. There should be a metal tube stub leading into the top bearing. Accessing it may be a a bit of a nuisance.'
dtut, I'm new to the site and can't seem to find that post and link by Lexx21… are you referring to page #15 under 'Analog Source' section?
Last edited:
The post by lexx21 is post #15 on page 2 of this thread.
To stretch the tubing, use any pointed round thing, like a pencil point, and maybe a little heat from a hair dryer if necessary.
To stretch the tubing, use any pointed round thing, like a pencil point, and maybe a little heat from a hair dryer if necessary.
Reply to post
It took some work but I got it on by soaking the ends in very hot water. Then quickly used a nail to open each end up and got them on far enough. Whew!
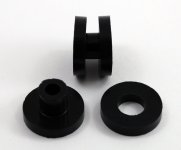
Next question for anyone out there: I'm missing one of the 3 suspension springs. Any good sources and tips? Also, the replacement rubber mounts between the springs and motor are too short to do much of anything. Has anyone tried using Sorbothane bushings to isolate from motor vibration? They look like they'd be perfect and could be cut and combined to really provide good isolation.
It took some work but I got it on by soaking the ends in very hot water. Then quickly used a nail to open each end up and got them on far enough. Whew!
Next question for anyone out there: I'm missing one of the 3 suspension springs. Any good sources and tips? Also, the replacement rubber mounts between the springs and motor are too short to do much of anything. Has anyone tried using Sorbothane bushings to isolate from motor vibration? They look like they'd be perfect and could be cut and combined to really provide good isolation.
Attachments
Arm placement
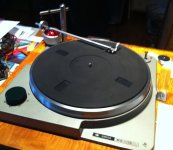
The members of this forum have been immensely helpful in getting my Neat Shield MO-19 off the ground. I have a few more parts to receive before I mount my WTT clone arm. Originally I thought to mount it as the primary arm but last night thought that prime piece of real estate should be reserved for a 12" arm, since that's what the plinth is designed for.
I posted a request for help over on Vinyl Engine and thought it would be helpful for me to ask you all for your assistance here as well. The link to the post is:
Turntable Forum • WTT Clone Arm on Neat Shield MO-19
I hope providing this link is okay to do here. I want to move the arm to the back of the table. I posted what specs I've sound with my post on Vinyl Engine. Obviously, I want to make sure the arm is aligned properly before I drill into this beautiful plinth! I plan to mount the arm to the plinth with a collar… I'm not sure about drilling a 3/4" hole into the plinth and drilling for a set screw (no easy drill press for that move) unless you convince me that's the only way it should be done!
Attachments
- Status
- Not open for further replies.
- Home
- Source & Line
- Analogue Source
- Neat Shield MO-19 table - help, anyone?